Sur la table SLT-3209 User manual

BEFORE USE, PLEASE READ AND FOLLOW ALL IMPORTANT
SAFEGUARDS, WARNINGS, CAUTIONS AND OPERATING INSTRUCTIONS.
4-SLICE
TOUCHSCREEN
TOASTER
USER MANUAL
SLT-3209 MODEL
www.mcappliances.us


Congratulations!Congratulations! You now own
an incredibly versatile, convenient,
and modern 4-slice toaster.
To get the most out of your new 4-slice
toaster, please read the manual carefully
before use, and keep this manual for easy
reference. Enjoy!Enjoy!
*This manual is only applicable to SLT-3209. All the contents in the manual are for
reference only during the user’s use and maintenance.
The pictures are for reference only.
*All the contents in the manual have been carefully checked. If there are any printing errors
or misunderstandings in the contents, the company reserves the right to interpret.
3

1. Read all instructions before use.
2. Do not let the cord hang over the edge of the table or countertop.
3. Do not use the toaster for anything other than its intended use.
4. Always operate the toaster from a power source of the same voltage, frequency, and
rating as indicated on the product rating plate.
5. Close supervision is necessary when the toaster is used by or near children or
incapacitated persons. Do not let children use it as a toy.
6. Do not operate toaster with a damaged cord or plug, or if the appliance is damaged
in any manner.
7. Do not immerse the toaster under water or any other liquid.
8. Do not operate the toaster in the presence of explosives and/or flammable fumes.
9. Do not pull on the cord when unplugging it from the outlet.
10. Do not place the toaster on or near a hot burner or in a heated oven.
11. Do not use toaster over a stove or other heat source.
12. Do not use outdoors.
13. Do not leave toaster unattended.
14. Turn off and unplug from outlet while not in use. Remove by grasping the plug. Do
not pull on the cord.
SAVE THESE INSTRUCTIONS
HOUSEHOLD USE ONLY
IMPORTANT SAFEGUARDS
4

Power Cord Instructions:
A short power-supply cord or detachable power-supply cord is provided to reduce risks
resulting from becoming entangled in or tripping over a longer cord. Longer detachable
power-supply cords or extension cords are available and may be used if care is
exercised in their use. If a long detachable power-supply cord or extension cord is used:
a. The marked electrical rating of the cord set or extension cord should be at least as
great as the electrical rating of the appliance;
b. The cord should be arranged so that it will not drape over the counter top or table
top where it can be pulled on by children or tripped over unintentionally; and
c. If the appliance is of the grounded type, the cord set or extension cord should be
grounding type 3-wire cord.
Do not pull, twist or otherwise abuse the power cord.
NOTICES:
1. Some countertop and table surfaces are not designed to withstand the prolonged
heat generated by certain appliances. Do not set the heated unit on a finished wood
table. We recommend placing a hot pad or trivet under your toaster to prevent
possible damage to the surface.
2. During initial use of this appliance, some slight smoke and/or odor may be detected.
This is normal with many heating appliances and will not occur after a few uses.
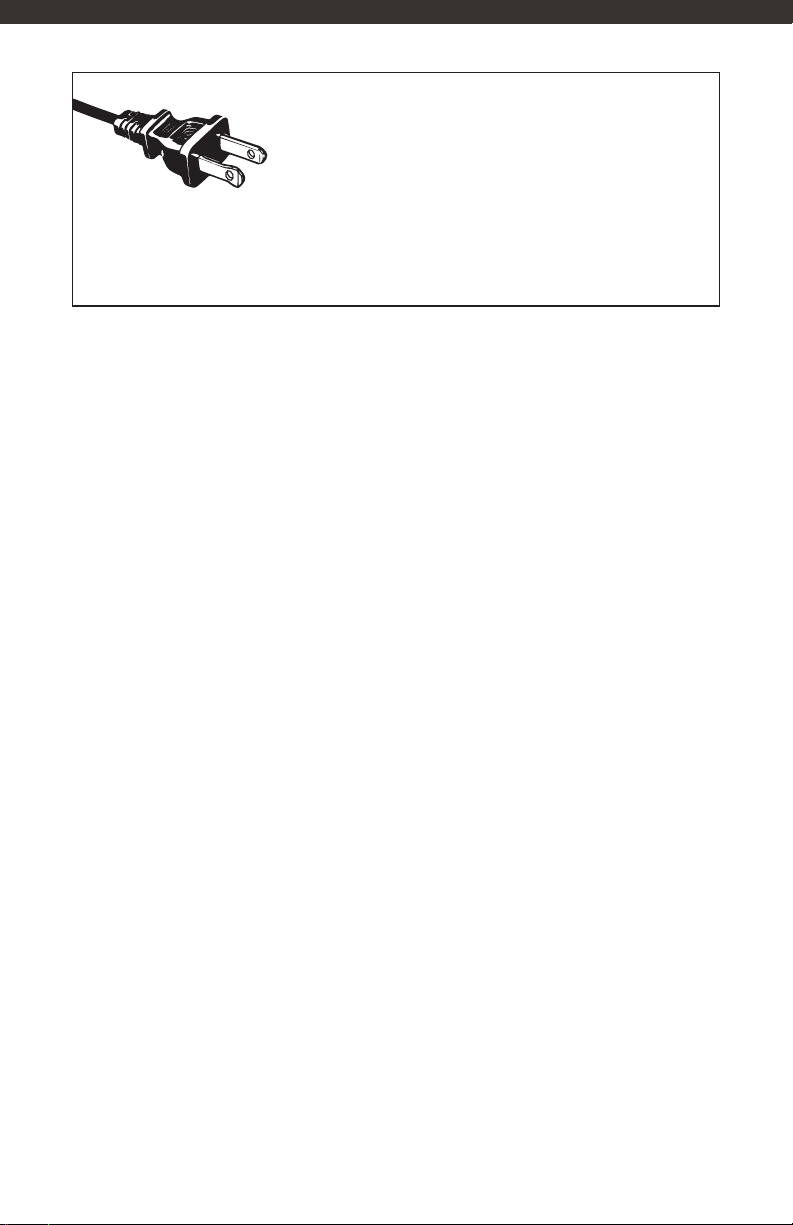
POLARIZED PLUG
This appliance has a polarized plug (one blade is wider
than the other). As a safety feature to reduce the risk of
electrical shock, this plug is intended to t in a polarized
outlet only one way. If the plug does not t fully in the
outlet, reverse the plug. If it still does not t, contact a qualied electrician. Do not
attempt to defeat this safety feature or modify the plug in any way. If the plug ts
loosely into the AC outlet or if the AC outlet feels warm do not use that outlet.
5

GETTING TO KNOW YOUR
4-SLICE TOUCHCREEN TOASTER
2
1
4
Product may vary slightly from illustration.
1 Bread Slots
2Digital Countdown Timer
3Toast Lift Lever
4Removable Crumb Tray (at rear)
5Toast Shade Selection
6Toast Shade Selection Button
7Toast Type Options
8Toast Type Selection Button
9Defrost Function
10 Reheat Function
11 Single Slice Function
12 Cancel
13 Power
3
5
69
5
10
8
12
8
10
12
11
6
9
7
13
7
6

7

1. Plug the toaster into the outlet.
2. The power button will illuminate. Press the power button to turn the
toaster on.
3. Insert bread into the bread slots.
4. Select the toast shade setting using the 1-7 button.
5. Select the toast type using the type button.
6. Select defrost, reheat, or single buttons if desired.
7. Lower the toast lift lever to begin toasting.
8. When toasting is complete, the toast lift level will return to the up
position.
NOTE: The toasting process can be stopped at any time by pressing
the cancel button. Do not attempt to lift the toast lift lever during the
toast cycle.
Countdown Timer
The countdown timer is a visual representation of the cycle time for the
selected shade and toast type. If during the toasting cycle you select a
different setting, the smart timer will automatically adjust the remaining
time to match the new setting.
Toast Shade Setting
The toast shade setting regulates how much the bread is toasted. Shade
1 offers the lightest toast and shade 7 offers the darkest toast. When
selecting the toast shade, please remember that dry or thin slices of bread
toast faster, so a lower toast shade setting may be appropriate. Thick or
moist bread types will require a higher shade setting.
Toast Type Setting
The type setting allows you to select from the 5 different types of toast
available.
USING YOUR TOASTER
8

Defrost
The defrost function allows you to toast any of the five toast type selections
straight from the freezer.
Reheat
The reheat button is a quick 30-second toasting cycle to warm up your
toasted food.
Single
The single function only heats up the bread slot with the single slice symbol.
Cancel
The cancel button allows you to stop the toast cycle at any point during the
process.
CAUTION
1. Remove all protective wrappings prior to toasting.
2. If toaster starts to smoke, press cancel to stop toasting immediately.
3. Avoid toasting food with extremely runny ingredients such as butter.
4. Never attempt to remove bread jammed in the slots without unplugging
the toaster from the electrical outlet first. Be sure not to damage the
internal mechanism or heating elements when removing bread.
5. In order to achieve uniform color we recommend that you should wait
minimum 30s between each toasting so that color control can reset
automatically.
9

CLEANING AND MAINTENANCE
1. Before cleaning, unplug toaster and let the toaster cool down
completely.
2. Wipe the outside with soft dry cloth, never use metal polish.
3. Pull out crumb tray at the bottom of toaster and empty it. If toaster
is used frequently, accumulated bread crumbs should be removed
at least once a week. Make sure the crumb tray is completely closed
before using the toaster again.
4. When not use, the power cord may be wound under the bottom
of toaster.
5. Any other servicing should be performed by an authorized service
representative.
TIP: Your toaster has been designed for optimum toast balance. Some
elements on the inside of the toaster may glow more brightly than others
when in use. This is part of normal toaster operation.
To remove food jammed in the bread slots:
Unplug the toaster and remove the food once the toaster has cooled
down.
Do not place food on top of toaster while it is warming.
WARNING! Empty the Crumb Tray frequently. Crumbs will
accumulate in the Crumb Tray and could catch fire if not emptied
periodically.
10

11
Table of contents
Other Sur la table Toaster manuals