SurfaceMaxx SGY-PWA97 User manual
1
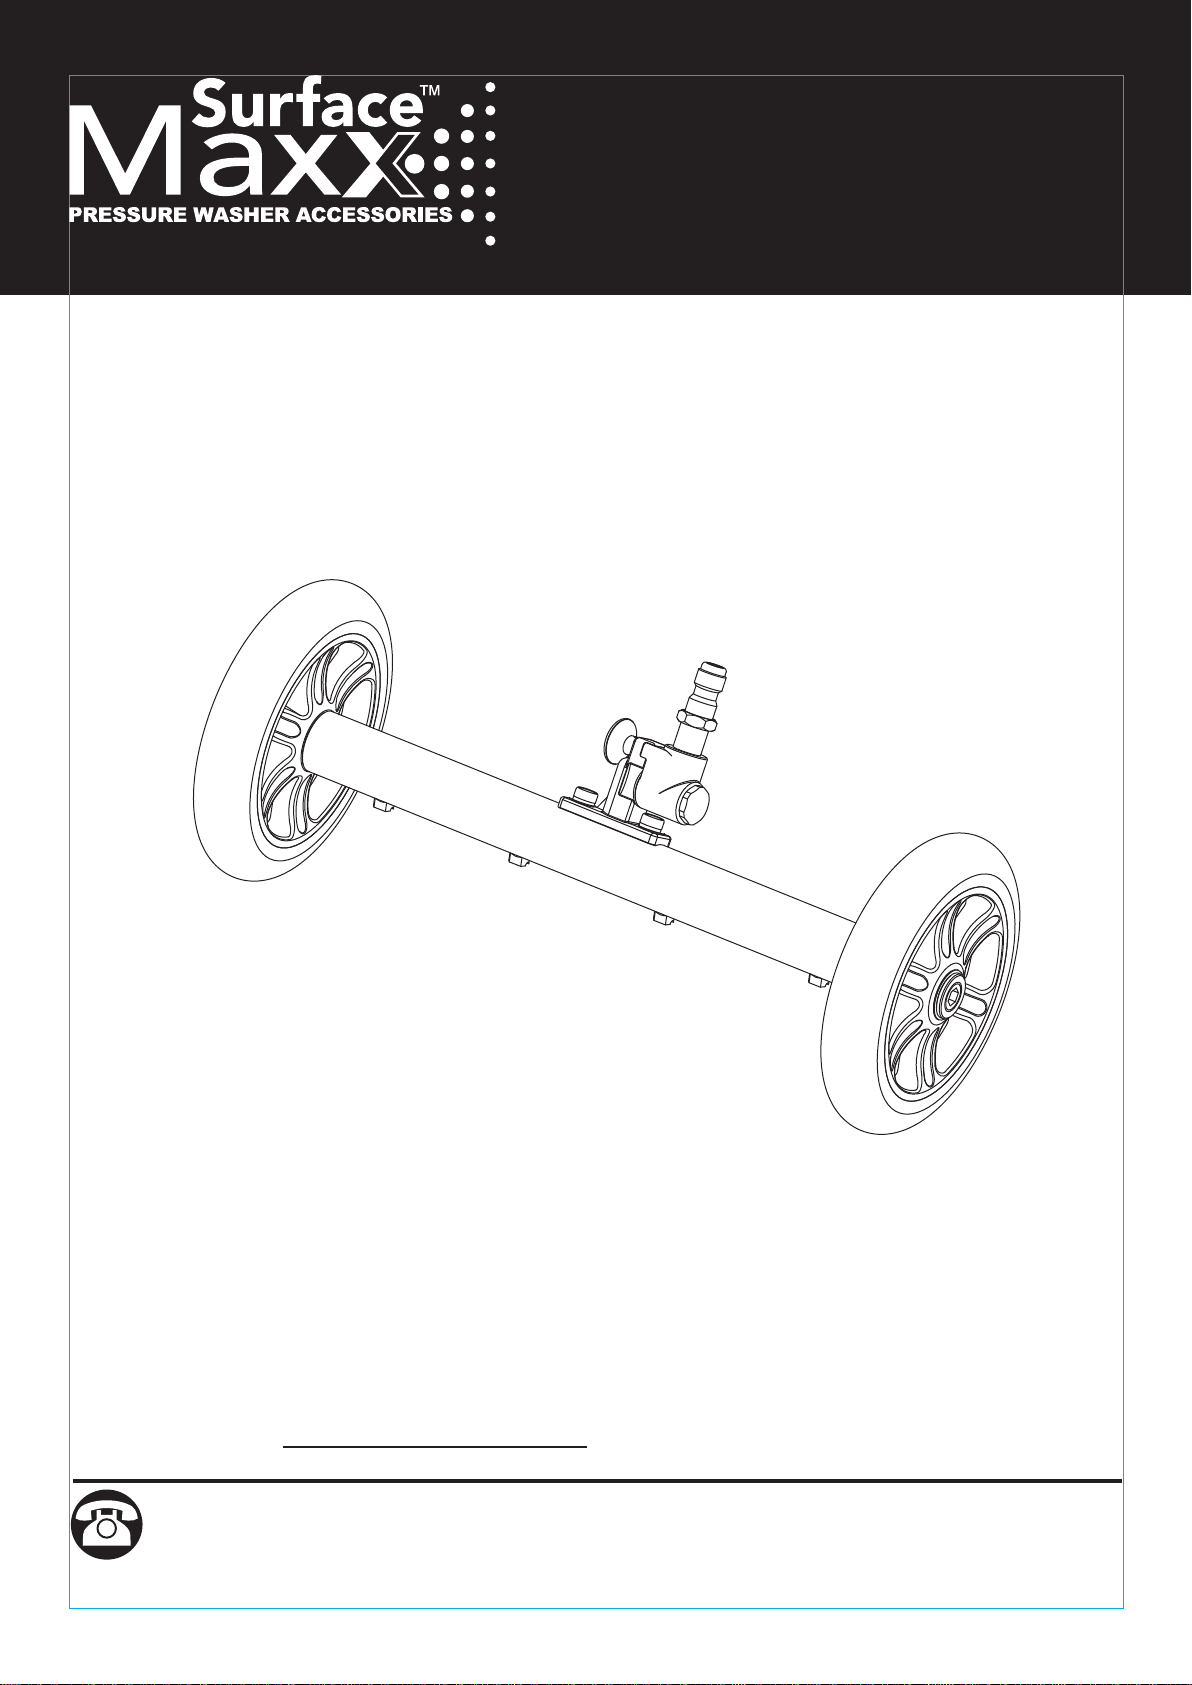
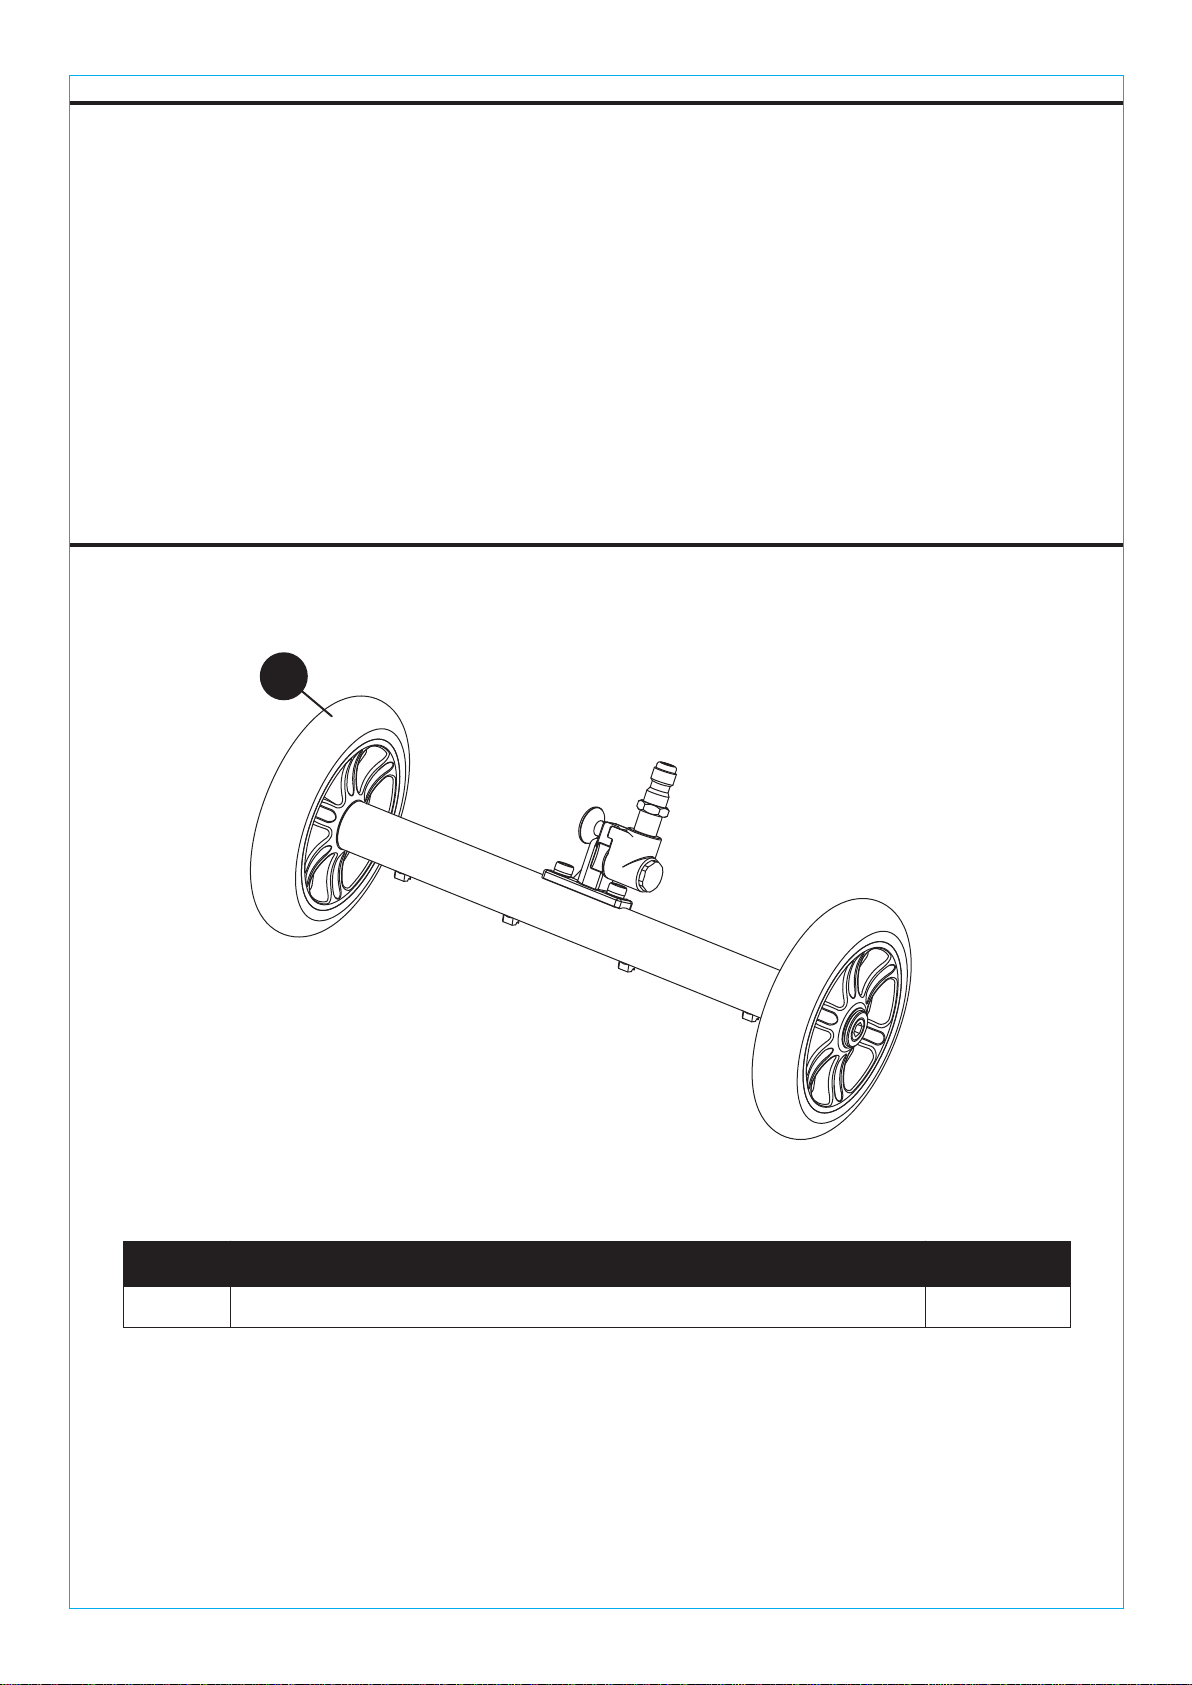
14" Water Broom &
Undercarriage Cleaner
INSTRUCTION SHEET
ITEM #2637679
MODEL #SGY-PWA97
ATTACHYOUR RECEIPT HERE
Purchase Date
service department at +1 (866) 870-9930, 9 a.m. - 5 p.m., EST, Monday - Friday.
www.surfacemaxx.com
Questions, problems, missing parts? Before returning to your retailer, call our customer

TABLE OF CONTENTS
PACKAGE CONTENTS
Product Specifications ...............................................................................................................
Important Safety Instructions .....................................................................................................
Operating Instructions ...............................................................................................................
Maintenance ..............................................................................................................................
Warranty ....................................................................................................................................
3
3
Assembly Instructions ................................................................................................................3
4
4
5
QUANTITYDESCRIPTIONPART
A
14" Water Broom & Undercarriage Cleaner 1
2
A
www.surfacemaxx.com
IMPORTANT SAFETY INSTRUCTIONS
Observe the safety instructions of your pressure washer.
To reduce the risk of injury, the user must read and understand this insert sheet as well as the
operator’s manual for their pressure washer before using this product. Failure to follow all warnings
and precautions may result in death, serious personal injury, or property damage.
3
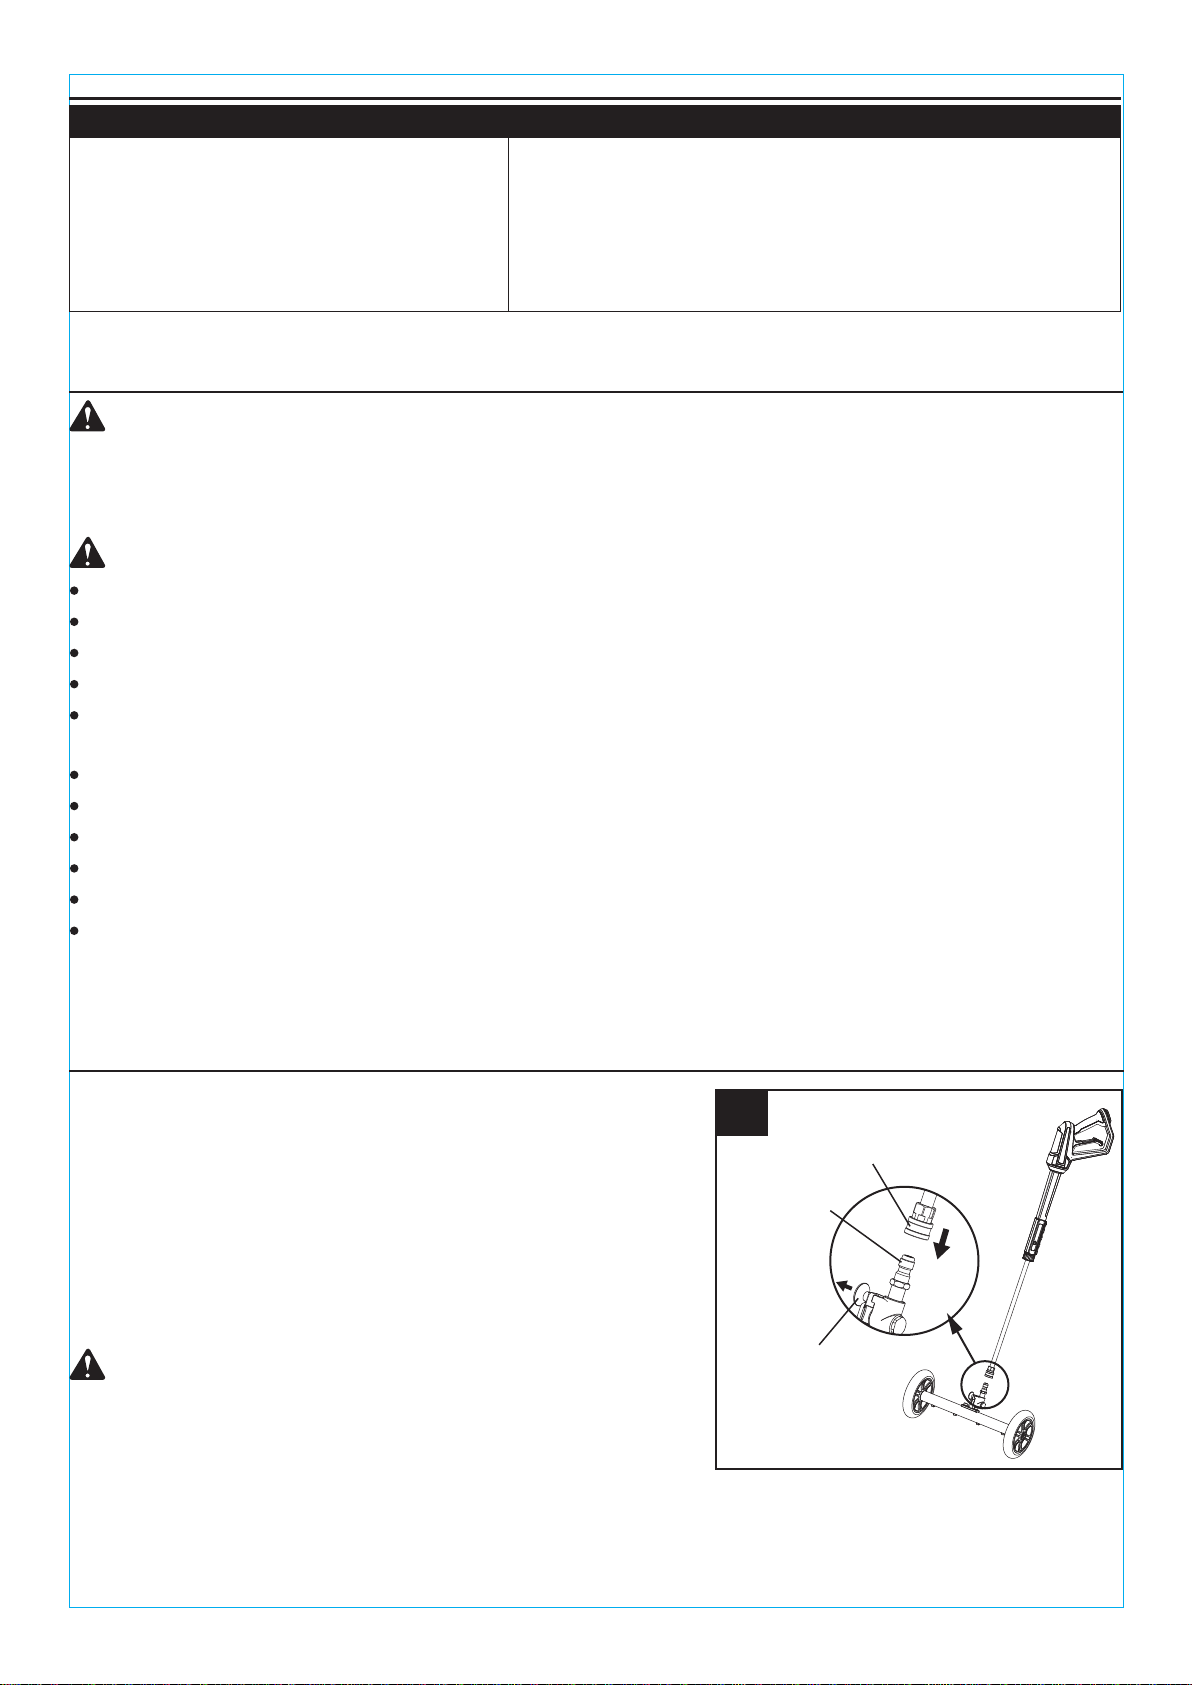
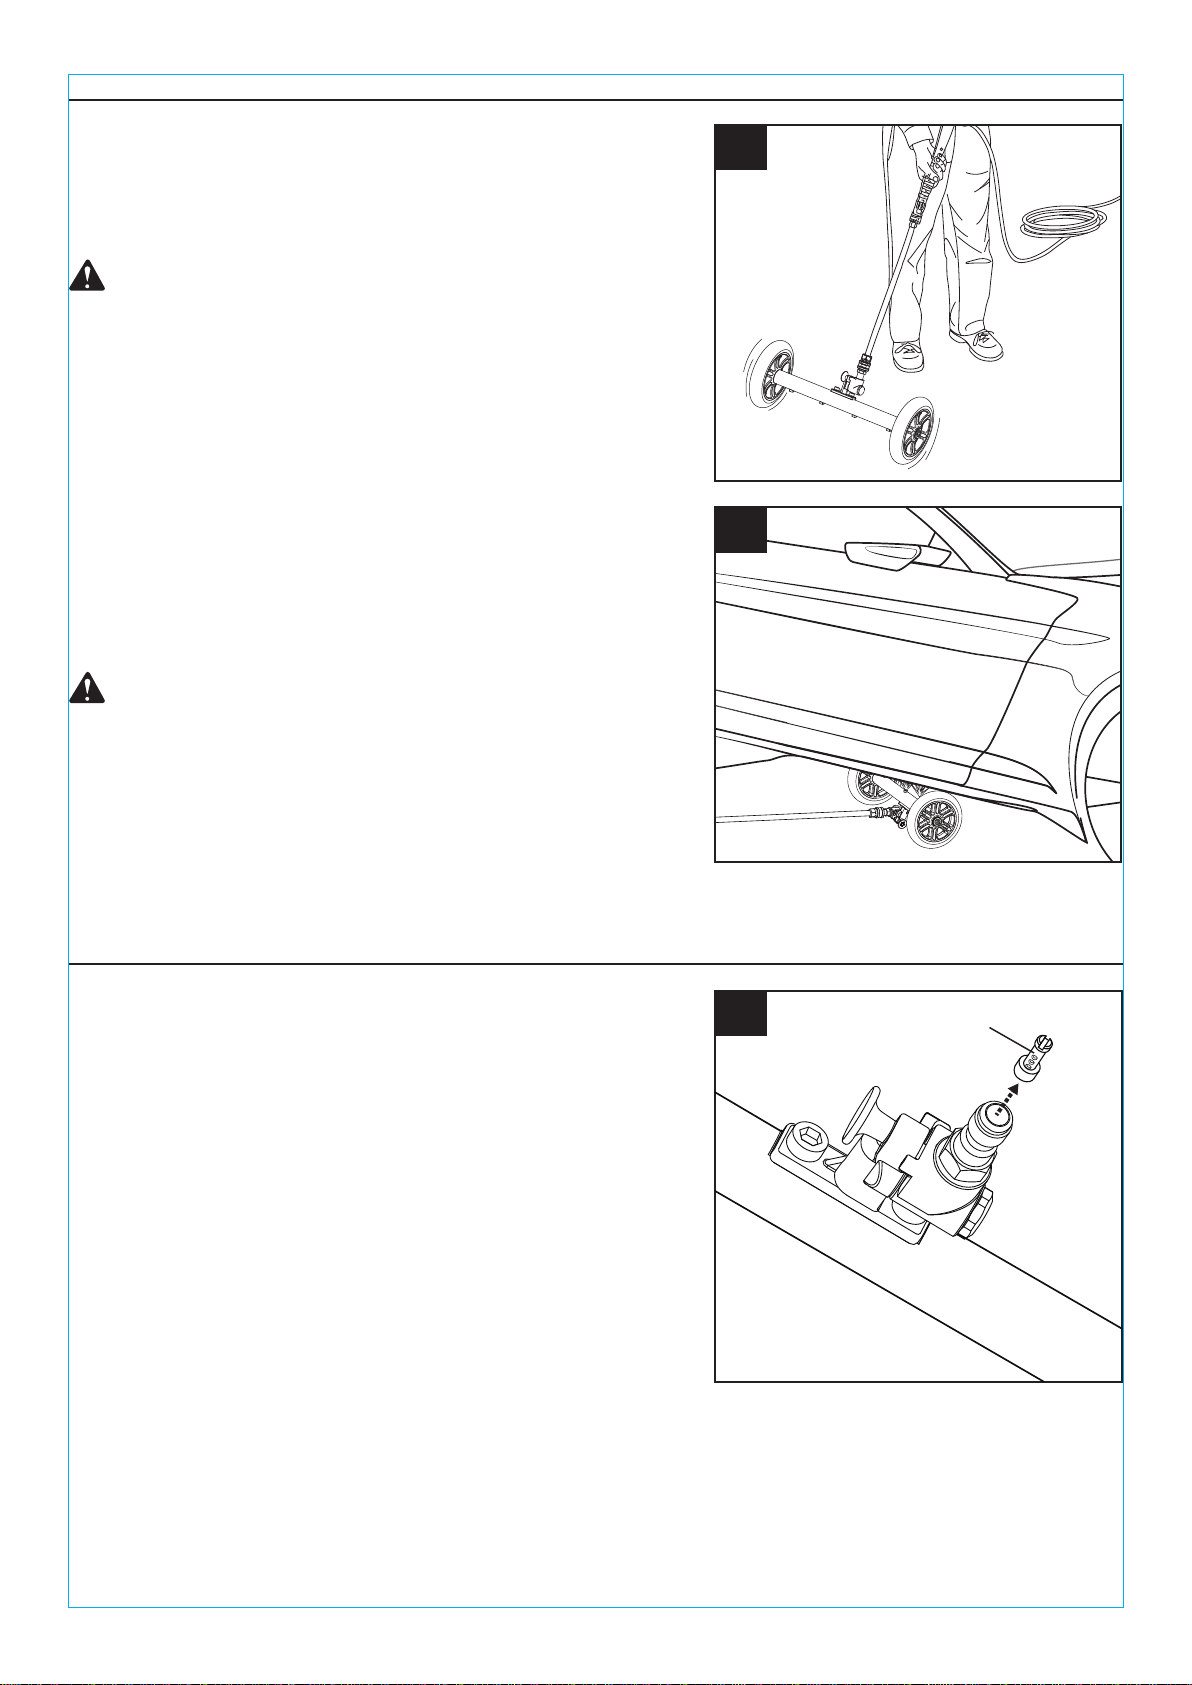
1. Attach the cleaner’s 1/4 in. quick connect plug into
the end of the pressure washer wand.
Risk of injury can occur if the cleaner’s 1/4 in. quick
connect plug is not properly inserted into the quick
connect coupler. Make sure you hear a "click" sound
when attaching the 1/4 in. quick connect plug to the
quick connect coupler.
2. Connect hose to the pressure washer and start
pressure washer as described in its Owner’s Manual.
3. Pull the pivot knob out and move the pivot coupler
back or forward to achieve the desired nozzle
orientation.
1/4 in. quick
connect plug
Pivot knob
DANGER:
WARNING:
CAUTION:
The product must not be used by children.
Keep all persons/animals clear of the immediate vicinity of the cleaning head.
Keep hands away from moving parts.
Turn off the pressure washer and relieve the pressure when examining or changing the product
and after the completion of the cleaning operation.
The product is not suited for scouring or scrubbing.
Do not run over freestanding corners.
Wear eye protection with side shields marked to comply with ANSI Z87.1.
Test the product in an inconspicuous area.
Not to be used on vertical surfaces.
Do not exceed the maximum rated pressure, volume, or temperature listed in the product
specifications.
SPECIFICATIONS
COMPONENT
Connections
Broom Width
Maximum Pressure
Maximum Water Temperature
Maximum Water Flow
Weight
1/4 in. Quick Connect Plug
14 in.
3,300 PSI
PRODUCT SPECIFICATIONS
140°F (60°C)
3 GPM
2.1 lbs.
ASSEMBLY INSTRUCTIONS
1
www.surfacemaxx.com
Quick connect coupler
4
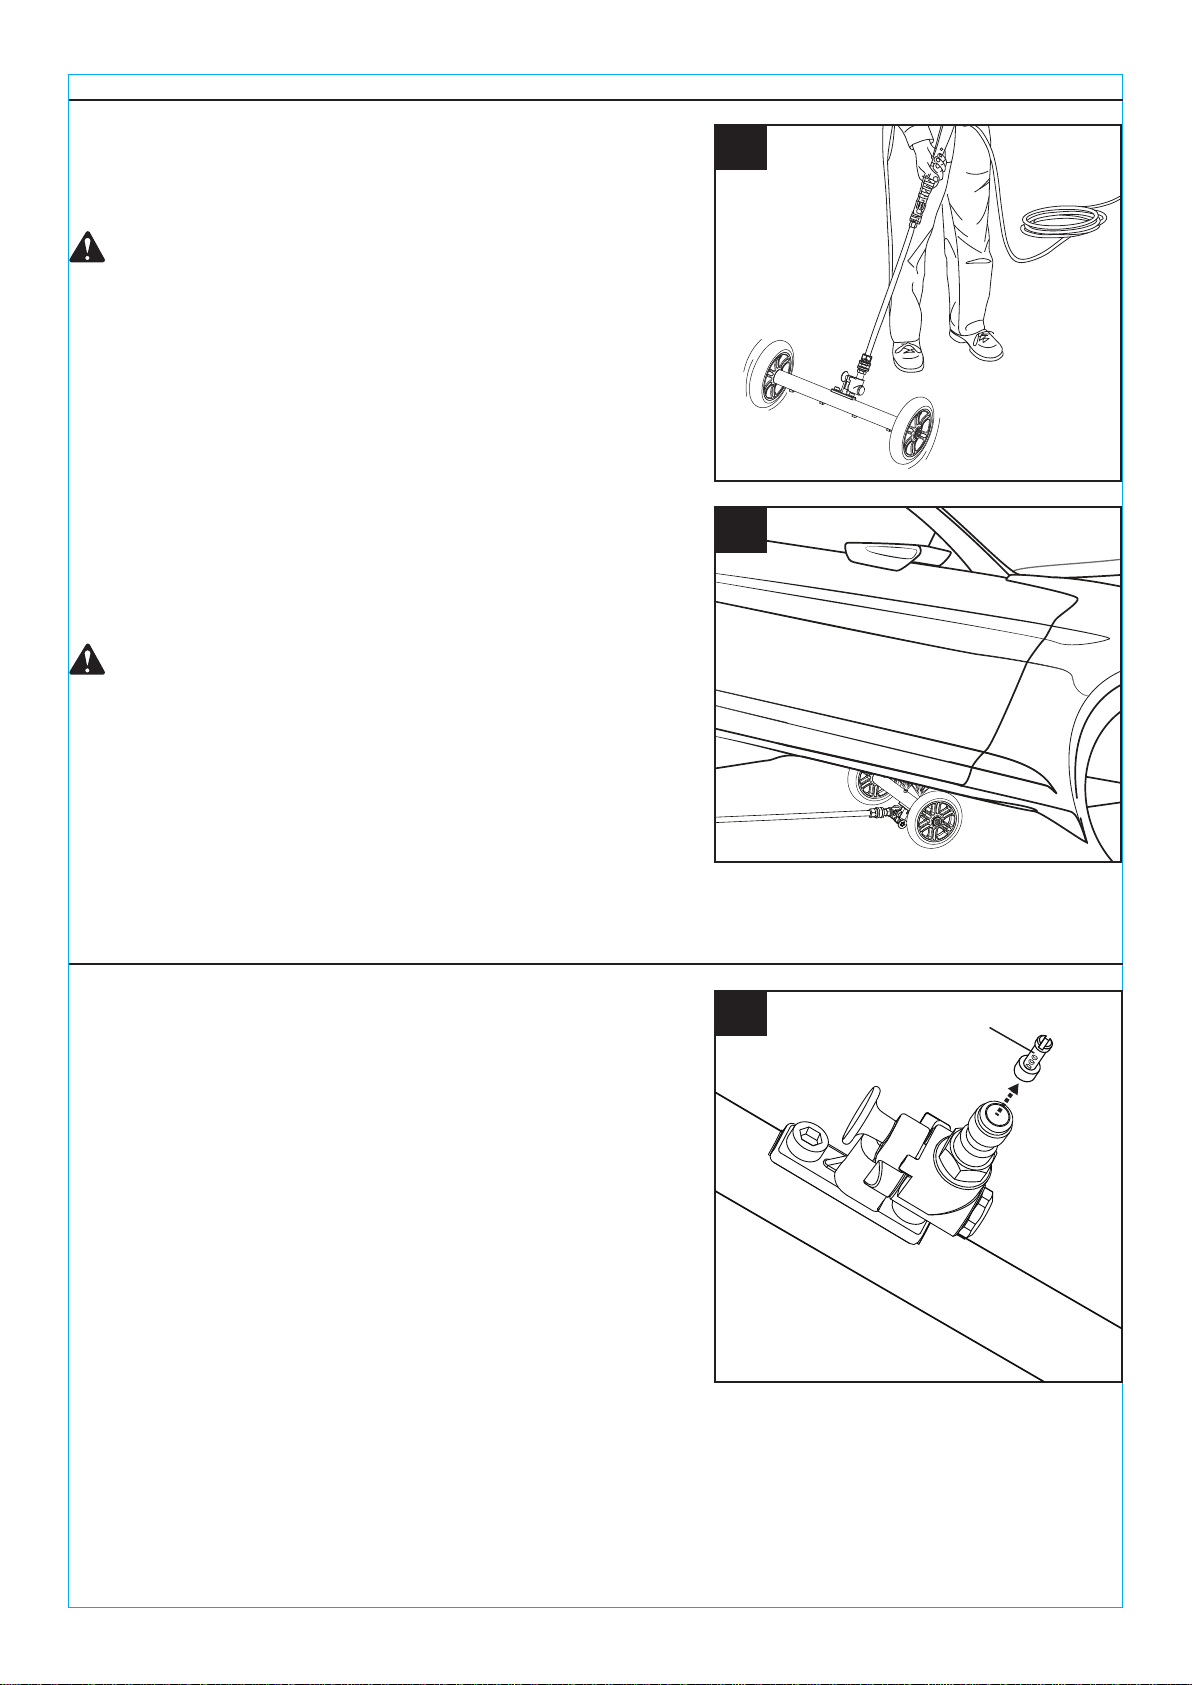
1. Use with the nozzles pointed down and forward
(pivot coupler in back position) to wash large flat
surfaces like sidewalks or driveways. Walk slowly
behind the cleaner, cleaning as you go.
2. Rotate the spray bar 180° so the nozzles are
pointed upward (make sure the pivot coupler is in
the forward position) to clean the underside of
raised items like your car’s undercarriage.
To reduce the risk of injection or injury, never lift the
cleaner while operating the pressure washer.
WARNING:
To reduce the risk of injection or injury, do not depress
the trigger until the cleaner nozzles are completely
underneath the surface being cleaned, and always
release the trigger before removing the cleaner from
underneath the surface.
WARNING:
OPERATING INSTRUCTIONS
MAINTENANCE
1
1
2
www.surfacemaxx.com
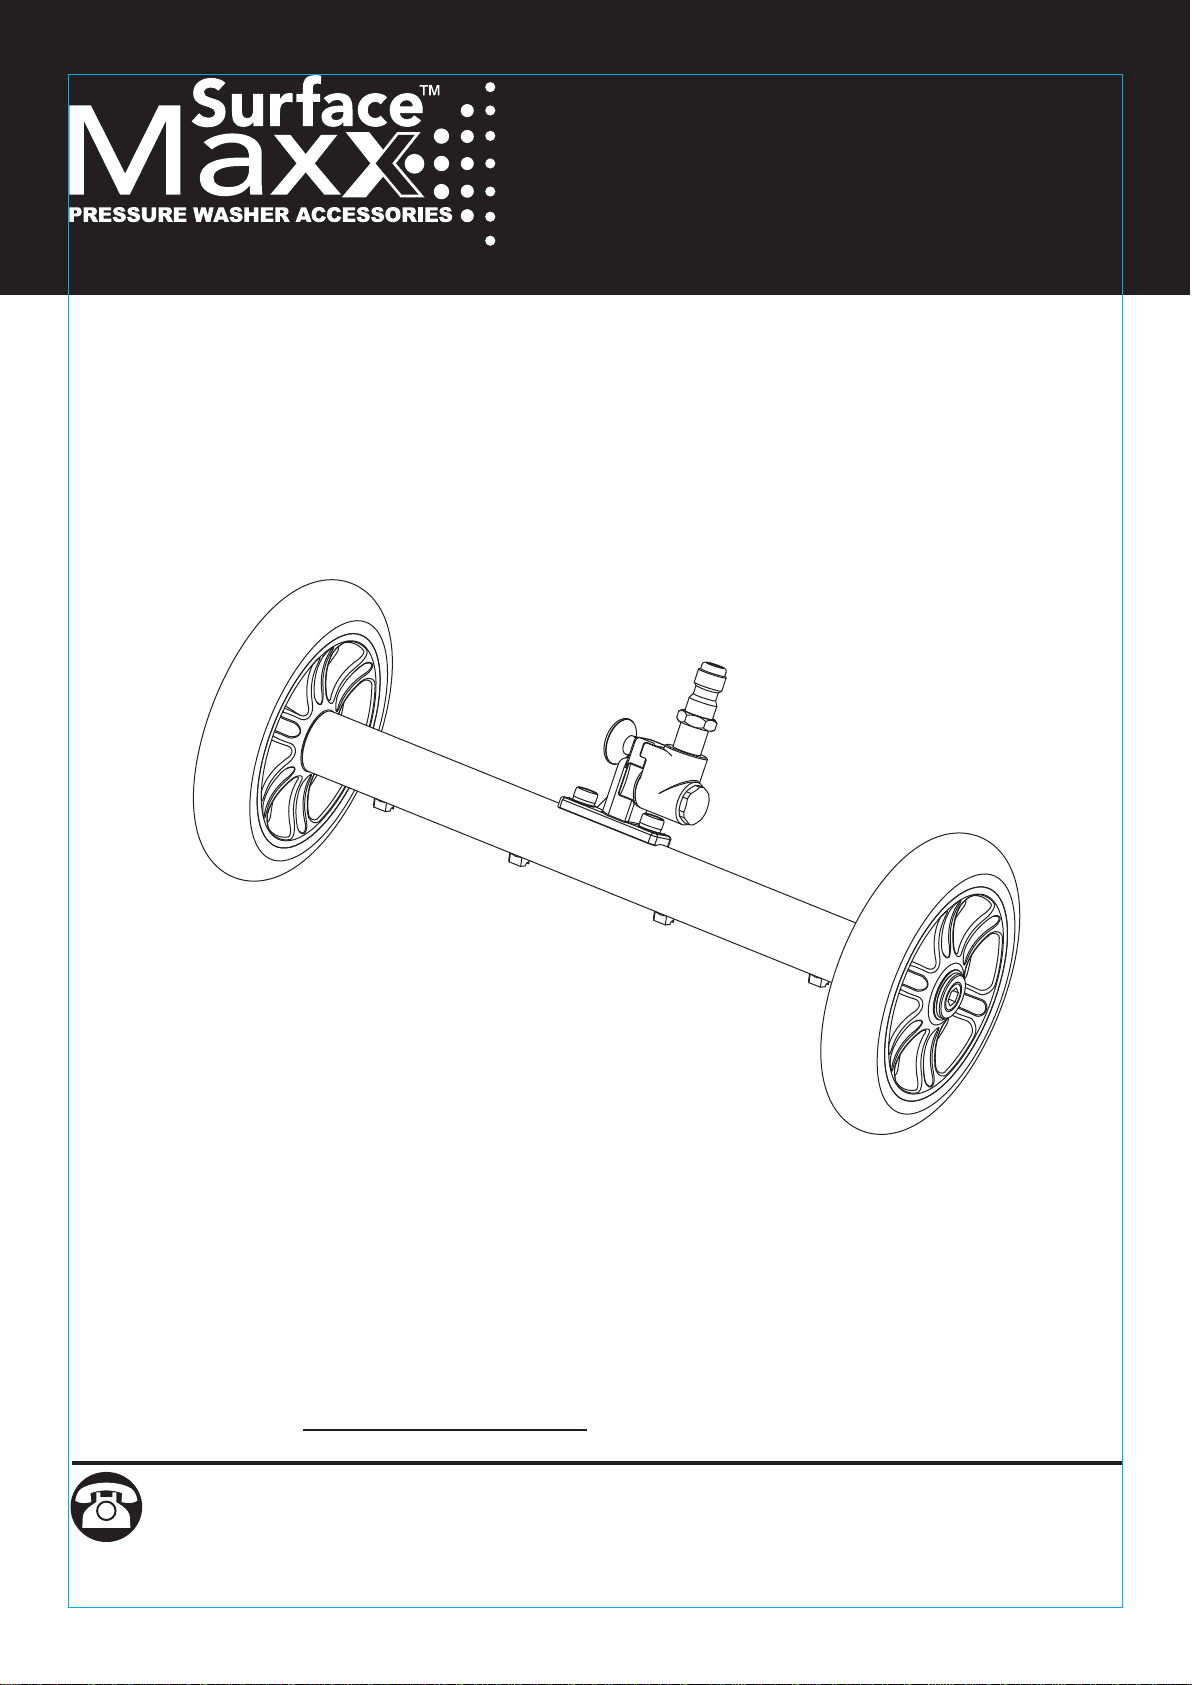
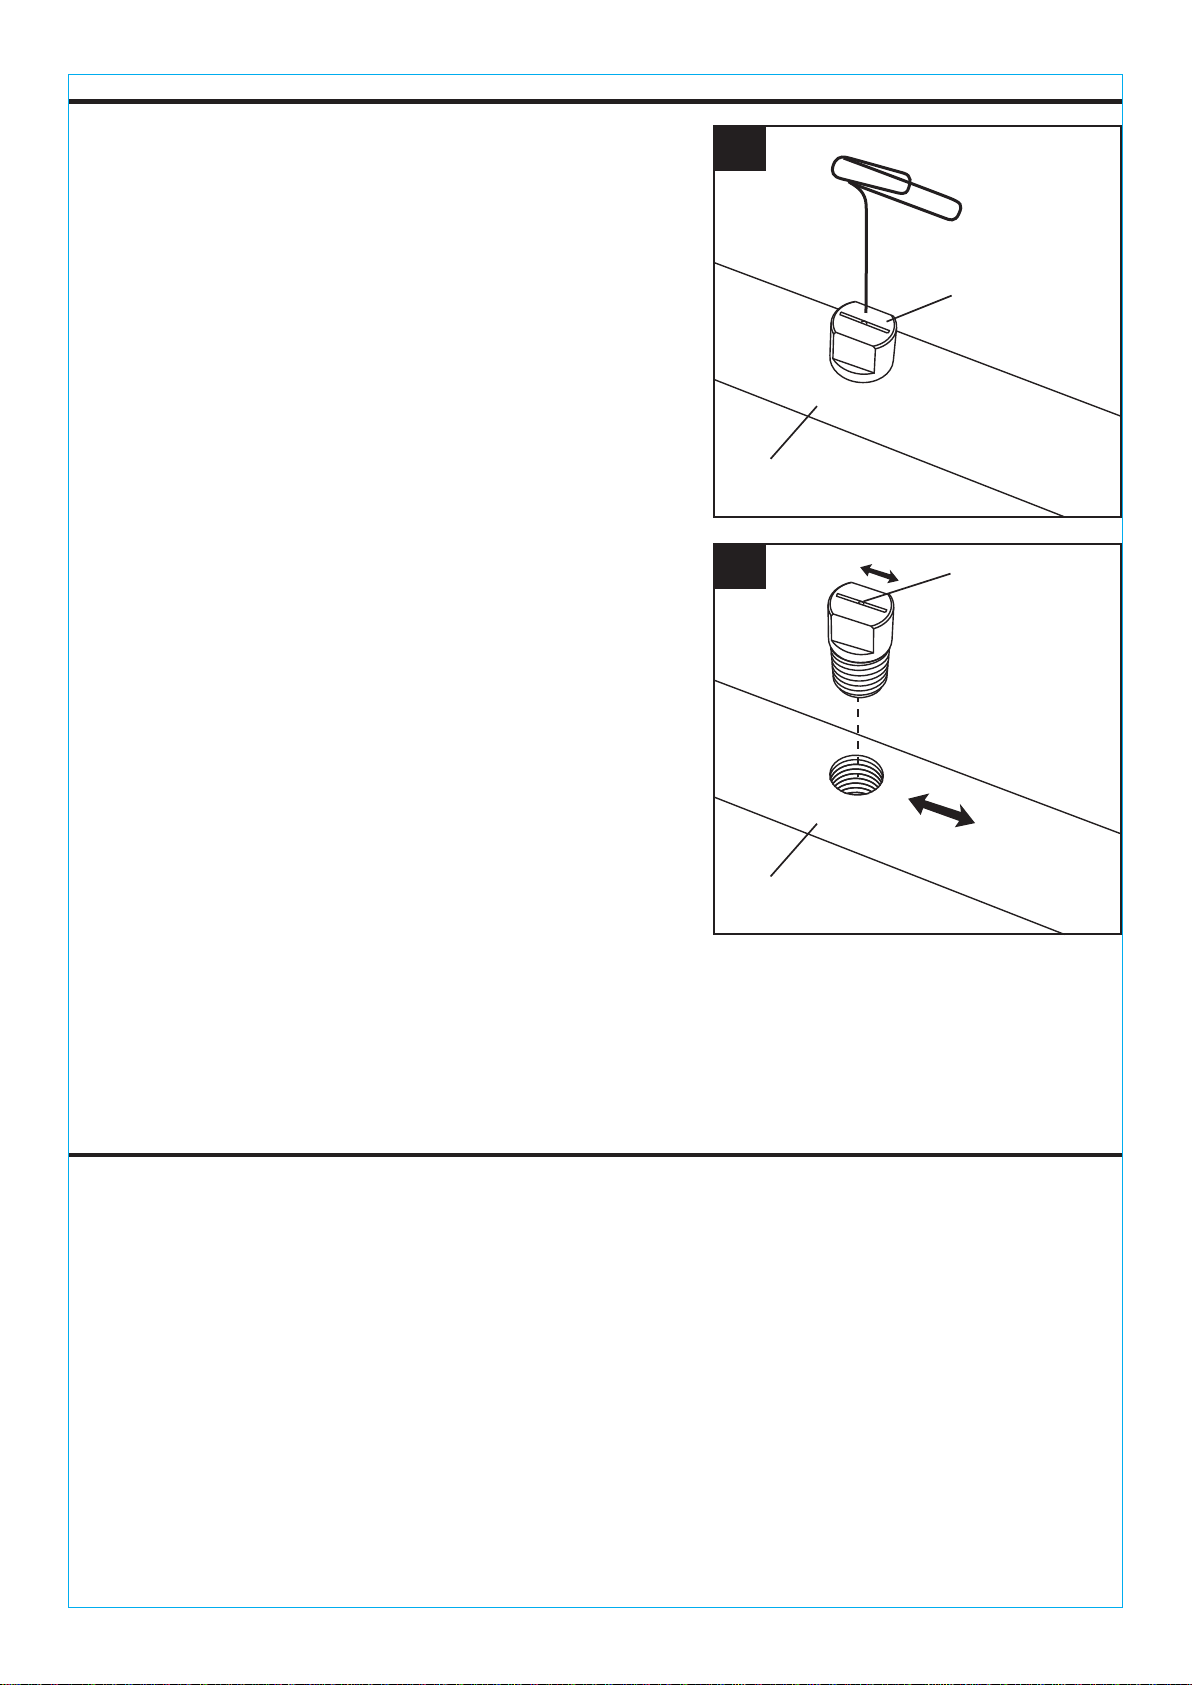
Inlet plug filter
A clogged or dirty nozzle will result in excessive pump
pressure causing a pulsing sensation.
1. Turn off the pressure washer and turn off the water
supply. Release the residual pressure by
squeezing the gun’s trigger.
2. Disconnect the pressure washer wand from the
cleaner.
3. Remove the inlet plug filter and clean with running
water. (See Figure 1)

WARRANTY
The manufacturer warrants this product against defects in materials and workmanship for two (2)
years from date of purchase. If within this period a product is found to be defective in material or
workmanship, the product must be returned with a copy of the bill of sale as proof of purchase to
the manufacturer. This warranty does not cover the product becoming defective due to misuse,
accidental damage, improper handing and/or installation and specifically excludes liability for direct,
incidental or consequential damages. As some states do not allow exclusions or limitations on how
long an implied warranty lasts, the above exclusions and limitations may not apply to you. This
warranty gives you specific rights and you may also have other rights which vary from state to state.
For warranty service, call +1 (866) 870-9930, 9 a.m. - 5 p.m., EST, Monday - Friday.
TWO YEARS LIMITED WARRANTY
Printed in China
www.surfacemaxx.com
5
MAINTENANCE
4. Using a wrench (not provided) remove the nozzle
from the spray bar.
5. Using a straightened paper clip, free any foreign
material clogging or restricting the nozzle. (See
Figure 2)
6. Flush debris out of the nozzle. Direct the flow of
water through the nozzle backwards from the
outside to the inside.
7. Attach the wand back to the cleaner, set the
cleaner on a flat surface. Turn on the water
(DO NOT START THE PRESSURE WASHER)
and squeeze the trigger on the gun. Allow water
to run through the spray bar for approximately
30 seconds.
2
Spray bar
Nozzle
Straightened
paper clip
3
Spray bar
Nozzle opening
8. Reinstall the nozzle to the spray bar. Tighten securely.
Align the nozzle opening as shown in Figure 3.
Note: After tightening securely, nozzle opening should
be pointed in same direction as spray bar.
Note: If your spray pattern begins to change, it could
mean that the nozzles are worn and they will
need to be replaced.
6www.surfacemaxx.com
Escoba hidráulica de 35,56 cm y
limpiadora con soporte inferior
HOJA DE INSTRUCCIONES
MODELO #SGY-PWA97
ARTÍCULO #2637679
ADJUNTE SU RECIBO AQUÍ
Fecha de compra
¿Preguntas, problemas, piezas faltantes? Antes de volver a la tienda, llame a nuestro
Departamento de Servicio al Cliente al +1 (866) 870-9930, de lunes a viernes de 9 a.m. a
5 p.m., hora estándar del Este.
ÍNDICE
CANTIDADDESCRIPCIÓNPIEZA
A
Escoba hidráulica de 35,56 cm y limpiadora con soporte inferior 1
A
7
CONTENIDO DEL PAQUETE
www.surfacemaxx.com
Especificaciones del producto ...................................................................................................
Instrucciones importantes de seguridad ....................................................................................
Instrucciones de funcionamiento ...............................................................................................
Mantenimiento ...........................................................................................................................
Garantía ...................................................................................................................................
8
8
Instrucciones de ensamblaje ..................................................................................................... 8
9
9
10

INSTRUCCIONES IMPORTANTES DE SEGURIDAD
Tenga en cuenta las instrucciones de seguridad del equipo de lavado con agua a presión.
Para disminuir el riesgo de lesiones, el usuario debe leer y entender esta hoja adjunta, además del
manual del operador del equipo de lavado con agua a presión antes de usar este producto. No
seguir todas las instrucciones y precauciones puede provocar la muerte, lesiones personales
graves o daños materiales.
1. Fije el enchufe de conexión rápida de ¼ pulg. de la
limpiadora al extremo de la vara del equipo de lavado
con agua a presión.
Se puede producir un riesgo de lesiones si el enchufe
de conexión rápida de ¼ pulg. de la limpiadora no está
insertado correctamente en el acoplador de conexión
rápida. Asegúrese de escuchar un sonido de "clic"
cuando fije el enchufe de conexión rápida de 1/4 pulg.
al acoplador de conexión rápida.
2. Conecte la manguera al equipo de lavado con agua
a presión y arránquelo como se describe en su
manual del propietario.
3. Jale la perilla de giro y mueva el acoplador de giro
hacia atrás o hacia delante para lograr la orientación
deseada de la boquilla.
Enchufe de
conexión
rápida de
1/4 pulg.
Perilla de giro
PELIGRO:
ADVERTENCIA:
PRECAUCIÓN:
Los niños no deben utilizar el producto.
Mantenga los alrededores inmediatos del cabezal de limpieza libre de personas/animales.
Mantenga las manos alejadas de las piezas móviles.
Apague el equipo de lavado con agua a presión y libere la presión cuando examine o cambie el
producto y luego de finalizar la operación de limpieza.
El producto no está diseñado para fregar o restregar.
No lo utilice sobre esquinas independientes.
Use lentes de protección lateral que cumplan con la norma ANSI Z87.1.
Pruebe el producto en un área poco visible.
No debe usarse en superficies verticales.
No exceda la presión máxima indicada, el volumen o la temperatura que aparece en las
especificaciones del producto.
ESPECIFICACIONES
COMPONENTE
Conexiones
Ancho de la escoba
Presión máxima
Temperatura de agua máxima
Flujo de agua máximo
Peso
Enchufe de conexión rápida de 1/4 pulg.
14"
3300 PSI
60 °C (140 °F)
11,35 LPM
0,95 kg
INSTRUCCIONES DE ENSAMBLAJE
1
8
ESPECIFICACIONES DEL PRODUCTO
www.surfacemaxx.com
Acoplador de conexión rápida
1. Úselo con las boquillas orientadas hacia abajo y hacia
delante (acoplador de giro en posición posterior) para
lavar grandes superficies planas como aceras o
entradas de vehículos. Camine lentamente detrás de
la limpiadora, limpiando sobre la marcha.
2. Gire la barra rociadora 180° para que las boquillas
apunten hacia arriba (asegúrese de que el acoplador
de giro esté en la posición hacia delante) para limpiar
la parte inferior de elementos elevados como el
soporte inferior de su automóvil.
Para reducir el riesgo de inyección o lesiones, nunca
levante la limpiadora mientras opera el equipo de lavado
con agua a presión.
ADVERTENCIA:
Para reducir el riesgo de inyección o lesiones, no presione
el gatillo hasta que las boquillas de la limpiadora estén
completamente debajo de la superficie que se está
limpiando, y siempre suelte el gatillo antes de retirar la
limpiadora de debajo de la superficie.
ADVERTENCIA:
INSTRUCCIONES DE FUNCIONAMIENTO
MANTENIMIENTO
1
1
2
9www.surfacemaxx.com
Filtro del tapón de entrada
Una boquilla obstruida o sucia producirá una presión
excesiva de la bomba, lo que causa una sensación
pulsante.
1. Apague el equipo de lavado con agua a presión y
corte el suministro de agua. Libere la presión residual
apretando el gatillo de la pistola.
2. Desconecte la vara del equipo de lavado con agua a
presión de la limpiadora.
3. Retire el filtro del tapón de entrada y límpielo con
agua corriente. (Consulte la figura 1)
MANTENIMIENTO
10
GARANTÍA
El fabricante garantiza que este producto está libre de defectos en los materiales y la mano de obra
por dos (2) años a partir de la fecha de compra. Si dentro de este período un producto presenta
defectos en el material o la fabricación, se debe devolver el producto, junto con una copia del
recibo de venta como comprobante de compra, al fabricante. Esta garantía no cubre productos
dañados debido al mal uso, daño accidental, manipulación y/o instalación inadecuada y excluye
toda responsabilidad por daños directos, accidentales o resultantes. Algunos estados no permiten
exclusiones o limitaciones con respecto a cuánto dura una garantía, de modo que las exclusiones
y limitaciones anteriores pueden no aplicarse a usted. Esta garantía le otorga derechos específicos,
pero podría tener también otros derechos que varían según el estado. Para obtener el servicio de
garantía, llame al +1 (866) 870-9930, de lunes a viernes, de 9 a.m. a 5 p.m., hora estándar del Este.
GARANTÍA LIMITADA DE DOS AÑOS
Impreso en China
www.surfacemaxx.com
4. Con una llave inglesa (no se proporciona) retire la
boquilla de la barra de chorro.
5. Con un sujetapapeles enderezado, libere cualquier
material que obstruya o restrinja la boquilla.
(Consulte la figura 2)
6. Lave la boquilla para eliminar los desechos. Dirija el
flujo de agua a través de la boquilla al revés, desde
el exterior hacia el interior.
7. Vuelva a colocar la vara en la limpiadora, coloque la
limpiadora sobre una superficie plana. Abra el agua
(NO INICIE EL EQUIPO DE LAVADO CON AGUAA
PRESIÓN) y apriete el gatillo de la pistola. Deje que
el agua corra a través de la barra de rociado durante
aproximadamente 30 segundos.
2
Barra de chorro
Boquilla
Sujetapapeles
enderezado
3
Barra de chorro
Abertura de
la boquilla
8. Vuelva a instalar la boquilla de la barra de chorro.
Apriétela firmemente. Alinee la abertura de la boquilla,
como se muestra en la figura 3.
Nota: Luego de apretarla firmemente, la abertura de la
boquilla debe apuntar en la misma dirección que
la barra de chorro.
Nota: Si el diseño de rociado comienza a cambiar,
podría significar que las boquillas están
desgastadas y que es necesario reemplazarlas.
This manual suits for next models
1
Table of contents
Languages:
Other SurfaceMaxx Ultrasonic Jewelry Cleaner manuals


Popular Ultrasonic Jewelry Cleaner manuals by other brands


Ensitech
Ensitech TIG BRUSH TBE-160CM Operation, safety and maintenance manual

Mafiti
Mafiti VGT-900 user manual

Bauer
Bauer HYPERMAX 191101C-B Owner's manual & safety instructions

E-MAG
E-MAG Emmi HC Series Operating instruction

Dirt Devil
Dirt Devil M266 operating manual

Far Tools
Far Tools SPO 20L Original manual translation