Surna ISOSTREAM SWFC Operating instructions

surna.com
Model: SWFC
August 2021
ISOSTREAM®
SURNA WALL
FAN COIL
OPERATING AND MAINTENANCE MANUAL

INVESTING IN QUALITY, RELIABILITY & PERFORMANCE
World Leading Design and Technology
Every product is manufactured to meet the stringent requirements of the internationally
recognized ISO 9001 standard for quality assurance in design, development and
production. Equipped with the latest air-conditioning test rooms and manufacturing
technology, our fan coil units are produced conforming to the highest international
standards of quality and safety.
The Highest Standards of Manufacturing
All products conform to UL standard for Safety for Heating and Cooling Equipment
UL1995 4th Edition, October 14, 2011; all products conform to CSA standard for Safety for
Heating and Cooling Equipment CSA C22.2 No.236-11, 4th Edition, October 14 2011.
In order to guarantee the very highest standards and performance, every stage in the
manufacturing of our products are managed. Throughout the production process strict
control is maintained, starting with extensive resources in research and development
through to the design and manufacture of almost every individual component, from
molded plastics to the assembly of the units and controllers.
Quality Controlled from Start to Finish
All products conform to the “WEEE” directive to guarantee correct standards of
environmental solutions.
Highly trained sta and strict quality control methods enable the production of products
with an exceptional reputation for reliability and eciency, maintained over many years.
As well as full CE certification and ISO 9001, several products ranges have UL / ETL safety
approvals, Eurovent performance and sound certification as well as ROHS compliance
for Europe, giving you the confidence of knowing our company is the right choice when
selecting fan coil units.
ALWAYS MAKE SURE THIS MANUAL REMAINS WITH THE UNIT. READ THIS MANUAL
BEFORE PERFORMING ANY OPERATION ON THE UNIT.
ISO 9001 QUALITY
ETL SAFETY STANDARDS
WEEE MARK
TABLE OF CONTENTS
Specifications 5
Technical Description 9
Warnings 11
Warranty Information 13
Installation Instructions 14
Routine Maintenance 25
Troubleshooting 27
3

MODEL CODE NOMENCLATURE
SPECIFICATIONS
2PIPE SYSTEMS
SWFC - XX - V - X - AECM - X- XX
AECM EC motor configuration
X 220V/1Ph/60Hz
VChilled/Hot Water, 2-Pipe
4 Unit sizes, see general
specifications section
for cooling and heating
capacities.
18
30
SWFC Surna Wall Fan Coil
Notes:
1. Cooling mode (2-pipe)
- return air temperature: DB 80°F/WB 67°F
(DB 26.7°C/WB 19.4°C).
- inlet/outlet water temperature: 45°F/55°F
(7.2°C/12.8°C).
2. Heating mode
(2-pipe with electric heat)
- return air temperature: 70°F
(21.1°C).
Table 1: Specifications
Model
SWFC-4-V-X-
AECM-X
2-Pipe, Cooling
Only
SWFC-4-V-X-
AECM-X-EH
2-Pipe with
Electric Heat
SWFC-18-V-X-
AECM-X
2-Pipe, Cooling
Only
SWFC-18-V-X-
AECM-X-EH
2-Pipe with
Electric Heat
SWFC-30-V-X-
AECM-X
2-Pipe, Cooling
Only
SWFC-30-V-X-
AECM-X-EH
2-Pipe with
Electric Heat
Unit
Configuration
Configuration 2-pipe
Number of fan blowers Single
Power supply (V/Ph/Hz) 220/1/60
Performance Data
Air
Total Air Flow CFM
(m/h) 218 (370) 464 (788) 729 (1240)
Cooling
Cooling Capacity BTU/hr
(kW)
3,377 (1) 12,590 (3.7) 20,001 (5.9)
Sensible Cooling
Capacity 2,745 (0.8) 8,686 (2.5) 13,687 (4)
Heating
Max Electric Heater
Capacity @ 220V kW N/A 1N/A 1N/A 1.5
Sound
Sound Pressure Level dB(A) 33 49 50
Sound Power Level 42 58 59
Electrical
Fan Motor Power W 13 30 50
Fan Motor Running
Current @ 220V
A
0.12 0.27 0.45
Min. Circuit Ampacity
(MCA) 0.07 4.3 0.17 8.7 0.28 8.8
Max. Overcurrent
Protection (MOP) 15
Full Load Amps (FLA) 0.12 4.7 0.27 7.1 0.45 7.3
Hydronic
Cooling Water Flow
Rate
GPM
(L/h) 0.7 (159) 2.5 (567.8) 4 (908.5)
Cooling Pressure Drop FT/Head
(kPa) 4.9 (14.6) 13.5 (40.4) 20.4 (61)
Water Content Gal (L) 0.01 (0.045) 0.05 (0.192) 0.07 (0.252)
Physical Data
Water
Connections
Type Socket (NPT Threaded)
In
in (mm)
1/2 (12.7) NPT
Out
Condensate Drainage
Connection 5/8 (16) NPT
Dimensions
L 34-1/2 (876) 41-7/8 (1063)
W 9 (228) 9-7/16 (240)
H 11-13/16 (300) 1 (25.4)
Net Weight lbs (kg) 24.3 (11) 30.9 (14) 35.3 (16)
3. All dimensions are approximate within
1/16 of an inch of those indicated.
4. Data is based on fan running at
maximum speed @ 220V.
SWFCXXVXAECMXXX
EH Electric Heat
No Electric Heat
W
Flexible function onboard
PCB with zone control
functionality.
S
Complete function
onboard PCB with
integrated group control
functionality.
54

Model SWFC-4 SWFC-18 SWFC-30
Speed H(700) M(600) L(500) H(1300) M(1100) L(900) H(1350) M(1200) L(900)
Sound Power
dB(A) 39.4 36.2 36.2 60.0 54.5 47.5 60.3 56.9 49.4
Sound Power in 1/3 Octave-bands under ESP:OPa (dB)
20.0 Hz 23.7 20.1 16.5 14.7 23.8 19.0 20.8 19.9 17.0
25.0 Hz 22.1 15.3 15.7 21.4 17.9 17.9 21.4 19.1 20.5
31.5 Hz 22.3 14.7 18.3 21.2 17.9 19.1 17.6 15.2 17.5
40.0 Hz 16.1 15.2 16.8 28.1 19.1 17.6 23.2 24.3 16.2
50.0 Hz 16.9 17.3 17.8 23.2 26.0 20.8 25.5 22.4 18.0
63.0 Hz 20.5 17.7 13.4 34.4 29.1 23.3 29.0 28.9 23.2
80.0 Hz 17.2 16.9 9.8 38.8 31.2 26.0 35.4 31.4 23.5
100.0 Hz 20.1 16.8 31.9 39.4 37.2 27.6 37.0 34.3 27.9
125.0 Hz 23.5 27.8 14.6 43.2 34.6 28.8 39.8 36.3 29.2
160.0 Hz 24.5 20.9 16.3 44.5 37.0 31.8 43.4 38.3 32.2
200.0 Hz 23.5 19.5 16.1 44.6 37.5 31.3 43.1 38.9 35.2
250.0 Hz 24.2 20.7 16.3 43.5 36.9 30.8 41.4 39.8 34.0
315.0 Hz 26.0 23.3 21.8 45.0 40.4 34.3 46.4 43.2 41.4
400.0 Hz 33.0 26.4 21.3 50.5 45.1 38.0 50.1 46.1 39.5
500.0 Hz 32.0 24.5 25.4 50.9 46.3 41.3 50.5 46.3 40.6
630.0 Hz 30.5 26.0 21.4 52.3 49.5 39.7 52.3 49.8 40.8
800.0 Hz 27.1 22.8 18.0 50.8 44.4 37.2 53.1 50.3 41.7
1000.0 Hz 28.4 22.9 20.2 52.6 45.7 39.1 50.7 47.2 38.1
1250.0 Hz 25.0 21.0 19.6 49.1 43.9 35.0 50.3 47.4 37.7
1600.0 Hz 23.3 22.4 20.7 47.1 39.4 31.3 46.9 42.3 31.9
2000.0 Hz 20.6 20.0 19.4 44.4 36.8 28.0 46.1 41.6 29.3
2500.0 Hz 20.6 20.0 19.8 41.6 34.1 25.9 41.9 37.0 25.5
3150.0 Hz 21.0 20.6 20.6 38.3 31.3 23.7 41.2 35.8 24.3
4000.0 Hz 20.7 20.5 20.8 36.6 29.5 22.9 37.3 31.8 22.3
5000.0 Hz 20.7 20.8 20.5 32.7 25.9 21.6 33.5 28.3 21.3
6300.0 Hz 20.4 20.2 20.1 29.1 23.1 20.4 29.2 24.8 20.6
8000.0 Hz 19.2 19.2 19.3 24.6 20.5 19.3 25.2 21.4 19.5
10000.0 Hz 17.3 17.3 17.4 19.5 17.7 17.3 19.5 18.0 17.4
12500.0 Hz 14.4 14.3 14.5 15.3 14.5 14.4 15.2 14.7 14.6
16000.0 Hz 11.3 11.4 11.1 11.9 11.4 11.6 12.3 12.1 11.7
SOUND DATA
Table 2: Sound power
Model
Unit Dimensions
in (mm)
A B C D E F G H
SWFC-4/18 1-9/16
(40)
4-1/8
(105)
34-7/16
(875)
2-3/16
(55)
4-1/8
(105)
R 13/16
(R20)
2-3/8
(60)
2-15/16
(74)
(All dimensions are approximate within 1/16 of an inch of those indicated.)
DIMENSIONAL DRAWINGS
OF SWFC4/18
Model
Unit Dimensions
in (mm)
a b c d e f g h
SWFC-4/18 7-7/8
(200)
2-3/16
(55)
1-3/16
(30)
1-3/16
(30)
8-11/16
(220)
9
(229)
3/8
(10)
11-13/16
(300)
Model
Unit Dimensions
in (mm)
1 2 3 4
SWFC-4/18 26-3/16
(665)
6-11/16
(170)
27-15/16
(710)
4-15/16
(125)
A
C
B
H
G
D
F
E
1 2
43
f
h
g
d
b
c
a
e
Figure 1: SWFC-4 and SWFC-18 dimensional drawings
Table 3: SWFC-4 and SWFC-18 dimensions
76

DIMENSIONAL DRAWINGS
OF SWFC30
Model
Unit Dimensions
in (mm)
A B C D E F G
SWFC-30 3-9/16
(90)
41-5/16
(1050)
2
(51)
3-9/16
(90)
9/16
(15)
2-7/8
(73)
2-15/16
(74)
(All dimensions are approximate within 1/16 of an inch of those indicated.)
Model
Unit Dimensions
in (mm)
a b c d e f g h
SWFC-30 8-7/16
(215)
2-1/16
(52)
1-3/16
(30)
1-1/4
(32)
9-1/4
(235)
12-3/16
(310)
2-1/4
(58)
1/2
(13)
Model
Unit Dimensions
in (mm)
1 2 3 4
SWFC-30 33-11/16
(855)
6-1/8
(155)
32-1/4
(820)
6-7/8
(175)
A
C
B
G
D
F
E
1 2
43
f
h
g
d
b
c
a
e
Table 4: SWFC-30 dimensions
Figure 2: SWFC-30 dimensional drawings
TECHNICAL
DESCRIPTION
Figure 3: SWFC unit overveiw
Cover
Coil
Base
Valve
Motor + fan blower
Control Box
This High-Wall Unit is designed to meet demanding
requirements for eciency, quiet operation and
appearance. The sleek profile and elegantly styled
cabinet complements any interior design theme, while
providing accurate environmental control.
Cabinet - constructed of durable flame resistant
acrylonitrile-butadiene-styrene (ABS) plastic. The silver
white color and rounded corners provide its modern look.
Water Coil - has a large heat transfer surface and utilizes
the latest fin profile technology. It combines an advanced
technology approach with the security of a traditional
design regarding tube thickness. The water coil is also
equipped with an air vent valve and a water purge valve.
Integral Hoses - a synthetic elastomer tube, with
stainless steel outer braiding and brass connectors,
which enables quick, low cost connections with no
brazing.
98

Blower and Motor - the unit incorporates only specially
designed and tested EC motors, allowing the blower
wheel to provide optimum performance in airflow-
eciency and quiet operation.
Filters - washable, easy-to-remove, fine mesh air filters
are standard to all high-wall models. Tabs located on the
front of the unit can be unsnapped, allowing the filter
to be easily slid downward and removed. No tools are
required, nor any dismantling of the equipment.
Air Grille Distribution ~ all units are equipped with both
deflector blades and independent directional vanes,
enabling the supply air to be automatically distributed,
and air flow and direction to be customized.
Electro-Mechanical Controls allow operation with 24 VAC
thermostat. When any of the motor speed terminals is
powered ON or Modulating signal is more than 2.0 VDC,
the stepping motor is working and opens the louver
at the maximum position. When all of motor speed
terminals are powered OFF or the modulating valve
is less than 2.0 VDC, the stepping motor will close the
louver. The condensate pump will run continuously, as
long as coil temperature is less than 59°F (15°C). Alarm
notification and zone control functions are available. A 40
VA 24VAC transformer is equipped with the unit, which
is used to supply 24VAC power to the thermostat and
modulating valve.
WARNINGS
DEFINITIONS
CAUTION: Risk of minor/moderate injury if precaution
not taken.
WARNING: Risk of death/serious injury if warning
isn’t heeded.
DANGER: Risk of death/serious injury if danger
isn’t avoided.
SAFETY SYMBOLS USED
CAUTION: Important information, read the
provided instructions carefully
WARNING: Potential electric shock hazard
WARNING: High voltage
WARNING: Cut/Crush hazard
Protective earth connection
Action prohibited
WALL FAN COIL SAFETY GUIDE
Please read the information in this document carefully
prior to attempting the installation, operation and/or
servicing of the wall fan coil. This document contains all
information required to install and operate the Surna
wall fan coil unit. Failure to follow the directions provided
herein may impair the safeties provided and could cause
damage to the fan coil equipment and/or accessory
equipment, damage to building facilities and/or cause
serious injury or death to the operator. Please adhere
to all applicable safety guideline requirements in this
document and all applicable electrical and mechanical
jurisdictional codes.
Prior to providing power to the equipment, inspect the
area for water spills, which may present a shock hazard
to the user. Take extra care to mount accessory electrical
equipment away from areas regularly exposed to water
and provide secure wire and cable routing to protect
personnel from shock hazards.
Only operate the equipment with an appropriately sized
breaker in place and wire sizes with adequate current
carrying capacity. Consult with an electrician before
attempting electrical installation.
Using Surna wall fan coils in a manner not described
in this manual may void its warranty and any safeties
provided herein.
1110

After installation and maintenance activities, observe
the system operation to verify that the fan coil is
operating normally before leaving equipment to operate
unattended.
Only use Surna supplied or recommended equipment
with the Surna wall fan coil.
CAUTION: Care must be taken when handling sheet
metal. Sheet metal parts have sharp edges and could
cause injury.
The components of this fan coil have been inspected at
the factory and readied for shipment. Upon receiving the
shipment, a visual inspection of the packaging must be
performed.
Care must be taken to ensure the structural integrity of
the supporting members when mounting these devices.
Verify that the load bearing capacity of any mounting
surface is rated for the load of the fan coil.
DO NOT use ethylene glycol with this system. Only
propylene glycol is to be used.
Adequate clearance shall be provided around the unit
for regular servicing. After installation, service and
maintenance personnel shall be able to access the power
supply, coil connections and condensate drain.
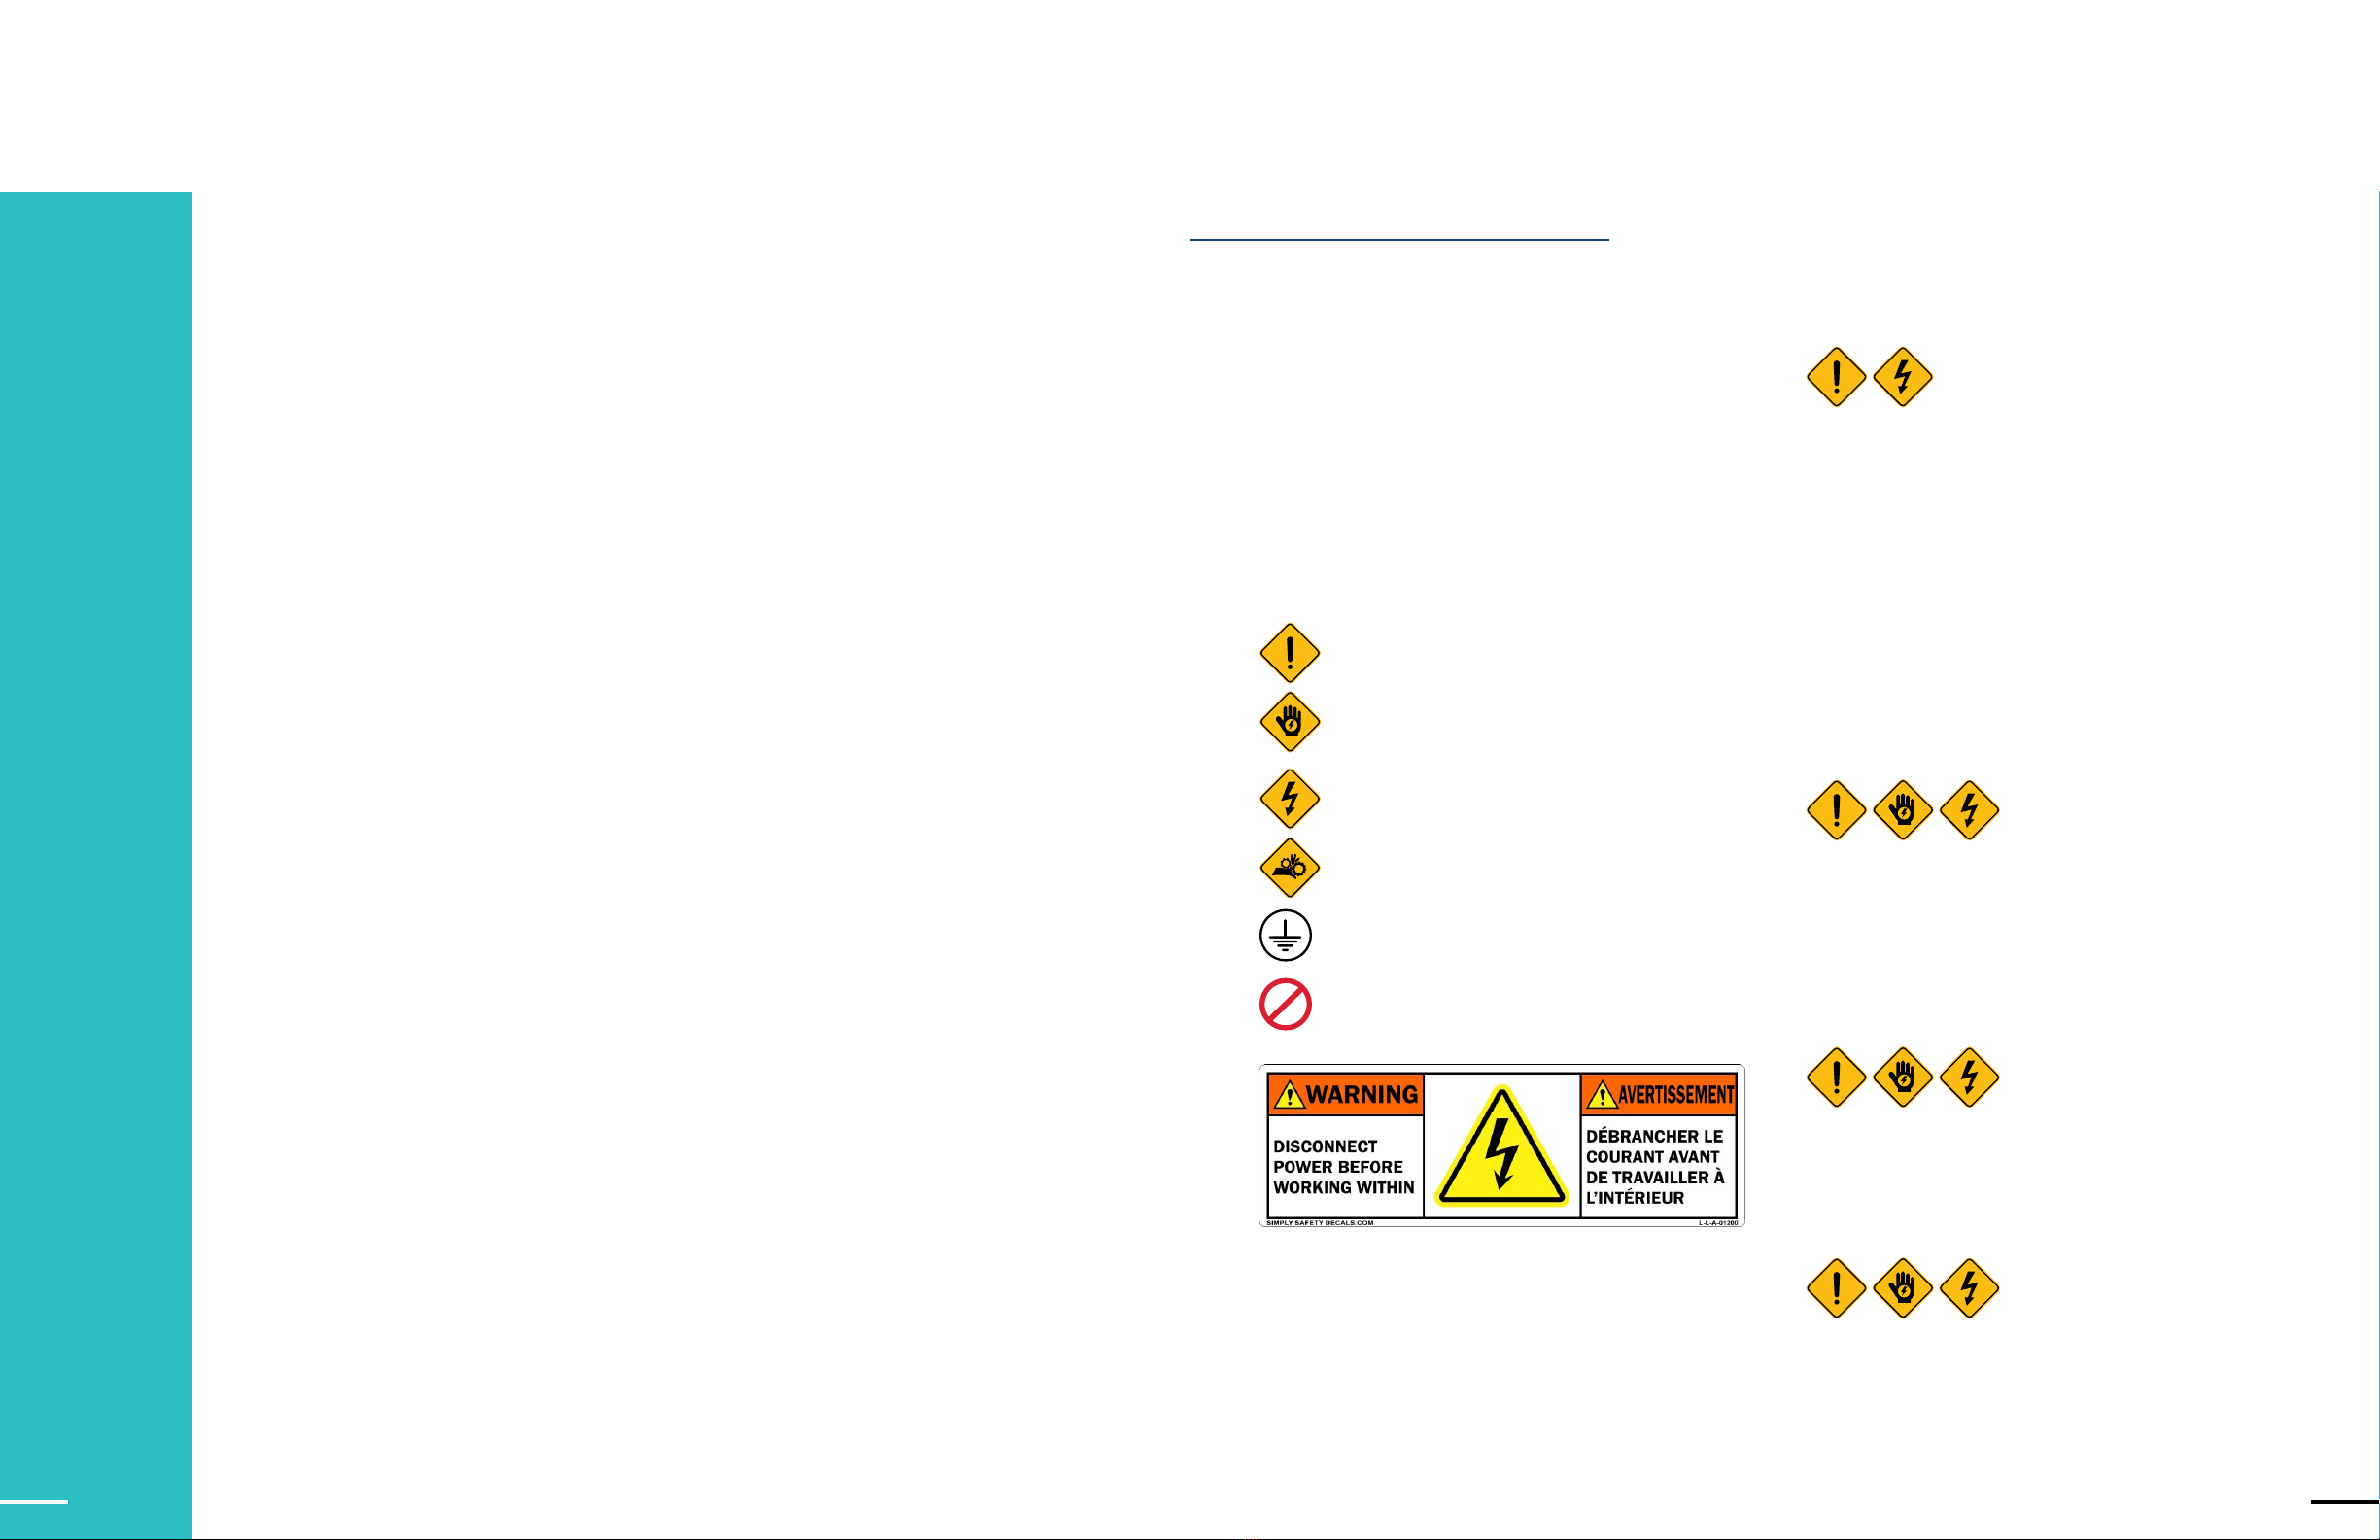
This unit must be connected to a protective earthing
system prior to operation. DO NOT remove the
grounded connection while power is being supplied to
the Surna wall fan coil. Doing so presents an electric
shock hazard to users and service personnel.
Installing and servicing fan coil unit should be performed
by qualified personnel only.
Equipment manufactured by Surna (“Company”), the
warranty shall exist for a period of twelve (12) months from
initial start-up or eighteen (18) months from date of
shipment, whichever period is shorter, against failure due to
defects in material and/or manufacturing and warranted to
the capacities and ratings set forth in Company’s catalogs
and bulletins (“Warranty”).
Equipment, material, and/or parts that are not
manufactured by Company are not warranted by Company
and carry such warranties as may be extended by the
respective manufacturer.
Exclusions from this Warranty include damage or failure
arising from: wear and tear; corrosion, erosion,
deterioration; modifications made by others to the
Equipment; repairs or alterations by a party other than
Company that adversely aect the stability or reliability of
the Equipment; vandalism; neglect; accident; adverse
weather or environmental conditions; abuse or improper
use; improper installation; commissioning by a party other
than Company; unusual physical, electrical or mechanical
stress; lack of proper startup or maintenance as
recommended by Company; operation with any accessory,
equipment or part not specifically approved by Company.
Company shall not be obligated to pay for the cost of lost
product or any other direct, indirect, or consequential
damages. Company’s obligations and liabilities under this
Warranty are limited to furnishing replacement equipment
or parts, at its option, FCA (Incoterms 2000) factory or
warehouse (f.o.b. factory or warehouse for US domestic
purposes) at Company-designated shipping point, freight
allowed to Company’s warranty agent’s stock location, for
all non-conforming Company manufactured Equipment
which have been returned by Customer to Company.
Returns must have prior written approval by Company and
are subject to restocking and replacement charges where
applicable.
No warranty liability whatsoever shall attach to Company
until Customer’s complete order has been paid for in full
and Company’s liability under this Warranty shall be limited
to the purchase price of the Equipment shown to be
defective.
Additional warranty and service protection is available on
an extra-cost basis and must be in writing and agreed to by
an authorized signatory of the Company.
The warranty excludes: (a) labor, transportation and related
costs incurred by the Dealer or Customer; (b) re-installation
costs of repaired equipment; (c) re-installation costs of
replacement equipment; (d) removal costs of equipment; (e)
consequential damages of any kind; and, (f) reimbursement
for loss caused by interruption of service.
EQUIPMENT MANUFACTURED BY COMPANY THAT
INCLUDES A REQUIRED START-UP AND SOLD IN NORTH
AMERICA WILL NOT BE WARRANTED BY COMPANY
UNLESS COMPANY OR ITS AUTHORIZED AGENT
PERFORMS THE EQUIPMENT STARTUP.
COMPANY MAKES NO REPRESENTATION OR
WARRANTY, EXPRESS OR IMPLIED, REGARDING
PREVENTION OF MOLD/MOULD, FUNGUS, BACTERIA,
MICROBIAL GROWTH, OR ANY OTHER CONTAMINATES.
EXCEPT FOR COMPANY’S WARRANTY EXPRESSLY SET
FORTH HEREIN, COMPANY DOES NOT MAKE, AND
HEREBY EXPRESSLY DISCLAIMS, ANY WARRANTIES,
EXPRESS OR IMPLIED CONCERNING ITS PRODUCTS,
EQUIPMENT OR SERVICES, INCLUDING, WITHOUT
LIMITATION, ANY WARRANTY OF DESIGN,
MERCHANTABILITY OR OF FITNESS FOR A PARTICULAR
PURPOSE, OR OTHERS THAT ARE ALLEGED TO ARISE
FROM COURSE OF DEALING OR TRADE.
WARRANTY
INFORMATION
1312

INSTALLATION
INSTRUCTIONS
MECHANICAL
This wall fan coil unit is designed to be mounted in a
horizontal configuration only. The weight information for
each model can be found in the specifications section
of this document; take care to ensure the supporting
members are rated to support the fan coil load. When
installing, clearances must be provided as a provision
to allow maintenance/service of the unit. Additionally,
clearance around the unit increases performance by
allowing airflow.
ELECTRICAL
Electrical Connection: An appropriate strain relief device
must be used to attach the power wires to the terminal
box. A 13/16in (20.6mm) hole is designed on the terminal
box for field installation of the strain relief device. A
main switch or other means for disconnection, having a
contact separation in all poles, must be incorporated in
the fixed wiring in accordance with the relevant local and
national codes.
WIRING
WARNING: Turn o the breaker until all electrical
connections are made.
WARNING: This unit must be connected to a protective
grounding system.
All wiring shall comply with local and national codes.
Before attempting system installation, verify that
the electrical system and wiring are adequate for
supplying the required ampacity to the wall fan coil
unit (see specifications section of this document).
High and low voltage terminal blocks are provided in
the unit’s electrical panel. Reference figure 3 for wiring
diagram. Making improper electrical connections could
cause damage to the equipment or harm to servicing
personnel. Never perform electrical work unless properly
trained and licensed and aware of relevant electrical
codes and requirements.
There are dierent wiring configurations depending on
selected options, but all units will include high and low
voltage terminals as well as a ground terminal.
Unit components are wired to the terminal block of the
indoor unit. Wiring can be accessed from the terminal
block inside the control box.
WIRING DIAGRAM
Figure 4: Wiring diagram complete function (S)
Wiring Diagrams
SWFC (SWC) - S CONTROL
SUR-FCU NA-007v01
31
SWFC CONTROL SPECIFICATIONS COMPLETE FUNCTION (S)
1514 14

220Vac 60Hz
Figure 5: Wiring diagram flexible function PCB (W)
SWFC CONTROL SPECIFICATIONS FLEXIBLE FUNCTION PCB (W)
CONTROL SPECIFICATIONS
Table 5: I/O port definitions
ONBOARD CONFIGURATIONS
There is 1 DIP switch set on the PCB:
DIPB (8 positions)
• SW1: configured for dierent modulating signal
• SW2 – SW4: brushless DC fan motor configuration.
• SW5 – SW8: Reserved
Table 6: Onboard configurations
Model SW2 SW3 SW4 High Medium Low
SWC-4 0 0 0 700 600 500
SWC-18 1 0 0 1300 1100 900
SWC-30 1 1 1 1350 1200 900
Default RPM 1 1 1 Set by customer requirement
I/O Port Code 2-Pipe
Analog Input Chilled water sensor AI1 Coil sensor (Ti1)
Power Input
High speed Hi
24VAC input signals from wired thermostat
Medium speed Med
Low speed Lo
EH signal CN4
Phase L
220V/1Ph/60HzNeutral N
Earth GND
Signal Input 0-10VDC Signal 0-10VDC, SW1=1
Digital Input Wired wall pad TTL Adjust EC motor RPM
Output
EC motor CN3 EC motor output
Stepping motor CN1, CN2 Stepping motor output
Electric Heater Signal CN5 When EH signal input is powered on and EC motor RPM>500RPM,
EH output is turned on.
LED Display X-DIS LED Display signal
Code State Description
S1 0 PCB configured for 0-5VDC modualting signal input.
1 PCB configured for 0-10VDC modulating signal input.
1716

For all units
Power/Operation LED light (both green)
Unit on Operation LED On, Power LED O
Unit in standby Power LED On, Operation LED O
For all units - Operation LED light (Green)
Blink LED Display Item Reason Remedy
Green LED blinks 4
times, stops for 3s E4 Indoor coil sensor 1 failure Ti1 sensor connection is
unplugged or damaged.
1. Check if Ti1 plug is connected or not.
2. Check if sensor’s resistance is correct or not.
Green LED blinks 9
times, stops for 3s E9 EC motor failure No EC motor feedback 1. Check if EC motor’s wires are connected.
2. Check the EC motor.
Green LED blinks 11
times, stops for 3s E11 Anti-frozen protection When unit is standby,
Ti1<35.6°F (2°C) Turn on unit to keep Ti1 higher than 41°F (5°C)
LED DISPLAY AND ERROR DESCRIPTION
CONTROL LOGIC SPECIFICATION
POWER ON SETTING
1. When any fan speed is selected or the modulating
signal is more than 2 VDC, the unit is turned on.
2. When all of the fan speed inputs (G2/G1/G0) are OFF
and modulating signal is less than 2Vdc, the unit is
turned OFF.
ALARM PROTECTION AND ERROR DISPLAY
If EC motor fails, EH relay is turned OFF at once.
LOUVER
1. When the unit is turned on, the louver will open
to the largest angle at 100°, then move to the
operating angle at 87°.
2. When the unit is turned o, the louver will close.
SIGNAL INPUT
1. When Auto speed is turned ON, the unit is turned on
and the motor runs at 200 RPM.
2. EC motor RPM will be changed by the signal voltage.
ELECTRICAL HEATER OPERATION
1. After unit is turned ON, EH relay will be ON when EH
signal is powered ON and EC motor RPM>500.
2. If EC motor fails or EC motor RPM<500, EH relay is
turned OFF at once and an error code is reported.
LOW TEMPERATURE PROTECTION OF INDOOR COIL
IN WINTER
This is frost protection when the unit is o to prevent
water in the coil and the unit from freezing.
UNIT IS IN STANDBY MODE
If Ti1≤ 35.6°F (2°C) for 2 minutes, the unit will report an
error code and an audible sound will alarm.
Table 7: LED display - for all units
UNIT INSTALLATION
1. Pass the piping through the hole in the wall and hook the indoor unit on the mounting plate by the upper hooks.
2. Move the body of the unit from side to side to verify if it is securely fixed.
3. While pushing the unit toward the wall, lift it slightly from beneath to hook it up on the mounting plate by the
lower hooks.
4. Make sure the unit firmly rests on the hooks of the mounting plate.
DRAIN HOSE INSTALLATION
1. Install the drain hose so that it slopes downward slightly for free drainage. Avoid installing it as shown in the below
illustrations marked with an “X”.
2. Put water in the drain pan and make sure that the water drains outdoors.
3. If the flexible drain hose provided with the indoor unit is not long enough, please extend it by joining it to an ex-
tension hose (not provided). Be sure to insulate the connecting part of the extension drain hose with a shield pipe
as shown.
4. If the attached drain hose passes through an indoor area, insulate it with heat insulation material.
Hook
Putty
Slope
downward Do not
lift up It waves
Do not push the
drain hose end in
the drainage ditch
Do not put the
drain hose end
into water
1-15/16in
(50mm)
or more
Shield Pipe
Drain Hose Extension Drain HoseInside the Room
Figure 6: Unit installation
Figure 7: Drain hose installation
Figure 7: Joining to extension hose
(All dimensions are approximate within 1/16 of an inch of those indicated.)
1918

VALVE CONNECTION
PRE-ASSEMBLY
COMPLETE ASSEMBLY
Flexible hose Valve body
with actuator
1/2in
(12.7mm)
gasket
Coil connector
DRAIN PUMP AND INSTALLATION FIXTURE (OPTIONAL)
Upon request, the metal bracket for fixing the drain pump and drain pump kits can be oered. Please consult our
sales representatives for these optional accessories.
Figure 8: Drain pump kits (optional)
Figure 9: Metal bracket for fixing the
drain pump on the unit (optional)
212020

AIR VENT AND WATER PURGE VALVES
1. After connecting the water inlet and outlet pipes to the main supply lines turn on the main breaker and operate
the unit in COOLING mode. The high-wall unit should be mounted on a solid wall.
2. Open the water inlet valve and flood the coil.
3. Check all connections for water leakage. If no leak is found, open the purging valve with an open end wrench while
supporting the unit with your other hand then purge the air trapped inside the coil. When performing this activity,
take care not to touch the electrical parts.
4. Close the purging valve when no bubbles appear.
5. Open the water outlet valve.
MOUNTING DETAIL
Select the location for the high-wall unit with the following considerations:
1. The air inlet and outlet area should be clear without obstructions. The air should flow freely.
2. The high-wall unit should be mounted on a solid wall.
3. The location should allow easy access to connect water pipes easily to achieve drainage.
4. Ensure the clearance around the fan coil unit conforms to the following drawing.
Notes for above diagram:
• Required clearance for maintenance and servicing is as shown above.
• All dimensions shown in mm.
5. The unit should be installed higher than eye level.
6. Avoid installing the unit where it will be in direct sunlight.
7. The signal receiver on the unit must be kept away from any high frequency emission source.
8. Keep the unit away from fluorescent lamps, which may aect the control system.
9. Avoid electromagnetic control system interference, ensure control wires are installed separately from 110-240 VAC
power supply wires.
10. Use shielded sensor cables where electromagnetic waves are present.
11. If electrical noise is present, the use of an approved electrical noise filter is suggested.
Figure 10: Clearance
3-15/16in
(100mm) 3-15/16in
(100mm)
3-3/16in
(80mm)
Higher than eye-level
(All dimensions are approximate within 1/16 of an inch of those indicated.)
Figure 11: Suspension bolts layout
MOUNTING PLATE DIMENSIONS
SWFC-30
OPERATING LIMITS
Power Supplies
Volt Phase Hz Model
208-240 1 60 SWFC
Water Circuit
Minimum entering water temperature +35.6°F (2°C)
Maximum entering water temperature +176°F (80°C)
Coil tested maximum pressure 435 PSI (3000 kPa)
(All dimensions are approximate within 1/16 of an inch of those indicated.)
SWFC-4/18
All dimenions in inches (millimeters)
30-15/16 (786)
15-1/4 (387)
7/16 (11)
1-3/16 (30)
2 (51)
1
(13)
2 (51)
2 (51)
2 (51)
3/8
(10)
3/8
(10)
2-3/4
(70)
3/16
(5)
6-1/8
(156)
3-1/8
(79) 7-3/8
(187)
10-1/16
(256)
1-3/8 (35)
13-1/2 (343)
13/16 (21)
9-1/16 (230)
4-1/2
(114)
1-3/16 (30)
35-5/8 (905)
16-5/16 (414)
9-1/16 (230)
7-11/16
(195)
9-5/8
(244)
1-11/16
(43)
10-1/4 (260)
1-1/8 (29)
3/8
(10)
1-3/16 (30)
2-1/2
(64)
1-3/16
(30)
14-7/8 (378)
6-1/16
(154)
3-9/16
(90)
1-9/16
(40) 5-13/16 (152)
6-5/8 (168)
Table 8: Operating limits
2322

MOUNTING PLATE INSTALLATION
1. Select the structural position (e.g. a pillar or lintel) on the wall.
2. Temporarily fasten the mounting plate on the wall with a steel nail.
3. Mount the mounting plate horizontally as shown in the above figure or by means
of a level. Failure to follow this may cause water to drip indoors and create atypical noise.
4. Fix the mounting plate by means of expansion screws or tapping screws.
CONDENSATE DRAINAGE HOLE DRILLING
1. Ensure that the hole for condensate drainage is correctly positioned.
The height should be lower than the bottom edge of the indoor unit.
2. Drill a 65mm diameter hole with a descending slope.
3. Seal it o with putty after installation.
Mounting Plate
Temprorary Fastening
Screw
Thread
Weight fit the level line
2-9/16in
(65mm)
Figure 12: Mounting plate installation
Figure 13: Condensate drainage hole drilling
This product is designed to provide many years of dependable, trouble-free service when properly maintained. Proper
maintenance will consist of routine filter cleanings/changes, bi-annual check-ups that include (but are not limited to)
filter inspections and electric heater inspections/cleaning of the internal electrical and heat transfer components by a
qualified service technician. Failure to provide periodic check-ups and cleaning can result in excessive operating cost
and/or equipment failure.
CONTACT US
Task Description for Fan-coil Units Frequency*
Check condensate lines are draining and free of blockage and/or debris. Treat
drains and remove any foreign debris. Q
Verify condensate line meets minimum insulation requirements. Verify insulation
is free of excessive moisture buildup. Advise on adjustments and/or repairs. Q
If the thermostat in use requires batteries, please check and/or replace the
batteries as needed on a quarterly basis. Q
Verify fan-coil unit flow rate meets manufacturer specifications. Advise on
adjustments or repairs to restore flow and ensure proper operation and optimal
energy eciency.
Q
Check fan blade housing for signs of damage or excessive wear. Advise on re-
pairs to ensure proper operation. Q
Visually inspect coil for evidence of damage. Advise on repairs to restore
proper operation. SA
Check coil has appropriate airflow. Clean as needed. Advise on repairs to ensure
proper airflow for optimal energy eciency. SA
Check system temperatures. If outside of recommended set points, find cause,
advise on adjustments or repairs to achieve and/or maintain optimal energy
eciency.
A
Table 10: Routine maintenance
ROUTINE
MAINTENANCE
Legend*
Q1 Quarterly
SA Semi-Annually
A Annually
Anchor bolt hole
2524

OPENING AND CLOSING OF LIFTUP GRILLE COVER
1. Open the grille cover by lifting from the bottom position indicated by the arrows.
2. Close the grille cover by pressing down at the positions indicated by the arrows.
FRONT COVER ASSEMBLY REMOVAL
1. Set the horizontal louver to the horizontal position.
2. Remove the screw caps below the louver, and then remove the mounting screws
(red circles in below picture).
3. Open the lift-up grille cover by grasping the panel at both sides as shown above.
4. Remove the remaining screws located in the center of the front cover.
5. Grasp the lower part of the front cover and pull the entire assembly out and up towards you.
TROUBLESHOOTING
Figure 14: Troubleshooting guide
2726
This manual suits for next models
3
Table of contents
Popular Air Conditioner manuals by other brands

Mitsubishi Electric
Mitsubishi Electric DXK09ZJ-S Technical manual

Mitsubishi Electric
Mitsubishi Electric PUMY-SP112VKM.TH Technical & service manual

Acson
Acson AWM 301 installation manual

Hokkaido
Hokkaido FREE MATCH HKEU 265 XR user manual

Mitsubishi Electric
Mitsubishi Electric MXZ-8C60NA installation manual

Movincool
Movincool Office Pro 10 Operation manual