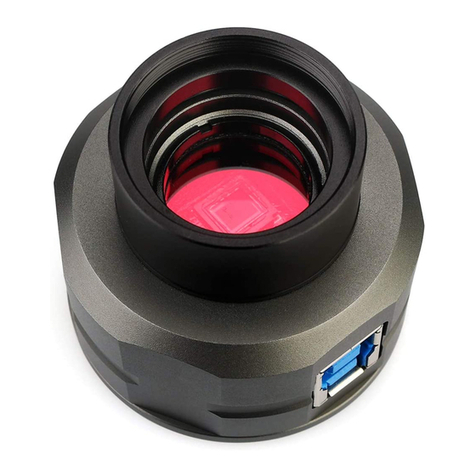
SVBONY SV189 User manual

SV189
EN
JP
DE
FR
IT
ES
RU
USB Microscope Digital Camera
User Manual

CONTENTS
Product Introduction . . . . . . . . . . . . . . . . . . . . . . . . . .
Installation guidelines . . . . . . . . . . . . . . . . . . . . . . . .
Software function introduction . . . . . . . . . . . . .. . . . .
Warning . . . . . . . . . . . . . . . . . . . . . . . . . . . . . . . . . .
1
2
4
5

◆Product Introduction
Congratulations on your purchase of SVBONY SV189 USB digital microscope
camera for microscope. Suitable for microscopes with plug-in standard
23.2/30MM eyepiece interface This manual will briefly introduce you how to use
the SV189 USB digital microscope camera.
SVBONY reserves the right to modify this document without notice. Please
download the latest version of the user manual pdf file from our official website or
print this file.
Please read this manual completely before use. If you have any questions,
please feel free to contact us: Facebook: www.facebook.com/svbony
For software installation instructions and other technical support information,
please send us an email: info@svbony.com
1.Package Including
①SV189 digital microscope camera
②microscope adapter
③1.5m USB 2.0 Cable
④CD-ROM
⑤User’s Manual
English
2. When using, install the microscope adapter to the camera and tighten it .
3. Specifications
Eyepiece interface size
Suitable microscope method
Photosensitive component
Static image resolution
dynamic image resolution
Sensitivity
Pixel size
Spectrum response
Shutter type
Frame rate
Image format
White balance
Interface
23.2mm, 30.00mm
plug-in optical microscope eyepiece holder
1/4"1.3 million pixel CMOS
1280*1024, 640*480, 320*240 1280*1024Pixels/24fps
1.0V/lux-sec@550nm
2.8×2.8um
400nm---1000nm
ERS (electronic rolling shutter)
16 f/s @ 1280*1024
JPG/BMP format
automatic/manual
USB2.0
Figure 2. Adapter assembly is complete
1①②③
④⑤
Figure 1.Parts description

◆Installation guidelines
1.Installation instructions:
PC System Requirements:Windows(32, 64 bit) XP/7/8/10 /MAC OS10.5 and above / photo booth OS
10.13 3 .SVBONY official download address:https://www.svbony.com/Support/SoftWare-Driver/ Enter the address from the
browser to download and install.
Use the attached CD or download "S-EYE_Setup-1.4.4.500" (Figure 3) from the
SVBONY official website. After the installation is successful, the shortcut icon
"S-EYE" (Figure 4) will be displayed.
2. CD installation:
2.1 Put the CD into the CD-ROM, and the
files of the CD will be automatically
displayed on the screen.
Note: If the CD-ROM does not run
automatically, please double-click
"CD-ROM", or right-click "open" under the
CD-ROM menu bar
2.2 Double-click the installation file
"S-EYE_Setup" to enter the S-EYE
Installation Wizard installation wizard. You
must accept the user license agreement,
so please click: "Accept and Install" to
agree to continue the installation . Do not
click “Cancel” to exit (Figure 5).
2.3 The default location of the installation
directory is "C:\Program Files
(x86)\S-EYE", you can click "Browse" to
change it to the desired destination folder
(Figure 6), check to create a desktop icon ,
Easy to use and operate.
Figure 3 Figure 4
S-EYES-EYE_Set…
Figure 5
Figure 6
2

2.4 Click "Install" to start the installation and enter the installation process . Do
not click “Cancel” to exit (Figure 7). When the S-EYE icon appears on the
desktop, the program installation is complete. As shown
Figure 7 S-EYE
3. Installation/debugging:
3.1 Put the observation specimen into the microscope stage, and fix it with the
pressing clip; turn the light source adjustment knob to adjust to the desired light
source position, turn the low-magnification objective lens to the positioning point,
and move the horizontal and vertical adjustment on the stage Ruler, make the
observation specimen to the center position; fine-tune the focus adjustment
wheel to obtain a clear imaging effect, take out the eyepiece and extender on
the microscope, and insert the SV189 microscope digital camera into the
eyepiece tube (Figure 8);
3.2 Connect the SV189 microscope digital camera to the computer. Note: Before
connecting the USB camera to the computer, please make sure that the USB2.0
interface on the computer can work normally.
Connect the USB2.0 cable of SV189 to the computer,
Open "S-EYE", click the camera name "1.3M Camera" in the camera list in the
upper right corner of the software interface, the blue indicator light of the SV189
microscope digital camera will light up and enter the power-on state; SV189
imaging is displayed on the screen (Figure 9) The imaging display
Figure 9
3
Figure 8

Figure 10
2. In the "Measure" mode, Use the measuring
tool to measure specimen Width/ Height
/Radius/ Area /Length /Angle/Distance and
other information (Figure 10)
effect can be achieved by manually fine-tuning the focus adjustment wheel to
achieve a clearer effect.
◆Software function introduction
1. Software interface operation: After entering the "S-EYE" software interface,
In the "Camera" mode, Snap /Record/Browse functions can be operated, and
Resolution and Format/Exposure and Gain/White Balance/Color Adjust/Color
Mode/Flip can be set individually (Figure 10)
3. Click the "0utpat" function to view the measurement data list and export the
measurement record data to a file.
Click the “ ” Capture preview image to a file, including measurement tools
on the image.
Click the “ ” Export measurement data to csv file.
◆Introduction to measurement toolse
CSY
+ +
++
Point
Broken line
Polygon
Parallel line
Perpendicular
Two Crosshairs
Arc
Two points circle
Concentric circles
Move
Line
Rectange
Distance between two lines
Distance to the first line
Crosshair
Angle
Circle
Three points circle
The distance between the two circles
Remove
Set the color of the measurement tool
4
Remove all
measurement tools

Figure 11
4. Click the "Edit" function to calibrate
multiple measurement data of the specimen,
and "Backup" can backup and save the
calibration data as a file (Figure 11).
Before using this device, read this guide which contains
important operating instructions for safe usage and control
for compliance with applicable standards and regulations.
ATTENTION!
FCC Requirements:
•Products authorized under Part 15 using SDoC or Certification require a label
containing one of the following compliance statements
(1)Receivers associated with licensed device service operaions:
This device complies with part 15 of the FCC Rules. Operation is subject to the
condition that this device does not cause harmful interference.
(2)Stand-alone cable input selector switch:
This device complies with part 15 of the FCC Rules for use with cable television
service.
(3)All other devices:
•This device complies with part 15 of the FCC Rules. Operation is subject to the
following two conditions:
(1) This device may not cause harmful interference, and
(2) this device must accept any interference received, including interference that
may cause undesired operation.
CE Requirements:
•(Simple EU declaration of conformity) Hong Kong Svbony Technology Co.,Ltd
declares that the equipment type is in compliance with the essential
requirements and other relevant provisions of RED Directive 2014/30/EU and the
ROHS Directive 2011/65/EU and the WEEE Directive 2012/19/EU; the full text of
the EU declaration of conformity is available at the following internet address:
www.svbony.com.
•Disposal
The crossed-out wheeled-bin symbol on your product, literature, or packaging
reminds you that in the European Union, all electrical and electronic products,
batteries, and accumulators (rechargeable batteries) must be taken to
designated collection locations at the end of their working life. Do not
dispose of these products as unsorted municipal waste. Dispose of
them according to the laws in your area.
IC Requirements:
CAN ICES-3(B)/NMB-3(B)
5
◆Warning
WARNING
Avoid Choking Hazard
Approved Accessories
•This device meets the regulatory standards when used with the
Svbony accessories supplied or designated for the product.
•For a list of Svbony-approved accessories for your item, visit the
following website: http://www.Svbony.com
Small Parts. Not for children under 3 years.
6

前書き
製品説明書 . . . . . . . . . . . . . . . . . . . . . . . . . . . . . . . .
インストールガイド . . . . . . . . . . . . . . . . . . . . . . . . . . .
ソフトウェア機能紹介 . . . . . . . . . . . . . . . . . . . . . . . . .
警告. . . . . . . . . . . . . . . . . . . . . . . . . . . . . . . . . . . . . .
7
8
10
11

◆製品説明書
顕微鏡用SVBONY SV189 USBデジタル顕微鏡カメラをお買い上げいただき
ありがとうございます。
プラグイン標準の23.2 / 30mm接眼レンズインターフェースを備えた顕微鏡に
適しています。
このマニュアルでは、SV189 USBデジタルマイクロスコープカメラの使用方法
を簡単に紹介します。
SVBONYは、このドキュメントを予告なしに変更する権利を留保します。ユー
ザーマニュアルの最新バージョンのPDFファイルを当社の公式ウェブサイトか
らダウンロードしてくださいね。
ご使用前に本書をよくお読みください。ご不明な点がございましたら、お気軽
にお問い合わせください:Facebook:www.facebook.com/svbony
ソフトウェアのインストール手順およびその他のテクニカルサポート情報につ
いては、何かご問題がございましたらメールで送信してくださいね。
メールアドレス:info@svbony.com
備えたコンパクトで、地上だ
メールアドレス:info@svbony.com
1.バッケージ内容
①SV189デジタル顕微鏡カメラ
②顕微鏡アダプター
③1.5m USB 2.0ケーブル
④CD-ROM
⑤取扱説明書
3. 仕様:
接眼レンズインターフェースサイズ適切な顕微鏡法感光性コンポーネント静止画像の解像度動的画像解像度感度ピクセルサイズ23.2mm、30.00mm
プラグイン光学顕微鏡接眼レンズホルダー1/4 "130万ピクセルCMOS
1280 * 1024、640 * 480、320 * 240
1280 * 1024ピクセル/ 24fps
1.0V / lux-sec @ 550nm
2.8×2.8um
図2.アダプターの組み立てが完了しました。
Janpan
7
2.使用するときは、顕微鏡アダプターをカメラに取り付けて締めます(図2)
①②③
④⑤
図1、部品説明

スペクトル応答シャッタータイプフレームレート画像形式ホワイトバランスインターフェース400nm --- 1000nm
ERS(電子ローリングシャッター)16 f / s @ 1280 * 1024
JPG / BMP形式自動/手動USB2.0
2、CDのインストール:
2.1 CDをCD-ROMに入れると、CDのファ
イルが自動的に画面に表示されます。
注:CD-ROMが自動的に実行されない場
合は、「CD-ROM」をダブルクリックす
るか、CD-ROMメニューバーの下の「開
く」を右クリックしてください。
2.2インストールファイル「S-EYE_Setup
」をダブルクリックして、S-EYEインスト
ールウィザードのインストールウィザー
ドに入ります。ユーザー使用許諾契約に
同意する必要があるため、[同意してイン
ストール]をクリックして、インストール
を続行することに同意してください。「
キャンセル」をクリックして終了しない
でください(図5)。
図3 図4
S-EYES-EYE_Set…
図5
8
◆インストールガイドライン
1、インストール手順:
PCシステム要件:
Windows(32、64ビット)XP / 7/8/10 / MACOS10.5以降/プリクラ
OS10.13 3
SVBONY公式ダウンロードアドレス:
https://www.svbony.com/Support/SoftWare-Driver/
このアドレスでダウンロードしてインストールしてくださいね。
添付のCDを使用するか、またはSVBONYの公式Webサイトから「S-EYE_Set-
up-1.4.4.500」(図3)をダウンロードしてください。インストールが成功す
ると、ショートカットアイコン「S-EYE」(図4)が表示されます。

図 6
図 7 S-EYE
図 8
図 9
9
2.3インストールディレクトリのデ
フォルトの場所は「C:\
ProgramFiles(x86)\ S-EYE」で
す。「参照」をクリックして目的の
宛先フォルダに変更し(図6)、チ
ェックしてデスクトップアイコンを
作成します。 使いやすく、操作も
簡単です。
2.4 [インストール]をクリックしてインストールを開始し、インストールプロセ
スに入ります。「キャンセル」をクリックして終了しないでください(図7)。
デスクトップにS-EYEアイコンが表示されたら、プログラムのインストールは
3.インストール/デバッグ:
3.1観察標本を顕微鏡ステージに入れ、プレス
クリップで固定します。光源調整つまみを回
して希望の光源位置に調整し、低倍率の対物
レンズを位置決め点に回し、ステージ定規の
水平調整と垂直調整を動かして、観察標本を
中央位置にします。フォーカス調整ホイール
を微調整して鮮明な画像効果を取得し、顕微
鏡の接眼レンズとエクステンダーを取り出し
、SV189顕微鏡デジタルカメラを接眼レンズ
チューブに挿入します(図8)。
3.2 SV189顕微鏡デジタルカメラをコン
ピューターに接続します。注:USBカメ
ラをコンピューターに接続する前に、コ
ンピューターのUSB2.0インターフェイス
が正常に機能することを確認してくださ
い。
SV189のUSB2.0ケーブルをコンピュー
ターに接続します。
「S-EYE」を開き、ソフトウェアインタ
ーフェース右上のカメラリストでカ
メラ名「1.3MCamera」をクリックする
と、SV189顕微鏡デジタルカメラの青

図 10
CSY
+ +
++ ポイント破線ポリゴン平行線垂直2つの十字線アーク2点円同心円移動すべての測定ツールを取り外しますライン矩形2つの線の間の距離最初の行までの距離十字線角度サークル3点円 2つの円の間の距離足踏み測定ツールの色を設定します10
色表示灯が点灯し、電源投入状態になります。画面にSV189イメージングが表
示されます(図9)フォーカス調整ホイールを手動で微調整することで、よりク
リアな効果が得られます。
◆ソフトウェア機能紹介
1.ソフトウェアインターフェース操作:「S-EYE」ソフトウェアインターフェ
ースに入った後、
「カメラ」モードでは、スナップ/記録/ブラウズ機能を操作でき、解像度とフ
ォーマット/露出とゲイン/ホワイトバランス/カラー調整/カラーモード/フリッ
プを個別に設定できます(図10)
2.「測定」モード 測定ツールを使用して
、試験片の幅/高さ/半径/面積/長さ/角度
/距離およびその他の情報を測定します(
図10)。
3.「出力」機能をクリックして、測定デ
ータ一覧を表示し、測定記録データをフ
ァイルにエクスポートします。
「 」をクリックします。プレビュー画像をファイルにキャプチャします。
これには、画像の測定ツールが含まれます。
「 」をクリックします。測定データをcsvファイルにエクスポートします。
◆測定ツールの紹介

図 11
このデバイスを使用する前に、このガイドを読んでくださ
い。このガイドには、安全な使用と、適用される規格およ
び規制への準拠のための制御に関する重要な操作手順が含
まれています。
注意!
FCC要件:
SDoCまたは認定を使用してパート15で承認された製品には、次のコンプライア
ンスステートメントのいずれかを含むラベルが必要です。
(1)ライセンスを取得したデバイスサービス操作に関連する受信者:
このデバイスはFCC規則のパート15に準拠しています。操作は、このデバイス
が有害な干渉を引き起こさないという条件の対象となります。
(2)スタンドアロンケーブル入力セレクタースイッチ:
このデバイスは、ケーブルテレビサービスで使用するためのFCC規則のパート
15に準拠しています。
(3)その他のすべてのデバイス:
このデバイスはFCC規則のパート15に準拠しています。操作は次の2つの条件の
対象となります。
(1)このデバイスは有害な干渉を引き起こさない可能性があります。
(2)このデバイスは、望ましくない動作を引き起こす可能性のある干渉を含め
、受信した干渉を受け入れる必要があります。
CE要件:
(簡単なEU適合宣言)Hong Kong Svbony Technology Co.、Ltdは、機器のタ
イプがRED指令2014/30 / EUおよびROHS指令2011/65 / EUの必須要件およ
びその他の関連規定に準拠していることを宣言します。WEEE指令2012/19 /
EU; EU適合宣言の全文は、インターネットアドレスwww.svbony.comから入
手できます。
•廃棄
製品、資料、またはパッケージにある取り消し線付きのゴミ箱の記号
は、EUでは、すべての電気および電子製品、バッテリー、および蓄
電池(充電式バッテリー)は、使った後に指定された収集場所に持
ち込む必要があることを示しています。これらの製品を分別しない
一般廃棄物として廃棄しないでください。お住まいの地域の法律に
従って廃棄してください。
IC 要件:
CAN ICES-3(B)/NMB-3(B) 11
4.「編集」機能をクリックして試料の
複数の測定データを校正すると、「バ
ックアップ」で校正データをファイル
としてバックアップおよび保存できま
す(図11)。

12
注意
小さなパーツ。 3歳未満の子供は対象外です。
お勧めアクセサリー
•このデバイスは、製品に付属または指定されているSvbonyアクセサ
リと併用すると、規制基準を満たします。
•Svbonyが承認したアイテムのアクセサリーのリストについては、次
のウェブサイトにアクセスしてください: http://www.Svbony.com
窒息の危険から避ける

INHALT
Produkteinführung . . . . . . . . . . . . . . . . . . . . . . . . . .
Installationsrichtlinien . . . . . . . . . . . . . . . . . . . . . . . .
Einführung in die Softwarefunktion . . . . . . . . . . . . ..
Warnung . . . . . . . . . . . . . . . . . . . . . . . . . . . . . . . . . .
13
14
16
17

3. Technische Daten
GrößederOkularschnittstelleGeeigneteMikroskopmethodeLichtempfindlicheKomponenteStatischeBildauflösungdynamischeBildauflösungEmpfindlichkeit:PixelgrößeSpektrumantwortVerschlusstyp23.2 mm, 30.00 mm
Einsteckbarer Okularhalter für optische Mikroskope
1/4 "1.3 Millionen Pixel CMOS
1280 * 1024, 640 * 480, 320 * 240
1280 * 1024 Pixel / 24 fps
1.0 V / Lux-Sek@550 nm
2.8 × 2.8 um
400 nm - 1000 nm
ERS (elektronischer Rollladen)
13
Deutsch
◆Produkteinführung
Herzlichen Glückwunsch zum Kauf der digitalen USB-Mikroskopkamera
SVBONY SV189 für das Mikroskop. Geeignet für Mikroskope mit steckbarer
Standard-Okularschnittstelle 23,2 / 30MM.
In diesem Handbuch erfahren Sie kurz, wie Sie die digitale USB-Mikroskop-
kamera SV189 verwenden.
SVBONY behält sich das Recht vor, dieses Dokument ohne vorherige
Ankündigung zu ändern. Bitte laden Sie die neueste Version der PDF-Datei des
Benutzerhandbuchs von unserer offiziellen Website herunter oder drucken Sie
diese Datei aus.
Bitte lesen Sie dieses Handbuch vor Gebrauch vollständig durch. Bei Fragen
wenden Sie sich bitte an: Facebook: www.facebook.com/svbony
Für Anweisungen zur Softwareinstallation und andere Informationen zum
technischen Support senden Sie uns bitte eine.
E-Mail: info@svbony.com
1.Paket inklusive
①Digitale Mikroskopkamera SV189
②Mikroskopadapter
③1,5 m USB 2.0-Kabel
④ CD-ROM
⑤Benutzerhandbuch
2. Installieren Sie bei Verwendung den Mikroskopadapter an der Kamera
und ziehen Sie ihn fest (Abbildung 2).
Abbildung 2.
Die Adapterbaugruppe ist abgeschlossen
①②③
④⑤
Abbildung 1.Teilbeschreibung

Bildrate:Bildformat:Weißabgleich:Schnittstelle:16 f / s @1280 * 1024
JPG / BMP-Format
automatisch / manuell
USB2.0
2. CD-Installation:
2.1 Legen Sie die CD in die CD-ROM ein,
und die Dateien der CD werden
automatisch auf dem Bildschirm angezeigt.
Hinweis: Wenn die CD-ROM nicht
automatisch ausgeführt wird, doppelklicken
Sie bitte auf "CD-ROM" oder klicken Sie
mit der rechten Maustaste auf "Öffnen" in
der CD-ROM-Menüleiste
2.2 Doppelklicken Sie auf die Installations-
datei "S-EYE_Setup", um den
Installationsassistenten des S-EYE-Instal-
lationsassistenten aufzurufen. Sie müssen
die Benutzerlizenzvereinbarung
akzeptieren. Klicken Sie daher auf:
"Akzeptieren und installieren", um der
Fortsetzung der Installation zuzustimmen.
Klicken Sie zum Beenden nicht auf
„Abbrechen“ (Abbildung 5).
Abbildung 3. Abbildung 4.
S-EYES-EYE_Set…
Abbildung 5
14
◆Installationsrichtlinien
1. Installationsanweisungen:
PC-Systemanforderungen:
Windows (32, 64 Bit) XP / 7/8/10 / MAC OS 10.5 und höher / Photo Booth OS
10.13 3
Offizielle Download-Adresse von SVBONY:
https://www.svbony.com/Support/SoftWare-Driver/ Geben Sie die Adresse aus
dem Browser ein, um sie geschlossenzuladen und zu entfernen.
Verwenden Sie die beigefügte CD oder laden Sie "S-EYE_Setup-1.4.4.500"
(Abbildung 3) von der offiziellen SVBONY-Website herunter. Nach erfolgreicher
Installation wird das Verknüpfungssymbol "S-EYE" (Abbildung 4) angezeigt.

Abbildung 6
Abbildung 7 S-EYE
Abbildung 9
15
2.3 Der Standardspeicherort des
Installationsverzeichnisses ist "C: \
Programme (x86) \ S-EYE". Sie können auf
"Durchsuchen" klicken, um es in den
gewünschten Zielordner zu ändern
(Abbildung 6). Aktivieren Sie das
Kontrollkästchen, um ein Desktopsymbol zu
erstellen. Einfach zu bedienen und zu
bedienen.
2.4 Klicken Sie auf "Installieren", um die Installation zu starten und den
Installationsvorgang aufzurufen. Klicken Sie zum Beenden nicht auf „Abbrechen“
(Abbildung 7). Wenn das S-EYE-Symbol auf dem Desktop angezeigt wird, ist die
Programminstallation abgeschlossen. Wie gezeigt
3. Installation / Debugging:
3.1 Legen Sie die Beobachtungsprobe in den Mikroskoptisch und befestigen Sie
sie mit dem Pressclip. Drehen Sie den Einstellknopf für die Lichtquelle, um die
gewünschte Lichtquellenposition einzustellen, drehen Sie die Objektivlinse mit
geringer Vergrößerung zum Positionierungspunkt und bewegen Sie die
horizontale und vertikale Einstellung auf dem Bühnenlineal. Stellen Sie die
Beobachtungsprobe in die Mittelposition. Stellen Sie das Fokuseinstellrad fein
ein, um einen klaren Bildeffekt zu erzielen, nehmen Sie das Okular und den
Extender am Mikroskop heraus und setzen Sie die Digitalkamera des
SV189-Mikroskops in das Okularrohr ein (Abbildung 8).
Abbildung 8

Abbildung 10
CSY
16
3.2 Schließen Sie die Digitalkamera SV189 an den Computer an. Hinweis: Bevor
Sie die USB-Kamera an den Computer anschließen, stellen Sie bitte sicher, dass
die USB 2.0-Schnittstelle des Computers normal funktioniert.
Schließen Sie das USB2.0-Kabel des SV189 an den Computer an. Öffnen Sie
"S-EYE" und klicken Sie auf den Kameranamen "1.3M Camera" in der
Kameraliste in der oberen rechten Ecke der Softwareschnittstelle, der blauen
Anzeigelampe des SV189-Mikroskops Die Digitalkamera leuchtet auf und
wechselt in den Einschaltzustand. Die SV189-Bildgebung wird auf dem
Bildschirm angezeigt (Abbildung 9). Der Bildanzeigeeffekt kann durch manuelle
Feinabstimmung des Fokuseinstellrads erzielt werden, um einen klareren Effekt
zu erzielen.
◆Einführung in die Softwarefunktion
1. Betrieb der Softwareschnittstelle: Nach Eingabe der Softwareschnittstelle
"S-EYE"
Im "Kamera" -Modus können die Funktionen "Aufnehmen" / "Aufnehmen" /
"Durchsuchen" ausgeführt und Auflösung und Format / Belichtung und
Verstärkung / Weißabgleich / Farbanpassung / Farbmodus / Spiegeln individuell
eingestellt werden (Abbildung 10).
2. Messen Sie im Modus "Messen" mit dem Messwerkzeug die Breite / Höhe /
den Radius / die Fläche / die Länge / den Winkel / den Abstand und andere
Informationen der Probe (Abbildung 10).
3. Klicken Sie auf die Funktion "0utpat",
um die Messdatenliste anzuzeigen und
die Messdatensatzdaten in eine Datei zu
exportieren.
Klicken Sie auf das Vorschaubild “ ” in
einer Datei, einschließlich der
Messwerkzeuge auf dem Bild.
Klicken Sie auf “ ” Messdaten in
CSV-Datei exportieren
+ +
++
Punkt
Gestrichelten Linie
Polygon
Parallele
Aufrecht
Zwei Fadenkreuze
Linie
Rechteck
Abstand zwischen zwei Linien
Abstand zur ersten Zeile
Fadenkreuz
Winkel
◆Einführung in Messwerkzeuge
Table of contents
Languages:
Other SVBONY Digital Camera manuals

SVBONY
SVBONY SV105 User manual

SVBONY
SVBONY SV205 User manual

SVBONY
SVBONY SV605CC User manual

SVBONY
SVBONY SV505C User manual

SVBONY
SVBONY SV605MC User manual

SVBONY
SVBONY SV105 User manual

SVBONY
SVBONY SV305 Pro User manual

SVBONY
SVBONY SV905C User manual

SVBONY
SVBONY SV905C User manual

SVBONY
SVBONY SV105 User manual