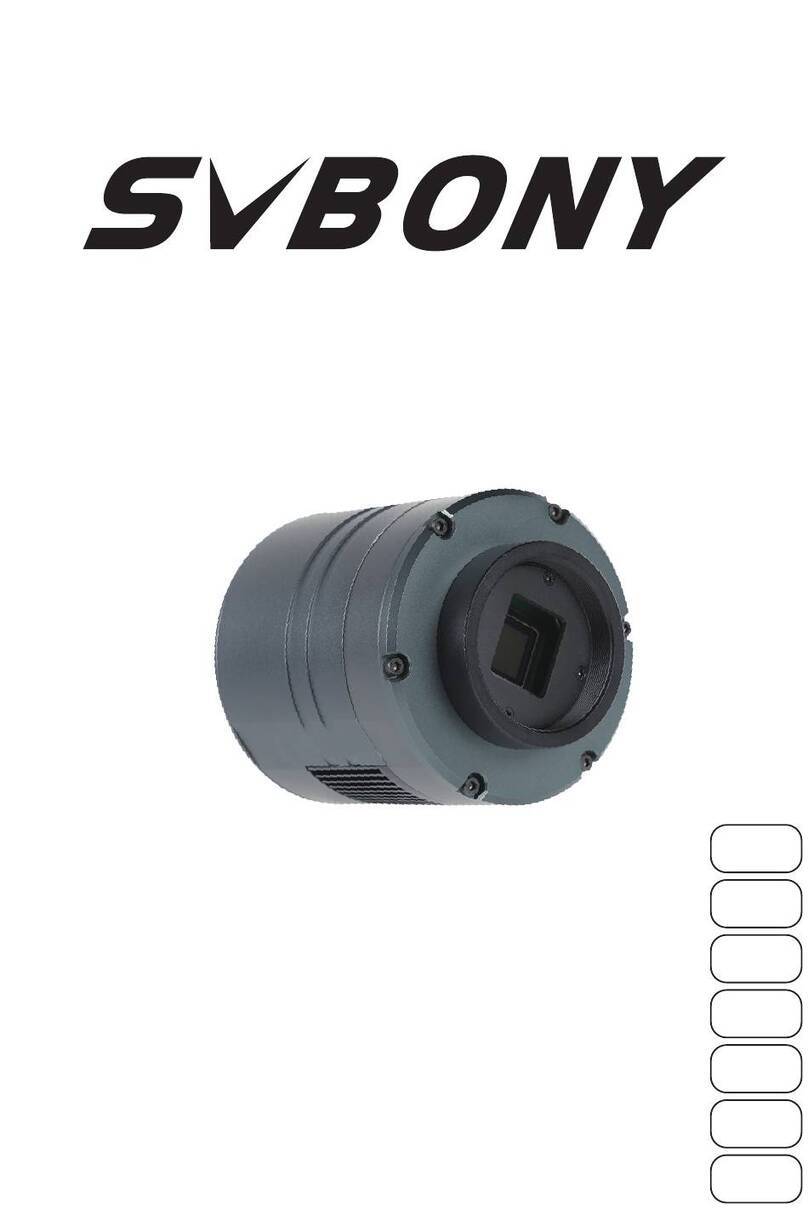
SVBONY SV505C User manual

User Manual
SV505C

1.To Customers
2.Package List
3.Camera Specifications
4.How to Use Astronomy Camera
4.1 Driver Installation
4.2 Image Software Installation
4.3 Guide Star Software Installation
4.4 Telescope Connection
4.5 Guide Star Connection
5.Structure
6.Store and General Clean
7.Quality Assurance
8.Warning
DE:08-14
FR:15-21
IT:22-28
ES:29-35
JP:36-42
RU:43-49
------------------------------------------------------01
--------------------------------------------------------01
------------------------------------------01
-----------------------------02
------------------------------------------------02
-----------------------------------02
-----------------------------04
-----------------------------------------04
-----------------------------------------04
-------------------------------------------------------------05
---------------------------------------05
------------------------------------------------05
--------------------------------------------------------------07
CONTENT
EU Importer:
Address:Uetzenacker 29,38176 wendeburg
Name:Germany Retevis Technology GmbH

01
1.To customers
Hello, friends! You can download SV505C User Manual pdf file or print this file.
SVBONY has the rights to modify this document without prior notice. Please
download the latest version from our official website.
Thanks for purchasing your new SVBONY astronomy camera! This manual will
give you a brief introduction of the SV505C camera. Please read this manual
completely before using it. If you have any questions, please feel free to contact
us:
Facebook: www.facebook.com/svbony
For software installation instructions and other technical support, please email
2. Package Including
①SV505C Astronomy Camera X1
②M42-CS Adapter X1
③T2 Adapter X1
④CS-C Adapter X1
⑤1.25-inch T-Adapter X1
⑥2-inch Cover X1
⑦USB3.0 Cable X1
⑧ST4 Cable X1
⑨User Manual X1
⑩Cleaning Cloth X1
3.Camera Specification
1
2
3
4
5
6
7
8
9
10
11
12
13
14
15
16
17
Model
Sensor
Total Pixels
Diagonal
Maximum Resolution
Pixel Size
Chip Size
Maximum Frame Rate
Shutter Type
Time of Exposure
Readout Noise
QE Peak
Full Well
ADC
Gain
ROI
Bin
SVBONY SV505C
IMX464 CMOS
4.2 Megapixel
9mm
2712×1538
ȝP[ȝP
7.9mm×4.5mm
93FPS
Rolling Shutter
64us-2000s
2.9e~0.7e
80%
12ke
12bit
0-500
YES
1X1 2X2

02
4.How to Use Astronomy Camera
4.1 Driver Installation
1.Driver Download
You can download the latest driver from the SVBONY official website.
https://www.svbony.com/Support/SoftWare-Driver/
2. Install the Native Driver
①Double-click the driver installation package, select the language, and enter the
installation page
②Click install and wait for completion
③Check the driver installation. After the installation is complete, connect the
camera to the USB port of the computer via a USB cable, and the camera will
automatically recognize it.
④Check the camera status in the device manager
Note: Please do not connect the camera before installing the driver.
4.2 Shooting Software Installation
1. Installation and Use of Shooting Software
①Use the Sharpcap software to download the latest version from the sharpcap
official website.
18
19
20
21
22
23
24
25
Digital Noise Cancellation
Compatible Systems
Caching
Guide Port
Data Port
Adapter
Back Focal Length
Protective Window
HCG
Windows , Linux OS
Raspberry Pi,Mac os,
Chrome os
DDR3 128M
ST4
USB3.0
ƎƎ0;
6.5mm/12.5mm
AR Coating

03
②Click install, set the installation path (default), and the installation is complete.
③After the installation is complete, perform a preliminary test. Open the
software, find the model of Svbony Camera in the camera drop-down menu and
click connect.
④Set the shooting storage path.
⑤The introductory operation guide of sharpcap can be viewed in the "Help"
option of the software. At the same time, the download of PDF format files is
provided under "Documents" on the homepage of sharpcap official website,
which can be downloaded and studied.
2.Checking of the Shooting Software
①. Check the frame rate
②. Remove the camera dust cover, adjust the exposure time, and the preview
interface will have light and dark changes, indicating that the work is normal.

04
4.3Guide Star Software Installation
①Using PHD2 software, download the latest version on the PHD2 official
website, and there are also download links on the Svbony official website.
②Click Next, set the installation path (default), click Install, and the installation is
complete.
③About the PHD2 introductory operation guide, you can check it in the "Help"
option of the software. At the same time, there is an introductory operation
instruction manual on the homepage of the PHD2 official website, which can be
downloaded and used for learning.
④Questions about using the app with PHD2, general troubleshooting, bug
reports, feature requests, and questions about the development of PHD2 can be
found by posting in the Open PHD Guiding Google group.
4.4 Telescope Connection
1. Camera + T2 Adapter + 1.25-inch T-barrel + Filter + Telescope
2. Camera+M42-CS Adapter+CS Lens
3. Camera+M42-CS Adapter+CS-C Adapter+C Lens
4.5 Guide Star connection

05
5. Structure
6. Camera Cleaning
If you find dust on the CMOS sensor, you can remove the front half of the
camera. Then use the cleaning kit for DSLR camera sensors to clean the CMOS
sensor. You must be careful when cleaning it. You can also use a DSLR
cleaning tool or lens tissue to clean it. Be careful not to use too much force,
because the coating of the CMOS sensor is very fragile and can be scratched
easily. The general identification of whether the dust is on the sensor or on the
window glass is as follows.

06
7. Quality Assurance
The Astronomy Camera warranty time is one year. Within warranty period, if the
camera fails to function, we will provide free after-sales maintenance service.
Besides the warranty days, we provide life-long maintenance services and
charge only the parts that need repair or replacement. The buyer will pay for the
postage of returning camera to factory to be repaired. Within the warranty
period, if the following condition occurs, certain maintenance costs will be
charged.
1. The malfunction and damaged caused by incorrect use, the unauthorized
repairs and alteration.
2. The damage caused by fire, flood, earthquake, other natural disasters and
secondary product damage.
3. The product malfunction caused by the fall and transportation failures after
purchase.
4. The malfunction and damaged caused by the other barriers (man-made
factors or external device).
5. Purchase without the warranty card and purchase invoices.

FCC Requirements:
•Products authorized under Part 15 using SDoC or Certification require a label
containing one of the following compliance statements
(1)Receivers associated with licensed device service operaions:
This device complies with part 15 of the FCC Rules. Operation is subject to the
condition that this device does not cause harmful interference.
(2)Stand-alone cable input selector switch:
This device complies with part 15 of the FCC Rules for use with cable television
service.
(3)All other devices:
•This device complies with part 15 of the FCC Rules. Operation is subject to the
following two conditions:
(1) This device may not cause harmful interference, and
(2) this device must accept any interference received, including interference that
may cause undesired operation.
CE Requirements:
•(Simple EU declaration of conformity) Hong Kong Svbony Technology Co.,Ltd
declares that the equipment type is in compliance with the essential
requirements and other relevant provisions of RED Directive 2014/30/EU and the
ROHS Directive 2011/65/EU and the WEEE Directive 2012/19/EU; the full text of
the EU declaration of conformity is available at the following internet address:
www.svbony.com.
•Disposal
The crossed-out wheeled-bin symbol on your product, literature, or packaging
reminds you that in the European Union, all electrical and electronic products,
batteries, and accumulators (rechargeable batteries) must be taken to
designated collection locations at the end of their working life. Do not
dispose of these products as unsorted municipal waste. Dispose of
them according to the laws in your area.
IC Requirements:
CAN ICES-3(B)/NMB-3(B)
Avoid Choking Hazard
Small Parts. Not for children under 3 years.
Approved Accessories
ATTENTION!
Before using this device, read this guide which contains important
operating instructions for safe usage and control for compliance
with applicable standards and regulations.
•This device meets the regulatory standards when used with the
Svbony accessories supplied or designated for the product.
•For a list of Svbony-approved accessories for your item, visit the
following website: http://www.Svbony.com
WARNING
07
08
1.An den Kunden
Hallo Freunde! Sie können die SV505C Bedienungsanleitung als PDF-Datei
herunterladen oder diese Datei ausdrucken. SVBONY behält sich das Recht vor,
dieses Dokument ohne vorherige Ankündigung zu ändern. Please download the
latest version from our official website.
Vielen Dank für den Kauf der neuen SVBONY Astro-Kamera! Dieses Handbuch
gibt Ihnen eine kurze Einführung in die SV505C-Kamera. Bitte lesen Sie dieses
Handbuch vollständig, bevor Sie es verwenden. Bitte zögern Sie nicht, uns zu
kontaktieren, wenn Sie Fragen haben:
Facebook: www.facebook.com/svbony
Für Software-Installationsanleitungen und anderen technischen Support senden
Sie uns bitte eine E-Mail: [email protected]
2. Liste der Pakete
①SV505C Astronomische Kamera X1
②M42-CS Adapter X1
③T2 Adapter X1
④CS-C Adapter X1
⑤1.25 "T-Adapter X1
⑥2" Kamerakappe X1
⑦USB3.0 Kabel X1
⑧ST4 Kabel X1
⑨Bedienungsanleitung X1
⑩Reinigungstuch X1
3.Spezifikation der Kamera
1
2
3
4
5
6
7
8
9
10
11
12
13
14
15
16
Modell
Sensor
Gesamtpixel
Diagonale
Maximale Auflösung
Pixelgröße
Zielgröße
Maximale Bildrate
Verschlusstyp
Belichtungszeit
Ausleserauschen
QE-Spitze
Voll aufgeladen
ADC
Verstärkung
ROI
SVBONY SV505C
IMX464 CMOS
4.2 Megapixel
9mm
2712×1538
ȝP[ȝP
7.9mm×4.5mm
93FPS
Rollladen
64us-2000s
2.9e~0.7e
80%
12ke
12bit
0-500
JA

09
4.Wie man die Astronomie-Kamera benutzt
4.1 Treiberinstallation
1.Treiber herunterladen
Sie können die neuesten Treiber von der offiziellen SVBONY-Website
herunterladen.
https://www.svbony.com/Support/SoftWare-Driver/
2. Installation der Windows-Treiber
①Doppelklicken Sie auf das Treiberinstallationspaket, wählen Sie die Sprache
aus und rufen Sie die
②Klicken Sie auf Installieren und warten Sie, bis Sie fertig sind
③Überprüfen Sie die Treiberinstallation. Schließen Sie die Kamera nach
Abschluss der Installation über ein USB-Kabel an den USB-Port des Computers
an und die Kamera wird automatisch erkannt.
④Kamera-Status im Geräte-Manager prüfen
Hinweis: Bitte schließen Sie die Kamera nicht an, bevor Sie den Treiber
installieren.
4.2 Installation der Shooting-Software
1. Installation und Verwendung von Shooting-Software
①Verwenden Sie die Sharpcap Software, um die neueste Version von der
offiziellen Sharpcap Website herunterzuladen.
17
18
19
20
21
22
23
24
25
Bin
Digitale Rauschunterdrückung
Kompatible Systeme
Zwischenspeicherung
Guide Star-Schnittstelle
USB-Schnittstelle
Kamera-Schnittstelle
Rückseitige Abfangvorrichtung
Schutzfenster Optisches Glas
1X1 2X2
HCG
Windows , Linux OS
RaspberryPi,Mac os,
Chrome os
DDR3 128M
ST4
USB3.0
ƎƎ0;
6.5mm/12.5mm
AR-Beschichtung

10
②Klicken Sie auf Installieren, legen Sie den Installationspfad fest (Standard)
und die Installation ist abgeschlossen.
③Nachdem die Installation abgeschlossen ist, führen Sie erste Tests durch.
Öffnen Sie die Software, suchen Sie das Modell der Svbony-Kamera im
Dropdown-Menü Kamera und klicken Sie auf Verbinden.
④Legen Sie den Aufnahmespeicherpfad fest.
⑤Die einführende Bedienungsanleitung für sharpcap kann in der Hilfe-Option
der Software eingesehen werden. Zur gleichen Zeit ist der Download von
PDF-Dateien auf der offiziellen Website von Sharpcap unter "Dokumente"
verfügbar, die zum Herunterladen und Lernen bereitgestellt werden können.
2.Inspektion der Aufnahme-Software
①. Überprüfen Sie die Bildrate
②.Entfernen Sie die Staubabdeckung der Kamera und passen Sie die
Belichtungszeit an. Die Vorschauschnittstelle ändert sich in Licht und Schatten,
was darauf hinweist, dass sie ordnungsgemäß funktioniert.

11
4.3Installation der Guide Star Software
①. Mit PHD2-Software, laden Sie die neueste Version auf der offiziellen Website
von PHD2, und es gibt auch einen Download-Link auf der offiziellen Website von
Svbony.
②. Klicken Sie auf Weiter, legen Sie den Installationspfad fest (Standard),
klicken Sie auf Installieren, die Installation ist abgeschlossen.
③Eine Anleitung zum Einstieg in PHD2 finden Sie in den Hilfeoptionen der
Software. Zur gleichen Zeit gibt es auf der Homepage der offiziellen
PHD2-Website eine Bedienungsanleitung für den Einstieg, die heruntergeladen
und zum Lernen verwendet werden kann.
④Fragen zur Verwendung von PHD2-Anwendungen, allgemeine Fehlerbehe-
bung, Fehlerberichte, Feature Requests, und Fragen zur Entwicklung von PHD2
können durch die Veröffentlichung in der Open PHD Guide Google Group
gefunden werden.
4.4 Anschluss an das Teleskopnnection
1. Kamera + T2 Adapter + 1.25 "T-Lauf + Filter + Teleskop
2. Kamera + M42-CS Adapter + CS Objektiv
3. Kamera + M42-CS Adapter + CS-C-Adapter + C-Objektiv
4.5 Leitsternverbindung

12
5. Die Struktur
6. Reinigung der Kamera
Wenn Sie Staub auf dem CMOS-Sensor finden, können Sie die vordere Hälfte
der Kamera entfernen. Anschließend wird der CMOS-Sensor mit dem DSLR
Camera Sensor Cleaning Kit gereinigt. Seien Sie vorsichtig, wenn Sie putzen.
Sie können auch das DSLR-Reinigungswerkzeug oder das Linsengewebe
verwenden, um es zu reinigen. Achten Sie darauf, nicht zu hart zu arbeiten, da
die Beschichtung des CMOS-Sensors sehr zerbrechlich ist und leicht zerkratzt
werden kann. Die allgemeine Erkennung, ob sich der Staub auf dem Sensor
oder auf der Fensterscheibe befindet, ist wie folgt.

FCC-Anforderungen:
•Für Produkte, die gemäß Teil 15 unter Verwendung von SDoC oder
Zertifizierung zugelassen sind, ist ein Etikett erforderlich, das eine der folgenden
Konformitätserklärungen enthält
(1) Empfänger, die mit lizenzierten Gerätedienstvorgängen verbunden sind:
Dieses Gerät entspricht Teil 15 der FCC-Bestimmungen. Der Betrieb unterliegt
der Bedingung, dass dieses Gerät keine schädlichen Störungen verursacht.
(2) Eigenständiger Kabeleingangswahlschalter:
Dieses Gerät entspricht Teil 15 der FCC-Bestimmungen für die Verwendung mit
Kabelfernsehdiensten.
(3)Alle anderen Geräte:
•Dieses Gerät entspricht Teil 15 der FCC-Bestimmungen. Der Betrieb unterliegt
den folgenden zwei Bedingungen:
(1) Dieses Gerät darf keine schädlichen Störungen verursachen
(2) Dieses Gerät muss alle empfangenen Störungen akzeptieren, einschließlich
Störungen, die einen unerwünschten Betrieb verursachen können.
ATTENTION!
LESEN SIE VOR DER VERWENDUNG DIESES GERÄTS
DIESE ANLEITUNG, DIE WICHTIGE BETRIEBSANWEISUN-
GEN FÜR DIE SICHERE VERWENDUNG UND KONTROLLE
ZUR EINHALTUNG DER GELTENDEN NORMEN UND
VORSCHRIFTEN ENTHÄLT.
13
7. Quality Assurance
Die Astro-Kamera hat eine Garantie von einem Jahr. Während der Garantiezeit,
wenn die Kamera ausfällt, bieten wir einen kostenlosen After-Sales-Reparatur-
service an. Zusätzlich zu den Garantiezeiten bieten wir einen lebenslangen
Reparaturservice an, der nur für Teile berechnet wird, die repariert oder ersetzt
werden müssen. Der Käufer bezahlt das Porto für die Rücksendung der Kamera
zur Reparatur an das Werk. Während der Garantiezeit werden bestimmte
Reparaturkosten in Rechnung gestellt, wenn Folgendes eintritt.
1. Fehler und Schäden, die durch unsachgemäße Verwendung, unbefugte
Reparaturen, Änderungen verursacht werden.
2. Schäden durch Feuer, Überschwemmungen, Erdbeben, andere
Naturkatastrophen und Schäden an Sekundärprodukten.
3. Produktfehler aufgrund von Stürzen, Transportstörungen nach dem Kauf.
4. Fehlfunktionen und Schäden, die durch andere Hindernisse (menschliche
Faktoren oder externe Geräte) verursacht werden.
5. Kauf ohne Garantiekarte und Kaufrechnung.

CE-Anforderungen:
• (Einfache EU-Konformitätserklärung) Hong Kong Svbony Technology Co., Ltd
erklärt, dass der Gerätetyp den grundlegenden Anforderungen und anderen
relevanten Bestimmungen der ROTEN Richtlinie 2014/30 / EU und der
ROHS-Richtlinie 2011/65 / EU und entspricht die WEEE-Richtlinie 2012/19 / EU;
Der vollständige Text der EU-Konformitätserklärung ist unter der folgenden
Internetadresse verfügbar: www.svbony.com.
•Verfügung
Das durchgestrichene Mülleimersymbol auf Ihrem Produkt, Ihrer Literatur oder
Ihrer Verpackung weist Sie darauf hin, dass in der Europäischen Union alle
elektrischen und elektronischen Produkte, Batterien und Akkus (wiederauflad-
bare Batterien) am Ende ihrer Abgabe an bestimmte Sammelstellen
gebracht werden müssen Arbeitsleben. Entsorgen Sie diese Produkte
nicht als unsortierten Siedlungsabfall. Entsorgen Sie sie gemäß den
Gesetzen in Ihrer Nähe.
IC-Anforderungen:
CAN ICES-3(B)/NMB-3(B)
Erstickungsgefahr vermeiden
Kleine Teile. Nicht für Kinder unter 3 Jahren.
• Dieses Gerät erfüllt die gesetzlichen Standards, wenn es mit
dem mitgelieferten oder für das Produkt bestimmten
Svbony-Zubehör verwendet wird.
• Eine Liste der von Svbony zugelassenen Zubehörteile für Ihren
Artikel finden Sie auf der folgenden Website: http://www.Svbo-
ny.com
WARNING
Approved Accessories
14

15
1.Aux clients
Bonjour les amis ! Vous pouvez télécharger le manuel d'utilisateur SV505C en
format pdf ou l'imprimer. SVBONY se réserve le droit de modifier ce document
sans avis préalable. Veuillez télécharger la dernière version sur notre site
officiel.
Merci d'avoir acheté votre nouvelle SVBONY caméra d'astronomie ! Ce manuel
vous donnera une brève introduction de la caméra SV505C. Veuillez lire ce
manuel dans son intégralité avant de l'utiliser. Si vous avez des questions,
n'hésitez pas à nous contacter :
Facebook : www.facebook.com/svbony
Pour les instructions d'installation du logiciel et toute autre assistance technique,
veuillez nous envoyer un courriel à : [email protected]
2. Le paquet comprend
①SV505C Caméra d'astronomie X1
②M42-CS Adaptateur X1
③T2 Adaptateur X1
④CS-C Adaptateur X1
⑤1.25-inch Baril en T X1
⑥2-inch Couvercle X1
⑦USB3.0 Câbles X1
⑧ST4 Câbles X1
⑨Manuel de l'utilisateur X1
⑩ Chiffon de nettoyage X1
3.Spécifications de la caméra
1
2
3
4
5
6
7
8
9
10
11
12
13
14
15
16
Modèle
Capteur
Nombre total de pixels
Diagonal
Résolution maximale
Taille des pixels
Taille cible
Fréquence d'images maximale
Type d'obturateur
Temps d'exposition
Bruit de lecture
QE Peak
Pleine charge
ADC
Gain
ROI
SVBONY SV505C
IMX464 CMOS
4.2 Mégapixels
9mm
2712×1538
ȝP[ȝP
7.9mm×4.5mm
93FPS
Volet roulant
64us-2000s
2.9e~0.7e
80%
12ke
12bit
0-500
OUI

16
4.Comment utiliser la caméra d'astronomie
4.1 Installation du pilote
1.Téléchargement du pilote
Vous pouvez copier le pilote de la caméra à partir du CD ou télécharger le
dernier pilote sur le site officiel de SVBONY.
https://www.svbony.com/Support/SoftWare-Driver/
2. Installer le pilote Windows
①Double-cliquez sur le paquet d'installation du pilote, sélectionnez la langue, et
entrez dans la page d'installation.
②Cliquez sur installer et attendez la fin de l'installation.
③Vérifiez l'installation du pilote. Une fois l'installation terminée, connectez
l'appareil au port USB de l'ordinateur via un câble USB, et l'appareil le
reconnaîtra automatiquement.
④Vérifiez le statut de la caméra dans le gestionnaire de périphériques.
Remarque : Ne connectez pas la caméra avant d'installer le pilote.
4.2 Installation du logiciel de prise de vue
1. Installation et utilisation du logiciel de prise de vue
①Utilisez le logiciel Sharpcap pour télécharger la dernière version sur le site
officiel de sharpcap.
17
18
19
20
21
22
23
24
25
Bin
Suppression numérique du bruit
Systèmes compatibles
Caching
Interface Guide Star
Interface USB
Interface caméra
Interception arrière
Fenêtre de protection Verre
optique
1X1 2X2
HCG
Windows , Mac os, Chrome os
Linux OS Raspberry Pi,
DDR3 128M
ST4
USB3.0
ƎƎ0;
6.5mm/12.5mm
AR Revêtement

17
②Cliquez sur installer, définissez le chemin d'installation (par défaut), et
l'installation est terminée.
③Une fois l'installation terminée, effectuez un test préliminaire. Ouvrez le
logiciel, trouvez le modèle de Svbony Camera dans le menu déroulant des
caméras et cliquez sur connecter.
④Définissez le chemin de stockage des prises de vue.
⑤Le guide d'utilisation introductif de sharpcap peut être consulté dans l'option
"Aide" du logiciel. Parallèlement, le téléchargement de fichiers au format PDF
est proposé dans la rubrique "Documents" de la page d'accueil du site officiel de
sharpcap, qui peut être téléchargé et étudié.
2.Vérification du logiciel de prise de vue
①. Vérifier la fréquence d'images
②. Retirez le cache-poussière de la caméra, ajustez le temps d'exposition, et
l'interface de prévisualisation présentera des changements clairs et foncés,
indiquant que le travail est normal.

18
4.3Installation du logiciel Guide Star
①. En utilisant le logiciel PHD2, téléchargez la dernière version sur le site officiel
de PHD2, et il y a aussi des liens de téléchargement sur le site officiel de
Svbony.
②. Cliquez sur Suivant, définissez le chemin d'installation (par défaut), cliquez
sur Installer, et l'installation est terminée.
③A propos du guide d'utilisation introductif du PHD2, vous pouvez le consulter
dans l'option "Aide" du logiciel. En même temps, il y a un manuel d'instruction
d'opération d'introduction sur la page d'accueil du site officiel de PHD2, qui peut
être téléchargé et utilisé pour l'apprentissage.
④Les questions sur l'utilisation de l'application avec PHD2, le dépannage
général, les rapports de bogues, les demandes de fonctionnalités et les
questions sur le développement de PHD2 peuvent être trouvées en postant
dans le groupe Google Open PHD Guiding.
4.4 Connexion du télescope
1. Caméra + Adaptateur T2 + Baril en T de 1,25 pouce + Filtre + Télescope
2. Caméra + adaptation M42-CS + Objectif CS
3. Caméra + adaptateur M42-CS + adaptateur CS-C + objectif C
4.5 Connexion Guide Star
Table of contents
Languages:
Other SVBONY Digital Camera manuals

SVBONY
SVBONY SV105 User manual

SVBONY
SVBONY SV905C User manual

SVBONY
SVBONY SV605CC User manual

SVBONY
SVBONY SV189 User manual

SVBONY
SVBONY SV405CC User manual

SVBONY
SVBONY SV605MC User manual

SVBONY
SVBONY SV105 User manual

SVBONY
SVBONY SV205 User manual

SVBONY
SVBONY SV905C User manual

SVBONY
SVBONY SV105 User manual