Page 2 Page 7
Product Overview
The N2143 HD Encoder converts video, audio, and control to IP packets for low-latency switching
and distribution over standard networks. The N2243 HD Decoder accepts the HD over IP streams
and converts them back to synchronized audio and video to allow any video source to any display.
Both models feature keyboard and mouse extension over IP, input and output scaling, encryption,
embedded 7.1 audio, de-embedded balanced analog audio, and Power-over-Ethernet (PoE).
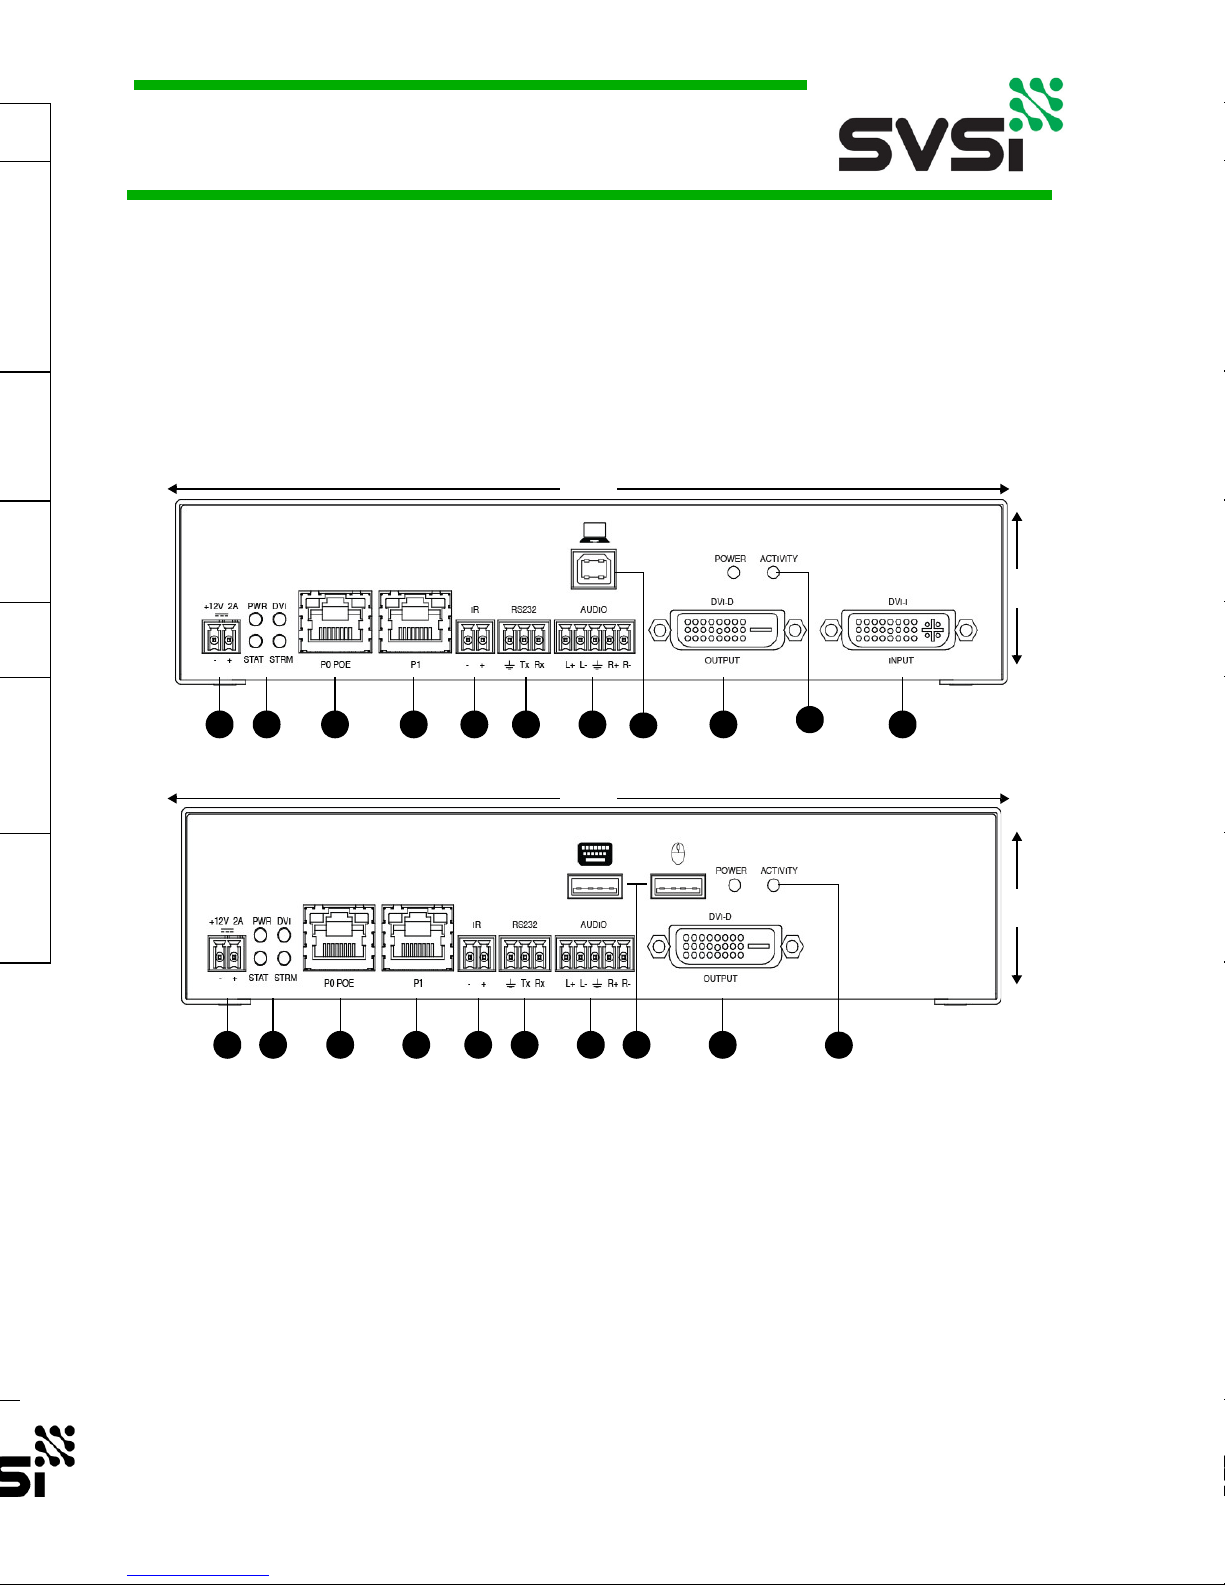
N2X43 Ports
The DVI-I port on the N2143 HD Encoder auto-senses either analog or digital video and converts
input video to network packets for output through the RJ45 port. Audio can be input as embedded
digital audio through the DVI-I port or as balanced analog audio through the 5-pin phoenix AUDIO
port. Keyboard and mouse control over IP is provided through a USB standard-B port to the PC.
The N2243 HD Decoder accepts the network packets and reconstitutes synchronized video and
audio for display through its DVI-D port. Digital-only video is output by the Decoder. Keyboard and
mouse control over IP is provided through two USB standard-A ports. For keyboard/mouse
combos (with a single connection), use the keyboard port.
IR and serial commands can be transmitted by either Encoder or Decoder using SVSi's free N-
Able configuration software, SVSi's N8000 series controller, or using third-party controllers. IR and
RS232 serial ports are not pass-through and must use a central controller to direct commands to
each device. Both Encoder and Decoder can be powered either using the 12V optional external
power supply or by PoE.
Establishing Connection to Your New Networked AV Product
Before using your N2X43 unit, it must be configured using SVSi's free N-Able software. Please
download the latest version of N-Able for PC or Mac at http://svsiav.com/support/resources/
software.
Steps for auto discovering devices on the network:
1. Download and install N-Able.
2. Attach devices to the layer-3 network switch.
3. Disable the wireless adapter on your computer (it must be hard-wired to the switch).
4. Connect the host PC running N-Able to the layer-3 network switch.
5. Open the N-Able application.
6. Discover the devices on your network by clicking Auto Discover on the Unit Management
tab.
Auto discovery is a broadcast command and will discover all units even if they are not in the same
IP subnet. However, you will not be able to configure units until they are in the same subnet as the
host PC. N-Series devices are shipped in Auto-IP mode with a default IP address of
169.254.xxx.xxx. Before attempting configuration, some changes must be made to the host PC.
Steps for IP address configuration (for Windows 8):
1. Select Control Panel > Network and Sharing Center from the Start menu.
2. Select Change adapter settings.
3. Select the wired interface connected to your AV network.
4. Click the Properties button.
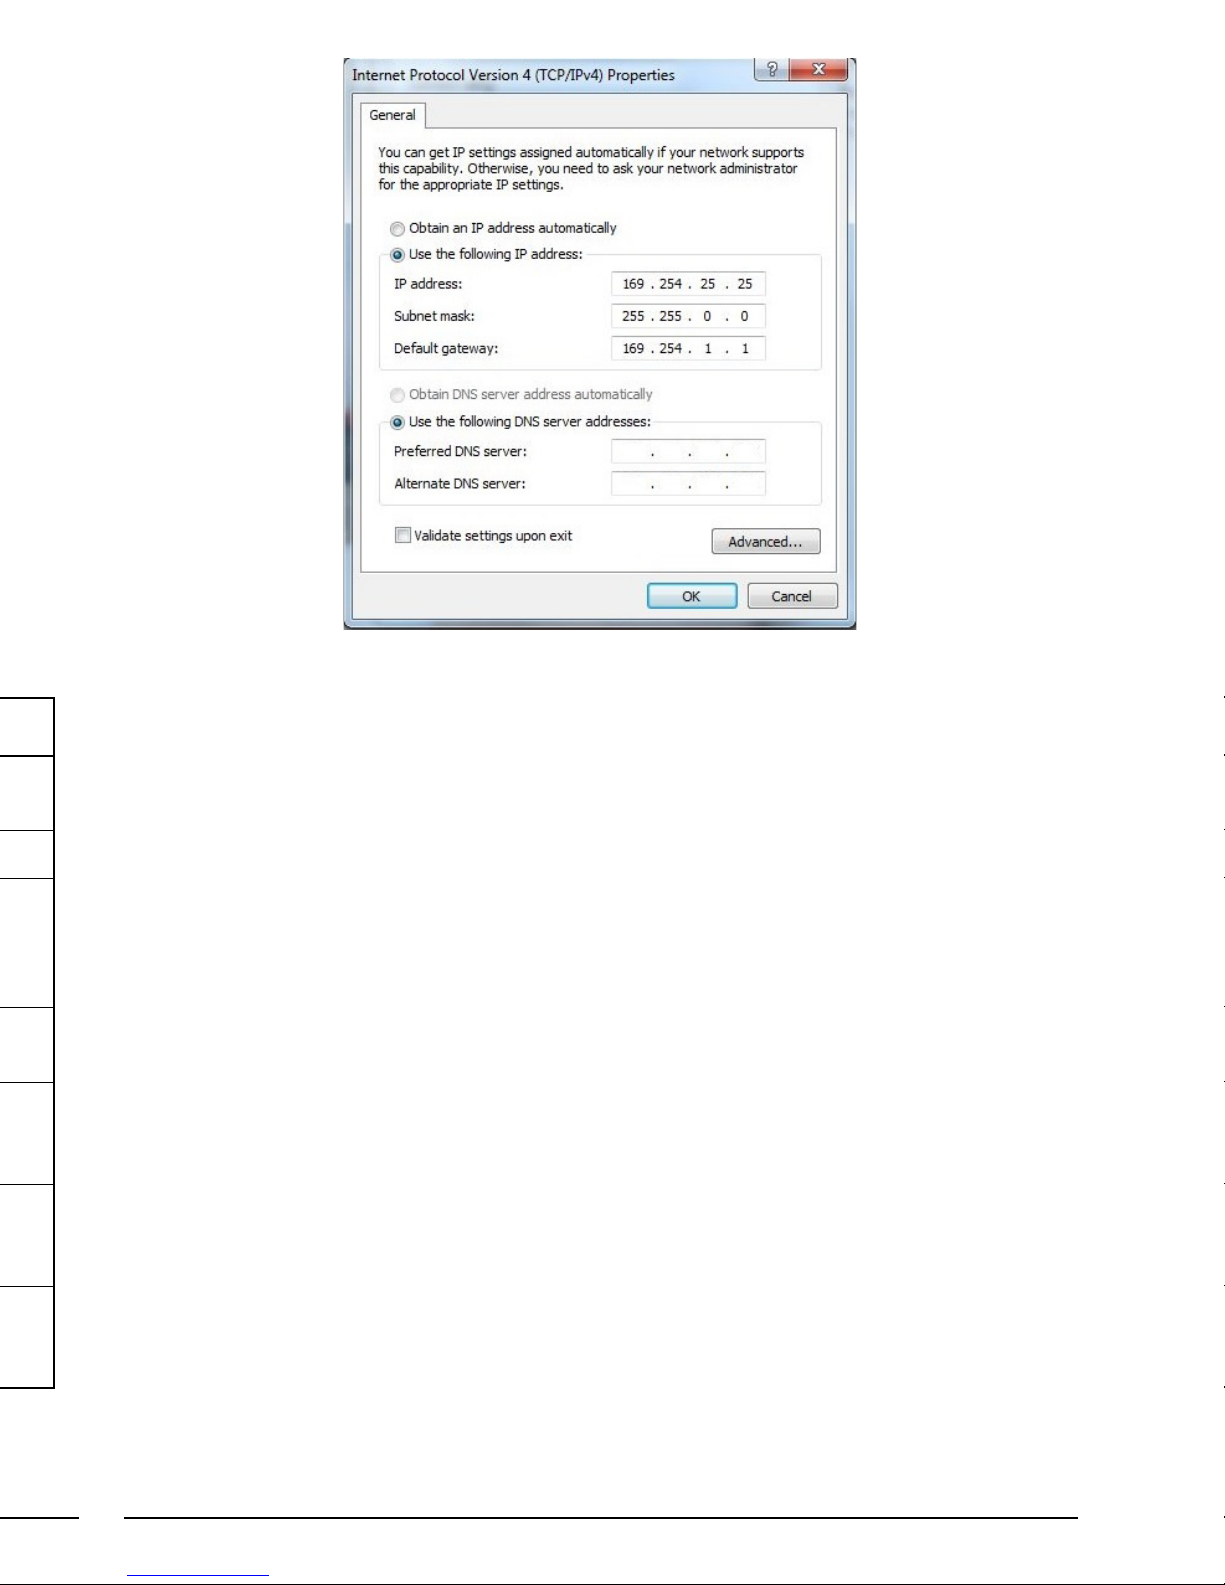
5. Scroll down in the list to the Internet Protocol Version 4 (TCP/IPv4) option. Highlight it and
click the Properties button.The screen shown on the following page is displayed.
6. Enable the Use the following IP address option, and enter the static IP address provided to
you by your network administrator.
CSV File Use
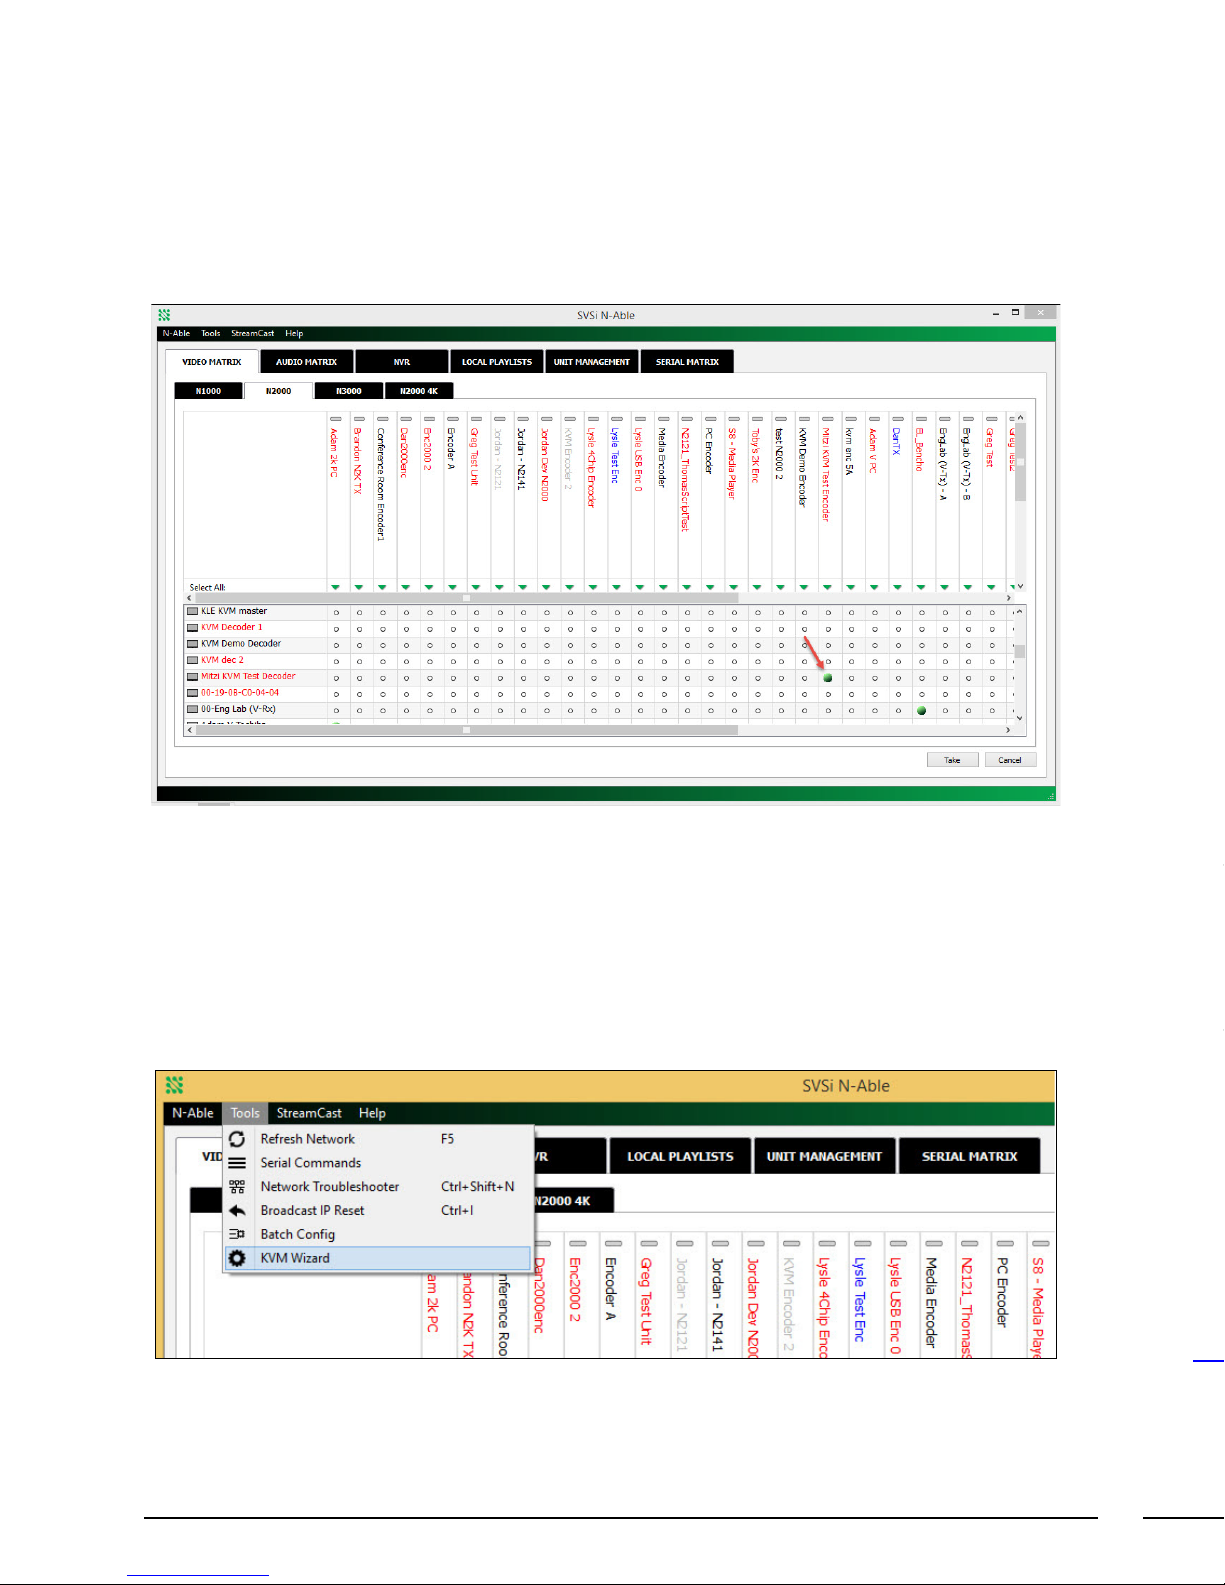
Multiple N2143 HD Encoders and N2243 HD Decoders can be configured from a single CSV file.
Click the KVM Wizard’s Export KVM CSV button to download the CSV file to your computer. The
file must then be uploaded to each unit. To do this, go to N-Able’s Unit Management page and
double-click the unit name. Once the Settings page displays, click the KVM link. Click the
Choose File button, browse to the CSV file you exported, and click the Upload button.
The following screen shot shows an example CSV file in Excel 2010:
Each column has the following uses:
Column Usage
type Defines if the unit is an Encoder or a Decoder.
name Name of the unit.
ip IPv4 address of the unit.
multiaccess Set to 1 if multiple users can access this N2143 HD
Encoder. Otherwise, set to 0 for all Decoders.
permission Permission level of the Decoders.
new password Password for the Encoder.
Note: A password is only required for the Encoders.
Enter to override previous password.
encrypted password Encrypted password when exported from unit. Leave
blank if entering new password.
<hotkey numbers> Enter a Decoder’s IP address to assign it a hotkey
number connection to an Encoder. The number at the
top of the column represents which hotkey you are
assigning.