2Need help? Give us a call on 0330 026 6273 and speak to one of our trained advisors.
Important Safety Informaon
Need help? Give us a call on 0330 0267 658 and speak to one of our trained advisors.
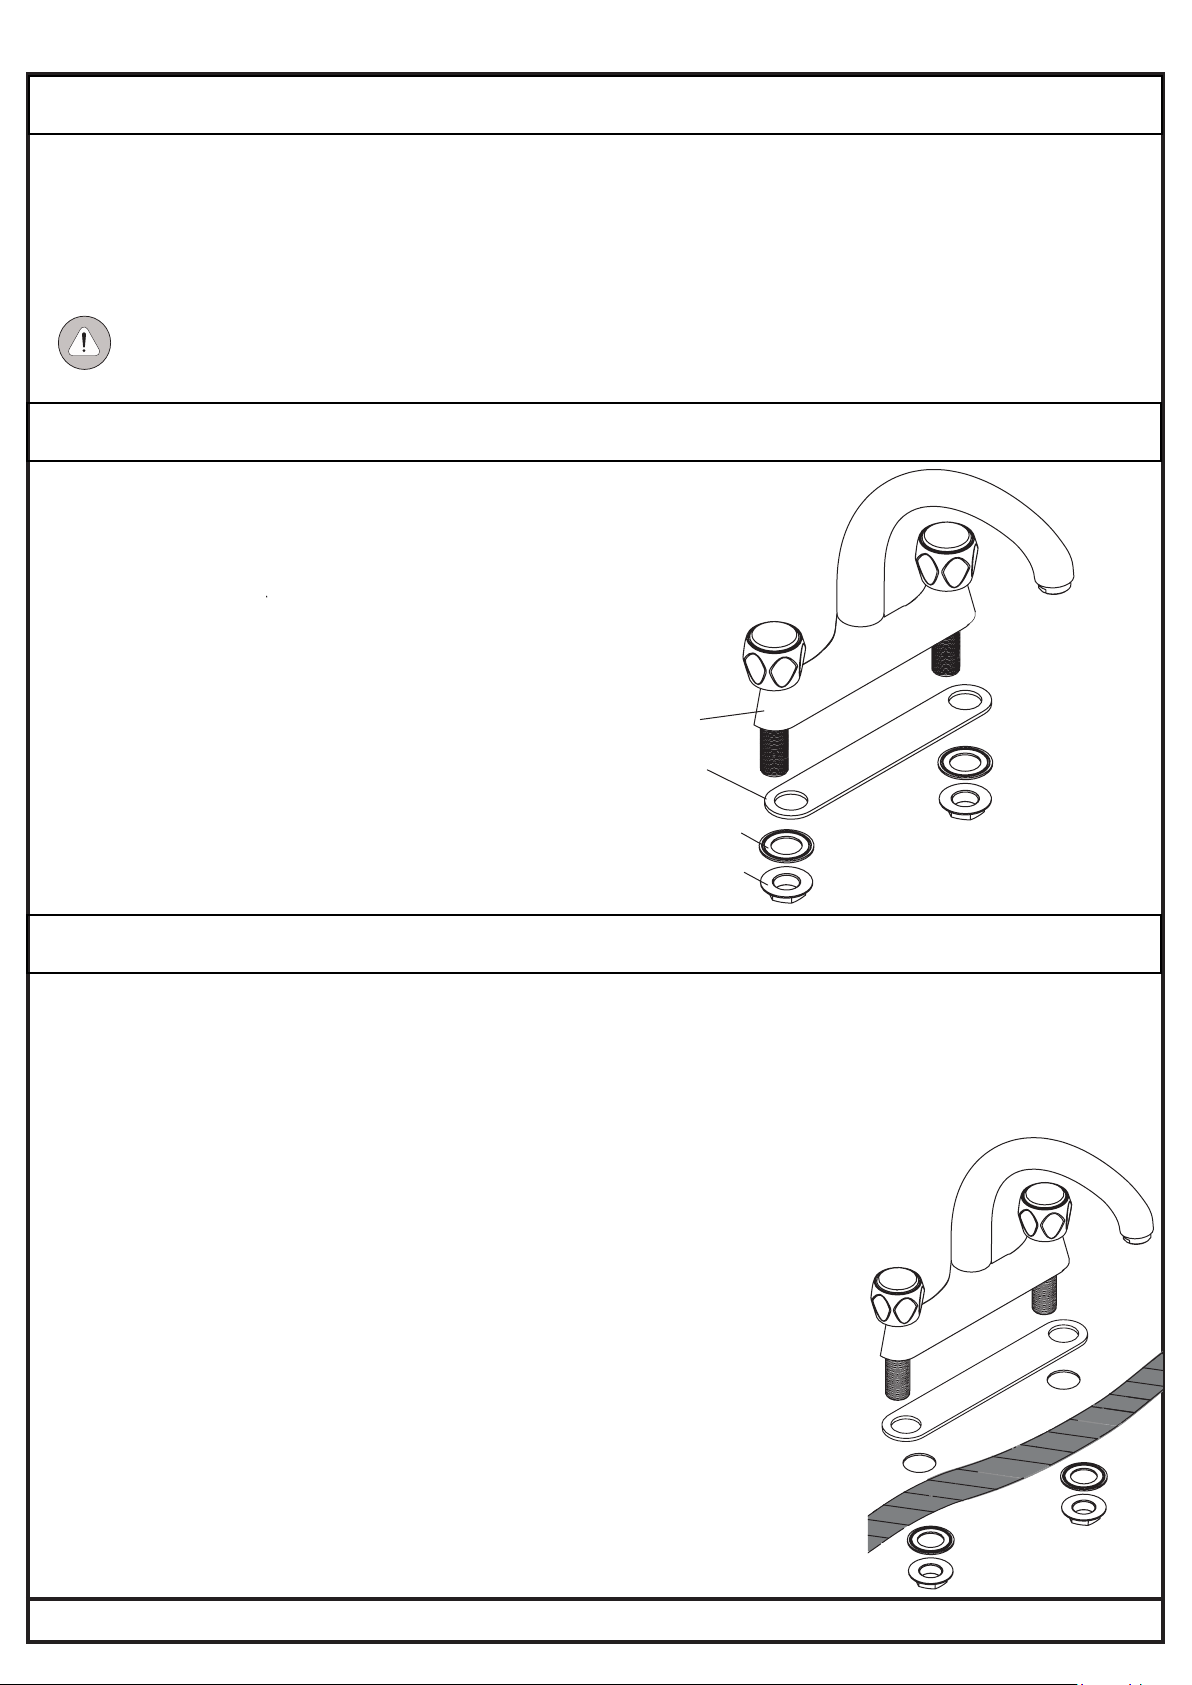
Tap Body
Tap Base
Washer
Rubber Washer
Fixing Nut
Please read these instrucons thoroughly and retain for future use.
All products supplied by Swan are safe provided they are installed, used correctly and receive regular maintenance in accordance with these
instrucons. If you are in any doubt about your ability to install this product safely you must employ the services of an experienced qualied
plumber.
Remove all packaging and check the components for damage before starng installaon. Before starng any installaon please consider the
following:
Prior to drilling into walls, check that there are no hidden electrical wires, cables or water supply pipes. This can be checked with the aid of an
electronic detector.
If power tools are used do not forget to:
- Wear eye protecon
- Unplug equipment aer use
Idenfy all components before
ng.
- 1 x Tap Body
- 2 x Fixing Nuts
- 2 x Rubber Washers
- 1 x Tap Base Washer
1. Fit the taps to the sink using xing
nuts supplied. The rubber washer
goes between the xing nut and
underside of the sink.
2. Connect the hot and cold
supplies.
3. Fully open both valves, leng
them run for a few minutes to
ush out the system. Check all
joints and connecons for leaks.
Working Pressure Range: Min 0.2 bar, Max 5.0 bar
Maximum Stac Pressure: 10 bar
BS 6700 recommends the temperature of stored water
should never exceed 65°C. A stored water temperature
of 60°C is considered sucient to meet all requirements
and will minimise the build up of limescale in hard water
areas.
Specicaons
Installaon Steps
This product needs to be installed in accordance with, and meet the
requirements of the Water Supply (Water Fings) Regulaons 1999
and current byelaws. For full Installaon Requirements & Notes
(IRN) please visit www.wras.co.uk/directory.
Isolaon valves must be ed to the inlet water supplies to ensure
ease of future maintenance. Full access must be made available for
future maintenance/servicing purposes. Before installing this
product the water supply must be thoroughly ushed in order
to remove any swarf, solder etc.
This product must not be modied in any way as this will
invalidate the guarantee.
If in doubt, contact a registered plumber or your Local Water
Authority or the Secretary of the Instute of Plumbing,
address as follows:-
The Instute of Plumbing,
64 Staon Lane,
Hornchurch,
Essex,
RM12 6NB, Tel: 01708 472791
Installaon


