Sweepovac SV14.3000 User manual

www.sweepovac.com
OPERATING MANUALOPERATING MANUAL
Model SV14.3000Model SV14.3000
Section 1
Warning: Installation...................................................................................... 2
Warning: Operation........................................................................................2
Warning: Disposal..........................................................................................3
Section 2
Fitting Instructions.........................................................................................6
Instructions for use........................................................................................4
Changing the bag and filter...........................................................................5
Specifications................................................................................................
Dimensional Information................................................................................9
Section 3
9
Troubleshooting............................................................................................
Warranty........................................................................................................
Section 4
10
11
Contents
SAVE THESE INSTRUCTIONSSAVE THESE INSTRUCTIONS
FITT_10342
Issue-1
SV14.3000

2
Section 1
IMPORTANT SAFETY INSTRUCTIONS
Dear Customer,
Please read through these operating instructions carefully.
Please study and observe the safety instructions on the
first few pages of this booklet. Please observe all cautionary
markings in this manual, on the vacuum bags and on the
Sweepovac vacuum appliance. Please keep these operating
instructions for later reference and pass them on to any
person carrying out cleaning, maintenance or repair, or to
any subsequent owner of the appliance.
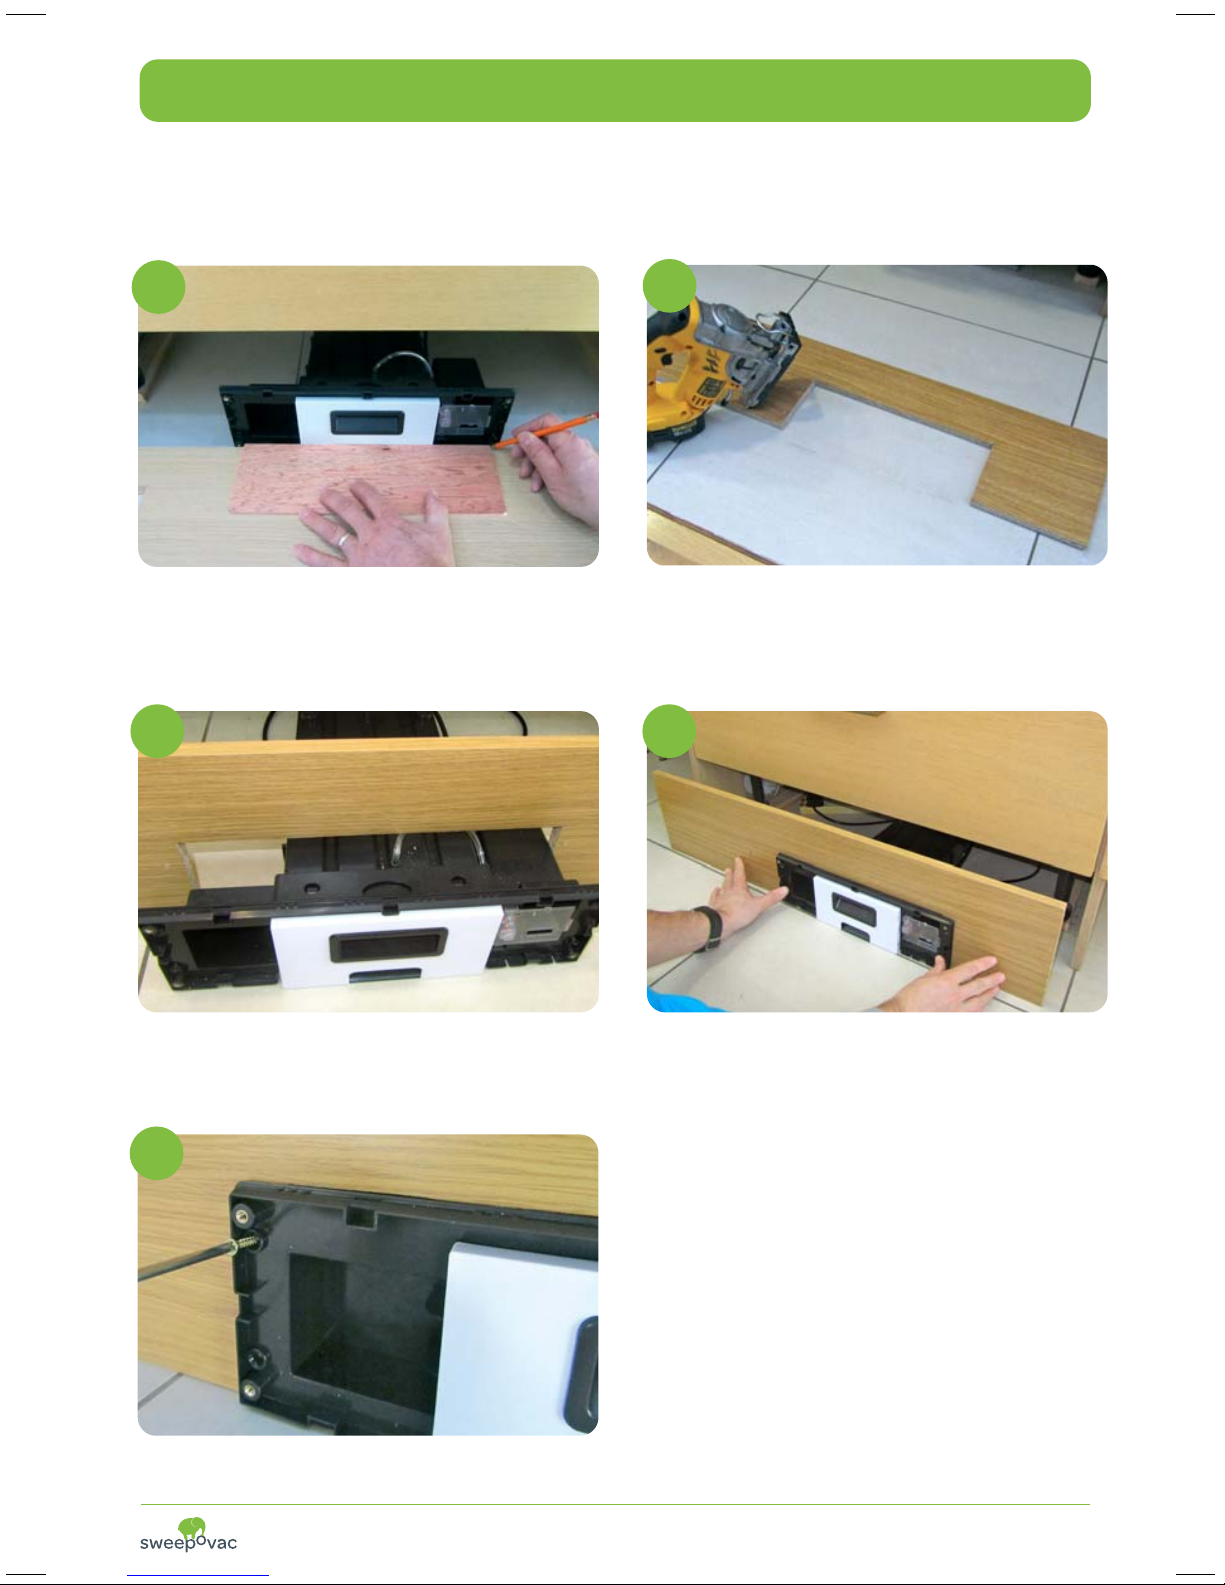
WARNING: INSTALLATION
Installation must be carried out strictly in accordance
with the supplied installation instructions.
The appliance must be plugged into a switched
socket, located so that mains power can be readily
removed from the appliance for cleaning and
similar purposes.
The socket used must be protected by an
Earth Leakage Circuit Breaker, (ELCB).
Do not use the appliance with Mains supply
extension leads.
If removal of the supplied plug-top is required
for installation, or replacement, it must be
re-connected as follows.
The wires in this mains lead are coloured in
accordance with the following code:
BLUE: Neutral; BROWN: Live.
GREEN/YELLOW: Earth
a. The wire which is coloured BLUE must be
connected to the terminal in the plug
which is marked with the letter N or
marked Neutral.
b. The wire which is coloured BROWN must
be connected to the terminal in the plug
which is marked with the letter L or
marked Live.
To reduce the risk of fire, electric shock, or injury:
c. The wire which is coloured Green/Yellow must
be connected to the terminal in the plug which is
marked with the letter E or marked Earth.
d. Always ensure that the cable clamp is fitted and
that it clamps the cable outer and NOT the
coloured wires.
If for any reason, it becomes necessary to replace
the fuse, a 5 Amp time-delay fuse must be fitted.
NB. DO NOT USE A 13 AMP FUSE.
If the supply cable of the appliance is damaged,
disconnect the appliance from the socket outlet
immediately. The complete Sweepovac electrical
module will have to be replaced. This should be
carried out by Sweepovac Ltd only, or its
appointed agent.
NB. If in any doubt please consult Sweepovac
Ltd directly, or a qualified electrician.
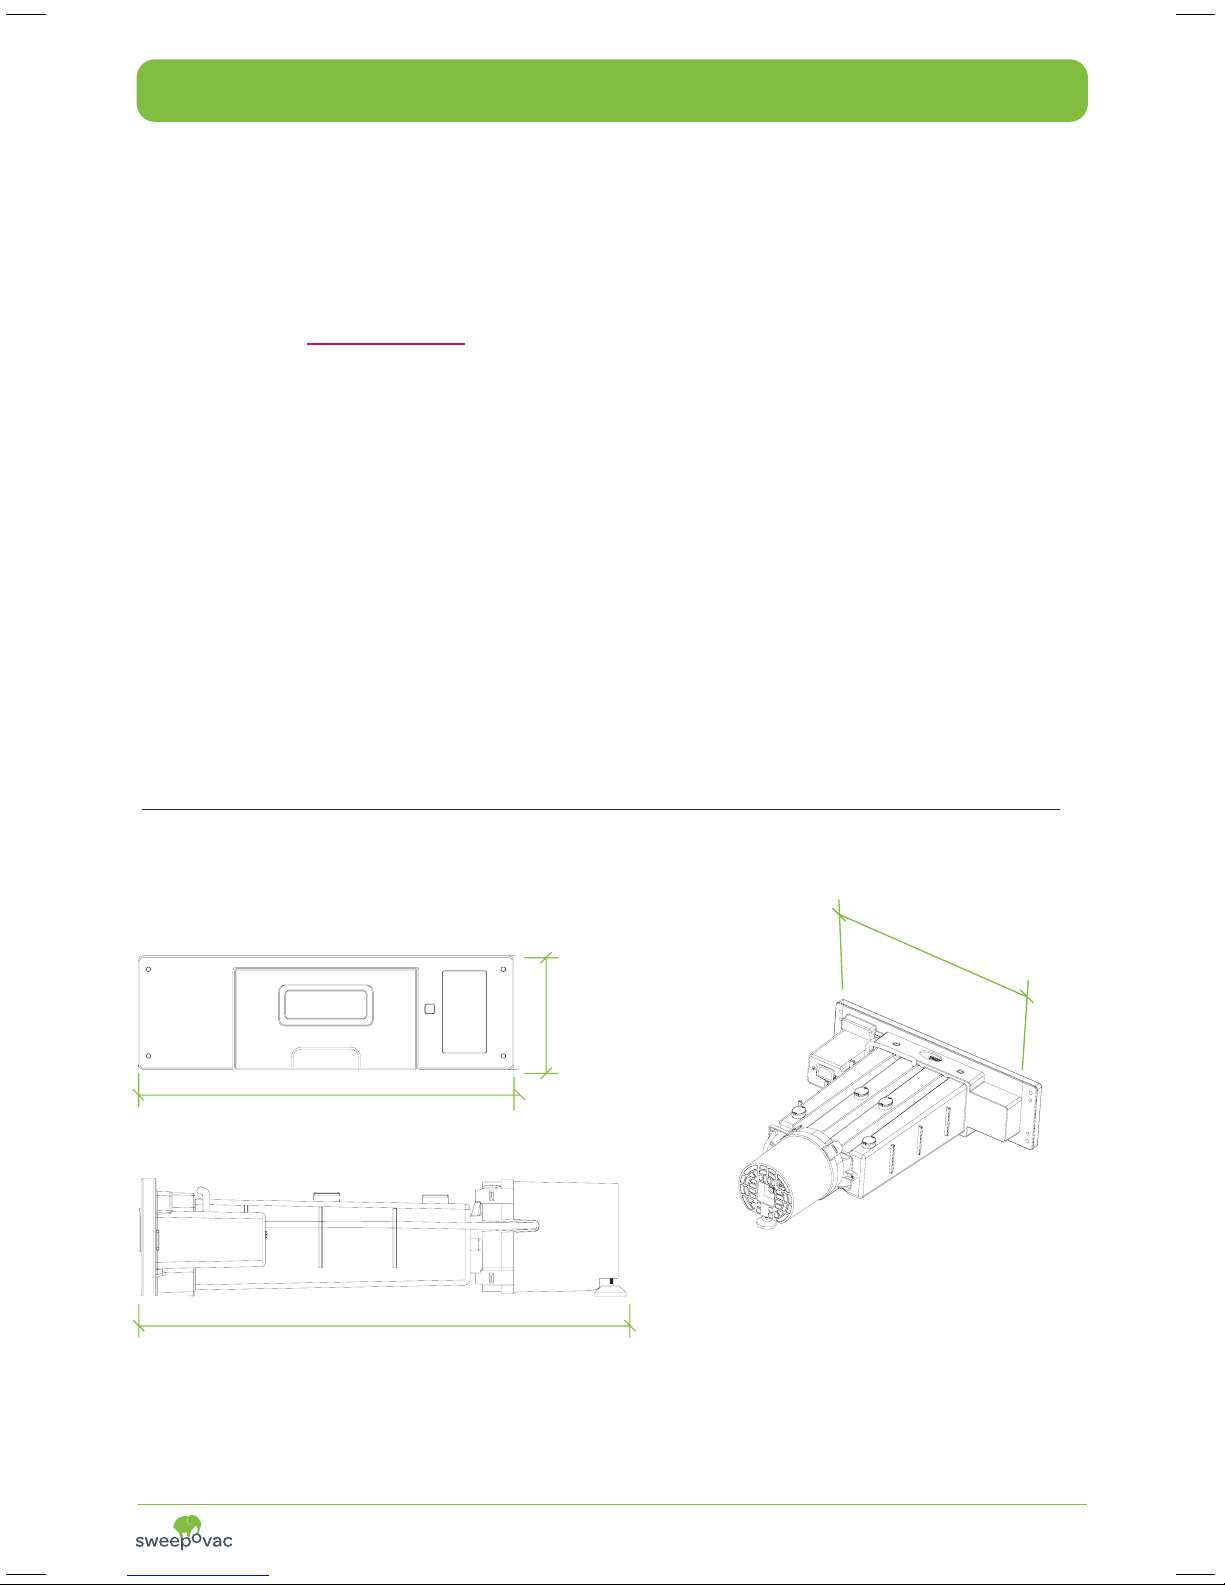
Fitting Clearances:
The vacuum must have the following clearances
when fitted;
Rear of the machine to nearest surface - 20mm.
Top and bottom of the body of the machine to
nearest surfaces - 2mm.
Left hand and right hand side - collectively - 100mm.
No extra ventilation is required.
A6
A7
A8
B1
WARNING: OPERATION
To reduce the risk of fire, electric shock, or injury:To reduce the risk of fire, electric shock, or injury:
PATENT PENDING PCT/IE2011/000065
A1
A2
A3
A4
A5
The Sweepovac unit is designed to handle normal
dry dust and debris in a domestic or office
environment. It is not designed to handle water,
or superfine industrial dust. Do not install or use
the Sweepovac vacuum outdoors, in a bathroom,
a wet area, within 10 feet (3.1m) of a pool. Do not
expose to moisture, rain or snow. Do not pick up
water or sweep water into the Sweepovac Vacuum.

3
Section 1
Do not pick up water, or any other liquid.
This will cause the product to fail, and
invalidate your warranty.
It is not designed to pick up small sharp
objects, such as pins, paper clips, small
toys, etc.
Do not use without a clean dust-bag and
filter in place. To do so can damage the
appliance, and invalidate your warranty.
Do not operate the Sweepovac vacuum
when the drawer is removed.
Do not fit anything other than original
Sweepovac dust bags or filters. To do so can
damage the appliance, and invalidate your
warranty.
Always remove the plug from the wall socket
before attempting any form of user maintenance
or cleaning, as specified in this booklet.
This Sweepovac vacuum device is not
intended for use by young children or infirm
persons with reduced physical, sensory or
reasoning capabilities, or lack of experience
and knowledge, unless they have been given
supervision or instruction by a responsible
person concerning use of the Sweepovac
vacuum to ensure that they can use safely.
Do not allow to be used as a toy. Close
attention is necessary when used by children.
Children should be supervised to ensure that
they do not play with the Sweepovac Vacuum.
Do not sweep any combustible or flammable
material such as petrol or lighter fuel into the
Sweepovac.
Do not sweep in anything that is burning or
smoking, such as cigarettes. Do not sweep in
hot or warm ashes from a stove, fireplace etc.
B2
B3
B4
B5
B6
B7
B8
B9
B10
B11
B12
B13
B14
Do not place any objects inside the
Sweepovac chamber when the drawer is removed.
Do not put your hand inside the Sweepovac
chamber when the drawer is removed.
Do not disassemble the Sweepovac vacuum
as incorrect assembly may result in
electric shock, malfunction or fire.
WARNING: DISPOSAL
To reduce the risk of fire, electric shock, or injury:
The materials used in this product comply
with international EU Directives on the
Restriction of Hazardous Substances (RoHS)
The symbol shown below and on the product,
means that it is classed as Electrical or
Electronic Equipment and should not be
disposed with other household or commercial
waste at the end of its working life, in
conformance with the EU ‘Waste of Electrical
and Electronic Equipment (WEEE) Directive
(2002/96/EC)
If disposing of this product, please contact
your local authority or the retailer where the
product was purchased. In the event of
difficulty, please contact Sweepovac Ltd.
directly.
C1
C2
C3
0681

Section 2
4
INSTRUCTIONS FOR USE
Sweep dirt and debris to a point in front
of the Sweepovac.
1
Tap the lower part of the switch gently with
the brush or with your foot.
2
Sweep in the debris.
3
If you wish you may clean the brush head by
rubbing the head over the vacuum aperture
4
Tap the switch to turn off or allow the ten
second timer to automatically turn off the unit.
5
Cleaning: To clean the front face of the Sweepovac. Switch off the mains.
Rub the front using a slightly dampened cloth.
Light will come on during
operation when bag is full

5
Section 2
CHANGING THE BAG AND FILTER
Slide out the bag drawer.
1
Press down the bag release catch to clip in or
to remove the bag.
2
Replace the bag as shown every 12 weeks
(for normal domestic use). The bag can be
changed at the appliance or the entire drawer can
be carried to the bin and the bag disposed of there.
Ensure the three cardboard lugs are slotted home.
Push down clip to release the bag.
3
It is recommended to change the filter every
year or if it appears dirty on visual inspection.
4
Push the drawer home until it clicks back
into place.
5
Change the bag every 12 weeks (for normal
KVTLZ[PJ\ZLHUK[OLÄS[LYL]LY`TVU[OZ
HOW DO YOU KNOW
THE BAG IS FULL?
If the light flashes on when in use.
If dirt has to be brushed right into
the opening to be vacuumed up.
If the motor sound changes.
1.
2.
3.
Table of contents
Other Sweepovac Vacuum Cleaner manuals