SWELLPRO GC2-S User manual

GC2-S
User Guide
Visit www.swellpro.com for the latest version of this manual and firmware updates for
your drone and accessories.
V1.0 –June 2021

2©2021 SwellPro
Thank you
The GC2-S is a waterproof low-light 2-axis gimbal camera designed for SplashDrone 4
to gain visual footage in low-light environment. The GC2-S comes with a dimable LED
light that allows use even in complete darkness. The high-sensitivity sensor of the GC2-
S provides full color images in low-light environment when normal cameras cannot
return an image.
Using this manual
This document is designed to be printed or viewed on a computer or mobile device.
Tutorial videos
To watch tutorial videos or download the firmware, please visit SwellPro website
www.swellpro.com

©2021 SwellPro
3
Contents
Thank you ......................................................................................................2
Using this manual..........................................................................................2
Tutorial videos...............................................................................................2
CONTENTS .........................................................................3
PRECAUTION......................................................................4
INSTALLATION ...................................................................4
Install the Gimbal ..........................................................................................4
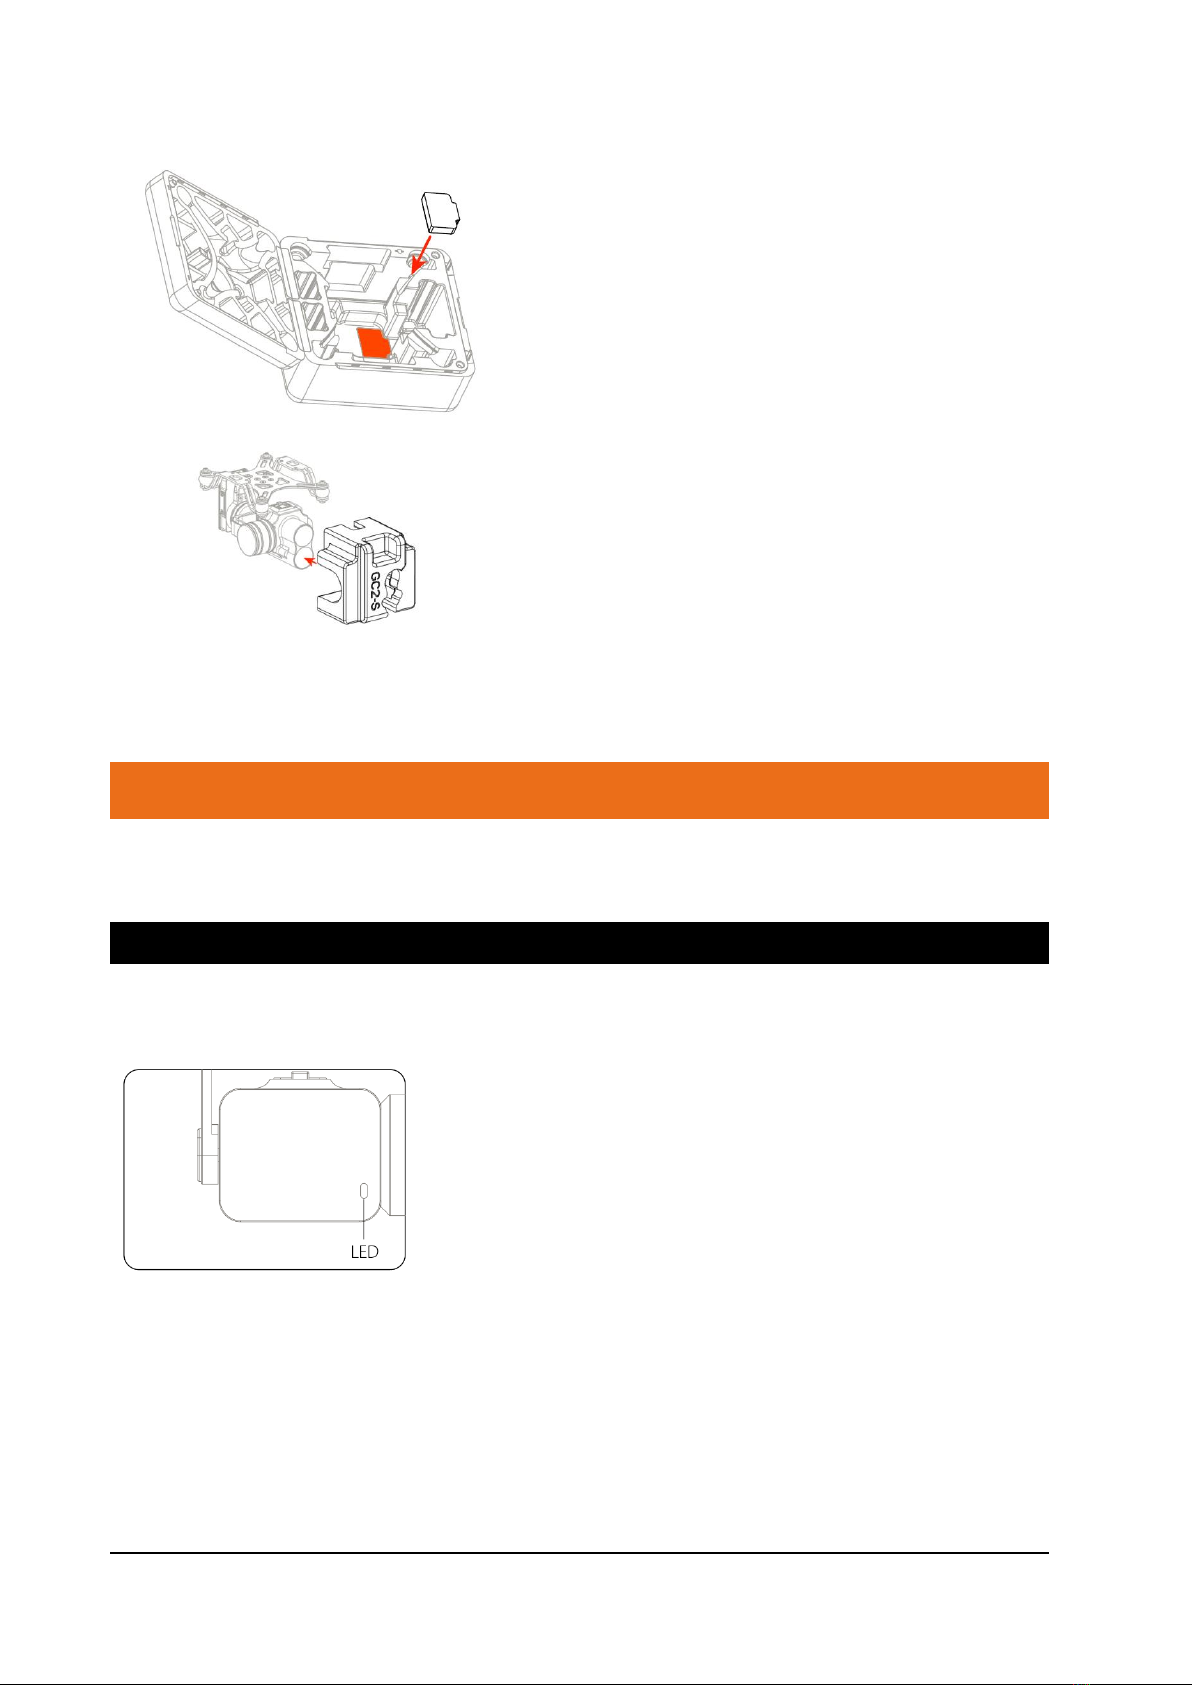
Install SD Card...............................................................................................5
After Use Casing............................................................................................5
CONTROL............................................................................6
Camera Status Indicator ...............................................................................6
Gimbal Control...............................................................................................7
Camera control..............................................................................................7
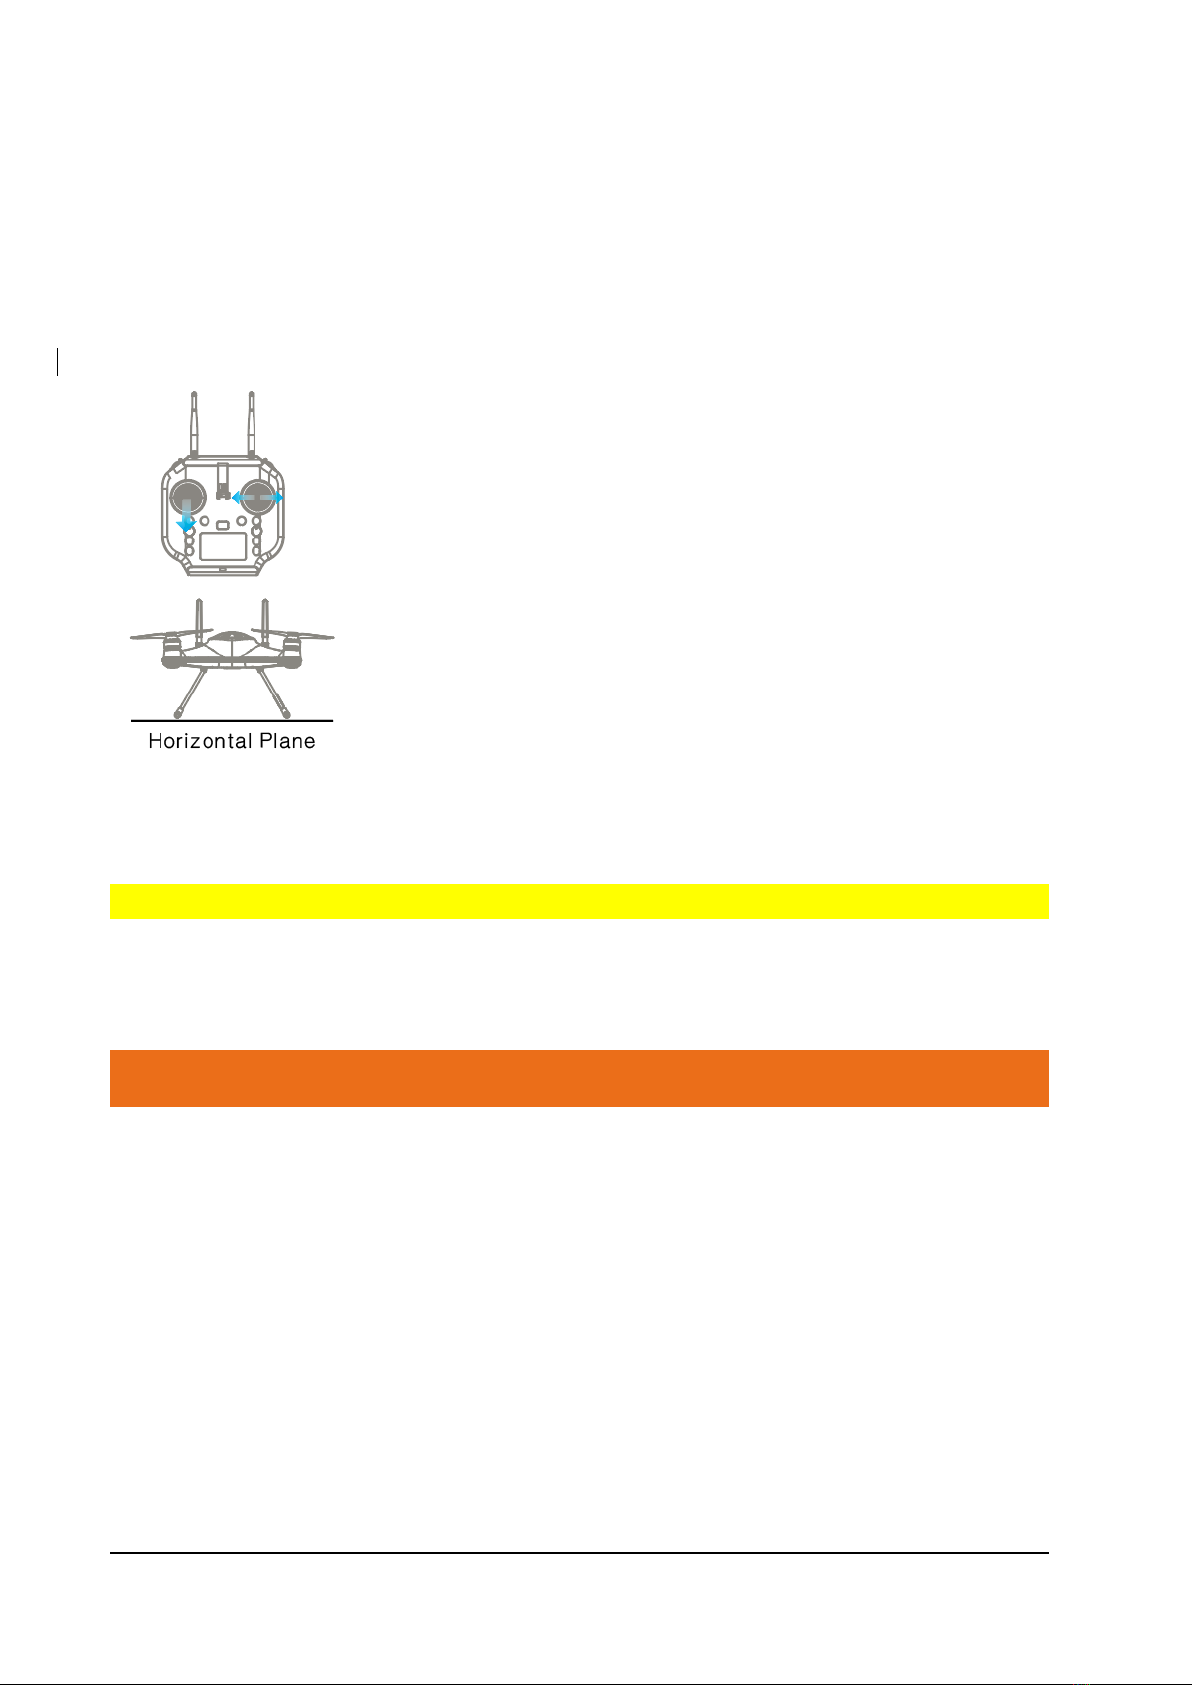
Calibration .....................................................................................................7
APP INTERFACE .................................................................8
SPECIFICATION ................................................................11
Version Information.....................................................................................12

4©2021 SwellPro
Precaution
⚫The GC2-S is a piece of precision electronics with corrosion-resistant materials
which allow for use in harsh marine environments. As with any marine equipment,
trouble-free and lasting operations depend on proper attention and maintenance of
the equipment.
⚫When taking off or landing, slowly proceed to avoid damage to the gimbal camera
which can cause by the huge impact when contacting the surface at high speeds.
Drop or crash directly into the water from above will result in significant damage to
the drone and the gimbal camera.
⚫After using in seawater, soak and rinse thoroughly with clean fresh water before the
seawater dries out.
⚫If seawater or other sediments form on the gimbal camera, soak thoroughly with
fresh water and clean all sediments on the camera and motor before use. For more
information, check the drone’s “Maintenance manual”.
Installation
Install the Gimbal
1. Unscrew and take off the gimbal port cover plate
using a hex screwdriver. (equipped with SplashDrone
4)
2. Plug the gimbal connector into the drone’s gimbal
port and screw it in place with a screwdriver.
Make sure the rubber ring is attached to the gimbal
connector before you screw the connector.

©2021 SwellPro
5
3. Aline the holes on the base of the gimbal to the
bottom of the drone, screw in to mount the gimbal.
Make sure the camera is pointing to the front of the
drone.
Install SD Card
1. Open the soft rubber seal on the top of the camera,
insert the Mirco SD card in the correct direction, press
the Mirco SD card, the "click" sound indicates that the
installation is in place.
2. After installing the Mirco SD card, plug the rubber seal
back.
Make sure the rubber seal is tightly plugged in to
ensure waterproofing.
•The GC1-S supports Mirco SD cards with a maximum capacity of 128GB. Since the
camera requires fast reading and writing of high-stream video data, please use
Mirco SD cards with Class 10 or UHS-1 or above to ensure proper functioning.
•Do not insert or unplug the Mirco SD card during aircraft shooting, as data files may
be damaged or lost.
•Once you are done recording, stop recording and save the file. If you turn off the
power directly before saving the files, the recording file will be lost.
After Use Casing
After using the gimbal camera, you can choose not to take off the gimbal camera and
put it directly into the case with the drone. Follow the following steps to make sure the
gimbal camera is properly secure after casing.

6©2021 SwellPro
1. Remove the double-side-glued pad from the
gimbal box and paste the pad into the drone’s
case as showing to the left.
2. After cleaning and drying the gimbal camera
and the aircraft, secure the gimbal camera with
the fixing case, then put the aircraft and other
parts into the case. The case is secure and ready
to be carried or transported.
Control
Camera Status Indicator
There is a camera status indicator on the back of the camera to indicate the camera's
working status. It flashes green or red.

©2021 SwellPro
7
Gimbal Control
Remote controller
Description
Tilt①: Roll the right gimbal control roller as
shown to turn the gimbal up or down from 0 to -
90 degrees.
Dimable LED light control②: Roll the left gimbal
control to adjust the brightness dimable LED
light. (Dimable LED light works the best when the
aircraft is 15 meters away from the subject.)
Camera control
Remote controller
Description
Photo①: press once to take a picture.
Video②: press once to start recording, press
again to stop recording, and save files.
Calibration
If there are any abnormal movements being observed or the camera is not level, you
can recalibrate the gimbal camera to solve the problem.

8©2021 SwellPro
Gimbal camera calibration is performed together with the aircraft gyroscope
calibration. To calibrate the gimbal camera, you just need to proceed with aircraft
gyroscope calibration.
To calibrate the gimbal camera:
1. Place the drone on a level surface, power on the remote
controller, then the drone. Wait for the aircraft to connect to the
remote controller.
2. Hold the left joystick down to its lowest position, then quickly
move the right joystick left to right, back and forth, until the front
and rear status indicators flash alternately, or the remote
controller screen prompts "WARNING aircraft Initializing,
Please Wait". The drone will now perform gyroscope
calibration. Now release the joysticks. This process will be
completed in 20 seconds. Do not move the drone during this
process.
3. When the front status indicators fast-flashing red and the rear
status indicators turn solid green, or "WARNING Aircraft
Initializing, Please Wait" prompt disappears, power off and
restart the drone. Gyroscope calibration is complete.
1) Do not calibrate the gimbal camera on a boat or other moving platforms.
APP Interface
To get into APP’s camera interface: Power on the remote controller, then the aircraft.
Connect the phone to the remote controller’s Wi-Fi hotspot. Then click "Login device".

©2021 SwellPro
9
Login
device
Camera Interface

10 ©2021 SwellPro
Photo Setting Interface
Video Setting Interface

©2021 SwellPro
11
Camera Setting Interface
Specification
Gimbal
Waterproof rating:
IP67
Stabilization:
2-axis (tilt, roll).
Controllable range:
Tilt: -90° to 0°
Max control speed:
Tilt: 60 °/s
Weight:
About 145 g
Size:
71*55*65mm
Camera
Sensors:
1/2" 2M CMOS
Lens:
FOV: 92.6°
Photo size:
4:3/16:9 12MP
Burst mode:
3/5/10 shoots
Video resolution:
FHD:1920*1080 30/60p | HD:1280*720 120/60p
Max data stream:
64 MBps
Photo format:
JPEG
Video format:
MP4,MOV
Memory card:
Micro SD card: supports up to 128GB of capacity, write
speeds ≥ 60 MB/s, and transfer speed rating of Class
10 or above, or with UHS-1 rating.
Working temperature:
-10°C - 40°C
Other manuals for GC2-S
1
Table of contents
Other SWELLPRO Camera Accessories manuals