SWELLPRO SPLASH DRONE User manual

User manual of the 4K camera
waterproof gimbal
www.swellpro.com

Content
03
Installation
04
Operation
04
04
Gimbal Control
Camera Control
04
Camera
05
06
07
07
07
Insert Micro SD card
Camera Setting and Usage
Camera Setting
Video Setting
System Setting
04
Gimbal Calibration
08
09
Gimbal Accelerometer Calibration
Gimbal GYRO Calibration
-3-
Description
Graphical Representation
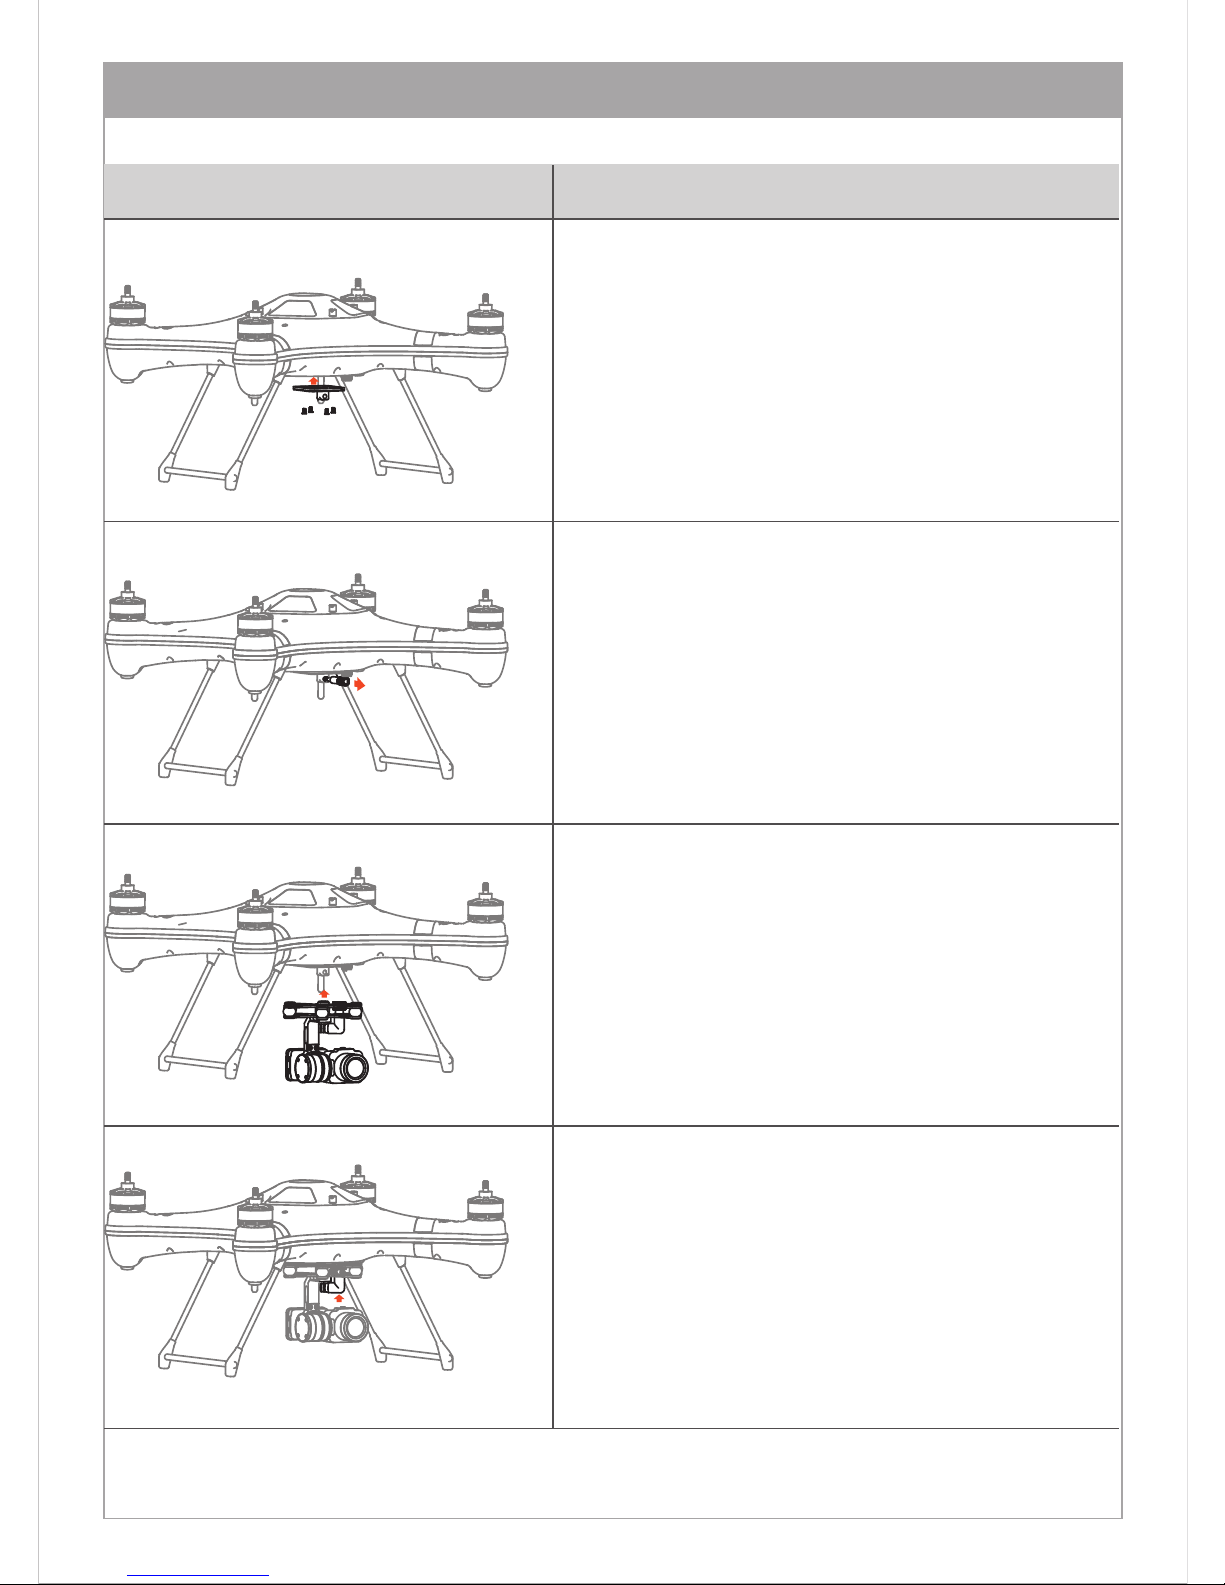
1.Installation
1. Fix the quick release to the bottom of the
body in the correct direction with the provided
screws.
2. Loosen the bolt at the bottom of the fuselage
(if it is too tight, use a dollar coin or other tool).
3. Insert the gimbal into the quick release parts
and lock the bolt with the quick release bolt.
4. Insert the cable connector in the correct
direction and lock the waterproof nut.
-4-
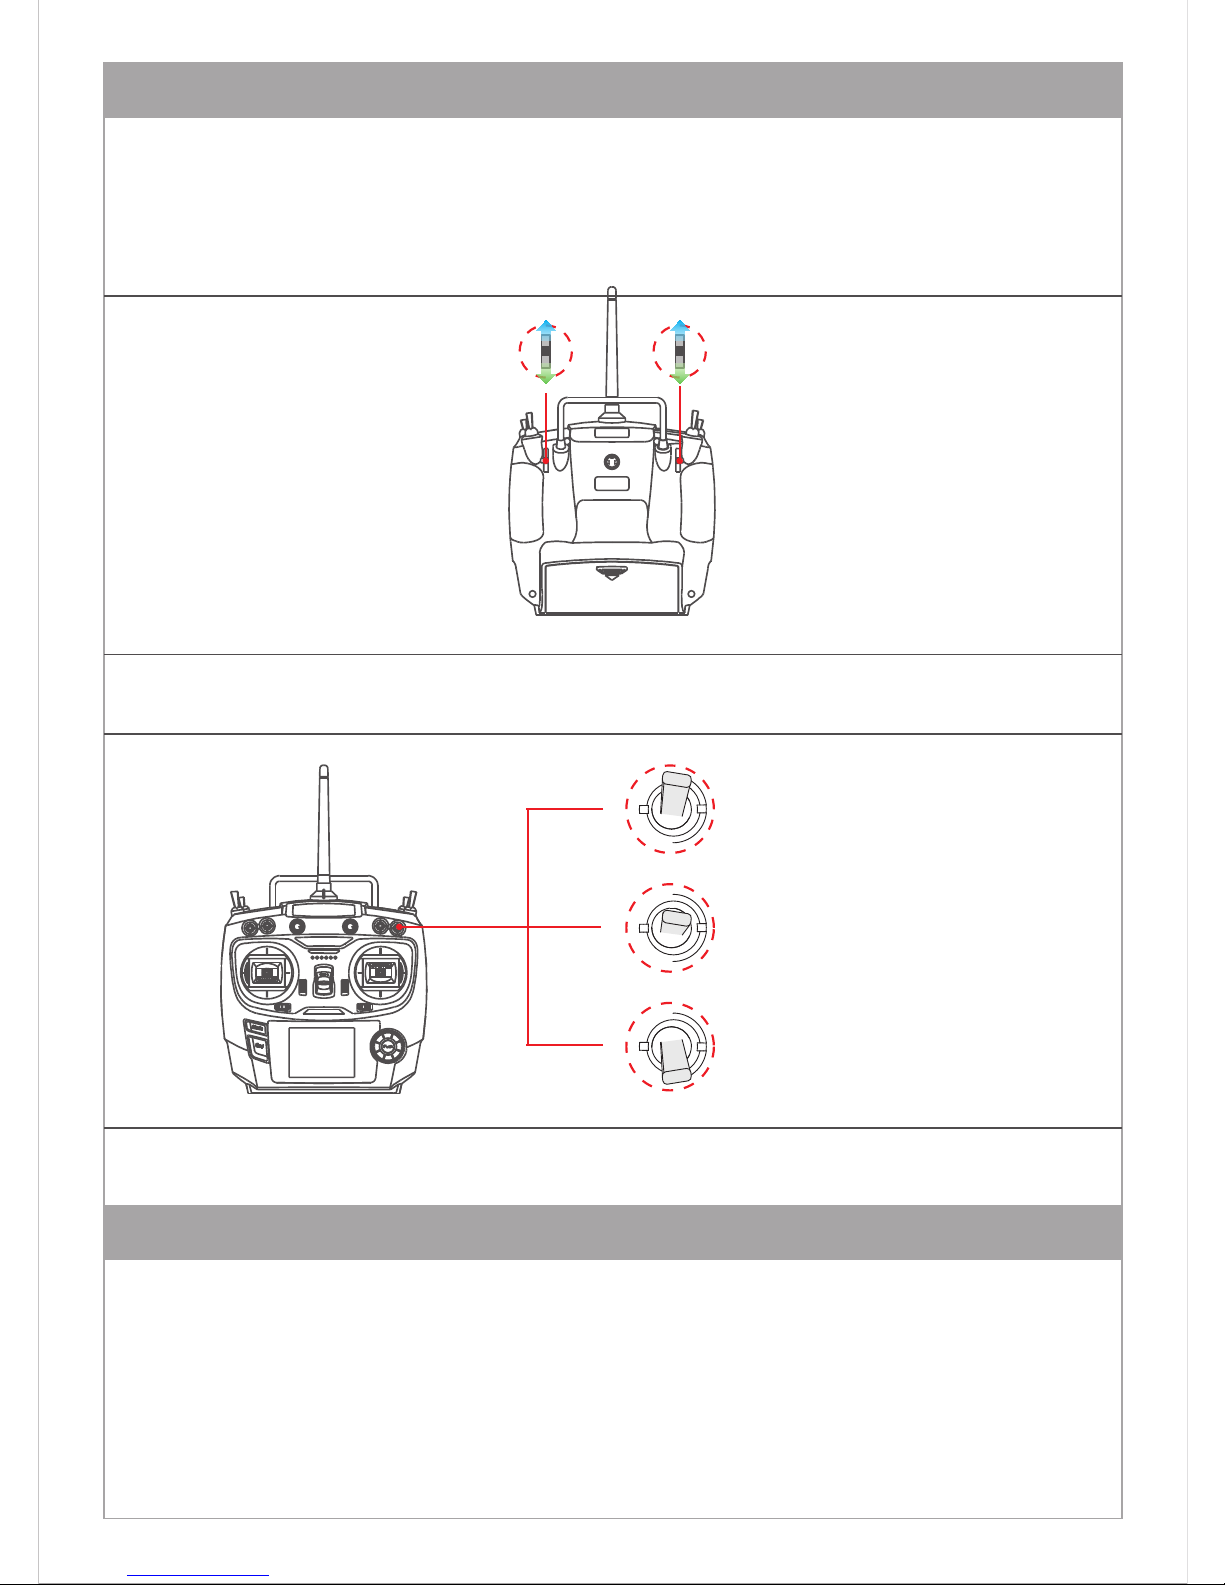
VRC slider controls the
camera's horizontal angle
VRD slider controls the
tilt angle of the camera
Video
Preview
Photo
2. Operation
3. Camera
The operation method is consistent with the Splash drone 2 pan tilt control mode.
Gimbal Control
Camera Control
Maximum support for 24 frames per second of 4K video. Its superior electronic image
stabilization technology, combined with the design of high-precision waterproof mechanical
Gimbal, it can guarantee the stability of the camera in high-speed movement, with loss less
and real-time shooting of video and photos.
-5-
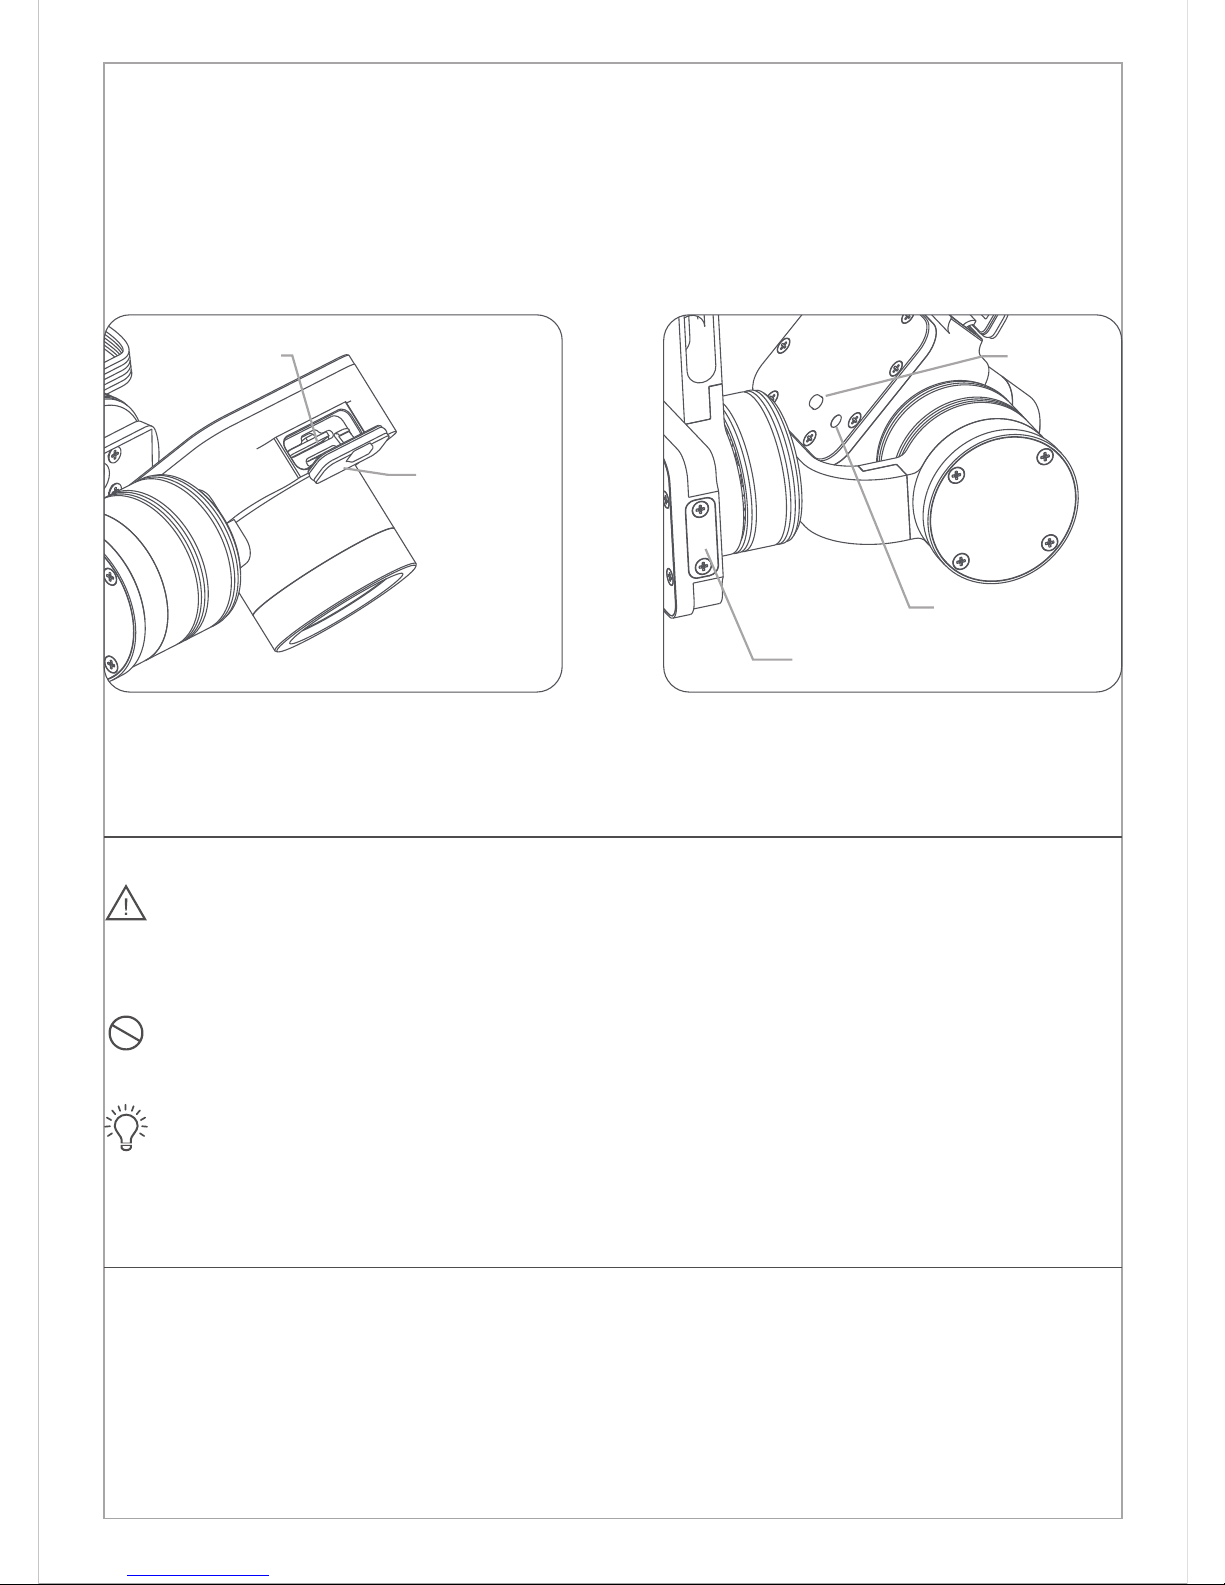
1.Please open the soft rubber stopper at the top of the camera and insert the Mirco SD card in
the right direction.
2.Fasten the rubber stopper
Install Micro SD card
Rubber Stopper
Gimbal Firmware Updating USB Port
Camera Status Light
WiFi Switch
WiFi Switch:Short press ON,
long press OFF.
Micro SD slot
Splash Drone 3 supports the highest capacity 64GB Mirco SD card. Since the camera
requires fast reads and writes of high bit stream video data, use Class 10 or UHS-1 and
above Mirco SD card to ensure normal camera recording.
Do not insert or unplug the Mirco SD card during the flight, otherwise the data file may
be corrupted or lost.
To ensure the stability of the camera system, the duration of a single video is limited to
less than 15 minutes.
-6-
00:05:20
8.5G2016/05/03 17:08
1. APP installation: iOS systems, for apple devices, please find the SwellCam APP in the apple
store, and install the APP.
Android systems can download the APK installation on the www.swellpro.com site
2. Camera WIFI connection: Please Note, the WiFi is used for preflight setup purposes only, and
must be disabled prior to take off.
Power on the drone, the camera will power on automatically, switch on the camera WIFI, the
red indicator lights up indicating the camera is on. Open the WIFI on your phone, search for the
name of SwellCam mobile devices, and request to connect, enter the initial password -
12345678, and connect.
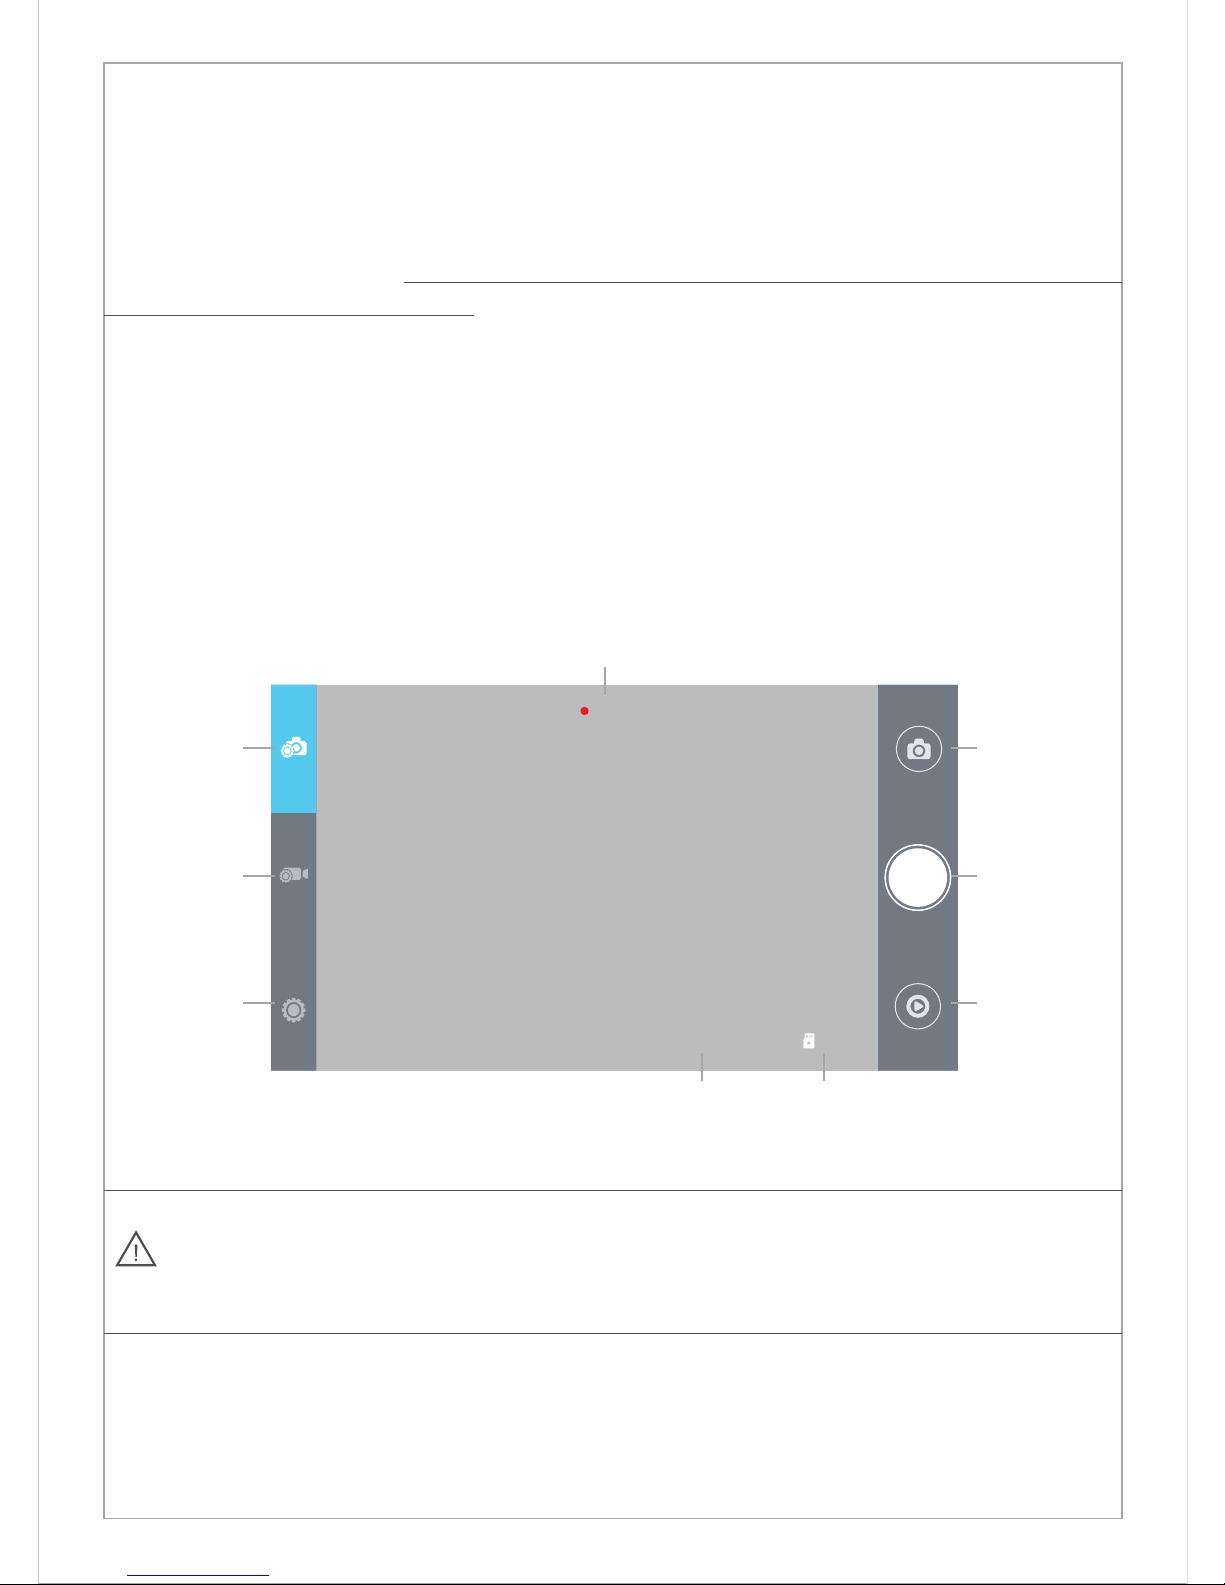
3. Using the APP: Open the camera APP into the camera preview screen. On the APP, you can
set the parameters of the camera and video, you can also control the camera for the taking of
pictures or videos, and other related functions.
Camera settings and use
Please turn off the camera's WIFI switch before take off, so as not to interfere with the
flight control or video transmission signals during flight.
Picture Setting
Video Setting
Camera Setting
Picture Button
Record Button
Playback Button
Record Time
Time Stamp Memory card capacity
-7-
Camera Setting
Picture Format
Picture Size
Time Stamp
Burst Speed
Timer
Self-timer
JPEG RAW J+R
14M 10M 5M 14M_16:9 10M_16:9 5M_16:9
OFF ON
OFF 3pics/second
OFF 5seconds 10 seconds
OFF 3seconds/pic 5seconds/pic 10seconds/pic 30seconds/pic
Record Setting
Resolution
Video Format
Time Stamp
APP control:
Remote Control:
MOV MP4
OFF ON
1920*1080(P30 /P60) 1280*720(P30/P60)
2880*2160 24p 2560*1440 30p
1920*1080(30/60p) 1280*720(30/60p)
System Setting
Language
Picture Flip
Time Setting
WIFI Password
ISO
EV
English, Chinese
180°Flip, OFF
AUTO 100 200 400 800 1600
-2 -1.5 -1.0 -0.5 0 +0.5 +1.0 +1.5 +2.0
Note: APP and remote control camera recording video resolution is different, please
select the best resolution according to your specific needs.
-8-
Accelerometer calibration is necessary if:
1. The camera lens isn't in horizontal location,when left at it’s default state.
2. This will display a tilted image.
Calibration Procedure:
1. Place the drone on the horizontal ground or desktop, power on the remote control, and
power on the drone, and the gimbal is powered on.
Camera gimbal accelerometer calibration
White Balance
OSD
Recording
Video Format
Metering
Frequency
Format
Default Setting
AUTO, cloudy, sunny, Incandescent lamp, Fluorescent lamp
ON, OFF
ON, OFF
PAL, NTSC
Global metering, Center-weighted, spot
50Hz, 60Hz
Sure, Cancel
Sure, Cancel
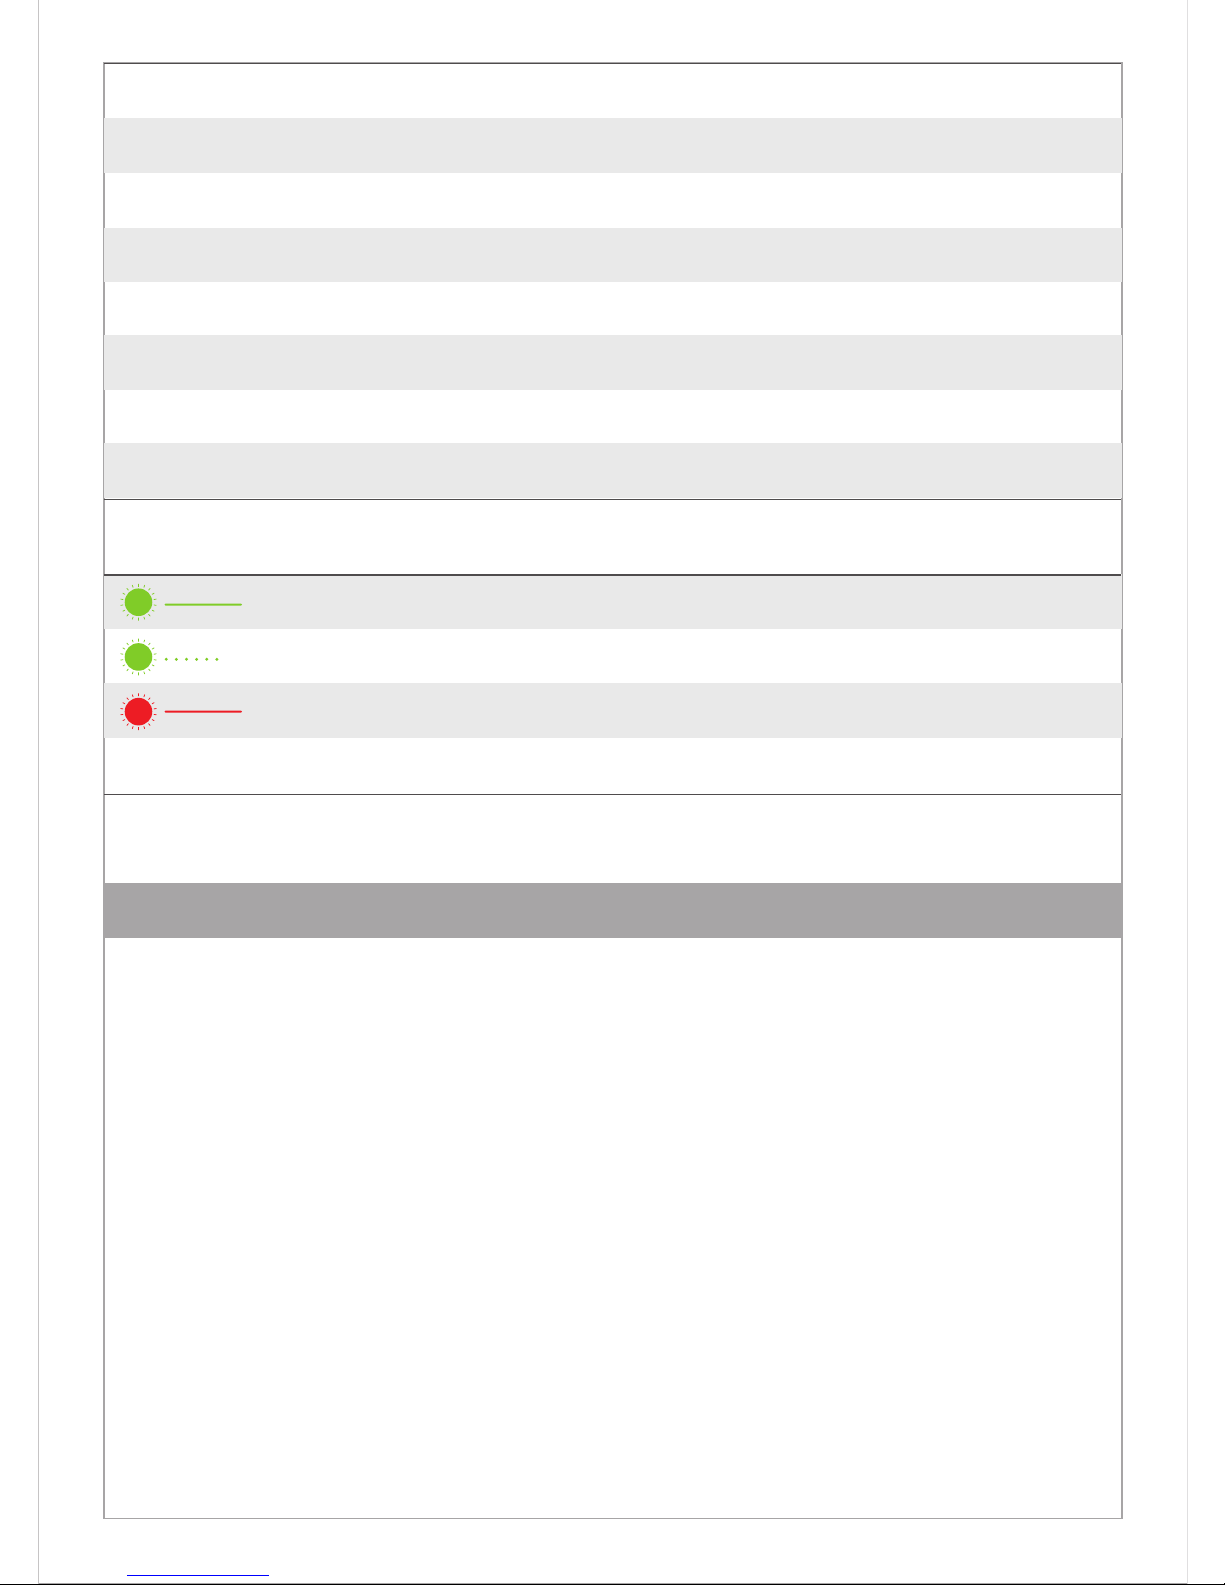
Camera Indicator
4. Gimbal Calibration
Green ON
Green Slow Blink
Red ON
Red OFF
Power on into preview mode
Saving picture or video
WIFI ON
Wifi Off

-9-
2. Put the thumbwheel VRC at the back of the controller to the middle position. Using the
thumbwheel (VRD) at the back of the controller, roll the thumbwheel quickly back and forth 5
times, until the gimbal goes into a relaxed state.
3. remove the camera gimbal, placed in the horizontal surface, ensure there is no vibration, and
hold the camera to keep the level. Bring the left VRC down to the bottom for more than 1
second. At this point, the camera gimbal starts to calibrate itself. When the camera gimbal start
working, release the camera and check if the gimbal works good or not. If it works well, the
calibration is successful.
Gyroscope calibration is necessary if:
1. When powering up the drone, the camera Gimbal is horizontal, but the image continually
becomes tilted.
Calibration Procedure:
1.Place the drone on the horizontal ground or desktop, power on the remote controller.
2.Put the thumbwheel VRD at the back of the controller to the middle position. Using the
thumbwheel (VRC) at the back of the controller, roll the thumbwheel quickly back and forth 5
times, until the gimbal goes into a relaxed state.
3.When the power is resumed to the camera gimbal, the calibration is completed.
Gimbal GYRO calibration
When the camera is not at the horizontal position, please power off, the camera will
return to balance state.
When doing calibration, the camera gimbal need to be placed on horizontal surface, no
other vibration. If the problem is not solved after calibration, please power off and redo
the calibration.

User manual of the 4K camera waterproof gimbal
V1.0 2017.06
www.facebook.com/swellpro/
Other manuals for SPLASH DRONE
6
Table of contents
Other SWELLPRO Camera Accessories manuals


