Swiss Made Gotec GO5 Instructions for use

GO 5 – GO 10 – GO 16
Notice d’installation et de maintenance
Bedienungsanleitung und Wartung
Instruction and maintenance manual
Manuale d’istallazione e di pulizia
Manual de instrucciones y mantenimiento

DONNEES TECHNIQUES / TECHNISCHE DATEN / TECHNICAL DATA /
CARATTERISTICHE / INFORMACION TECNICA
GO 5 :
Débit / Fördermenge / flow rate / portata / caudal 5 [l/h]
Aspiration / Saughöhe / self-priming / aspira ione / aspiración 2.5 [m]
Refoulement / Förderhöhe / head / mandata / impulsión 8 [m]
Tension / Spannung / voltage / tensione / voltaje 230 [V] / 50 [H ]
Puissance / Leistung / power / poten a / consumo 18 [VA]
GO 10 :
Débit / Fördermenge / flow rate / portata / caudal 10 [l/h]
Aspiration / Saughöhe / self-priming / aspira ione / aspiración 2.5 [m]
Refoulement / Förderhöhe / head / mandata / impulsion 8 [m]
Tension / Spannung / voltage / tensione / voltaje 230 [V] / 50 [H ]
Puissance / Leistung / power / poten a / consumo 18 [VA]
GO 16 :
Débit / Fördermenge / flow rate / portata / caudal 16 [l/h]
Aspiration / Saughöhe / self-priming / aspira ione / aspiración 2.5 [m]
Refoulement / Förderhöhe / head / mandata / impulsion 8 [m]
Tension / Spannung / voltage / tensione / voltaje 230 [V] / 50 [H ]
Puissance / Leistung / power / poten a / consumo 18 [VA]

DIAGRAMME PERFORMANCE / LEISTUNGSDIAGRAMM / DIAGRAM OF
PERFORMANCES / DIAGRAMMA DELLE PRESTAZIONI / DIAGRAMA DE LOS
RESULTADOS
L’EMBALLAGE CONTIENT / LIEFERUMFANG / CONTENTS / L’IMBALLAGGIO
CONTIENE / MATERIALES SUMINISTRADOS EN LA CAJA
1x
2x
1x
1x
2x
2x
1x
1x

INSTALLATION / EINRICHTUNG / INSTALATION / ISTALLAZIONE /
INSTALACION
Fixer le détecteur au tuyau d’évacuation à l’aide du manchon fourni.
Schliessen Sie das Schwimmermodul an das Ende der Ablaufleitung mit dem gelieferten Schlauchstück an.
Connect the detection unit to the end of the evacuation pipe by means of the supplied rubber tube.
Collegare il blocco di rileva ione mediante apposito manicotti di gomma al tubo di evacua ione.
Conectar la unidad de detección de condensados al tubo de evacuación con la manguera de goma suministrada.
ATTENTION / ACHTUNG / ATTENTION / ATTENZIONE / ATENCION
Connecter la pompe avec le détecteur avec du tuyau
Ø6mm intérieur. Placer la pompe dans la goulotte
ou, si possible, dans le faux-plafond. Fixer le clapet
anti-retour (fourni) côté refoulement.
Schliessen Sie die Pumpe an der Schwimmermodul
mit einem Schlauch von Ø6mm Innendurchmesser
an. Bauen Sie die Pumpe im Kanal oder, wenn es
möglich ist, in die Zwischendecke. Schliessen Sie
das Rückschlagventil nach dem Zulaufanschluss.
Connect the pump to the detection unit by means of
a Ø6mm internal diameter tube. Fix the pump in the
duct or, if possible, in the false ceiling. Fix the non
return valve on the end fitting
Inclinaison maximum
7.5°
Max.Gefälle 7.5°
Max.slope 7.5°
Penden a massima 7.5°
Max. inclinación 7.5°
Fixer
le tube évent fourni.
Schliessen Sie den gelierten
Entlüftungsschlauch an.
Connect the ventilation tubing.
Collegare il tubicino d’aria
fornito.
Conectar el tubo de ventilación.

Collegare la pompa al blocco di rileva ione con del tubo Ø6mm interno. E’ possibile montare la pompa dentro la
canalina, o in qualunque luogo coperto non soggetto a gelo. Fissare la valvola di non ritorno dopo il raccordo di
mandata.
Conectar la bomba y el detetor con el tubo Ø6 mm interior. Fijar la bomba en el canal o en el falso-techo.
MONTAGE AVEC DES VIS / EINRICTUNG MIT SCHRAUBEN / INSTALATION
WITH SCREWS / ISTALAZZIONE CON DELLE VITE / ISTALACION DE LOS
TORNILLOS :
Coller les deux amortisseurs transparents et fixer les
caoutchoucs pour les vis.
Kleben Sie die durchsichtigen Stossdämpfer und bauen Sie die
NBR-Scheiben für die Schrauben ein.
Stick the transparent shock absorbers and fix the NBR grommets
for the screws.
Fissare i due ammorti atore trasparenti e le rondelle per le vite.
Pegar ambos amortiguadores transparentes y fijar los cauchos
para los tornillos.
MONTAGE AVEC LE SCOTCH DOUBLE FACES / EINRICHTUNG MIT
DOPPELSEITIG KLEBENDEN MOOSGUMMIS / INSTALATION WITH DOUBLE
SIDE ADESIVE FOAM / ISTALAZZIONE CON BIADESIVO / ISTALACION CON
DOBLE ADESIVO :
Pour éviter les vibrations fixer la pompe avec le scotch double-face fourni.
Um die Vibrationen u vermeiden, bauen Sie die
Pumpe mit dem gelieferten doppelseitig klebenden Moosgummi ein.
To avoid vibration, fix the pump using the double side adhesive foam pads.
Per evitare delle vibra ioni, fissare la pompa con del biadesivo fornito.
Para evitar vibraciones, fijar la bomba usando la espuma adhesiva de doble cara suministrada.

RACCORDEMENT ELECTRIQUE / ELEKTRISCHER ANSCHLUSS /
ELECTRICAL CONNECTION / COLLEGAMENTO ELETTRICO / CONEXION
ELECTRICA
~ : Phase et neutre / Phase und Neutral / Phase and neutral /
Fase e neutron / Fase y neutron.
PE : Terre / Erde / Earth / Terro / Tierra.
NC : Alarme NC / Ausgang Phase NC / Alarm NC / Allarme NC / Alarma NC.
NO : Alarme NO / Ausgang Phase NO / Alarm NO / Allarme NO / Alarma NO.
C : Commun d’alarme / Eingang Phase / Alarm common / Comuna Allarme / Alarma común.
Fixer les câbles selon dessin ci-dessus (norme CE).
Befestigen Sie die Kabeln wie o.g.Zeichnung (EC
Norme).
Fix the power and alarm cords (CE standard).
Fissare I cavi come sul disegno (CE norma).
Fijar los cables segun el dibujo (norma CE).
Résis if
Ohmsche las
230V / 8A resis ive
carica ohmica
resis en e

CONSEILS / VORSCHLÄGE / ADVICES / CONSIGLI / CONSEJOS
Eviter
d’écrase
r les tuyaux
.
Vermeiden Sie die Schläuche u erdrücken.
Avoid crushing the tubing.
Evitare di schiacciare i tubi.
Evitar aplastar o doblar el tubo.
Créer des pertes de charges à l’évacuation.
Er eugen Sie Widerstand in den Druckschlauch.
Create increased resistance in the tubing.
Creare delle resisten e nel evacua ione.
Crear un incremento de resistencia en el tubo.
Faire des boucles.
Fügen Sie ein oder mehreren Bogen hin u.
Add on or more loops.
Fare dei ricci.
Añadir uno o mas vueltas de tubo.
Créer un siphon.
Er eugen Sie ein Siphon.
Create a siphon.
Creare un sifone.
Crear un sifon.

ENTRETIEN / WARTUNG / MAINTENANCE / PULIZIA / MANTENIMIENTO
Annuel, en début de chaque saison. Ouvrir le capot du bloc détection, enlever le flotteur et nettoyer avec une
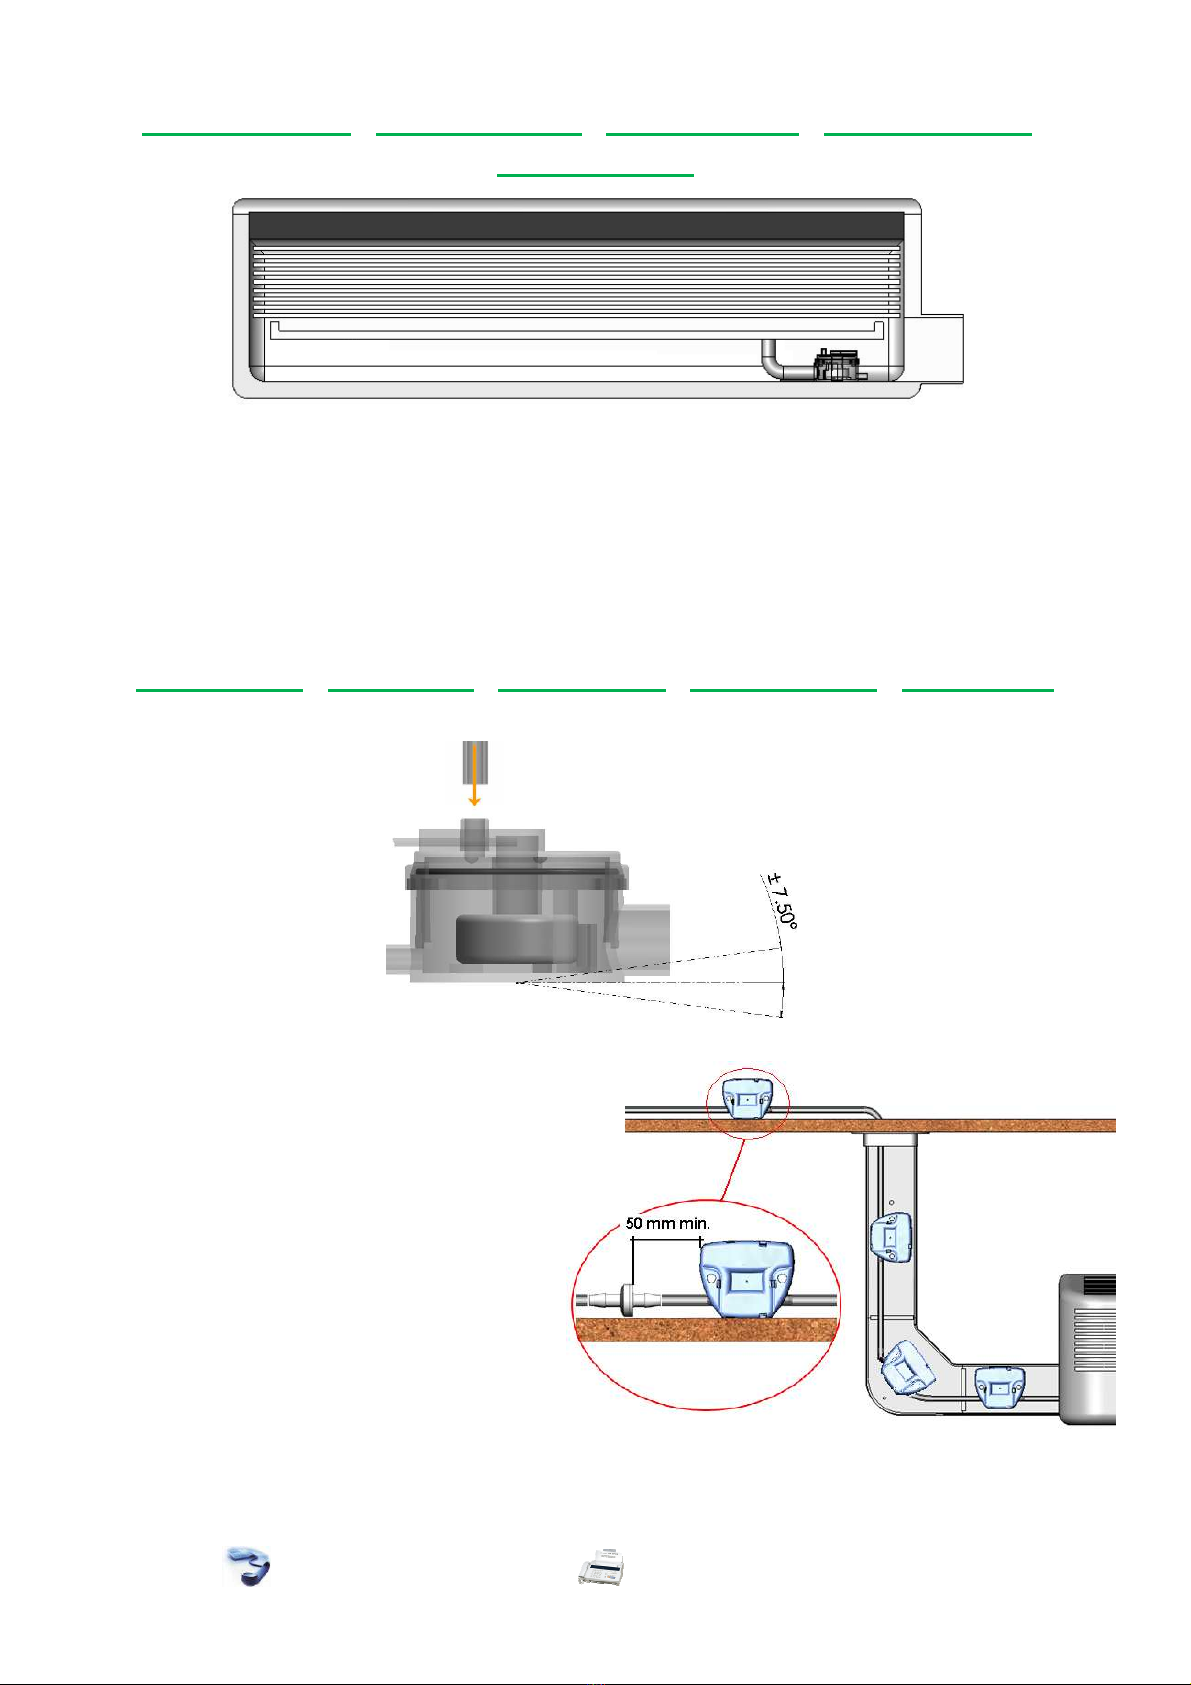
solution d’eau additionnée de 5% d’eau de Javel. Replacer le flotteur aimant vers le haut (voir dessin) et refermé
le couvercle en positionnant le joint torique. Faire un essai de fonctionnement de la pompe et de l’alarme.
Jährlich vor Beginn der Saison. Nehmen Sie den Deckel vom Schwimmerschalter ab und den Schwimmer heraus.
Reinigen Sie mit einer Mischung von Wasser und 5% Salmiakgeist (Javel-Wasser).
Stellen Sie den Schwimmer mit Magnet nach oben (siehe Abbildung) und schliessen Sie den Deckel wieder ab.
Führen Sie ein Test von alle Funktionen der Pumpe und Alarm.
Annual, at the beginning of the season. Remove the cover and the float of the detection unit. Clean it with a
solution of water and 5% bleach. Replace the float with magnet face up (see drawing) and close the cover with the
O-ring. Carry out an operating test on the pump and the alarm.
Annuale, all’ini io della stagione. Smontare il coperchio e il galleggiante del corpo galleggiante. Pulire con acqua
mista con 5% di varechina. Montare il galleggiante con il magnete in alto (vedere disegno) e chiudere il coperchio
posi ionando il giunto. Fare un test di fun ionamento della pompa e dell’allarme.
Anual, y al inicio de cada temporada. Desmontar la tapa superior y el flotador de la unidad de detección de
condensados. Limpiarlo con una solución de agua con un 5% de lejía. Volver a montar el flotador con el imán
mirando hacia arriba (ver dibujo) y cerrar la tapa superior con su junta. Hacer una prueba de comprobación de la
bomba y la alarma.
Aim
an en hau
.
Magne nach oben.
Magne face up.
Magne e in al o.
Colocar el imán hacia arriba.
GARANTIE / GEWÄHRLEISTUNG / WARRANTY / GARANZIA / GARANTIA
Un (1) an à partir de la date de livraison. Cette garantie porte sur les pièces présentant des vices de matière ou
des défauts de fabrication et se limite au remplacement ou à la remise en état des pièces défectueuses, sans
qu'aucune indemnité ou dommages et intérêts puissent être réclamés. Les pompes retournées doivent être
complètes (détection et pompe) et accompagnées d'une note précisant le défaut constaté.
Nous déclinons ou e responsabili é en cas d'ins alla ion non-conforme, de non-respec des spécifica ions, de non
en re ien ou de non raccordemen de l'alarme.

1 Jahr. Diese Gewährleistung gilt für Teile die Materialschäden oder Herstellungsfehler aufweisen und beschränkt
sich auf das Auswechseln oder die Reparatur der defekten Teile. Arbeitskosten und eventuelle sekundäre
Schäden können in keinem Fall als Grundlage für eine Reklamation dienen. Die urückgesendeten Geräte
müssen vollständig und mit einer schriftlichen Aufstellung der festgestellten Mängel versehen sein.
Bei einer nich konformen Ins alla ion oder bei Nich einhal ung der Spezifika ionen oder der War ung lehnen wir
jede Haf ung ab.
One (1) year as of date of delivery. This warranty concerns all parts with material defects or manufacturing faults
and is confined to the replacement or repair of the defective parts. Cost of labour and any secondary failures
cannot be considered as basis for a claim in any case.
All equipment returned must be complete and accompanied by a note indicating the observed fault.
We decline any responsibili y if ins alla ion is no in conformi y, if he specifica ions are no sa isfied, if he
equipmen is no main ained or if alarm is no connec ed.
La garan ia ha una durata di un (1) anno a decorrere della data di consegna. Essa copre difetti di materiale e di
fabbrica ione e si limita alla sostitu ione o ripara ione dei particolari difettosi sen a che possa essa reclamata
alcun’indennità, interesse o avan ata richiesta di danni.
Si respinge ogni responsabili à in caso d’ins allazione non conforme, inosservanza delle specifiche, dife o di
manu enzione o manca o collegamen o dell’allarme.
Un (1) año desde fecha de entrega. Esta garantía es valida para todos los elementos con defectos o problemas
de fabricación y esta restringida al cambio o reparación de las partes defectuosas. En ningún caso la mano de
obra y cualquier fallo secundario esta considerado en las bases de reclamación. Cualquier equipo devuelto debe
estar completo y debe ir acompañado de una nota indicando el fallo detectado.
Declinamos cualquier responsabilidad si la ins alación no es correc a, si las especificaciones no es án
cumplimen adas, si el equipo no es a debidamen e conservado o si la alarma no es a conec ada.

This manual suits for next models
2
Table of contents
Popular Water Pump manuals by other brands

red lion
red lion 2RLAG-1L owner's manual

Clarke
Clarke DFT12 Operation & maintenance instructions

Zenit
Zenit GRS First installation manual

Kodiak
Kodiak PSP125ABK Installation, operation & maintenance manual

Pentair
Pentair NOCCHI PRATIKA 970775 manual

GORMAN-RUPP PUMPS
GORMAN-RUPP PUMPS T SERIES Installation, operation and maintenance manual