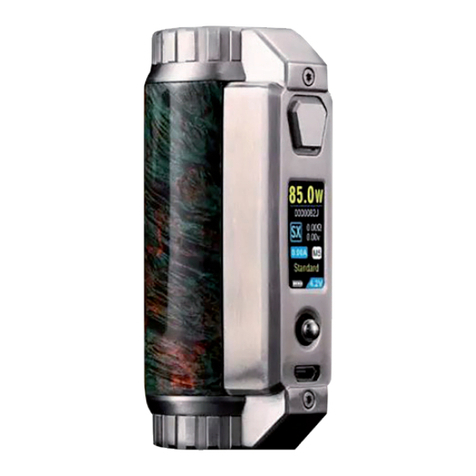
SX mini G2 User manual


1
V1.97
Diagram Breakdown.............p2
Start & Unlock
Theme 1 Breakdown.............p3
Main-Page Shortcuts ............p4
Shortcuts Unlock
Quick Shortcuts
Clock Customization.............p6
Curves Presets ......................p7
Curves DIY.............................p8
Sxi-EQ 1,2,3
Memory Proles....................p9
Start Temp Control.............p10
Locking Resistance ............. p11
Resistance Dialog Page.......p12
Temp Presets ......................p13
Main-Menu Overview..........p14
Puff Counter........................p15
Temp Control......................p16
Tweaks P1-2........................p17
Tweaks P3-4........................p18
Smart Boost........................p19
Set Date & Time ..................p20
Download New Languages.p21
Themes ...............................p22
Stats ....................................p23
WiFi Setup - STEP 1.............p24
WiFi Setup - STEP 2.............p25
WiFi Setup - STEP 3.............p26
SX-PANEL ............................p27
WiFi Troubleshooting - 1.....p28
WiFi Troubleshooting - 2.....p29
WiFi Troubleshooting - 3.....p30
Troubleshoot ......................p31
Specications .....................p32
Precautions.........................p33
2
V1.97
Fire Button
1.3” TFT IPS Display
Joystick
Battery A Door Panel
Type-C Charge Port
Battery B Door Panel
• Install 2 x 18650 batteries (orientation marked)
• 5 x re button to turn the device on
• 3 x re button to lock / unlock the device
1
6
2
3
5
4

3
V1.97
Battery A meter
Battery B meter
Power Display
Smart Boost
Puff Counter
Curve Display
Memory Prole
Main Menu Shortcut
Shortcut Lock Indicator
Mode Selector
Current voltage
Live ohm
Speculated Amp Draw
per battery
1
3
4
6
8
11
2
5
7
9
13
12
10

4
V1.97
With the shortcuts unlocked, Press the joystick to enable
shortcuts mode.
Scroll different choices with joystick movements:
and Press to select.
UNLOCK

5
V1.97
When a gear sign appears, move in its direction to open
further settings.
Without enabling shortcut mode, and with the joystick
unlocked, move the joystick for a quick setting:
• Joystick up / down: Directly adjust power settings
• Hold Joystick right : Change font color
• Hold Joystick left : Change wallpaper
(on supported themes)

7
V1.97
Main screen →Curves shortcut →
Joystick UP / DOWN
Choose your preferred style from 7 power /temp curves
presets, percentage derives from base wattage / Temp.
Starts at ~125% gradually to 100%
Constant on 100%
Starts at ~75% gradually to 100%
Start at 100% to reach ~50% in 3 seconds
Start at 100% to reach ~50% in 5 seconds
Start at 100% to reach ~50% in 7 seconds
Start at 100% to reach ~50% in 10 seconds
G2 Smart curves are all percentage-based,
thus can be used globally on all coil types
without additional adjustments.

8
V1.97
On curves shortcut - Push
joystick right to enter Curves
settings page.
Scroll right or left for
different curves.
Push down on SXi-EQ to
reveal the edit section
Navigate time using Right / Left
Up / Down to adjust the power / temp percentage for
each 0.5 seconds increment.
Current time increment
chosen power/temp percentage
a calculated wattage/temp value - (base W x power %)
1
3
2

9
V1.97
Any change on the main-page settings (including TCR value
for temp control) will be automatically synced and recorded
into your current enabled memory prole.
Memory proles for different atomizers can
help load your congurations faster
Rename prole names via the online SX-
PANEL dashboard
(For more info, view page:27).

10
V1.97
Enter shortcut - Scroll up / down to choose your
preferred wire prole or TCR to set it yourself.
SS316L
SS430
ni200
titanium
TCR
To set the TCR value for the specic Memory
prole, please enter the Temp settings page
in the Main Menu
(For more info, view page: )

11
V1.97
Before you start using temp control, the coil resistance
must be registered / locked while at its room (base)
temperature state.
While the device is in Temp mode:
Enter shortcuts mode, press on the resistance of the coil to
open the resistance lock dialog.
Locking the resistance AFTER usage, while
hot or above room temperatures lead to
miscalculation and poor performance.
Holding the joystick button will open the
resistance lock dialog page as well

12
V1.97
- the device will enter a 10-
minute analyzing phase to check whether the coil
resistance reached room temperature and locks it.
- will manually lock the resistance at
the current temperature. Please make sure the coil is at
room temperature before manually locking it.
Two methods to lock/register the resistance:
1
2

13
V1.97
While the temp presets should work out-of-the-box with
many coil setups, you can adjust the power and temp limit
to your preference.
Push up / down to scroll different temp presets.
Press right to enter the presets settings.
Each preset
has its own
temperature
settings, and
power.
Watt values
will auto
update on
new locked
coils.
- set your temperature limit.
- An intelligent VV power setting - the right (W)
column displays a calculated wattage for currently
locked resistance.
Press the reset button to restore all temp
presets back to factory defaults.

14
V1.97
- Quick Main-Menu shortcut button
(In supported themes)
Enter to shut down device
Puff Counter setting page
Temp control setting page
Tweak and adjust more options
Setting and operation page
A smart preheat function
Time & date settings page
Download Language packs
Theme selection page
Stats and info
Exit Main-menu

15
V1.97
The total amount of draws throughout the
life of the device. non-resettable
A puff (draw) counter - can only be manually
reset.
press on [] button to reset
Auto daily timed reset counter
Choose to show the / or
on the home-screen
Set the daily reset time for the counter.
* Daily Reset cycle initiates after 24 hours.
View your puff history

16
V1.97
- A strict temperature limit
module
- Temperature limit will uctuate
slightly above and below the set limit
Set your wire TCR and assign it to your
preferred Memory prole (M1-5)
Choose Celsius or Fahrenheit
The device will auto-lock the resistance
when idle and at room temp
Optional - Set your average room temp for
added accuracy
View the temperature & power stats of your
last vape session
Line:
Temperature
Line:
Wattage
Line:
Your set
Temp. Limit

17
V1.97
Set screen brightness
Brightness will auto adjust while vaping
Duration (sec.) until the screen dims out
Duration (sec.) until the clock dims out
: Auto-locks when the
screen times out
: Auto-lock when re is pressed
: Do not auto-lock
Duration (min) until device locks
Auto suggest wattage for newly attached
atomizers.
Congure your auto wattage suggestion
for new atomizers.
Duration (hours) until device shutdown
(Off / 1-48 Hours)
Set rear led logo brightness

18
V1.97
Show on homepage: //
Set vape cutoff time -
Set your battery’s CDR value to get
overload notications (per battery)
Screen brightness during night mode
Rear logo LED brightness during night
mode.
Set night mode beginning time
Set night mode ending time
select to restore all settings to factory
default. ( )
* CDR alert is based on an estimated calculation
** Restore default background images
via the online SX-PANEL

19
V1.97
can gradually initiate in between
boost cycles as well.
E.g., If - Expect a partial
boost even when vaping before the 30s mark.
will be followed by chosen curve.
Turn Smart-Boost feature On/Off
Set your power percentage.
(100% represents your base wattage)
How long the boost should be active.
How long before your coil gets cold,
and requires a full boost again.
Big mass coils might need a stronger pre-heat to reach the
set wattage quicker. But your second, third, and so forth
consecutive draws do not.
Smart Boost allows you to set a custom pre-heat for these
rst draws when the coil is cold. Consecutive draws (chain
vaping) will get a lower pre-heat power %.
This manual suits for next models
1
Table of contents