User Manual
Line-interactive UPS
ECO II-801/ECO II-1k LED/ ECO II-1K LCD
ECO II-1.2k LED/ ECO II-1.2K LCD/ ECO II-1.5k LED
ECO II-1.5K LCD/ECO II-2.2k LED/ ECO II-2.2K LCD
IMPORTANT SAFETY INSTRUCTIONS
(SAVE THESE INSTRUCTIONS)
This manual contains important safety instructions. Please read and follow all instructions carefully during installation and
operation of the unit. Read this manual thoroughly before attempting to unpack, install, or operate your UPS.
CAUTION! To prevent the risk of fire or electric shock, install in a temperature and humidity controlled indoor area free of
conductive contaminants. (See the specifications for the acceptable temperature and humidity range.)
2.With the UPS unit off and unplugged, connect the computer, monitor, and any externally powered data storage device
(Zip drive, Jazz drive, Tape drive), etc. into the battery power supplied outlets. DO NOT plug a laser printer, copier,
space heater, vacuum, paper
shredder or other large electrical device into the battery power supplied outlets. The power demands of these devices
will overload and possibly damage the unit.
3.Plug the UPS into a 2 pole, 3 wire grounded receptacle (wall outlet). Make sure the wall branch outlet is protected by a
fuse or circuit breaker and does not service equipment with large electrical demands (e.g. air conditioner, refrigerator,
copier, etc. Avoid using extension cords.
4.Press the power switch to turn the unit on. The power on indicator light will illuminate and the unit will "beep".
5.If an overload is detected, an audible alarm will sound and the unit will emit one long beep. To correct this, turn the UPS off
and unplug at least one piece of equipment from the battery power supplied outlets. Wait 10 seconds. Make sure the circuit
breaker / fuse is normal and then turns the UPS on.
6.To maintain optimal battery charge, leave the UPS plugged into an AC outlet at all times.
7.To store your UPS for an extended period, cover it and store with the battery fully charged. Recharge the battery every
three months to ensure battery life.
CAUTION! To reduce the risk of overheating the UPS, do not cover the UPS' cooling vents and avoid exposing the unit to
direct sunlight or installing the unit near heat emitting appliances such as space heaters or furnaces.
CAUTION! Do not attach non-computer-related items, such as medical equipment, life-support equipment, microwave ovens,
or vacuum cleaners to UPS.
CAUTION! Do not plug the UPS input into its own output.
CAUTION! Do not allow liquids or any foreign object to enter the UPS. Do not place beverages or any other liquid-containing
vessels on or near the unit.
CAUTION! In the event of an emergency, press the OFF button and disconnect the power cord from the AC power supply to
properly disable the UPS.
CAUTION! Do not attach a power strip or surge suppressor to the UPS.
CAUTION! Unplug the UPS prior to cleaning and do not use liquid or spray detergent.
CAUTION! Servicing of batteries should be performed or supervised by personnel knowledgeable of batteries and the
required precautions. Keep unauthorized personnel away from batteries.
CAUTION! The battery supply should be therefore disconnected in the plus and minus pole at the quick connectors of the
battery when maintenance or service work inside the UPS is necessary.
CAUTION! Internal battery voltage is 12Vdc. Sealed, lead-acid, 6-cell battery.
CAUTION! When replacing the batteries, use the same number and type of batteries.
CAUTION! Do not dispose of batteries in a fire. The battery may explode. Do not open or mutilate the battery or batteries.
Released electrolyte is harmful to the skin and eyes.
INSTALLING YOUR UPS SYSTEM
UNPACKING
The box should contain the following:
(1) UPS Unit x1; (2) User Manual x 1
OVERVIEW
The UPS provides automatic voltage regulation for inconsistent utility power, and provides battery backup during power
outages, and ensures consistent power to your computer system.
HARDWARE INSTALLATION GUIDE
1.Your new UPS may be used immediately upon receipt. However, recharging the battery for at least 8 hours is
recommended to ensure that the battery's maximum charge capacity is achieved. Charge loss may occur during shipping
and storage. To recharge the battery, simply leave the unit plugged into an AC outlet. The unit will charge in both the on
and off position.
BASIC OPERATION
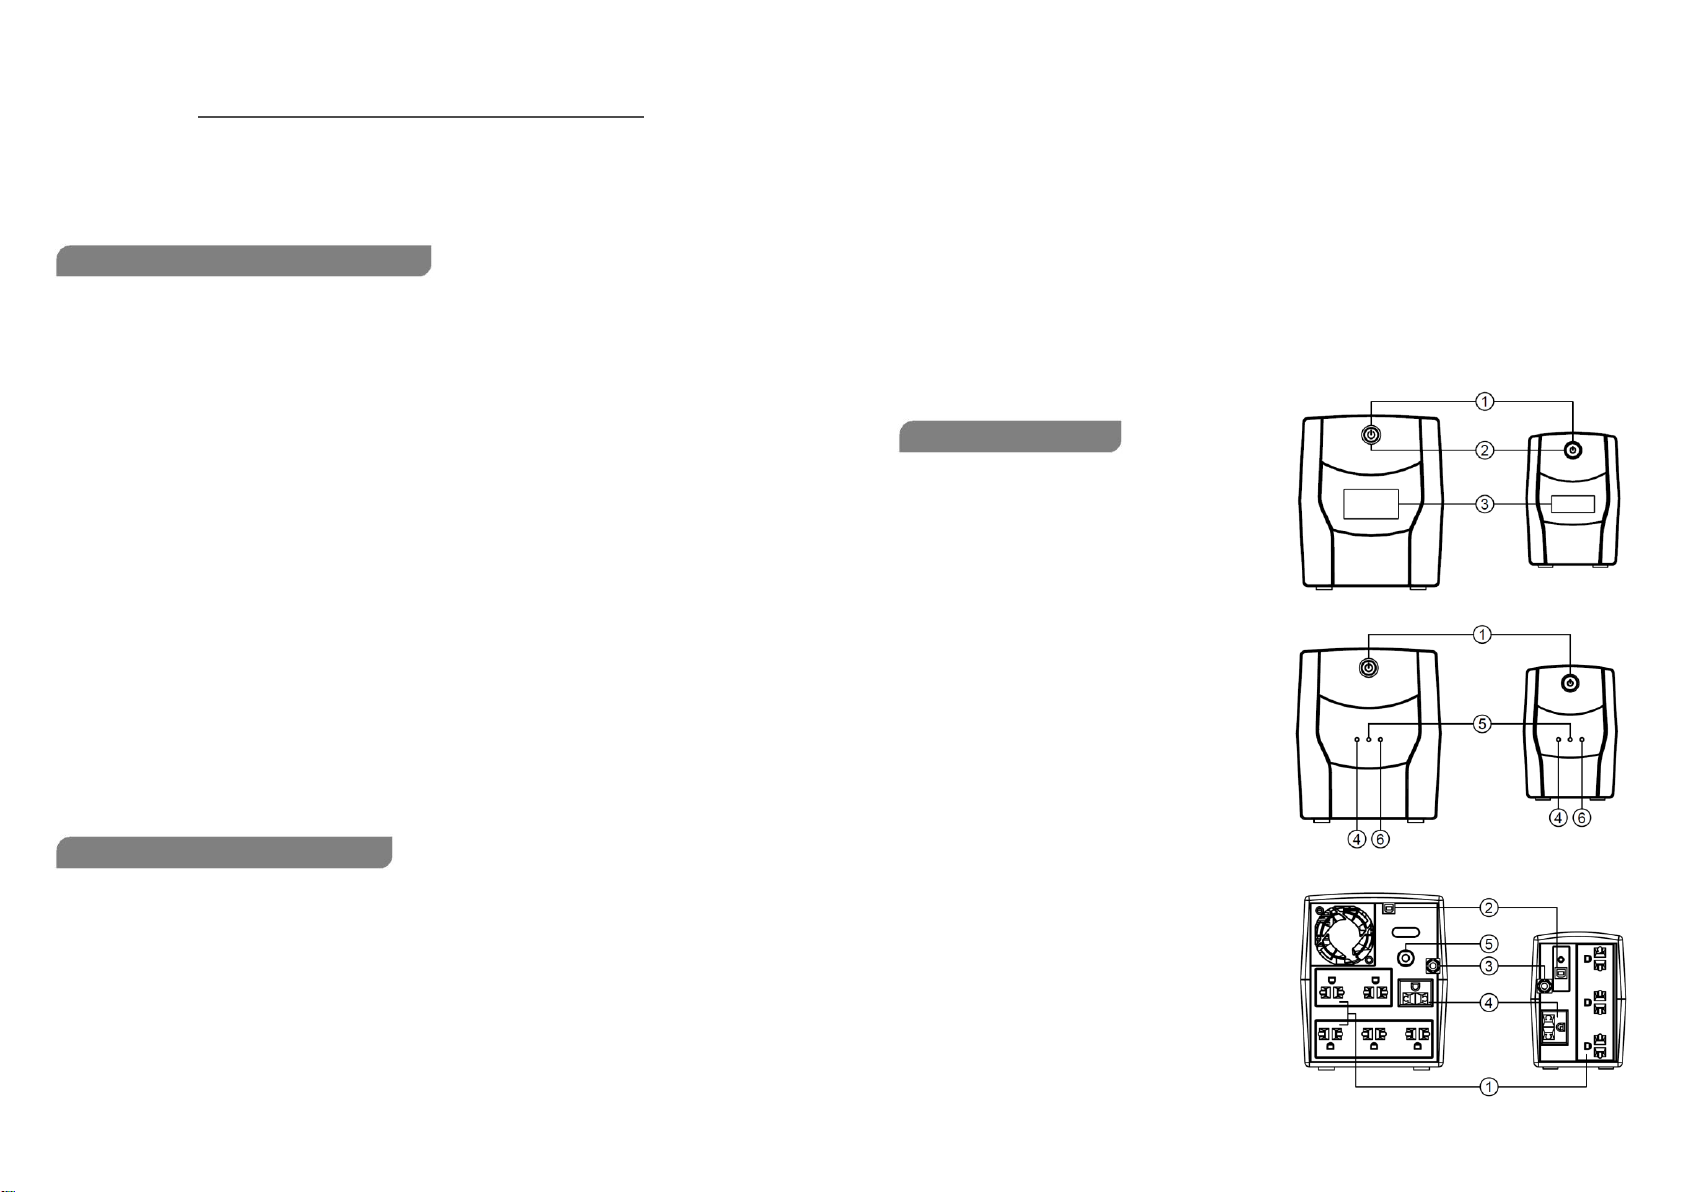
Front panel
1. Power Switch
Press the switch for 2 seconds to turn the UPS ON/OFF
Mute setting: The audible alarm can be turned OFF or ON
by quickly pressing the Power button twice. The default
setting is for the Alarm On.
2. Power On Led Indicators
This LED is illuminated when the UPS is working.
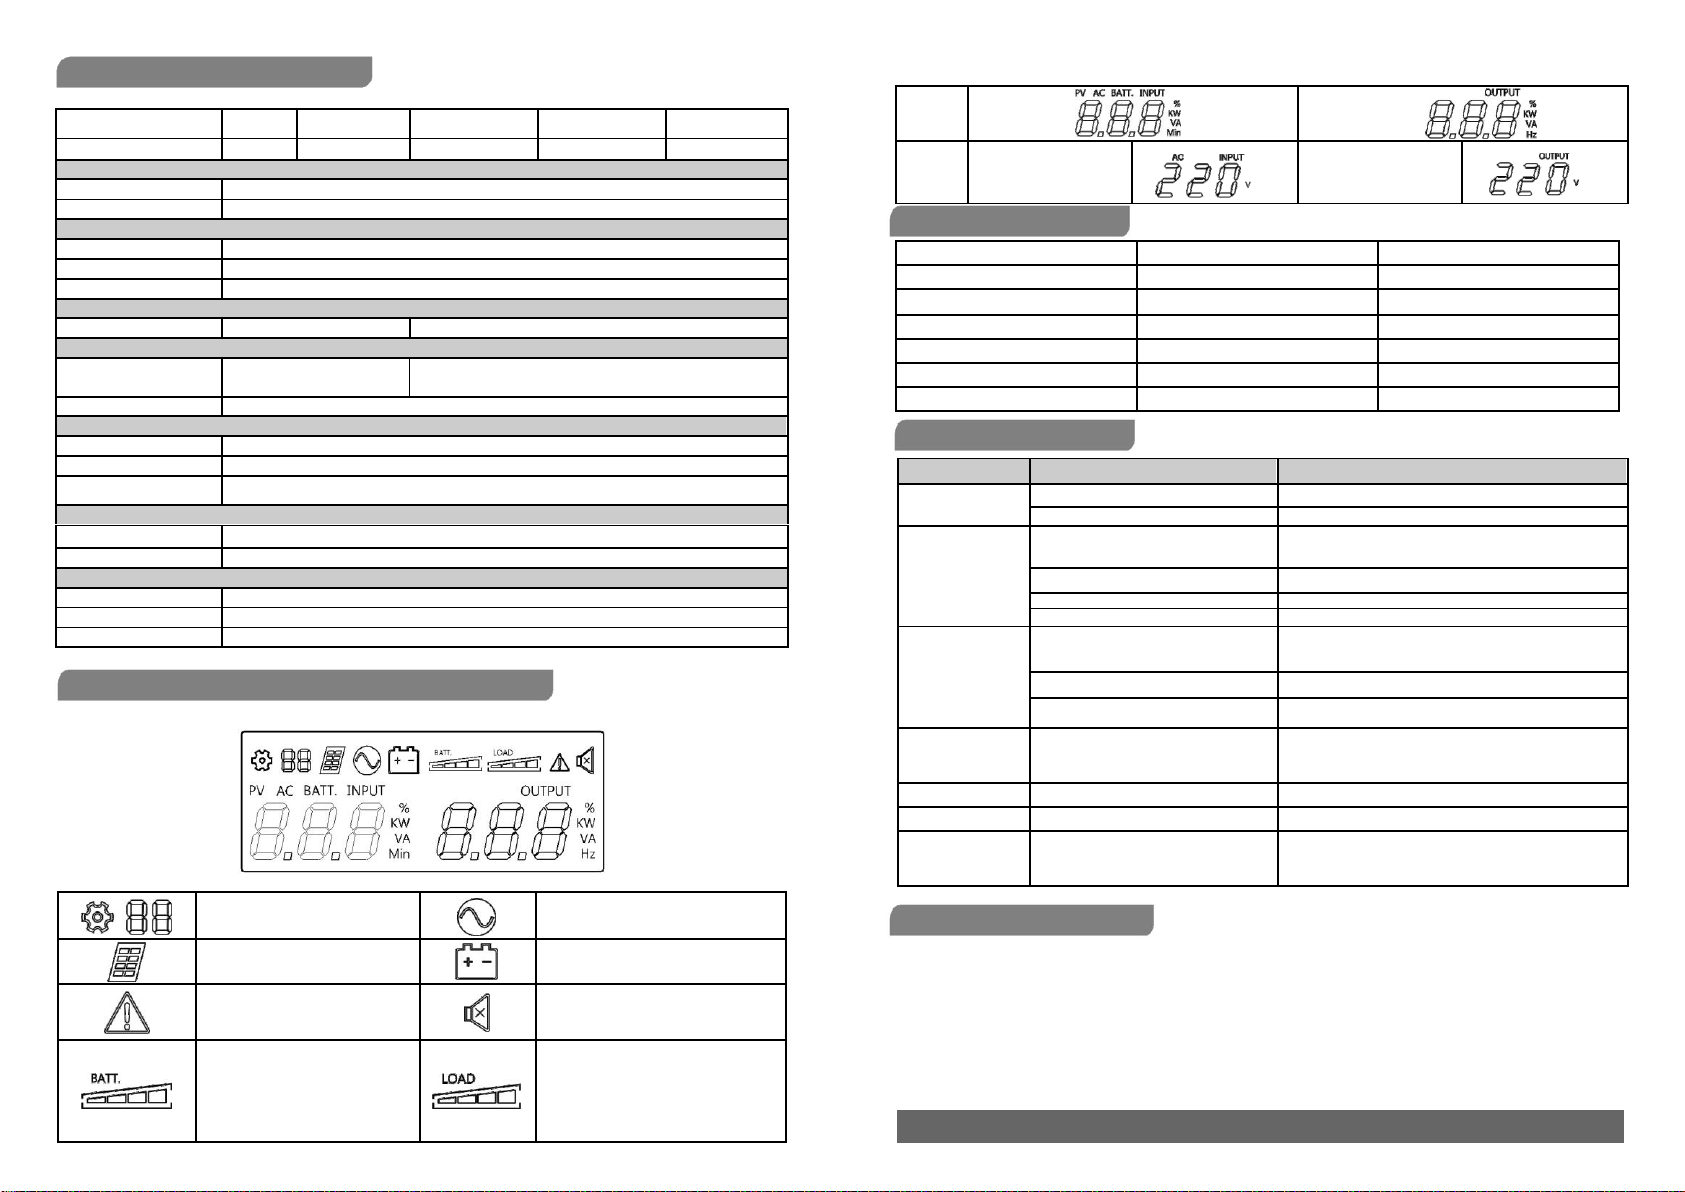
3. LCD Display
The LCD will display the UPS status including input
voltage, output voltage, percentage of load and
battery…etc.
4. AC Mode LED
The green LED will light when utility power is normal.
5. Battery Mode LED
The yellow LED will light when input power is abnormal
and the unit will work in battery mode.
6. Fault LED
The red LED will light when fault or over load occurs.
Rear panel
1. Battery Backup & Surge Protected Outlets
Provide battery backup and surge protection. They ensure
power is provided to connected equipment over a period of
time during a power failure.
2. USB COMM. Port(only for LCD models)
This port allows connection and communication from the
USB port on the computer to the UPS unit.
3. Input power cord Connect to utility power.
4. Surge Protected Outlets
Provides surge protection for devices that don’t
require battery backup.
5. Input Circuit Breaker
The circuit breaker provides optimal overload protection.
ECO Ⅱ-1.2/1.5/2.2K LCD ECO Ⅱ-1 K LCD
ECO Ⅱ-1.2/1.5/2.2k LED ECO Ⅱ-1k LED/801
ECO Ⅱ-1.2/1.5/2.2K ECO Ⅱ-1K/801


 Plus Startup manual")


