Syride Sys'ky User manual

1
Sys’ky
®
User Guide
Guide d’utilisation
Guíadelusuario
FR
EN
ES

0
Preambul
Welcome in the community of Syriders! Your Sys' ky has the most recent technologies
which will enable you to improve and to follow your in flight performances. You will be also able to
constitute a unique and very detailed flight notebook. Your practice of the paragliding will take an other
dimension with Sys' ky on your sail!
As a member of the community, you'll be a key player in the evolution and continuous
improvement of the product. The range of innovative sensors included in the Sys'ky allows the
development of future functions... We encourage you to share your suggestions for your greater
satisfaction.
Don't forget to consult the INFO of our website http://paragliding.syride.com/ for more
information on the capabilities of your Sys'ky.
The entire Syride team wish you beautiful flights…

1
Contents
I. Installing Syride communication software p2
II. Mounting the product on the sail p3
III. Recharging the battery p4
IV. Configurations p5
V. Advanced configurations p7
VI. Tracking a flight p9
VII. Knowing the GPS Status p11
VIII. Deleting a flight p12
IX. Warning message p13
X. Transfering flight data p14
XI. Parameters p17
XII. Suggestion of use p18
EN

2
I. Installing Syride Communication Software
1. Download the latest version of the
software of communication by visiting
this Web address:
http://paragliding.syride.com/support.php
2. Follow the instructions to install it on
your Windows PC / Linux or MAC OS.
3. An icon is located in the task bar to
detect the connection of the Sys'ky on a
USB port.
4. The software will automatically start
with your operating system.
10:39

3
II. Mounting the product on the sail
1. Syride suggests mounting the base
receiving the Sys'ky on the elevator of
your paraglider. We recommend that
you mount on which you mostly turn /
wrap so that it is in your field of vision.
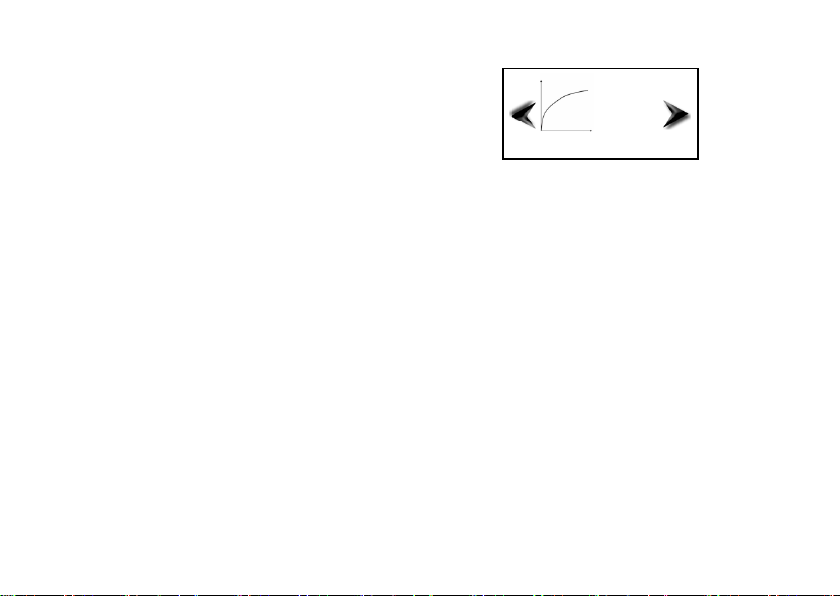
2. Remove the lift of the main link in your
selette and pass the base as in the
diagram on the right. Position the base
the lowest possible to avoid messing
with the accelerator.
3. You can secure the Sys'ky at the base
from a strap in the hole provided for this
purpose.
4. The position of the Sys'ky makes
maneuvering possible in flight with
gloves and without letting go.
EN
Back

4
III. Recharging the battery
1. Simply connect your Sys’ky USB cord
behind the cache on a the USB outlet
to a computer.
2. You can view the status directly on the
screen of your SYS. The full charge
lasts 2 hours.
3. When your battery is full the
"CHARGED" indication is displayed.
4. Disconnect the product to stop his
support. The Li-ion battery has no
memory effect.
CHARGING…
CHARGED

5
IV. Configurations
1. Press the Central button and the right
arrow to access the main menu.
2. In the main menu, press the central key
once you're on "SETUP"..
3. The "Info" screen informs you of the
State of battery charge, the amount of
memory remaining, the GPS reception
and the version of your software.
4. The "MAIN SCREEN CONFIG" screen
allows to configure the ordonancement
of the information that will be displayed
on your flight. Missing information will
be displayed on another screen.
SETUP
Sys - ky
Battery : 80%
Memory : 87%
GPS :FIXED
Soft : V..
INFOS
MAIN SCREEN CONFIG
Finesse
speed
VARIO
EN
START

6
5. The "BEEPER CONFIG" screen
changes the sound parameters of the
variometer:
Beep down = enable the pager when you get down
Beep up = activate the pager when you get up
Accelero. = use accelerometers in addition to the
pressure sensor (gain in reactivity).
6. The two next screens let you modify
your units of temperature (° C or ° F)
and distance (m or ft).
7. Return to the main menu by pressing
the centra button when you see "BACK
HOME".
°C / °F
77°F
METER / FEET
BACK HOME
Beep down : OFF
Beep up : ON
Accelero. : ON
BEEPER CONFIG
METER

7
V. Advanced configurations
1. In the main menu, press the central key
once you're on "SETUP”.
2. In the setup menu, press the central
key once you're on "ADVANCED
SETUP”.
3. You can change the up sensitivity. You
can settle it by pressing the center
button. Default = 0.5m/s (1.6ft/sec)
4. You can change the down sensitivity.
You can settle it by pressing the center
button. Default = -1m/s (-3.2ft/sec)
EN
SETUP
ADVANCED SETUP
UP SENSITIVITY
DOWN SENSITIVITY
-1m/s
0.5m/s

8
5. The filtering smoothes the variometer
informations to make it more reliable.
The reaction time will be impacted.
low = filtering on 0.5sec (reagent but risk of
nuisance tripping.)
medium = filtering on 1sec (normal configuration)
high = filtering on 1.5sec (less reactive, little
nuisance tripping)
FILTERING
Medium

9
VI. Flight tracking
1. Press on the central key and the right
arrow to access the main menu.
2. Before taking off, press on the central
key once you are on « New Flight ». the
recording starts…
3. Fly and give it the best!
The screen « Main screen » posts the
vario and information that you defined
in Options.
It is possible in flight to completely shut
off the sound of the vario
(transition/landing). Simply press the
central key when on « Main screen"
Tap a second time to reactivate the
sound.
NEW FLIGHT
MAIN SCREEN
EN
0.9
8.4 fi
31 km/h
START

10
4. The screen « ALTERNATIVE
SCREEN » indicates G-force (see
http://paragliding.syride.com/support.ph
p?faqCat=3&faqQuestion=5 ) Flight
time depends on your configuration :
altitude, speed and smoothness.
5. You can record a geographical point by
pressing the central key when on
« Save Position » screen.
6. The screen « COMPAS » indicates the
magnetic compass as well as the
principal cardinal direction which you
follow (available soon).
7. To stop recording, go to « End Flight »,
press the central key, then on the right
arrow.
END FLIGHT
SAVE POSITION
ALTERNATIVE SCREEN
1.2g
1856m
0h13m
4,3m
+250ft
COMPAS
NE
49°

11
VII. Knowing the GPS Status
The very first GPS reception can take up to 20 minutes (only outside).
We recommend turning on your Sys’ky on a few minutes before taking off
until you have GPS reception.
1. GPS status is trackable permanently on
the top right of the screen:
blinking : searching for reception
good quality signal
high quality signal
2. Or in the set-up screen of the main
meny:
Fixing = GPS signal pending
Fixed = GPS signal available
EN
NEW FLIGHT
Sys - ky
Battery : 80%
Memory : 87%
GPS :FIXED
Soft : V..

12
VIII. Deleting a flight
1. In the main menu, press on the central
key when you are on « Delete Flight ».
2. Choose with the directional arrows
which flight you wish to delete.
3. Validate by pressing the right key.
4. Come back to the main menu by
pressing the central key when you see
« Back home ».
FLIGHT INFO
DEL FLIGHT
ARE YOUR SURE ?
BACK HOME
FLIGHT #1
DATE 25 nov.
START TIME 13h56
DURATION 0h13m12s
YES

13
IX. Warning message
Posts at the start of use or during usage. The battery is at 10% and
recharging is necessary.
Posts if the Memory is 90% full. You need to transfer or delete flights.
Posts when the Memory is full. Transfer or delete flights.
If the temperature flickers, it means the temperature exceeds 50°C/120°F.
Your wing and Sys’ky are in risk if you do not protect them.
Memory < 10%
Memory FULL
124°F
EN
SETUP

14
X. Transfering flight data
1. Make sure you have installed the
software to transfer (Icon must appear
in the taskbar)
2. Turn on and plug your device with the
usb cord.
3. Click on Options and Setup.
4. To use the advanced flight analyzer on
syride.com, you muste enter your email
and password of your Syride account (
http://paragliding.syride.com )
Otherwise check "Keep a copy of IGC
files on my computer” and click “OK”.
10:39

15
5. Validate sending the data by clicking
« send flights ».
6. Go on your profile on the Syride
website to input the flight information.
Click the « visible » box if you do not
wish to show this flight in the public
profile.
7. Choose a location or create a new one.
8. Wait a few minutes for our server to
analyse your flight. Refresh the
webpage. In some instances, the data
will manually analysed and it may take
up to 24hrs to see the data posted.
EN

16
9. You can look at your personal evolution on the flight page through locaiton and time.
10. You can also compare your stats and
performances to the other riders!

17
XI. Parameters
Here is a list of parameters preprogrammed in your Sys’ ky in order to imrpove its use and
autonomy:
The maximum flight time is 10 hours.
When recording, in case of no mouvement at all of the Sys’ky for more than 3 minutes,
your Sys’ky will go back to the main menu. It most likely means you are no longer in flight.
Your Sys’ky will turn off if idle –without pressing any keys –for more 20 minutes, unless
you are recording a flight.
The Sys’ky is capable of tracking up to 16h of flight. The maximum number of flights is 10.
Then you must transfer or delete flights to record a new one. Note that flights data are
automatically deleted from the device upon transfer onto the website.
The clock parameters are set up based on the GMT hour of the GPS Geographical
location as well as the hour input into your computer.
EN

18
XII. Suggestion of use
We recommend turning on your Sys’ky on a few minutes before taking off
until you have GPS reception.
Click « New Flight » to record only when you are going to take off.
Holes on each side of your Sys’ky allow you to secure it on its base using a string.
If the Sys’ky is very hot and you fly in very cold air, fog can appear on the screen. It will
dissipate within minutes.
Table of contents
Popular Aircraft manuals by other brands

Air Creation
Air Creation Pixel 303 XC Instruction and maintenance handbook

Cessna
Cessna T182 Series Service manual

MAULE
MAULE MXT-7-180 Maintenance manual

RAM Outdoor Decor
RAM Outdoor Decor Tiki Bamboo Bar Product Info and Assembly Instructions

Topmodel CZ
Topmodel CZ Marabu V manual

Alexander Schleicher
Alexander Schleicher AS 33 ES Flight manual