T-Mobile Communication Centre User manual

T-Mobile
Communication
Centre
User manual

1. Introduction 3
2. Hardware and Software Requirements 4
3.Software Installation and Setup of Access
through Internet 4G Service 5
4. Software Installation and Setup of Access
through GPRS/EDGE 7
5. Main Window 10
6. Connection and Disconnection 11
7. WLAN Settings 12
8. Sending SMS 13
9. NetworkSelection and Logging-Off the Network 14
10. Equipment Management 15
11.APN Management 16
12. For Advanced Users 19
13. Abbreviations 20
Content

3
1. Introduction
nAlcatel One Touch 535
nAlcatel One Touch 715
nAlcatel One Touch 735
nEricsson T39
nEricsson T65
nLGB2050
nLGC1200
nLG C2200
nLG C3300
nLG L1100
nLG L5100
nMotorola C450
nMotorola C550
nMotorola E398
nMotorola E550
nMotorola L6
nMotorola T720i
nMotorola Timeport
nMotolora V3
nMotorola V66
nMotorola V300
nMotorola V547
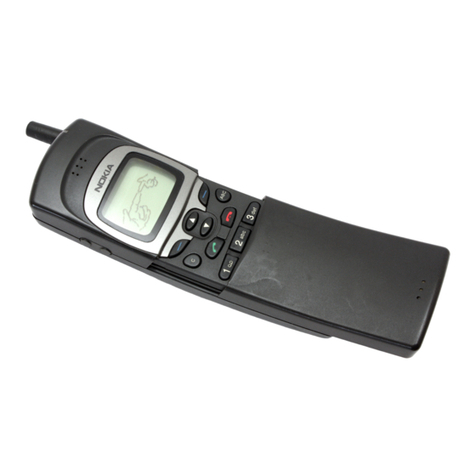
nNokia 3220
nNokia 3650
nNokia 5100
nNokia 5140
nNokia 5140i
nNokia 6020
nNokia 6021
nNokia 6100
nNokia 6101
nNokia 6170
nNokia 6220
nNokia 6230
nNokia 6230i
nNokia 6310
nNokia 6310i
nNokia 6510
nNokia 6600
nNokia 6610
nNokia 6610i
nNokia 6630
nNokia 6650
nNokia 6670
nNokia 6800
nNokia 6820
nNokia 7200
nNokia 7210
nNokia 7250
nNokia 7250i
nNokia 7260
nNokia 7600
nNokia 7610
nNokia 7650
nNokia 8310
nNokia 9300
nNokia 9500
nNokia D211
nNokia N70
nOption EDGE Combo
nOption Globetrotter
nPhilips Fisio 620
nSagem myC-4
nSagem myX-5
nSagem myZ-55
nSamsung SGH-D600
nSamsung SGH-D600E
nSamsung SGH-E100
nSamsung SGH-E300
nSamsung SGH-E330
nSamsung SGH-E630
nSamsung SGH-E700
nSamsung SGH-E720
nSamsung SGH-E800
nSamsung SGH-E820
nSamsung SGH-S300M
nSamsung SGH-V200
nSamsung SGH-X100
nSamsung SGH-X450
nSamsung SGH-X460
nSamsung SGH-X490
nSamsung SGH-X660
nSharp TM100
nSiemens C55
nSiemens C60
nSiemens C72
nSiemens C75
nSiemens ES75
nSiemens M55
nSiemens M65
nSiemens MC39i
nSiemens MC60
nSiemens ME45
nSiemens ME75
nSiemens MT50
nSiemens S45
nSiemens S55
nSiemens S65
nSiemens SL55
nSiemens ST55
nSony Ericsson D750i
nSony Ericsson GC85
nSony Ericsson K700i
nSony Ericsson P800
nSony Ericsson P900
nSony Ericsson P910i
nSonyEricsson T230
nSonyEricsson T300
nSony Ericsson T310
nSony Ericsson T68i
nSonyEricsson T610
nSony Ericsson T630
nSony Ericsson W800i
nSonyEricsson Z600
nT-Mobile MDA II
nT-Mobile MDA III
nT-Mobile MDA compact
nT-Mobile MDA Vario
T-Mobile Communication Centre allows easy setup of Internet
access and also access to the Internet from your computer using
mobile data transmission provided within the framework of
Internet 4G, GPRS/EDGE, and WLAN services.
If you decide to use the T-Mobile Communication Centre, you do not
have to spend time by installing the modem and configuring your
connection. The software does everything for you. It is only enough to
connect the modem or telephone to your computer using a cable,
Bluetooth, infrared port, or insert a suitable PCMCIA card into your
notebook and launch the installation file of this software.
It takes several minutes for the program to guide you through the
installation process and you can immediately start using your Internet
connection through Internet 4G, GPRS/EDGE, or WLAN service.
Internet access through Internet 4G service requires:
na4G Modem or 4G PC Card
naSIM cardwith T-Mobile Internet 4G service activated
na4G Modem connected toyour computer by cable or having
a 4G PC Card inserted
Internetaccess through GPRS/EDGE requires:
na telephone with GPRS/EDGE data transmission support
nactive T-Mobile GPRS/EDGE service (this service can be activated
through T-Mobile’s info-line free of charge)
natelephone connected to your computer by cable, Bluetooth, or
infrared port
You can use the T-Mobile Communication Centre for GPRS/EDGE
connection together with the following handsets/devices:
The software supports all GPRS/EDGE telephones sold through the
sales network of T-Mobile Czech Republic a.s. The list of supported
handsets/devices is displayed during software installation and also
at any time during a new device installation (see step 7 in Section
4below). Should your device be missing in the list, it is possible to
upgrade the software by clicking on Aktualizace programu (Software
Update) in Nastavení (Settings) menu available after clicking on the
button with key symbol (the link will take you to the page from which
the latest version of T-Mobile Communication Centre can be
downloaded).
T-Mobile Communication Centre is available in T-Mobile brand stores
on a CD or it can be downloaded free of charge from
www.t-mobile.cz/tmcc.

4
Minimal PC Configuration for a 4G Modem
Minimal Hardware Configuration:
nPentium-class II processor (300 MHz)
n64MB RAM (128 MB recommended)
n10 MB of free disk space
nUSB connector or Ethernet port (for optional cable)
nCD-ROM drive
Supported Operating Systems:
nMicrosoft Windows 98 (SE)
nMicrosoft Windows ME
nMicrosoft Windows 2000 (PC with one processor, administrator’s
rights required)
nMicrosoft Windows XP Home (administrator’s rights required)
nMicrosoft Windows XP Professional (administrator’s rights required)
Minimal PC Configuration for a 4G PC Card
Minimal Hardware Configuration:
nPentium-class II processor (300 MHz)
n64 MB RAM (128 MB recommended)
n10MB of free disk space
nCD-ROM drive
nPCMCIA type II slot
Supported Operating Systems:
nMicrosoft Windows 98 (SE)
nMicrosoft Windows ME
nMicrosoft Windows 2000 (administrator’s rights required)
nMicrosoft Windows XP Home (administrator’s rights required)
nMicrosoft Windows XP Professional (administrator’s rights required)
2. Hardware and Software Requirements

Insert the installation CD into your computer and in displayed
menu select T-Mobile Communication Centre installation
according to prefered language (Czech/English) or run the
installation package downloaded from www.t-mobile.cz/tmcc.
Step 1
After initialization of the installation you will be welcomed be the
wizard which will inform you about its current status in all next steps:
Choose the required connection method and press Finish.
Step 2
Connect your 4G Modem or 4G PC Card to your computer and wait
for the operating system to install relevant drivers. This operation may
take several minutes.
Step 3
Press Close.
Step 4
Press Next.
5
3. Software Installation and Setup of Access
through Internet 4G Service

Step 5
Read the license agreement carefully and if you agree, press Next.
Step 6
Confirm the folder where the application should be installed. You can
choose your preferred folder by clicking the Browse button. Press
Finish button.
Step 7
The application is now installed in your computer. The wizard continues
with the installation of the device. The T-Mobile Communication Centre
will guide you through the process of connected device detection.
The detection usually takes several seconds.
When your device is visible in the list, select it by clicking the mouse
and press Finish.In the event of any problems with the detection we
recommend that you press Back button, disconnect the device,
reconnect it again and repeat the detection process.
Step 8
This step installs the connected device and sets up the Internet
connection through Internet 4G service.
Click Close.
Now your computer is ready for the connection to the Internet over
T-Mobile Internet 4G service.
6

7
Insert the installation CD into your computer and in displayed
menu select T-Mobile Communication Centre installation
according to prefered language (Czech/English) or run the
installation package downloaded from www.t-mobile.cz/tmcc.
Step 1
After initialization of the installation you will be welcomed be the
wizard which will inform you about its current status in all next steps:
Choose the required connection method and press Finish.
Step 2
Press Close to continue.
Step 3
Press Next.
Step 4
Read the license agreement carefully and if you agree, press Next.
4. Software Installation and Setup of Access
through GPRS/EDGE

8
Step 5
Confirm the folder where the application should be installed. You can
choose your preferred folder by clicking the Browse button. Press
Finish button.
Step 6
The application is now installed in your computer. The wizard will
continue with device installation.
Notice:
Now connect the handset to the computer via cabel, bluetooth or
infrared port or insert the PCMCIA card into your notebook!
In some cases the connecting of the device can cause automatic
detection of the device by Windows. If you are asked to confirm
the installation of standard drivers (warning regarding the missing
digital signature) confirmthat bypressing Yes button!
If you aregoing toinstall GPRS PCMCIA cardOption Globetrotter
it is necessary toswitch offthe PIN lock in the SIM-cardyou are
using together with it. The PIN code has to be switched off always
you are using the PCMCIA card together with T-Mobile
Communication Centre (e.g. during GPRS connection
establishing). In case of must to switch on the PIN lock it is
necessary to install the original driver from Option CD – more in
chapter 9. If it is not quite necessary to use the PIN lock we don’t
recommend the installation of the original driver because of
possible problems with some configurations of Windows
operating system. If the PIN lock is switched off the installation
of T-Mobile Communication Centre only is sufficient.
Press Next.
Step 7
The list of supported devices will be shown. If your device purchased
within the sales network of T-Mobile Czech Republic a.s. is not
included in the list, it is possible to upgrade the software by clicking
on Software Update in Settings menu available after clicking on the
button with the key symbol (the link will take you to the page from
which the latest version of T-Mobile Communication Centre can be
downloaded). If you are using an equipment connected through
infrared port, it maybe also necessary to use the guide for infrared
portactivation in your telephone (see the check box).
Press Next.

Step 8
The T-Mobile Communication Centre will detect the connected
device. The detection usually takes several seconds.
When your device is visible in the list, select it by clicking the mouse
and press Finish.In the event of any problems with the detection we
recommend that you press Back button, disconnect the device,
reconnect it again and repeat the detection process.
Step 9
This step installs the connected device and sets up the Internet
connection through GPRS.
Note: If you are prompted by Windows to confirm the drivers
installation without digital signature, confirm the prompt by
clicking Yes!
Press Close.
Now your computer is ready for the connection to the Internet over
T-Mobile GPRS service (APN Internet).
9

After the succesful installation of the T-Mobile Communication
Centre software its availabilitty is indicated by the icon on the
Windows task bar.
The software starts automatically in the background when Windows
is restarted. It can be accessed at any time by double-clicking on its
icon on the task bar.
The main window in the default status:
The main application windowif your PC supports WLAN technology
and the T-Mobile HotSpotservice is accessible:
More details about the connection through WLAN can be found in
Section 7 – WLAN Setup.
Description of Main Window’s Items
Menu of installed device
This list enables you to select the equipment through which you will
connect to the Internet. If the software has just been installed, only
one device will be shown here (or other modems previously installed
in the computer). T-Mobile Communication Centre allows you to have
multiple devices installed in your computer simultaneously (see
Section 9) and tochoose the one you need for current connection
from the pull-down menu. Devices installed through T-Mobile
Communication Centrearehighlighted with red color and they serve
for connection through Internet 4G or PRS/EDGE services.
Information about Transmitted Data Volume
Information about transmitted data volume can be found right from
the name of the currently selected device. The values apply to the
selected device. If you use Internet 4G or GPRS/EDGE devices with
your computer moreoften, you can separately watch the data
volumes transmitted through each of these services. The values are
displayed in kB.
Control Buttons
Application control buttons can be found in the bottom part of the
window (described from left to right):
nkey – displays configuration options (settings)
nreceiver – connects the computer to the Internet using the selected
device
nmobile telephone – displays a window with SMS editor and with
signal/battery gauges; in case of a 4G device, technical information
about the connected device and effective signal strength/battery
gauges is displayed
nwaste bin – used to uninstall the selected device
nquestion mark – help
The buttons are available according to the current status of the
application. It is not for example possible to send SMS messages and
connect through GPRS at the same time. Unavailable buttons are
gray, available buttons change their color to red when the mouse
cursor is placed over them. Closing the window (using the top right
button with cross) minimizes the application. It can be recalled again
by double clicking on its icon on Windows task bar. If you want to
close the application, click once on the application
icon on the task bar and select Exit.
10
5. Main Window

11
6. Connection and Disconnection
For the possibility to connect to the Internet, at least one Internet
4G or GPRS/EDGE device must be installed. It is usually installed
already during the installation of the T-Mobile Communication
Centre, however, it can be carried out at any time – see the
procedure described in Section 9.
Step 1
Select the handset or card you want to connect with from the
pull-down menu with the list of available devices.
Step 2
Make sure that the device is correctly connected to the computer
(by cable, Bluetooth, infrared port, or PCMCIA card).
Step 3
Press the button with receiver and await connection establishment.
The connection progress is displayed on the screen.
If you havesetup multiple connections for the particular device
(see Section 9), you will be first prompted to choose the required
connection. However, you will most probably use only the Internet
connection (through APN Internet), which will be automatically used
as default connection.
Note: If you are going to use a 4G Modem or a 4G PC Card, the
PIN code request on your SIM card is active and you will be
prompted to enter your PIN code before the first connection. It is
possible to deactivate the PIN code protection in the window used
for PIN entry.
If you are going to use Option Globetrotter GPRS PCMCIA card, it
is necessary to deactivate the PIN code request on your SIM card!
The PIN request must be also deactivated whenever you use this
card together with T-Mobile Communication Centre (for example
when connecting through GPRS). Standard drivers supplied with
the Option card must be installed when the PIN code protection is
required for the data SIM card used – see the procedure
described in Section 11. Unless the PIN code is urgently required,
we do not recommend installation of standard Option drivers due
to possible problems with some Windows configurations. When
the PIN code request on the SIM card is off, it is enough to install
the T-Mobile Communication Centre.
Once the connection is setup, the windowwill display a duration of
connection and a meter of total data volume transmitted during the
current connection. The „Details“ button is displayed in the right
corner.It allows to get more informatin about current conectin.
After you pressed the „Details“ button the window will display a meter
of data volume transmitted during the current connection and
graphic connection speed meter, which informs you about the
current transmission speed. The values are displayed in bytes or
kilobytes per second. It is also possible to set up transparency of an
external graph displayed in the bottom right screen corner. This
graph can be used for continuous monitoring of the transmission
speed (the graph is transparent it is possible to click through it).
When the minimal transparency value is set (the indicator next to the
speed meter is moved far left), the external graph will not be shown.
The following information can be found right from the graphic speed
meter:
nduration of connection – in hh:mm:ss format
ncurrent – current transmission speed in bytes or kB per second
nmaximum – maximal speed of transmission reached during current
session measured in bytes or kilobytes per second
ntotal – amount of data sent and received during the current session
measured in bytes or kilobytes
When a connection is active, the button with receiver changes its
appearance to a replaced handset. Clicking this button will terminate
the connection.
When the particular GPRS/EDGE device is connected, sending of
SMS messages or its removal will not be possible – relevant buttons
will not be accessible in such case. If you use and have multiple
devices installed in the T-Mobile Communication Centre, it is possible
to send SMS messages through another device. It is however
necessaryto select it from the pull-down menu with the list of GPRS
devices and only then click on the button with the envelope symbol.
Note: Actions relating to clicking on connection/disconnection
button always relate to the device selected from the list. This
means that if you choose a device from the list and press the
receiver button, the connection will be established. If you
subsequently select another device and click the receiver button
again, the current connection will not be terminated – instead, the
system will attempt to establish a new connection through the
newly selected device. If you wan to end the current connection in
such case, you have to re-select the connected device from the list
and press the receiver button. Please note the receiver position
shown on the button – it informs you whether clicking the button
will result in connection establishment or termination.

T-Mobile Communication Centre application can be used for easy
connection setup and Internet access also through a high-speed
wireless technology (WLAN). If your notebook support WLAN or if
you have a WLAN card inserted, the connection to the Internet is
very easy.
If a recognized WLAN card is available in your computer and the
application TMCC recognized that T-Mobile HotSpot service is
available, the TMCC window is extended by a top part.
The customer can enter his/her name and password obtained within
the framework of the T-Mobile HotSpot service and log into the
network by clicking on Login. Name and password are stored for
future use.
You can log off the T-Mobile HotSpot service by clicking the Log off
button.
12
7. WLAN Settings

13
You can send SMS messages using the devices installed with
T-Mobile Communication Centre. The messages will be sent in the
same way as in the case of sending them directly from the
handset. With T-Mobile Communication Centre you can use the
advantage of comfortable and fast writing of the messages using
the computer keyboard.
Note: the SMS service is not available for the devices intended for
Internet connection through the Internet 4G service.
Select the device which you want to use for sending SMS in the
menu and connect the particular device to the computer (cable,
bluetooth or infrared port or insert the PCMCIA card).
This is the window for sending SMS which is viewed after clicking
the button with the picture of message:
It is possible to send SMS via the particular device only in case it is
not connected via GPRS.
You can write the message of up to 160 characters in the text field.
Right to that you can input the phone number of the recipient or you
can use the list of contacts read from SIM-card or from the handset
(the reading of the list takes several seconds depending on the
number of stored contacts).
Left to the text field is the indicator of signal level and its value in
decibels (dB) and on the opposite side of the window you can find
the indicator of battery level. These elements are available in several
seconds after opening this window (communication between
computer and the device takes several seconds for getting this data).
Send button is disabled if it is not possible to send the message or
the message is being currently sent. If you press the button it gets
disabled. In the time it is enabled again the message was
successfully sent.
For closing this part of the window for sending the SMS press the
button with pictureof message again. Please notethat actions
related to this button are relevant for the device currently selected
in the menu.
8. Sending SMS

14
9. Network Selection and Logging-Off
the Network
T-Mobile Communication Centre enables the users of an
EDGE/GPRS modem (PCMCIA card, external modem) with the
possibility of automatic or manual network selection and logging-off
the network without having to remove the SIM card from their data
device.
Select your PCMCIA card or external EDGE/GPRS modem you use to
connect to the Internet from the pull-down menu.
The network selection window is identical to that used for sending
SMS messages – it is displayed after clicking on the button with
telephone symbol.
Síť (Network) button is displayed next to the text field. If you click this
button once, a menu will appear enabling you to select Automatic
network selection, or Manual network selection and/or Logging-off
the network.

15
Installation of new equipment
Press the Settings button, select Add new mobile equipment option
and press Next button.
The following steps are same as in case of installation (more in
chapter 3) starting with the step 7.
New device installed will be available automatically in menu of the
main window.
Uninstalling the device
Select the device which you want to uninstall in the menu in the main
window.
Press the button for uninstalling.
The window with confirmation message will be displayed.
In case you are sure to uninstall it press Finish button.
The uninstalled device will be automatically removed from the menu
of the main window.
10. Device Management

16
Adding a new APN
If you do not want to use any other but default connection in the
T-Mobile Communication Centre (Internet connection through GPRS
APN Internet – this applies in particular to business customers with
their own APN), follow the procedure described below:
Note: Adding a new APN and removing current APN is not
currently possible for Internet connection through Internet 4G.
Step 1
Press the button with the key symbol in the main window.
Select Modify connection properties and press Next.
Step 2
Select Add new connection (APN,…) for new ME adding option.
Press Next.
Note: You can also modify the settings of current connection by selecting Modify
connection properties for new ME adding.Changes will apply to newly added devices
only – see the note below.
Step 3
All connection parameters must be entered during the next three
steps (press Next when all parameters for the particular step have
been entered).
It is recommended to contact your system administrator or another
person that can provide you with information about your APN settings.
11. APN Management

17
Press Finish.
Step 4
New APN will be saved.
Press Close.
Note: Considering the limitations inherent in some Windows versions, the
new APN will be available for newly installed devices only. Should you
require such APN for previously installed devices, it is necessary to remove
the device and add it again in order to set the new APN (see Section 9).
Remove APN
Follow the next steps:
Step 1
Press the button with the key symbol in the main window.
Select Modify connection properties and press Next.

18
Step 2
Select Remove connection for new ME adding option.
Press Next.
Step 3
Select the connection you want to remove from the list and press
Finish.
Step 4
Press Close.
Note: Considering the limitations inherent in some Windows
versions, the removed APN will be available for existing devices
until you remove the particular device and add it again (see
Section 8).

Using of PIN-lock with PCMCIA Option Globetrotter card
For using T-Mobile Communication Centre with PCMCIA card Option
Globetrotter it is necessary to switch off PIN-lock on the SIM-card.
If it is necessary to have it switched on anyway you must install the
original WCM driver available on original Option CD (part of Option
pack). Follow the next steps:
1. Make sure that the card is NOT inserted in the computer.
2. In the case that you have installed the card via T-Mobile
Communication Centre already remove it according to steps
described in chapter 7, Uninstalling the device.
3. When the card is removed in T-Mobile Communication Centre
insert the original Option CD into the device (it should be
automatically started or start it by clicking the GTinst.exe file).
4. Make the WCM installation according to displayed instructions.
Don’t insert the card until you are not asked for that by the installer.
It is possible to interrupt the installation in the time when the
following window is displayed:
5. In the displayed window press Cancel (and also in the next error
message). If you continue in the installation the special Option
manager will be installed – but you don’t need it if you connect via
T-Mobile Communication Centre. We recommend to install Option
manager only if you are going to use e.g. voice functions of the
card).
6. Add the card as a new device in T-Mobile Communication Centre
again.
7. Now you will be asked for PIN input during the connection if the
PIN-lock is switched on in the SIM-card:
Due toproblems of the original driver with some configurations of
Windows operating system we don’t recommend its installation and
rather werecommend to switch off the PIN lock in the SIM-card.
In case of using the original driver we recommend to wait 20–30
seconds after the insertion of the card for its full initialization and
then tomakeconnection.
External configuration file for installation
In case of adding the new connection (APN) according to chapter 8
in the directory where T-Mobile Communication Centre is installed is
newly available userconn.ini file. There are parameters of connection
configuration of both standard APN Internet and newly created APNs.
It is possible to use this file if you are going to install T-Mobile
Communication Centre on other computers with the same
configuration of connections. If this file is available in the same
directory as the installation setup.exe file during the installation
T-Mobile Communication Centre will be pre-configured with these
options after the installation. If the configuration file is not available
in the same directory during the installation only standard APN
Internet connection will be configured.
It is possible to edit the file manually too. This is its structure
(example of standard configuration for APN Internet):
[APN Internet]
userName=”gprs“
password=”gprs“
domain=” “
apn=”internet.t-mobile.cz“
ip=0.0.0.0
primaryDns=62.141.0.1
secondaryDns=213.162.65.1
primaryWins=0.0.0.0
secondaryWins=0.0.0.0
proxy=” “
proxyBypass=” “
This group of lines can be repeated in the file as manytimes as many
different connections you want to create.
19
12. For Advanced Users

20
13. Abbreviations
Abbreviation Full Wording Meaning
APN Access Point Name Access point name
CD Compact disk Data carrier
GPRS General Packet Radio Service Technology of fast mobile
data transmission
GSM Global System for Mobile
Communications Mobile telephone network
IR Infra Red Infrared port
PC Personal Computer Personal computer
SMS Short Message Service Short text message service
WLAN Wireless Local Area Network Wireless local network
Table of contents
