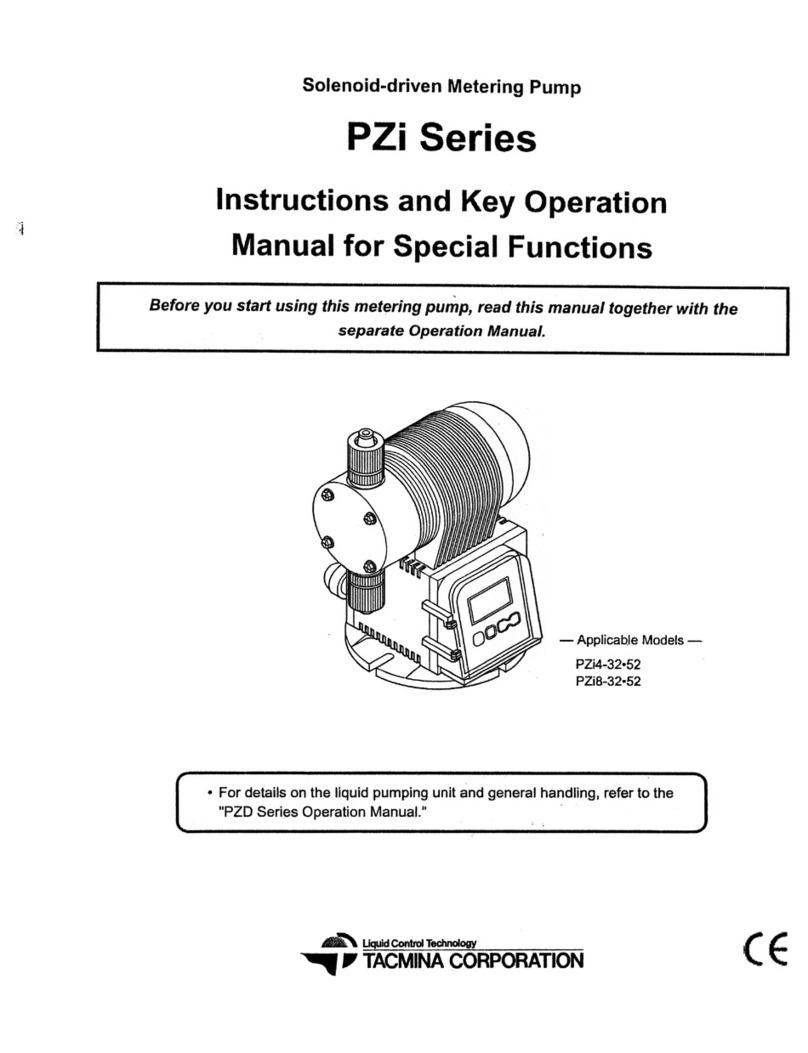
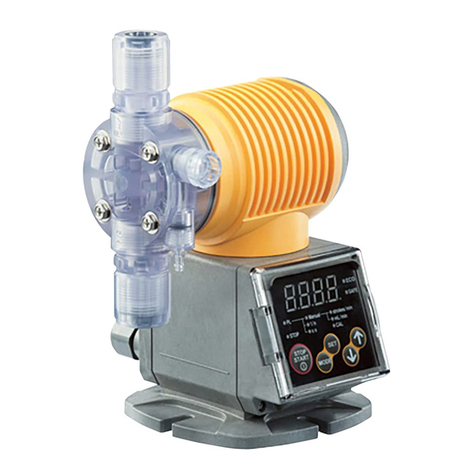
Tacmina CSII Series User manual

-
We
make
pumps
Diaphragm-type Motor-Driven Metering Pump
CSll
Series
OPERATION Manual
-
Applicable
Models
CSII-10
CSll-30
CSll-60
CSII-100
CSll-300
CSll-600
CSII-1000
Thank you for purchasing this TAClWlNA product. Please read this manual
carefully in order to ensure that you use this pump safely and correctly.
Be sure to keep this manual in a place where it will be easily available for
If the CSll series pump you bought conforms to special specifications not
described in this OPERATlOlV Manual, handle the pump according to

For the Safe Use of This Product-\
This manual is intended to help the operator to handle the product safely and correctly. In support of this aim, important
safety-related instructions are classified as explained below.
Be sure to follow them at all times.
/!\(warning)
*
If the product is operated incorrectly in contraventionof this instruction, it is possible that an accident resulting in death
or serious injurywill occur.
I
0
This indicates that improper operation can result in an injury or physical damage to the product.
(G+sz-]
Thisindicates information that should always be followed to maximize the product's performanceand service life.
(Note)
a
This indicates supplementary explanations.
Conditions of Use
*
This pump cannot be used in explosion-proof areas, and in explosivelignitable atmospheres.
This pump can be used for injection of chemicals only. Do not use this pump for other applications. Doing so might cause
accidents or malfunction.
This pump cannot be used for transferring fluids that contain slurry.
Q
Do not exceed the following operating ranges. Doing so might cause the pump to malfunction.
I
Ambient Ternoerature
I
0 to 40°C
--
-
-
-
..-
-
I
Operatinq Chemical Temperature
I
0
to 40°C(no freezing allowed.)
I
InstallationSite
Standardjoint
specification
Outdoors (lEC529-IPX3lrain-proof type)
1
*
Installthe chemical tank at a place higher thanthe pump.
Also, note that the viscosity that can be transferred or discharge volume change according to the pipingconditionsand the
nature of the chemical.
(
Transportation, Installation and Piping
)
,+,(-I
Install this pump in a location where it will not come into contact with children or other people besides the operator.
,+,(cX)
If you drop or damage this pump, contact your supplying agent. Continued use in this state might cause accidents or mal-
function.
Do
not install this pump at humid or dusty locations. Doing so might cause electric shock or malfunction.
*
If the discharge piping is provided with a cut-off valve, and when there is the danger that the piping will choke, install a
relief valve on the piping immediately after the discharge side of this pump.
When using water-diluted solutions in cold areas, chemicals may freeze in the pump head or piping, damaging the pump
and peripheral parts. Be sure to install heating apparatus or heat insulation.
Waterused inthe pre-shipment test may remain on pump liquid-end parts.When using chemicals that generate gas or
harden due to reaction with water, be sure to drain any water and allow liquid-end parts to dry before use.
The discharge volume cannot be adjusted by operating the valves on the discharge piping.
*
This pump generates pulsation. Install an air chamber or other pulsation attenuator.
The durability of the hose varies greatly according to the chemicals used, temperature, pressure and degree of exposure
to ultraviolet light. Inspect the hose, and replace with a new one if it has deteriorated.

ff
Checking the Product
1
When unpacking,please confirm the following items:
(1
)
Isthe enclosed product the same model you ordered?
(2)
Dothe details on the pump nameplate match your order?
(3)
Are all the accessories present and correct?
Please refer to the accessory list below.
(4)Can you detect any damage due to vibration
or
shock during transportation?
(5)
Are there any loose or disconnected screws?
All TACMINA products are carefully checked prior to shipment. If, however,you find a defect, please contact your supplying
agent.
l!E
Accessory
list
I
r^,nti
siphcnal
I
1
check valve
I
1
pce Anti siphonal
1
I
Icheckvalve
/
1
pce
Pump
fixingbolt
4
(M5
x
30. wlspring washer. flat washer, flange nut)]
-
.
.---
-
-
--
-
I
Footvalve
-
--
-
-.
-
1
pce
Braided
hose
:
3
m (4
x
9
mm dia.)
1
3
m
(6
x
11
mm dia.)
.---
Air
release
hose!
1
m
(4
x
6
mmdia.)
,---
___l______
I
j~oot
valve
]I
Pump
fining bolt
14
(M5
x
30,
wl
springwasher, flat washer,flange nut)l
--
I
VTCF
ihorler
specification)
I
Mortel
!TOT$
1
60
100
1
--
I
Dce
1
lNylon
tube
f
2
m (4
x
6
mm dia.)
i.
ERraicied
liose
1
1
m (4
x
9
mm dia.)
/
Oueratai
mariual
1
1
coov
I
2
m (6
x
8
mm dia.)
I
m
(6
x
11
mm dia.)
Aii
release
Rose
---
'
Pump
fixing
bolt
--
i
~TCT
STC~
1
Model
b~~303
00
6-000
-------.---+---
IStralghf
chaci<
'
jvaive for
bo~rerl
1
P@
I
rn
(4
x
6
mm dia.)
4
(M5
x
30,
vdl
spring washer, flat washer, flange nut)
I
rI1"!
1
pce
--
Foot
vai\/e
--
PTFE
hose
Hose
~umu
1
oce
/PPFE
hose
j
3
m
(6
x
8
mm dia.)
IiTZ6ump
I
1
uce
-
Punip
fixing
bolt
11
(M5
x
30, wl spring washer, flat washer,flange nut)
Operaiioi~
rna~ual
1
CODV
3m(12x15mmd1a)
-
Model
--
.
-
1
m (4
x
6
mmdia.)
4
~FG~Q
bolt
'4
(M5
x
30, wls~rinclwasher, flat washer,
fla"nu01
I
Pump
fixing
hi:
14
(M5
x
30. ./spring washer, flat washer. flange nut)
.-
8
fj;7p(
+
*,~on
mait:!ai
!
I
Y.:
..
..i
1
COPY

Contents
Product Description
........................................................................................................................
5
Names of Parts
...............................................................................................................................
5
Operation
........................................................................................................................................
6
Releasing Air
..................................................................................................................................
7
Adjusting the DischargeVolume
....................................................................................................
8
Shutting Down Operation for an Extended Period
.........................................................................
8
lhlaintenance
...................................................................................................................................
9
Replacingthe Diaphragm
.............................................................................................................
10
Replacingthe Valve Seat and Check Ball
..............................................................................
11, 12
Lubrication
..........................................................................................................................
13
to
15
Zero Adjustment of Flow Adjusting Section
.................................................................................
16
Mounting (Removing) the Motor.............................................................................................
16. 17
Troubleshooting
............................................................................................................................
18
Installation
..............................................................................................................................
19,20
Piping
.................................................................................................................................
I
to
24
Electric Wiring
..............................................................................................................................
25
...................................................................................................................................
Model code
26
List of CSll Thermal Relay Sizes
.................................................................................................
26
Performancespecification tables
...........................................................................................
27. 28
Power supply specifications
.........................................................................................................
29
Performance curves
..............................................................................................................
30,31
External dimensions
.....................................................................................................................
32
Consumables and Spare Parts
..................................................................
33
List of Tools for Disassembly and Inspection.............................................34
After Service
..............................................................................................
34

I
1
Product
Description
I
i
The CSll Series Diaphragm-typeMotor-DrivenMetering Pump can accuratelytransfer f~xedvolumes of liquids at fixed
intervals.
The CSll's pump head has two check valves that allow liquidto pass in only one direction. which helps ensure a fixed
discharge volume per single pump operation.
The CSllSeries is simply designed and iseasy
to
maintain.Itcan bedisassembledand inspectedby the user, which
reducesmaintenancecosts.
/
Names
of
Parts
All modelsof the CSll Series share the same body with the
Pump
head
~ariati~ns
exception of the pump head that differs according to model
type and pump size.
CSli-10/30/60/100/3OO-FTCT/5TCT
CSII-10/30/6Q/100/300-VTCUVTCF
\
CSI
1-10/30/60/100-CL
--Hose joint
CSll-10/30/60/1OO-VTCE
(boiler
specification)*
*
A tube fittingjoint is used on the dischargeside.

1
Operation
When handling chemicals, be sure to use protec-
tive coverings (rubber gloves, face mask, protec-
tive goggles, chemical-resistant work clothes,
etc.) matched to the chemicals you are using.
If you forget to open the discharge-side valve or
if foreign matter clogs the discharge piping, the
pressure in the piping and pump head may
increase beyond the range indicated in the pump
specifications. This may result in the chemicals
leaking or spurting, or in damage to the pump or
1
the piping. Check the valves and other parts
I I
I
before you start pump operation.
I
I
Check the follow~ngpoints.
c
1
Check Location
1
Detailsof Check
I
Remarks
1
Chemical solution Check for insufficient chemicals. Pay special attention to processes or chemicals that
I
tank Replenish if insufficient. are incompatible when air mixes into the chemical.
Piping Check piping for disconnection or damage.
Repair if disconnected or damage.
Valve
1
Make sure that the valve is open. This conditionresults in excessive pressure rise,spraying
(suction/dischargesides) Open if closed, out of chemicals or damage to piping,which is dangerous.
1
Power supply Make sure that the pump is connected to Connection of a non-specifiedmotor may
the specified power supply. cause motor seizure.
Mistakes inthe electrical wiring may cause
1
Electrical wiring
/
Check electrical wiring for mistakes. short circuits or current leakage.
I
Pump head
Joint
1
Check Location
1
Details of Check
Check for chemical leakage from the hole
at the bottom of the spacer ring on the rear
of the pump head.
Remarks
Check for chemical leakage.
A
probable cause of chemical leakage is
a damaged diaphragm.
Inspect the diaphragm.
Tighten the joints if chemicals are leaking from the joints.
If this does not stop chemical leakage,inspect the O-rings
at each section.
/
When using the pump for the first time
'I
Dischargeside
Check
the
Of
the
pressure
gage
pressure on the pump discharge side.
If erroneous numericalvalues are indicated,
probable causesare cloggedpipingor blockedvalves.
1
example, due to tank replacement
1
,
Inspectthe piping.
1
When resuming operation after the pump is shut
down for an extended period
When gas lock is occurring on the pump
When the chemical solution tank is empty, for
When using the pump for the first time
Adjusting the DischargeVolume
When changing the discharge volume
Releasing Air (page
8)
/
When shutting down operation for an extended
1
period
Shutting Down Operation for an
When resuming operation after the pump is shut
Extended Period
down for an extended period
(page
9)

/'-
"I,
/
o
During air release, chemicalsspout forcefullyfrom the tip of the air releasevalve (or piping, etc.). Either
I
releaseair usingwater or other safe liquid, or returnthe tip of the air releasepiping to the tank or other recep-
I
1
I
tacle.
I
Z
3
Insert the air release hose (provided) onto
thetip of the air releasevalve.
@
Set the stroke length to maximum.
*
For details on how to the set the stroke length, see
"Adjustingthe DischargeVolume."
The maximum stroke length differs accordingto
.
-. ..
.
-
.
the pump model.
(2
lurnthe pump
ON.
@)
lurnthe air releasevalve
I
to
1.5
turns
CCW
while operating the pump.
Air remaininginthe suction-sidehose and pump
head is discharged,and the pump head is filled with
liquid.
(5)
Tighten the air release valve if liquidcomes
out of the air release valve.
(7'
Turn the pump
OFF,
and fully release the
pressure on the discharge piping.
@Turnthe air releasecock
CCW.
(3)
Insert the hose pump (provided).
($1
Squeezethe hose pump
a
few times.
Air
remaining
in the suction-sidehose and pump
head is discharged,and the pump head is filled with
liquid.
6;
Tighten the air releasecock if liquid comes
out of the hose pump.
&I7
Take
care
not
to
loosen
air release
cock
too
much.
Doingso might cause air
releasecock to come
away and damage packing.
(1''
Fully
releasethe pressure on the discharge piping.
'z2
Set the stroke lengthto maximum.
*
For details on how to the set the stroke length, see "Adjustingthe DischargeVolume."
The maximum strokelength d~ffersaccordingto the pump model.
'3
Turn the pump
ON.
g,
Turn the pump
OFF
when liquid enters the pump head.
@
Restorethe discharge piping.

1
~djustingthe DischargeVolume
To adjust the injection amount, turn the adjusting dial.
The scale on this dial is divided into two scales, a pri-
mary dial scale and secondary dial scale.
The primary dial scale indicates the stroke length in
millimeters (mm).
The secondary dial scale is divided into ten equal sec-
tions, with one turn of the dial corresponding to 1 mm.
a
Loosen the dial set bolt.
@
Set the desired stroke length by the primary
dial scale, and make stroke length adjust-
ments of lessthan
1
mm by the secondary
dial scale.
@
Fix the adjusting dial in place by the dial set
bolt to prevent the adjusting dial from mov-
ing during pump operation.
TO set to 3.5 mm
r
/I
(
I
*Turningthe adjusting dial CCW increases the dis-
charge volume, while turning it CW decreases the
discharge volume.
*
Turning the adjusting dial beyond the effective adjust-
ment range does not increase the discharge volume.
<
(Important)
For details on the
relationship
between scale and
~njectionamount, see the performance curves on
pages 31 and 32.
The values Indicated in these performance curves
were obta~nedusing clean water under flxed con-
dltions on TACMINA testing facilities.
To obtain moreaccuratedischargevolumes,measure
the dischargevolume at the end of actual plping.
\
Do not turn the adjusting dial beyond 0 on the dial
scale or the maximum effective value indicated on the
scale.
(Note)
0 to 6 are indicated as the adjustment range on
the dial scale. The maximum effective value, how-
ever, differs according to pump model.
(Unit: mm)
(Unit: mm)
Model
Max. effective scale
1
Model
/
CSll-300 CSll-600
I
CSll-1000
/
CSII-10
I
CSll-30
2
Shutting Down Operation for
an
Extended Period
1
CSll-60 CSll-100
3
Max. effective scale
Follow the respective procedure below to shut down operation for an extended period or to resume operation after an
extended period.
6
f
i'
3
Clean inside the pump head.
Suck in and discharge clean water or washing
water intothe pump for about 30 minutes.
@Turn the pump OFF and disconnect the power
leads.
6j
Cover the pump with its protective cover.
Take measures to prevent dust from accumulat-
ing on the pump and protect it from corrosive
\
-
/
Check the inside of the tank for accumulation of
sediment, clouding of liquid or other abnormali-
ties.
If you find that liquid quality has deteriorated,
clean the inside of the tank, and completely
replace with fresh liquid.
(5
Check the check ball and valve seat insidethe
pump head to make sure they are free of adher-
ing dirt or foreign matter.
\
8
-

!
Maintenance
When performingmaintenanceon liquid-end
-
parts, be sure to use protectivecoverings (rub-
*
Do not turn the power ON during maintenance
and inspection.Attach a "Work In Progress"label
ber gloves, face mask, protectivegoggles, chem- to the power switch.
ical-resistantwork clothes, etc.) matched to the Beforedisassembling connecting parts, relieve
chemicalsyou are using. the pressurefrom the discharge piping,drain
chemicalsat connecting parts, and clean.
4000 hours of operation or once every year
Abnormal discharge (reduceddischargevolume)
Fluid leakagefrom pump headperiphery
4000 hours of operation or once every year
Abnormaldischarge (reduceddischargevolume)
4000 hours of operation or once every year
Abnormal noise from drive unit
Abnormal heat generatedon drive unit
Actual dischargevolume deviatesconsiderably
from set dischargevolume.
Adjusting dial is turned to 0 or less or
6
or more.
Replacingthe
Valve
Seat
and
Check
Ball
(pages
12,131
LubricationInspection
on
Drive
Unit
(laage
14)
Zero Adjustment
of
Flow
Adjusting Section
(laage
17)
/
Motorfailure
\
Mounting(Removing) the
Motor
(page
17)
f
Other abnormalities
\
Troubleshooting (page
19)
1
Perform periodic inspectionevery 4000 hours of operation or once every year, whichever comes first.

Replacing
the
Diaphragm
(-1
When fixing the pump head using the head bolts,
tighten the bolts in the order shown in the figure
on the right
a
little at a time using even force. For
example, tightening will be uneven if the bolts are
tightened in the order
1,
3,
2,
and
4.
This might
cause chemicals to leak from the pump head.
a
Removethe four head bolts.
a
Removethe pump head.
/'
(ImpOrtant)
Before attach~ngthe diaphragm,
remove any transferring l~quidor rust attached to
the t~pof the pump shaft and surrounding area
with a clean cloth,and apply a coating of grease.
@
Setthe adjusting dial to
"0".
@'
Removethe diaphragm.
Holdingthe outer periphery of the diaphragm, turn
the diaphragm CCW to remove.
@
Attach the new diaphragm.
Firmly turn CW the diaphragm until it cannot be
turned any more.
If the diaphragm is loose, it may contact the pump
head, and cause an accident or malfunction.
@Turnthe adjusting dial
CCW
until the
diaphragm contacts the spacer ring at the
rear.
w
Attach the pump head.

Attach
0
rings, ball stoppers, and check balls making sure that they face the right way.
a
When removing and re-attachingthe upper and lowerjoint sets, take care not to mistakethe upper and lower joints.
a
Check the
0
rings and check ballsfor scratches, or the valve seats for scratches or adhesion of dirt.
a
A parts kit containing diaphragmsfor the CSll 10to 300(excluding FTCTand 6TCT) and consumables for the valve
seat section is available.
a
An upper casing parts set, lower casting parts set, and pump head set each with replacement parts and consum-
ables are available.
Hosejoint,&
7
7-
I
nut
I
Ballstopper
1
payattention
Check ball
to
order and
Valve seat
Ball stopper
toplbsttsm
Check ball
orientation.
Valve seat
0
ring
Air releasevalve
to order
and
capnut
Dischargeside
hosejoint
\
[
0
ring
Valve stopper
Check ball
Dischargeside
lowerjoint
0
ring
Washer
Head bl/
0
head
*---
0
ring
+----Valve stopper
+---check ball
h,
Dischargeside
hosejoint
-Cap nut
&-
"-?
Hosejoint
--
Spacer(60/100
model
only)
rn
Ballstopper
m
I
---Check ball
Valve seat
$4
3
ell
stopper
-
c----
Check ball
-Valve seat
Air release valve
$+-
Valve seat

Replacing
the Valve Seat
and
Check Ball
@
L
*
Attach
0
rings, ball stoppers, and check balls making sure that they face the right way.
When removing and re-attaching the upper and lower joint sets, take care not to mistake the upper and lower joints.
*
Check the
0
rings and check balls for scratches, or the valve seats for scratches or adhesion of dirt.
-
Ball stopper
Check ball
Valve seat
Ball stopper
Check ball
-
Valve seat
Sleeve
Fitting
ring
Pum~head
ring
\
&Hose nut
Discharge side
hose joint
-Pump head
Hose nut
Air release valve
t
Compressed
coil spring
Check ball
Suction side
hosejoint
@
Hose nut
Hose nut
Washer
Head bolt
1
I
I
@-
Hose nut

@
Set the adjusting dial to
"0".
/
~ubrlcaitian
--
--
-
-
-
-
@
-
--
4000
hours
or
once
every
--
year
-
I
/'-
*
The following description uses illustrationsshowing a
@
Removethe four screws to remove4heter-
minal box cover.
When removingthe terminal box cover and partition
plate,and disassemblingthe upper and lower cas-
ings, provide additionalslack for the power leadsso
that the cases are not pulled together by the power
leads. Upper
,
/P,@iiiz)
If you perform the following immediatelyafter
stoppingpump
operation,
be sure to use protec-
casing
"\,
.
,I
terminal block attached.
Steps
(5,
to
13;
are sufficientfor regular lubrication
work.
However, we recommendthe procedureon page
16
ex'
/'
CP"
A
'
Terminal boxcover
tive coveringsto prevent burns as components after performingstep
(@
after
8000
hours of pump
insidethe pump are hot.
\,
operationor every two years to sustain performanceor
L--
-
.
-----
ensure
a
long service life.
d/
@
Loosenthe two screws (threeturns
CCW)
to
remove,and removethe upper casing from
@
Turn the upper casing upside down, remove
the four larger
(M6
x
20)
screws, and remove
the drive unit.
Do not remove other screws.
Removethese screws
(M6
x
20).
Remove these screws
(M6
x
20).
@
Holdthe motor anddraw
it
out straight up.
Motor section
t
@
Greasethe two gears.
Use MOLY-HD grease No.2 (Sumiko).

1
Lubrication
@
(4000
hours or once every year)
1
a
Attach the drive unit, and fix in place by the
four screws.
Insert the motor straight down following the proce-
dure in POINT below.
@Attachthe terminal box cover, and fix in
place bythe four screws.
*
Take care to prevent the power lead from
entering the motor fan.
*
Make sure that the power lead is not being
gripped in.
*
Make sure that the
0
ring isfitted into the ter-
minal box cover.
@I
Fix the upper casing in place by the two
screws, and insert the partition plate.
Pull power lead out
and check
Make sure that groove on pump
shaft is facing down. Pay attention as these points are
used for positioning.
I---
------
I
I
I I
I
I
I I
Positioning
I
points
/
/
A
5'
I
+
Groove
downward
I
-------A
1
-
-
-
-
-
-
--
--
Rotate motor fan
so that bearing fixing screw is
on opposite side of pump head.
Upper bearing plate
Align groove on pump shaft
with protrusion on upper
bearing plate.

i
I
I
Lsa
.
.
briication
..
_____.
iz)
.
8000
hours
___
or
once
ever^
.*,+
%~\!o
years
--
-
-
--
-
*-
-
--
Performthe following procedure after step
(6)
on page
14.
Remove two screws
A
to removethe motor.
@
Loosen screw
B
to draw out the eccentric cam set.
@I
Remove two screws
6.
@
Greasethe white lettered sections in the figure.
Eccentriccam
set
Screw
B
(M4
x
10)
Continued operationwithout replacement of
a
chippedor worn intermediate year or inner
bush may cause the pump to break down.
Be sure to replacea cl~~ppedor worn rnter-
er bearingplate mediate gear or inner
bush.
I-
i
i
-
---A-L--
--
Screw
A
(M5
x
14)
I
Screw
A
(M5
x
14)
Motor
Whenfixing bearing
in
place,
firmly
fix
so
contacts theflat
section of the
shafa
at right
angles.

1
Zero Adjustment of FlowAdjusting Section
~
a
Loosenthe dial set bolt.
@
Turn the pump
ON,
and start pump oper-
ation.
At this time, remove the piping from the joint to
prevent liquid from being fed.
@
Continually turn the adjusting dial CW
while operating the pump.
During this operation, you will feel the pump
shaft tap against the flow adjusting shaft.
As you continue to further turn the adjusting
dial, you will find a position where this contact
feeling disappears.This is the zero point.
@Temporarilytighten the dial set bolt.
Tighten the dial set bolt to prevent the shaft on
the adjusting section from turning.
13
Set the adjusting dial to
"0".
Loosen the set screw on the adjusting dial,
slide and turn the dial so that the main dial
scale is aligned with
"0
mm" and the secondary
dial scale is aligned with
"On,
and then fully
tighten the adjusting dial with the set screw.
Set screw
Primary dial scale
1
Mounting (Removing) the Motor
/
1
*
The following description uses illustrations show-
ing a terminal block attached.
a
Set the adjusting dial to
"0".
a
Removethe four screws to removethe
terminal box cover.
When removing the terminal box cover and par-
tition plate, and disassembling the upper and
lower casings, provide additional slack for the
power leads so that the cases are not pulled
together by the power leads.
Upper
casing
/
cover
@
Disconnect the power leads on the
motor side from the terminal block.
3-phase:
4
leads
Single-phase: 3 leads
Align
"0"
on both primary
and secondary s

/
Mounting
-
-
-
-
-
-.
---
(Removing
-
-
--
the
--
-
.----
-
@
Loosenthe two screws (threeturns
CCW)
to
@
Attach the motor.
remove, and remove the upper casing from
At this time, grease the motor output gear.
the lower casing.
@
Turn the upper casing upsidedown, remove
the two screws (MI
5
x 14) fixing the motor in
place, and remove the motor.
*
Do not removeother screws.
Removethis screw
(M5
x
14).
Remove this screw
(M5
x
14).
@
Removethe motor.
Motor
f
Do notforget grounding
lead.(Fixgroundinglead
matchedto motor
type).
@
Fix the upper casing in place by the
two
screws, and insert the partition plate.
Pullpowerleadout
andcheck
into motorfan.
@Wirethe power leadsto theterminal block.
@I
Attach the terminal box cover, andfix in
placeby the four screws.
*
Take care to prevent the power leads from
enteringthe motorfan.
*
Makesure that the power leads is not being
gripped in.
*
Makesure that the
0
ring is fitted intothe ter-
minal box cover.

I
Troubleshooting
1
Liauid is not discharaed.
Description
Pump does
(
Motor is not
(2) Defective motor wiring
(3) Power leads disconnection
(4) Switch is OFF.
(5) Breaker is tripped or fuse is blown.
(6) Motor is immersed in water.
(7) Motor damage
not operate. Connect to the correct power supply.
(2) lnspect
the
wiring,
and
correct
the
wiring if
necessary.
(3)
Repair or replacethe power leads.
(4) Turn switch ON.
(5) Replacethe motor.
(6) Replacethe motor.
(7) Replacethe motor.
Cause
operating.
Remedy
1 1
operating. (2) Eccentric cam mechanism is damaged. (2)Replacethe motor.
1
(8)Defective magnet switch
Pump
I
Air is entering
operates but
1
the pump.
(1) Defective power supply or voltage
(8) Replacethe magnet switch.
(1)
Gas is caused by nature of chemical.
(2) Leakage from joints and seals
(1) Check the power supply and voltage.
chemical is solutiontank is empty.
Chemical
is
leaking.
(1) Diaphragm is damaged.
(1)Remove the cause of gas generation.
(2)
Check
and
tighten
O-rings
and
other parts
if
necessary.
(3) Replenishchemicals and release air.
(1)
Clean the strainer and tank.
1
(2) Disassemble and clean.
(3) Replacethe valve seat.
(1) Replacethe diaphragm.
Small discharge volume
Description
Pump is running normally but
discharge volume is small.
(1) Review the piping, and install
a
back
pressure valve.
(2) Check or installan anti siphonal check valve.
(1) Review the piping, and install a
breather pipe or a back pressure valve.
(2) Release air from the piping.
pump is running normally but (1)Overfeeding is occurring.
1
Liauid leakaae
Cause
(1) The diaphragm is damaged.
(2) Foreign matter is biting into
valve
seat
and
check ball.
(3) Air is beingsucked in from suctionside piping.
(4) Dial isat tightened position.
(5) Defectivevalve seat and seals
discharge volume is large.
Chemical discharge does not
stop.
1
Descriation
Remedy
(1) Replacethe diaphragm.
(2) lnspect and clean.
(3) lnspectand tightenthe piping if necessary.
(4) Set the dial again.
(5)
Replace
valve
seats:
check
ball,0
rings
and
other
parts.
1
Excessive discharge volume
-
(2) Piping is connectedto suctionside
of
main pump
(1)
Siphoning is occurring.
(2) Air still remains in piping and is causing
damper effect.
I
Chemical is leaking.
I
Descriation
Cause
(1) The discharge side piping is blocked,
which is causing pressureto build up.
(2) The diaphragm is damaged.
Cause
Remedy
(1) Disassembleand clean.
Remedv
(2) Replace the diaphragm.
1
Heat generated, abnormal sound
1
1
(3) The screws are insufficientlytightened. (3)Tighten. The bolts on the pump head
are unevenly tightened.
Abnormal noise or heat is
being generated at the drive
section.
Description (1) Overload
(2) Insufficient lubrication
(3) Outside air temperature or transferring
air liquid temperature istoo high.
(4) Reductiongear mechanism is damaged.
(5)
Spring is damaged.
(6) Abnormal pressure is being applied on
the discharge side.
-
-
-
- --
-
(1) lnspectthe discharge pressure and parts
for
clogging.
(2) Apply grease.
(3) Improve the installation conditions.
Cause
(4) Repair or replace.
(5)
Replace.
(6) lnspect the piping.
Remedy
1

1
installation
This pump is not designedto explosion-proof Installthe pump in locations out of the reach of
specifications, It cannot be used in explosion- children and personnelother than an operator.
proof areas, and in explosivetignitableatmos-
1
pheres.
Avoid installingthe pump inthe direct sunlight. Also,
prevent it from beingexposedto wind and rain.
Thoughthis pump is designed for outdoor use, metal
parts sometimes heat up due to direct sunlight, plas-
tic parts sometimes deterioratedue to UV rays, and
scratches or rust sometimes appears due to grit and
dirt, or rainfall.To prolongthe service life of the pump
when it is used outdoors, we recommendattachinga
shade or cover.
Installthe pump in a locationthat is well-ventilated
during summer, and where chemicalswill not freeze
in winter.
Leave enough space to allow easy access for mainte-
nance and inspectionwork.
Installthe pump on
a
flat horizontalsurfaceand fix it
securely to prevent it from vibrating during the opera-
tion.
If
the pump is installed on an inclined surface,
the pump may not be able to discharge properly or at
all.
Use the four pump set bolts (provided) for fixing the
pump in positionat the positions shown in the figure
below.
-7
i
Fittingthe capacitor inside
the
pump
during
use
of a single-phase
motor
When lubricatingthe pump, changing the pump
head orientation,or otherwork, open the terminal
box cover, and removethe capacitorfrom insidethe
case.When fitting the capacitor inside the pump, fit
it at the position inthe figure shownbelow.
About the cooling air inlet port
Do not block the cooling air inlet port on the bottom
of the pump.
Also,
prevent this portfrom being
immersedin water during rainfall, etc.

I
1
Installation
1
The mounting of the upper and lower casings of this pump can bechanged
90"
so that the
pump head faces three different directions.
Change the mounting orientation when, for example, installation of the pump is
subject to piping restrictions.
*
The following description uses illustrations showing a terminal block
attached.
@
Removethe four screws to remove the terminal box
cover.
When removing the terminal box cover and partition plate,
and disassembling the upper and lower casings, provide
additional slack for the power leads so that the cases are
not pulledtogether by the power leads.
a
Loosenthe two screws, and position the
pump head inthe desired orientation
(90"
only in left and right).
Lift up the upper casing by about
5
mm from the
lower casing, and turn the upper casing.
@
Fixthe upper casing in place by the two
screws, and insert the partition plate.
Pull power lead out
and check
Partition plate
Attach the terminal box cover, and fix in
place bythe four screws.
*
Take careto prevent the power leads from
entering the motor fan.
*
Make sure that the power lead is not being
gripped in.
*
Make sure that the
0
ring is fitted into the ter-
minal box cover.
An indent and a protrusion for positioning are locat-
ed on the upper casing (inside)and lower casing
(outside), respectively. After you have changed the
pump head's orientation by turning the upper cas-
ing, make sure that you hear the protrusion click in
place into the indent.
Indent
(on inside of upper
casing)
Protrusion
on outside of lower
cas~ng)
This manual suits for next models
7
Table of contents
Other Tacmina Water Pump manuals
Popular Water Pump manuals by other brands

Wilo
Wilo TOP-S Installation and operating instructions

Crane
Crane BARNES SITHE 3SCM Installation and operation manual

CET
CET PFP-20HP-HND-1D Instruction handbook

Argal
Argal ASTRA Evo DDE Series Operator and maintenance manual

Pacer
Pacer S Series Assembly instructions

OLIJU
OLIJU SFI Installation and operation instructions