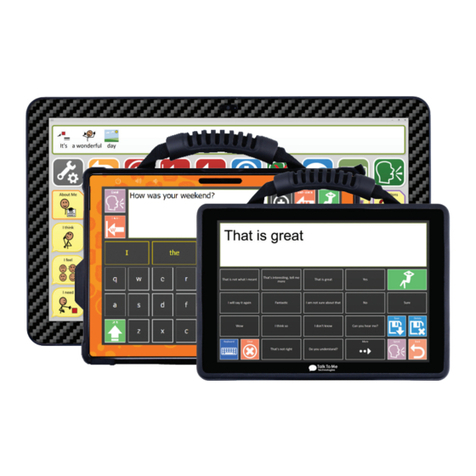
Talk To Me Technologies eyespeak zuvo 12-D User manual

User Guide for zuvo 12-D & zuvo 16-D
with eye-tracking cameras
Find more resources online:
talktometechnologies.com (click Support)E0125 04-08-21


Table of contents
Technical
Hardware buttons & features .....................................2
zuvo Control hardware and features ...............................4
Setting up the eyespeak .........................................6
Eye gaze settings ..............................................7
Using the eyespeak camera with a grid/page........................ 8
Speech settings ............................................... 9
Take photos with your device.................................... 10
Import pictures from your computer .............................. 11
Pair a TTMT Speaker (SPKR) .................................... 12
Update eyespeak software...................................... 12
Back-up a grid/vocabulary set................................... 13
View/hide menu bar ........................................... 14
Editing
Edit mode ................................................... 15
Change button label, image or message........................... 16
Change button appearance ..................................... 17
Change button styles .......................................... 18
Move, swap and re-size buttons ................................. 19
Edit rows and columns in a grid/page .............................20
Create a new page from an existing template.......................21
Link (jump) to a new page.......................................22
Word lists ....................................................23
Working with saved phrases .................................... 24
Important Note: If these instructions do not match your current vocabulary set, please
contact Technical Support for assistance.

2
Hardware, buttons & features
Power
Press this button to turn the device on.
USB/USB-C/Display Port
For connecting accessibility options such as a mouse, keyboard,
switch interface. On some models, this is a display port.
Auditory Scanning
The headphone jack is used for private voice output when accessing
the device via auditory scanning.
Volume Control
Press the volume toggle to adjust volume levels.
On some models, the volume is located on the left.
Charging the eyespeak
An external battery, TTMT Dual PowerBanks or Charger Extension
Cable may be included with your device. Charge the device and
PowerBanks at night or when not in use. Connect the device to one of
the PowerBanks to extend battery life.
Reserved for zuvo Control ECU
Enables Environmental Control Unit; DO NOT remove.

3
NOTE: It is important to shut down the device when you are no longer using it. This will
ensure that the entire system continues to work well. Please make sure the system is shut
down while charging overnight to allow it to fully charge.
zuvo 12-D with eyespeak zuvo 12-D with eyespeak inspo
& eyespeak alli
zuvo 16-D with eyespeak zuvo 16-D with eyespeak inspo

4
zuvo Control hardware and features
IR Ports*
1
Learning window for IR*
2
Switch ports
3
USB port
4
Mount plate
5
1
12
3
4
5
*Contact TTMT for details

5
FCC Compliance Information
This equipment has been tested and found to comply with the limits for
a Class B digital device, pursuant to part 15 of the FCC Rules. These
limits are designed to provide reasonable protection against harmful
interference in a residential installation. This equipment generates, uses
and can radiate radio frequency energy and, if not installed and used in
accordance with the instructions, may cause harmful interference to radio
communications. However, there is no guarantee that interference will
not occur in a particular installation. If this equipment does cause harmful
interference to radio or television reception, which can be determined by
turning the equipment off and on, the user is encouraged to try to correct
the interference by one or more of the following measures:
• Reorient or relocate the receiving antenna.
• Increase the separation between the equipment and receiver.
• Connect the equipment into an outlet on a circuit different from that to
which the receiver is connected.
• Consult the dealer or an experienced radio/TV technician for help.
CAN ICES-3 (B)/NMB-3(B)

6
Setting up the eyespeak
Assemble the mount (if applicable) and position the device.
Setting up the eye-tracking camera
1. Insomecases,theeye-trackingcameraisconguredtoworkwithyour
individual vocabulary set prior to shipment. To determine this, open a
grid/page to verify eye-tracking activity.
2. If eye-tracking is active, as indicated by a face in the feedback window,
proceed to “Part 2 of this guide: Working with grids/pages.”
3. If there does NOT appear to be eye-tracking activity within your grid/
page, please contact Technical Support for assistance.
eyespeak
camera
eyespeak
alli and
eyespeak inspo
camera
Eye-tracking
feedback window.
1. If applicable, refer to the manufacturer’s instructions to assemble the
mount and attach the device.
2. Proceed to turn the device ON, as described on page 2.
16-30”
16-30”
Proper Positioning: The top of the device should be even with the top
of the user’s head. The device may be placed to the side, or tilted down
if placed on a high table.
Approx. 16-30”
Optimal distance: 20”

7
Computer control
Not available on a dedicated device. Please contact Technical
Support to learn more.
Camera
Select the camera and change settings to track one eye or both
eyes. Tap > OK to save changes and exit.
Eye gaze settings
Customize timing, color and animation options.
Tap > (Menu) > Settings.
Tap > Access > Eye gaze.
Activation
Choose the cell click action, dwell setting and highlighting.
Calibration
Help the device to learn how your eyes move to improve accuracy.
Select Settings to change number of points or target used during
calibration. Select Calibrate to get started.
TIP: Reset camera between users to clear settings and ensure the best
performance. Not applicable to the zuvo 12-D with eyespeak inspo camera.
eyespeak alli camera reset:
Start EasyClick software
from desktop > choose mode
(Beginner) > Settings > Calibration
> Default Calibration > click OK
eyespeak camera reset:
Click desktop shortcut (Reset
eyespeak camera) > check User
Calibration > click OK
eyespeak inspo camera reset:
Not applicable

8
Using the eyespeak camera with a grid/page
Open a grid/page to test the settings.
Camera feedback window
Images displayed in this area indicate
the quality of connection between the
camera and the user’s eyes. If this
area shows less than ideal positioning,
or no tracking is indicated, try
adjusting the position of the device as
explained on page 6 of this guide. To
re-calibrate the camera for a user, Tap
> Home > Settings > Calibrate.
Rest Cell
Focusing on the rest cell will “pause”
eye-tracking. This feature is extremely
helpful when learning/exploring the
system. Eye-tracking
active
Eye-tracking
paused
Dwell Animation and Timing
When a user pauses on a cell, (indicating
a cell “selection”), the dwell animation
appears. To speed up or slow down
the activation process of selection and
clicking, see Activation on page 7. (In
this example, the animation type is set
to “Show Pie During Dwell.”) Animation
type and timing can be adjusted in
Menu > Access > Eye gaze.
Ideal OK
X
Adjustment
needed!
eyespeak camera
Adjustment
needed!
Ideal, tracking
both eyes.
eyespeak alli & inspo camera

9
Speech settings
Change the pronunciation of a word
1. Select Pronunciation from the speech settings menu.
2. In the Word box: type the word with the correct spelling (e.g. fajita).
3. In the Pronunciation box: type the word as you want it pronounced
(e.g. faheeta).
4. Select Test to hear the word pronounced.
5.Whennished,selectAdd Pronunciation > OK.
Select a voice
1. Select Voices from the speech settings menu.
2. Select a voice from list > Listen to play voice sample > OK to save
selection.
Adjust voice speed and pitch
1. Select Congure from the speech settings menu.
2. Adjust speed, pitch, and voice rates > select Speak to play voice
sample > OK.
Speech settings allow you to change the pronunciation of a word, select a
voice for speech output, and adjust the voice pitch and rate.
To go to speech settings, go to (Menu) > Settings > Speech.

10
Take photos with your device
9. When complete, select Finish Editing > Yes.
You may be able to take photos within your vocabulary set. Call technical
support for details.
1. Exit Grid 3 to display device desktop.
2. Select the Camera icon from the desktop screen.
Tip: If the image appears black, touch the icon in the upper left-hand corner to ip the
camera to front-facing.
3. Press the white button icon to take a picture. Take as many pictures as
you’d like.
4. Press the Xin the upper right-hand corner to exit the camera.
5. Open the communication software > navigate to the page to add your
pictures.
6. Enter Edit Mode: (Menu) > Edit grid > select button to edit/
add photo.
7. Select Find Picture on the top toolbar.
Tip: Find Picture will not display for Word List buttons, but you can still add a photo. See
“Word Lists” on page 21 for instructions on how to add photos to these buttons.
8. Select Picture File > Browse > This PC > Camera Roll > select photo
to add.

11
Import pictures from your computer
1.SavepicturesfromyourcomputerontoaUSBashdrive.
2.InserttheashdriveintotheUSBportonthesideofthedevice.
3. Exit Grid 3 to display device desktop.
4. On the desktop screen, select the folder icon from the bottom left toolbar.
5.SelecttheUSBashdrivefromthecolumnontheleft.
6.Pressandholdthepicturele>dragitintothePictures folder on the
left side.
7. Open Grid 3 > navigate to the page/buttons to add your pictures.
8. Enter Edit Mode: (Menu) > Edit grid > select button to edit/
add photo.
9. Select Find Picture on the top toolbar.
Tip: Find Picture will not display for Word List buttons, but you can still add a photo. See
“Word Lists” on page 23 for instructions on how to add photos to these buttons.
10. Select Picture File > Browse > Pictures > select photo to add.
11. When complete, select Finish Editing > Yes.

12
Update eyespeak software
1. An update is available when you see an orange circle in the upper right-
hand of the menu bar. Click this orange circle.
2. Select Install to run the software update.
Pair the TTMT Speaker (SPKR)
4. Touch TTMT SPKR > Next.
5. Once connected, the screen will close automatically.
Your TTMT Speaker (SPKR) is already paired with the device, but on
occasion, you may need to re-pair it.
1. Close all programs to display the device desktop.
2. From the desktop screen, select Add a Bluetooth Device.
3. Check the speaker on the back of your device is charged and turned on.

13
Back-up a grid/vocabulary set
4.Selecttosaveyourleinyourashdriveontheleftside.
5.Renamethele>Save.
Tip: Every time you back up your le, add the date to the le name so you track of the last
time you backed it up. (e.g. John Doe 12.25.19)
6.Safelyremoveashdrive:returntothedesktop screen > select the ^on
the lower right toolbar > select the USB icon.
Tip: You can keep the le saved on the ash drive just like this, or you can insert the
ash drive into your computer and save a copy of it wherever you’d like on your personal
computer. Please call Tech Support for assistance with backing up a complete user prole.
1. Insert a USB drive into the USB port on the device.
2. (Menu) > Grid Explorer > Menu > Share Grid Sets >
Grid set le >selectle>Save.
3. Select your drive from the left column of the Save As pop-up.

14
View/hide menu bar
Tap F12 on your keyboard to view or hide the menu bar in full screen.
Tip: You may also view the menu bar by tapping on the two corners of the grid/page and holding.

15
Edit mode
Enter Edit Mode to edit and customize your vocabulary set.
Edit mode tabs overview:
Grid Set
Navigate grids/
vocabulary
sets while in
edit mode, and
create new grid/
vocabulary sets
from existing
templates.
Home
Editing
commands,
including
options to
customize
vocabulary
cells.
Style
Options to edit
cell style and
formatting.
Layout
Insert, delete,
and arrange
rows, columns,
and cell
spacing.
Grid
Choose the
background
color, add
button
commands,
and modify
scan blocks
for access
switches.
1. Select (Menu) > Edit grid.
2. The editing toolbar appears at the top.
3. To exit edit mode or when edits are complete, select Finish Editing.
4. When applicable, a pop-up menu will ask if you want to save changes.
Select Yes to save and exit, No to exit without saving, or Cancel to
resume editing.

16
Change button label, image or message
Change Button Text
Select Change Label > in the button text space, type new label.
Change Button Message
In the Write Text box, type the message to be spoken aloud when the
button is pressed.
Change Button Image
Select Find Picture > select one of the following:
Symbols Type label name or word to search symbols >
select symbol to use > OK.
Finish Editing
Whennished,selectFinish Editing to save changes and exit edit
mode.
Enter Edit Mode:
Select (Menu) > Edit grid > select button to edit.
Picture File Select folder containing image > select photo to use.
Camera Press Capture to take a photo.
Screen Capture This option allows you to use anything on your screen as a
picture for your cell. Tap Capture > drag a square around the image on your screen
you want to use.
Web Search* SearchforanimageontheInternet.Usethesearchboxtonda
picture, select it, and click OK.
*PLUS/Unlocked models only. Contact us for details.

17
Change button appearance
Button Shape
Choose the shape of the button.
Button Border
Choose the color for the border around the button.
Font Size
Choose the size for the text in the button.
Button Fill
Choosethecolortollthebutton.
Font Type
Choose the font for the text in the button.
Button Surround
Choose the color for the background surrounding the button.
Font Color
Choose the color for the text in the button.
Tip: For more color options, select Adjust Color. To use a color from elsewhere on your
screen, select Find > click on the desired color using the eyedropper tool.
Youcanchangeabutton’sshape,size,andllandbordercolor,aswellas
the button text font, size, and color. To edit a button’s appearance: Enter
Edit Mode: Select (Menu) > Edit grid > Style > select button to
update > choose from the appearance options.

18
Change button styles
Change the style of a button to an existing style
Select an existing button > select the Style selection box > choose
new button style from the list. This will change the selected button to
the selected style.
Edit an existing style
Select a button with the style to edit > make desired changes to
button style > select Update Style. This will instantly update all
buttons with the same style within the grid/vocabulary set.
Create a new style
Select a cell and make desired changes to its appearance > click
New Style > give new style a name > click OK to add your new style
to the Styles menu.
Style themes
Themes are an easy way to change the look and feel of the grid/
vocabulary set. Select Themes > choose a new theme from the list.
Styles are a quick and powerful way of managing the appearance of a
range of cells across a grid set. For example, making all verbs in cells the
same color.
To edit button styles: Enter Edit Mode: Select (Menu) > Edit grid
> Select the Style tab.
This manual suits for next models
1
Table of contents
Other Talk To Me Technologies Conference System manuals