Talon Tools AEA002 User manual

1
GENERAL SAFETY RULES GB
WARNING! When using gas tools, basic safety precautions, including the following, should always be followed to reduce
the risk of serious personal injury and/or damage to the unit.
Read all these instructions before operating this product and save these instructions.
WARNING • PLEASE READ
For your own safety please read this manual before attempting to operate your new unit. Failure to follow instructions
can result in serious personal injury. Spend a few moments to familiarize yourself with your trimmer before each use.
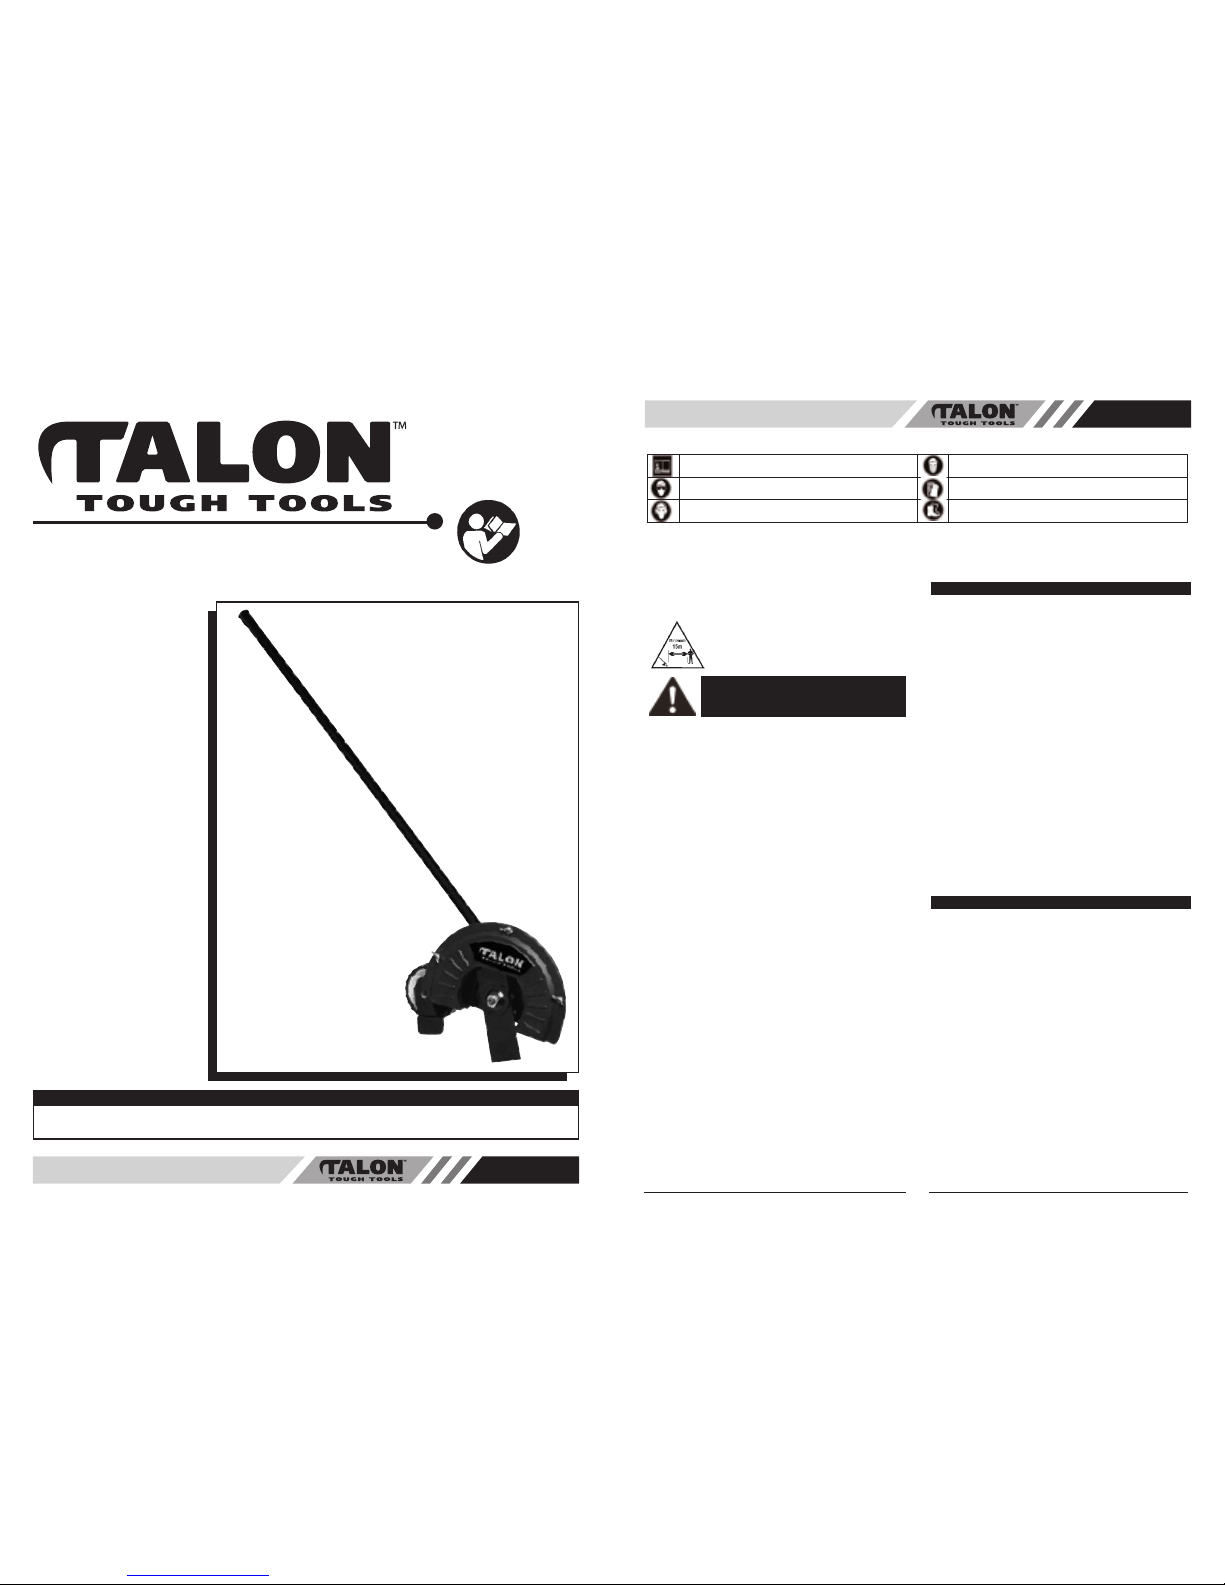
MODEL NO. AEA002
SAFETY
OPERATION
MAINTENANCE
Edger Attachment
USER MANUAL
Meaning of symbols marked on the product
Read the user manual before using the machine
Wear safety goggles to protect your eyes
Wear ear protection to protect against noise
Wear dust mask to protect against dust
Wear gloves to protect your hands
Wear safety boots to protect against electric shock
READ YOUR USER MANUAL AND ALL SUPPLE-
MENTS (IF ANY ENCLOSED) THOROUGHLY BEFORE
OPERATING YOUR UNIT.
1. Wear close fitting, tough work clothing that will
provide protection, such as long slacks or trousers,
safety work shoes, heavy duty work gloves, hard hat,
a safety face shield, or safety glasses for eye protec-
tion and a good grade of ear plugs or other sound
barriers for hearing protection.
2. Store in a safe place.
Open fuel cap slowly to release
any pressure which may have formed in fuel tank. To
prevent a fire hazard, move at least 10 feet (3 meters)
from fuelling area before starting.
3. Turn unit off before setting it down.
4. Always hold unit firmly with both hands, the
thumb and fingers encircling the handles.
5. Keep all screws and fasteners tight. Never operate
your equipment when it is improperly adjusted or not
completely and securely assembled.
6. Keep handles dry, clean and free of fuel mixture.
7. Keep stringhead as close to ground as practical.
Avoid hitting small objects with stringhead. When cut-
ting on a slope, stand below stringhead. NEVER cut
or trim on a hill or slope, etc. if there is the slightest
chance of slipping, sliding or losing firm footing.
8. Check area you will be trimming for debris that
may be struck or thrown during operation.
9. Keep all parts of your body and clothing away
from stringhead when starting or running engine.
Before starting engine, make sure stringhead will not
come in contact with any obstacle.
10. Stop engine before examining cutting line.
11. Store equipment away from possible flammable
materials, such as gas-powered water heaters,
clothes dryers, or oil-fired furnaces, portable
heaters, etc.
12. Always keep the debris shield, stringhead, and
engine free of debris build-up.
13. Operation of equipment should always be restricted
to mature and properly instructed individuals.
WARNING: Gasoline is highly flammable, and its vapours
can explode if ignited. Take the following precautions:
1. Store fuel only in containers specifically designed and
approved for the storage of such materials.
2. Always stop the engine and allow it to cool before fill-
ing the fuel tank. Never remove the cap of the fuel
tank, or add fuel, when the engine is hot. Never oper-
ate the unit without the fuel cap securely in place.
Loosen the fuel tank cap slowly to relieve any pressure
in the tank.
3. Mix and add fuel in clean, well-ventilated area out-
doors where there are no sparks or flames. Slowly
remove the fuel cap only after stopping engine. Do not
smoke while fuelling or mixing fuel. Wipe up any spilled
fuel from the unit immediately.
4. Avoid creating a source of ignition for spilled fuel. Do
not start the engine until fuel vapours dissipate.
5. Move the unit at least 10 feet (3m) from the fuelling
source and site before starting the engine. Do not
smoke, keep sparks and open flames from the area
while adding fuel or operating the unit.
6. Never start or run the unit inside a closed room or
building. Breathing exhaust fumes can kill. Operate
this unit only in a well ventilated area outdoors.
1. WARNING: To reduce the risk of electrical shock, use
only extension cords approved for outdoor use.
2. CORDS SETS: Make sure your cord set is in good
condition. When using a cord set, be sure to use a cord
that is heavy enough to carry the current that your unit
will draw. An undersized cord set will cause a drop in
line voltage resulting in loss of power and overheating.
See the operator’s manual for the unit that will power
this attachment for the recommended cord size.
3. Inspect all extension cords and the unit power connec-
tion periodically. Look closely for deterioration, cuts or
cracks in the insulation. Also inspect the connections
for damage. Replace the cords if any defects or dam-
age appear.
4. Avoid creating a source of ignition for spilled fuel. Do
not start the engine until fuel vapours dissipate.
5. Do not use the unit in the rain.
6. Do not handle the plug or unit with wet hands or stand-
ing on any wet surfaces.
7. Do not leave the unit plugged in when not in use,
changing attachments or add-ons, or while being serv-
iced.
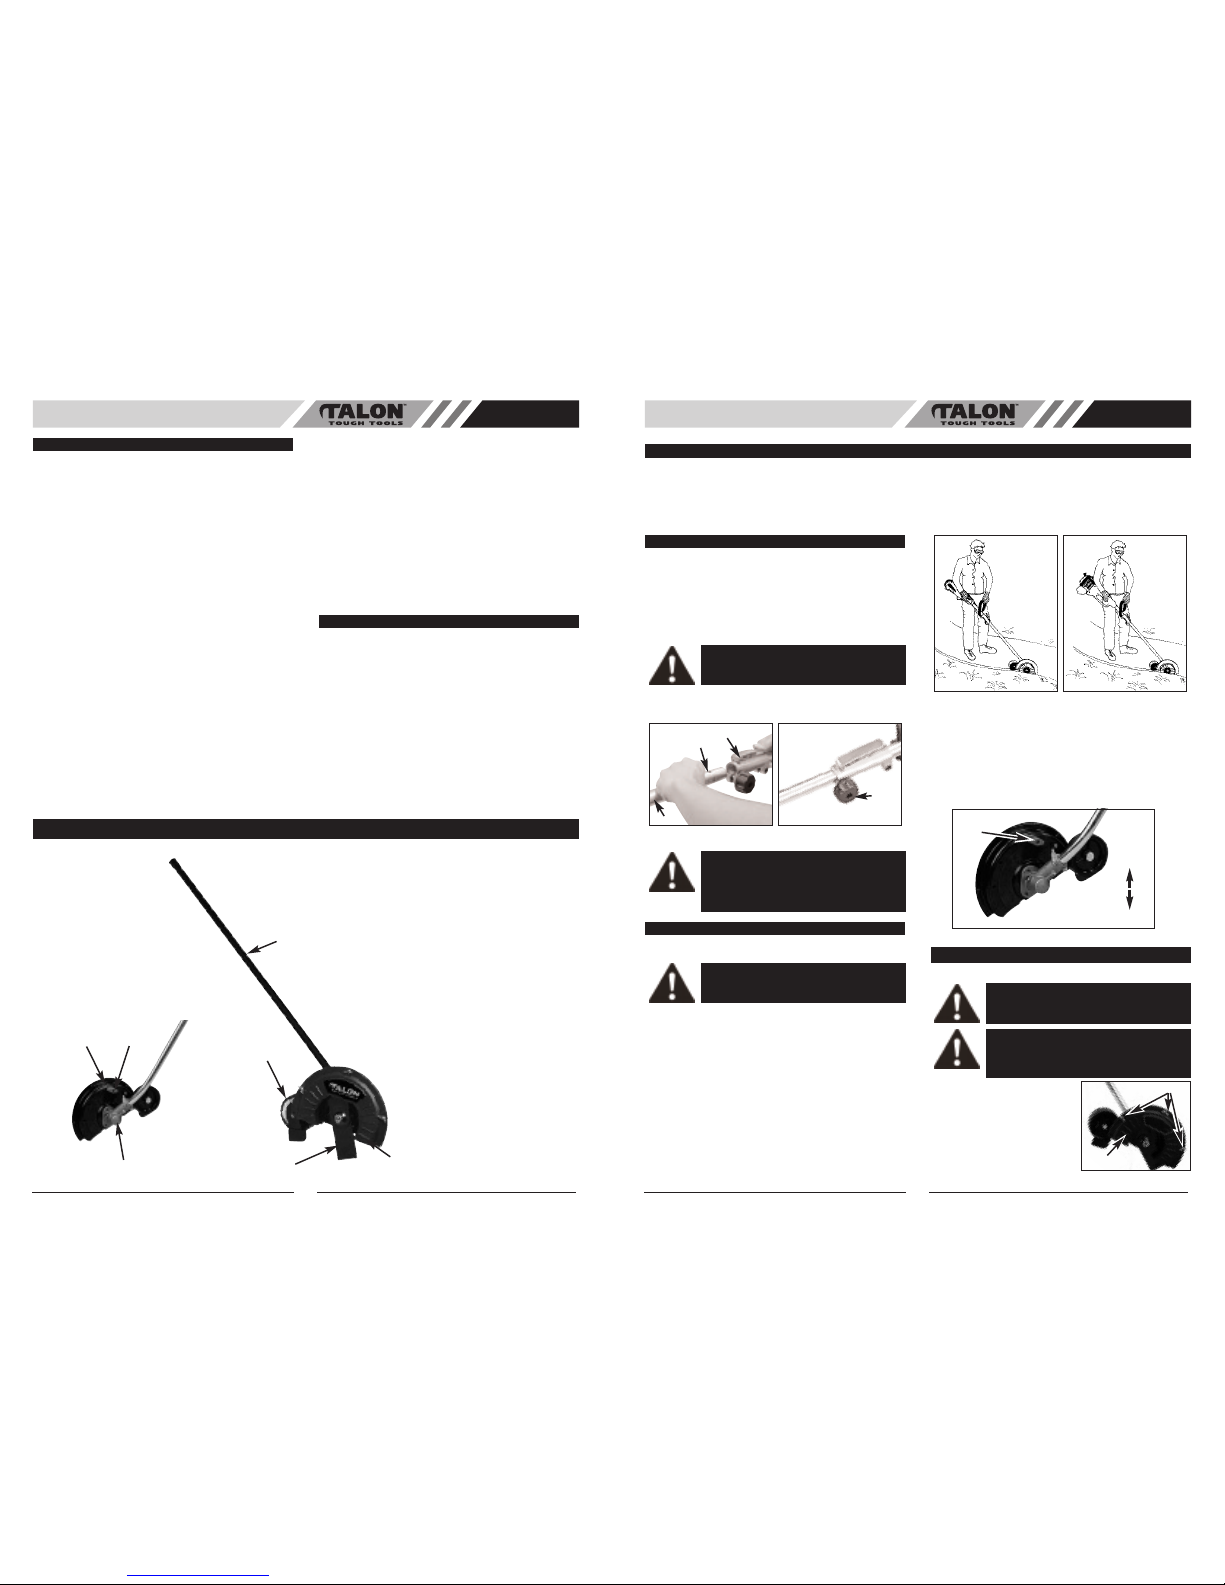
WARNING: Keep children, bystanders, and
animals 50 feet (15 meters) away. If
approached stop unit immediately.
SAFETY WARNINGS FOR GAS EDGERS
SAFETY WARNINGS FOR ELECTRIC EDGERS

• DRIVE SHAFT
Installing the lower shaft
1. Remove the hanger from the lower shaft (A). Press
the release lever (B) while pushing the lower shaft into
the tool-link couping. (Fig. 1A)
2. Locate and lock the release lever into the primary hole
(C) in the shaft. (Fig. 1A)
3. Tighten the knob (D) securely clockwise before using
the unit. (Fig. 1B)
• HOLDING THE UNIT WITH EDGER
Before operating the unit, stand in the operating position
(Fig. 2A & Fig. 2B). Check for the following:
1. The operator is wearing eye protection and proper
clothing.
2. The right arm is slightly bent, and the hand is holding
the shaft grip.
3. The left arm is straight, and the hand is holding the
handle.
4. The unit is at waist level.
5. The edger wheel adjusted for proper cut depth and
edger positioned. (Fig. 2A & Fig. 2B)
• ADJUSTING EDGER CUTTING DEPTH
1. Loosen the adjustment knob (A) above the wheel.
(Fig. 3)
2. Slide the wheel to the desired position.
Raising the wheel increases the cutting depth.
Lowering the wheel decreases the cutting depth.
3. Tighten the adjustement knob securely.
•EDGER BLADE REPLACEMENT
1. Unlock knobs (A). (Fig. 4A)
2. Remove front Blade cover
(B). (Fig. 4A)
3
GB
2
GB
1. Shaft Housing
2. Blade Shield
3. Wheel
4. Edger Blade
5. Gear Box
6. Depth Adjustment Knob
7. Blade Cover
SPECIFICATIONS
Blade Length . . . . . . . . . . . . . . . . . . . . . . . . . . . . . . . . . . . . . . . . . . . . . . . . . . . . . . . . . . . . . . . . . . . . . . . . . . . . . . .190mm
Blade Bore . . . . . . . . . . . . . . . . . . . . . . . . . . . . . . . . . . . . . . . . . . . . . . . . . . . . . . . . . . . . . . . . . . . . . . . . . . . . . . . . . .25mm
Max. Cutting Depth . . . . . . . . . . . . . . . . . . . . . . . . . . . . . . . . . . . . . . . . . . . . . . . . . . . . . . . . . . . . . .50mm
Weight with motor . . . . . . . . . . . . . . . . . . . . . . . . . . . . . . . . . . . . . . . . . . . . . . . . . . . . . . . . . . . . . . . . . . . . . . . . . . . . . . . . . .6.35 Kg
GENERAL IDENTIFICATION
1. Wear safety glasses or goggles and ear/hearing pro-
tection when operating this unit. Wear a face or dust
mask if the operation is dusty. Long sleeve shirts are
recommended.
2. Wear heavy, long pants, boots and gloves. Do not
wear loose clothing, jewellery, short pants, sandals or
go barefoot. Secure hair above shoulder level.
3. The edger shield must always be in place while oper-
ating the unit.
4. Use the unit only in daylight or good artificial light.
5. Use the right tool. Only use this tool for the purpose
intended.
6. Do not overreach. Always keep proper footing and bal-
ance.
7. Always hold the unit with both hands when operating.
Keep a firm grip on both the front and rear handle or
grips.
8. A coasting blade can cause injury while it continues to
spin after the unit has been switched off. Wait until the
blade has completely stopped rotating before inspect-
ing unit.
9. Keep hands, face and feet at a distance from all mov-
ing parts. Do not attempt to touch or stop the blade
when it is rotating.
10.Do not operate the unit faster than the speed needed
to edge. Do not run the unit at high speed when not
edging.
11.Always stop the unit when work is delayed or when
walking from one cutting location to another.
12.If you strike or become entangled with a foreign object,
stop the engine immediately and check for damage.
Have any damage repaired before attempting further
operations. Do not operate unit with a bent, cracked or
dull blade. Discard blades that are bent, warped,
cracked or broken.
13.Stop the unit IMMEDIATELY if you feel excessive
vibration. Vibration is a sign of trouble. Inspect thor-
oughly for loose nuts, bolts or damage before continu-
ing. Repair or replace affected parts as necessary.
14.Stop and switch the unit to off for maintenance, repair,
or for changing add-ons or other attachments.
1. Allow the unit to cool before storing or transporting. Be
sure to secure the unit while transporting.
2. Store the unit in a locked up or high and dry place to
prevent unauthorize use or damage, out of the reach
of children.
3. Never douse or squirt the unit with water or any other
liquid. Keep handles dry, clean and free from debris.
Clean after each use, See Cleaning and Storage.
4. Keep these instructions Refer to them often and use
them to instruct other users. If you loan someone this
unit, also loan them these instructions.
WHILE OPERATING
OTHER SAFETY WARNING
1
2
3
4
5
6
7
ASSEMBLY INSTRUCTIONS
CAUTION:
Make sure the release lever is
locked in the primary hole and knob is securely
tightened before operating this unit.
CAUTION:
All attachments are designed to
be used in the primary hole unless otherwise
indicated in the specific attachment’s opera-
tor’s manual. If the incorrect hole is used, it
could result in injury, or damage to the unit.
B
A
Fig. 1A Fig. 1B
C
D
OPERATING INSTRUCTIONS
WARNING:
Always wear eye, hearing, foot
and body protection to teduce the risk of
injury when operating this unit.
Fig. 2A Fig. 2B
Fig. 3
WARNING :
To avoid serious personal injury,
always wear gloves while handling, removing
or installing the blade.
WARNING:
The gear housing gets hot after
long periods of use. To avoid serious person-
al injury, do not touch the housing until it has
cooled.
A
Raising
Lowering
A
Fig. 4A
B

GB
4
3. Line up the hole in output shaft (A) with the locking rod
slot. Insert the locking rod (B) through the slot into the
output shaft hole (Fig. 4B).
4. While holding the locking rod, loosen the nut on the
blade by turning it clockwise with a 5/8” wrench (Fig.
4C). Remove the nut, retaining washer and blade.
Keep the nut and blade retainer for installation.
5. Install the new blade (A), blade retainer (B) and nut
(C) (Fig. 4D). Insert the locking rod through the slot
into the output shaft hole. Make sure that the blade
stays flat and centered against the output shaft while
tightening the lock nut counterclockwise (Fig. 4E).
6. If you have a torque wrench, tighten the nut to 325-
335 in/lbs (37-38 N/m), while holding the locking rod
in the slot.
If you do not have a torque wrench, hold the locking
rod in the slot. Rotate the nut counterclockwise with a
5/8” closed-end or socket wrench, until the nut press-
es against the washer and the blade is snug. Make
sure the blade assembly is installed correctly, then
rotate the nut an additional 1/4-1/2 turn (Fig. 4E).
7. Remove the locking rod.
A
Fig. 4B Fig. 4C
B
B
Fig. 4D Fig. 4E
AC
WARNING:
Verify the blade is flat against the
output shaft after the nut is tightened. If the
blade is off-center, the unit will be damaged
by vibration, and the blade may fly off, which
can cause serious personal injury.
Popular Edger manuals by other brands

CRL
CRL VE-1P Operation and maintenance manual

Scag Power Equipment
Scag Power Equipment SE-3.5BS Operator's manual

Craftsman
Craftsman Weedwacker 358.796050 Operator's manual

Troy-Bilt
Troy-Bilt 554 Operator's manual

Weco
Weco E.32 Instructions for cleaning and sterilization

EarthQuake
EarthQuake WE43 Operator's manual