Tapeswitch CKP/S1 User manual

1
IMPORTANT
This manual must accompany the product throughout its working
life. Those persons responsi le for the use of the product must ensure
that all persons involved in the installation, commissioning, operation,
maintenance and servicing of the product have access to all the
information supplied y the manufacturers of the machine and its
safety system.
WARNING
Tapeswitch safety mat systems are intended to protect operators
working at or near dangerous machinery. They can only perform this
function if they are correctly fitted and interfaced to a suita le
machine. It is essential that the full contents of this manual and all the
authoritative documents referred to herein are fully understood
efore any attempt at installation is made. If in dou t contact
Tapeswitch or your Tapeswitch distri utor.
TAPESWITCH
SAFETY MATS-
CKP/S1 Sensors
with PRSU/4 control units
TECH ICAL MA UAL 343181-09
English

2
CO TE TS
1. I TRODUCTIO
1.1 PRODUCT DESCRIPTION
1.2 PRODUCT RANGE
1.3 PRODUCT FEATURES
1.4 PRODUCT APPLICATION
1.5 STANDARDS AND SAFETY INTEGRITY
1.6 SPECIFICATION AND ORDERING INFORMATION
2. TECH ICAL DESCRIPTIO
2.1 SYSTEM OVERVIEW
2.2 SENSORS
2.3 CONTROL UNIT
3. I STALLATIO
3.1 GENERAL
3.2 SENSOR INSTALLATION
3.3 CONTROL UNITS
3.4 INITIAL CHECKING
4. PERIODIC CHECKI G
4.1 GENERAL
4.2 COMMISSIONING CHECKS
4.3 SIX MONTHLY CHECKS
4.4 DAILY/SETTING CHECKS
5. OPERATIO , MAI TE A CE A D SERVICI G
5.1 OPERATION
5.2 MAINTENANCE
5.3 SERVICING
6. TECH ICAL SPECIFICATIO
6.1 SYSTEM
6.2 SENSORS
6.3 MATERIAL SPECIFICATION
6.4 CONTROL UNIT
7. CO TACTS

3
1.2 PRODUCT RA GE
1.2.1 SENSORS
1.2.1.1 SENSOR SHAPES AND SIZES
Mat sensors can be produced in any shape and
size which meets the following restrictions:
- all corners, internal or external, should be
90 degrees.
- the maximum possible width of a mat is
1200 millimetres.
- the maximum possible length of a mat is
2 00 millimetres.
- the maximum total area is 2.88m².
Rectangular shapes are preferred although any
shape which meets the restrictions outlined
above is possible.
The dimensions of sensors and their layout
must be such access to the machine is not
possible without stepping on a sensor. It should
not be possible to move the sensors or bridge
them using boards, plates etc. Further guidance
is given in section 1.6.
NOTE: CKP/S1 sensors have an inactive area
around the outer edges. This inactive area is 30
millimetres wide which means that the
dimensions of the active area (i.e. the zone
within which the application of pressure will
actuate the sensor) is 60 millimetres less than
the overall dimensions of the mat as shown in
Figure 1. This should be borne in mind when
specifying the size of mat for a particular
application. See section 1.6 for further
guidance on determining sensor dimensions.
1. I TRODUCTIO
1.1 PRODUCT DESCRIPTIO
Tapeswitch safety mat systems are pressure
sensitive safety devices designed to protect
operators working at or near dangerous
machinery. A system consists of a pressure
sensitive sensor and a control unit. When
correctly installed at and interfaced to a suitable
machine the system will:
(a) detect a person present in the dangerous
area and prevent dangerous motion from
occurring.
( ) detect a person entering the dangerous
area and cause dangerous motion to cease
before the person can reach the dangerous
parts.
(c) a combination of (a) and ( ).
Pressure sensitive sensors are fixed to the floor.
The area covered by the sensor depends on
which of the functions (a), (b) or (c) is to be
performed. When a person steps onto a sensor
a signal is transmitted to the control unit which
will in turn transmit a stop signal to the
machine control system.
Figure 1 - Dimensions of the inactive area
around outer edge of sensor
ACTIVE
AREA
30 30
30 30

4
1.2.1.2 SENSOR OPTIONS
CKP/S1 sensors can be supplied with two 2-
core leads or a single -core lead. Where a
single mat sensor is used a single -core lead
is most practical. Where several mats are
connected in series to form a larger sensor two
2-core leads should be specified.
1.2.2 PRSU/4 CONTROL UNIT
The PRSU/ control unit is designed to
monitor -wire safety sensors. The unit
provides monitoring of a sensor (or a number
of sensors connected in series), auto or
manual reset function and 3 safety outputs.
1.2.3 ACCESSORIES
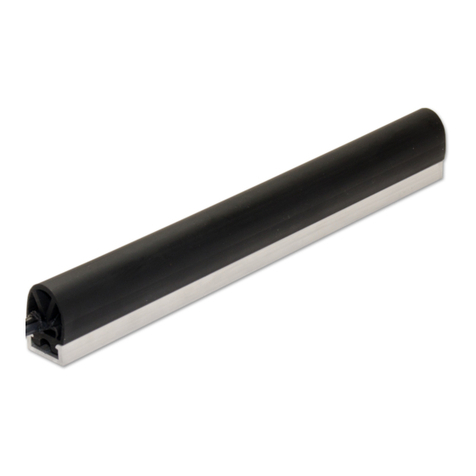
Aluminium edging is available for fixing the
sensors in position. This edging consists of
two interlocking aluminium extrusions, a base
and a cover. The edging can accommodate the
mat wiring and provides a 20 degree ramp to
prevent a tripping hazard at the mat edge.
1.3 PRODUCT FEATURES
1.3.1 SENSORS
* Tapeswitch internal switching elements.
* Sealed to IP65.
* 2 volt operation.
* Low pressure actuation.
* Heavy duty, abrasion and chemical resistant
materials.
* Multiple sensors can be connected to one
control unit.
1.3.2 CONTROL UNIT
* Cross-monitored safety output relays
with force guided contacts.
* Auto or manual reset function
* DIN rail mounting enclosure.
* Simple, reliable, proven technology.
*One control unit capable of monitoring
multiple sensors.
* Built in diagnostic indication.
* 2 Vdc supply.
NOTE: The external 2 Vdc power supply
must either be provided from a safety
transformer meeting EN607 2 or from a
battery. Cables feeding the supply should be
run separately and should be protected against
damage.

5
1.4 PRODUCT APPLICATIO
1.4.1 GENERAL
Tapeswitch safety mat systems can be used
either to provide primary guarding where
other types of guarding are impractical or to
provide secondary guarding where the
primary guarding method cannot protect all
danger areas. Safety mats are particularly
useful for protecting operators who may be
inside large machines and for awkwardly
shaped machines. Applications include:
* Robot cells
* Tube bending machines
* Carton folding/gluing machines
* Punching machines
1.4.2 FACTORS AFFECTING
SUITABILITY
1.4.2.1 PERSONS TO BE PROTECTED
CKP/S1 safety mats are not suitable for use
where children are to be protected.
1.4.2.2 MACHINE CONTROL FACTORS
The machine control system must satisfy the
following requirements:
(a) The dangerous motion of the machine
must be electrically controllable.
( ) The machine response/stopping
performance must be adequate and consistent.
(c) It must be possible to stop the dangerous
motion of the machine at any point in its
operation.
(d) The control system as a whole must be
constructed to provide the level of safety
integrity determined by a risk assessment as
described in section 1. .2.2.
1.4.2.3 RISK FACTORS
Every machine has its own unique hazards. In
order to determine the level of risk in a
particular application a risk assessment must
be performed. In many countries methods
have been developed and published, usually
by the organisations responsible for industrial
safety, to enable a systematic risk assessment
to be carried out.
The guidance available in a particular country
may take the form of national, European or
international standards. Persons responsible
for selecting safety devices should be familiar
with the guidance available in his country
before specifying particular safety devices. In
most current guidance the factors considered
in risk assessment are:
(a) the severity of possible injury.
( ) the frequency of exposure to the
hazard.
(c) the possibility of avoiding the hazard.
CKP/S1 mat sensors are suitable for use
in low to medium risk applications where the
following conditions apply:
EITHER
- the severity of possible injury is slight.
OR
- the severity of possible injury could be
serious and
- the frequency of exposure to the hazard is
low and
- the possibility of avoiding the hazard is high.

6
1.4.2.4 ENVIRONMENT FACTORS
The existence of the following factors
may preclude the use of safety mat
systems in particular applications:
(a) risk of injury from thermal or
other radiation.
( ) a tendency for the machine to
eject materials or components.
(c) a need for heavy vehicles to
frequently enter the dangerous area.
(d) continuous or repeated immersion
in water or other fluids.
(e) exposure to damage due to
droppage of heavy or sharp objects.
(f) exposure to spillage of hot and/or
solidifying substances.
(g) exposure to spillage of aggressive
chemicals.
Consult Tapeswitch or your Tapeswitch
agent if in doubt.
1.5 STA DARDS A D SAFETY
1.5.1 GENERAL
Tapeswitch CKP/S1 safety mat systems
have been designed to meet the
requirements of the European Standard
EN 13856-1 "Safety of Machinery.
Presssure-sensitive protective device.
General principles for the design and
testing of pressure-sensitive mats and
floors".
They also conform to Performance
Level PLd of EN138 9-1 "Safety of
machinery. Safety-related parts of
control systems. General principles for
design" when used with a Tapeswitch
PRSU/ control unit. In this case the
probability of dangerous failures per
hour, PFHd , is 1.03 x 10⁻⁷
As a component only, the B10d lifespan
value for the mat sensor is .0 x 106
cycles.

7
1.6 SPECIFICATIO A D
ORDERI G I FORMATIO
1.6.1 DETERMINING SENSOR
DIMENSIONS
1.6.1.1 GENERAL
The dimensions of the dangerous area depend
on the particular application. The parameters
to be considered include:
- speed of walk or arm movement
(typically 1,6m/s)
- arm length (typically 0,85m)
- length of stride (typically 0,7m)
- response time of system
- position of inactive areas
- overtravel of dangerous parts after stop
signal is generated
A Tapeswitch pressure sensitive safety mat
system can be used as:
(a) a combined trip and presence sensing
device - the device is positioned such that it
will be activated when a person enters a
dangerous area and remains activated whilst
the person is inside the dangerous area.
( ) a presence sensing device - the sensor is
positioned such that it will be actuated by a
person who is inside a dangerous area.
(c) a trip device - the sensor is positioned
such that it will detect a person entering a
dangerous area.
NOTE: Tapeswitch CKP/S1 safety mats
have an inactive area around the outer
edges. This inactive area is 30
millimetres wide which means that the
dimensions of the active area (i.e. the
zone which must cover the dangerous
area) will be 60 millimetres less than the
overall dimensions of the mat, as shown
in Figure 2. This should be borne in mind
when specifying the size of mat for a
particular application.
A1
B1
C1
A1
B1
C1
Active Area = A1 x A2
Overall Mat Dimensions = B1 x B2
Area Covered with Edging = C1 x C2
C1 =B1 + 126mm
C2 =B2 + 126mm
B1 =A1 + 60mm
B2 =A2 + 60mm
Figure 2 - Sensor Dimensions

8
Where possible, the shape and size of the
dangerous area should be designed such
that a single rectangular sensor,
preferably of a standard size, can be used.
Where this is not possible, non-standard
rectangular shapes, irregular shapes and
combinations of sensors will be required.
The range of standard sizes and the
restrictions on size and shape for
individual sensors are given in section
1.2.
Where a combination of sensors is
required the following considerations
apply:
(a) If possible all mat sensors in a
combination should be the same shape
and size. This makes it possible for the
user organisation to hold spare sensors
and simplifies the ordering of
replacements.
( ) If possible the mat sensors should be
arranged in a single row with joints
perpendicular to the normal direction of
approach of the operator as illustrated in
Figure 3.
(c) When mats must be arranged in an
array, one side of the array must not
exceed two mats as shown in Figure .
Figure 3 - Arrangement of mat joints
MACHI E
JOI T OF MATS
PERPE DICULAR
TO DIRECTIO OF
APPROACH
DIRECTIO OF
APPROACH
MAT 1
MAT 2
1.6.1.2 USE AS A COMBINED TRIP AND
PRESENCE SENSING DEVICE
When a system is used as a combined
trip and presence sensing device it will
normally be the sole means of guarding
at that particular part of the machine. In
this case it is necessary to ensure that
the dimensions of the sensor(s) are such
that the machine will be brought to rest
before an approaching person can reach
the dangerous parts and that the sensor
covers all of the dangerous area. It
should not be possible for a person to
stand anywhere between the front edge
of the active zone of the mat, and the
machine without standing on the mat.
In order to determine the position of the
front edge of the active zone it is
necessary to consider the stopping
performance of the machine.
Any machine, regardless of the
efficiency of its braking system, will
take a certain time to come to rest after
a stop signal is generated.
Figure 4 - Mat array requirements
2 MATS WIDE

9
From the instant that a persons foot
touches the mat to the instant that
dangerous motion actually ceases is
called the overall system response time.
The overall system response time, T, is
given by the following calculation:
T = t1 + t2
where t1 = the maximum response time
of the safety device between
the actuation of the sensor and
the generation of the stop
signal = 30ms
and t2 = the response time of the
machine between receiving a
stop signal from the safety
device and the dangerous
parts coming to rest.
The dangerous parts will obviously
continue to move during this time. The
sensor must therefore be dimensioned
such that the nearest point at which a
person could first touch the mat is at a
certain minimum distance from the
dangerous parts, to prevent the person
from reaching the dangerous parts
before they have stopped.
This must take into account the worst
case conditions illustrated in Figure 5
where a person could be a full stride
onto the sensor before the sensor is
actuated. This means that a certain
distance from the front edge of the
sensor and the nearest dangerous parts
must be maintained.
MINIMUM SEPARATION
DISTANCE S
DANGEROUS
PARTS
WORST CASE
POINT OF
DETECTION
Figure 5—Minimum separation distance
BEST CASE
POINT OF
DETECTION
NEAREST DANGER POINT
FRONT EDGE OF ACTIVE ZONE

10
This distance is the minimum separation
distance. All possible directions of
approach must be considered. The
minimum separation distance, S, can be
calculated using the following formula:
S = (1600 x T) + 1200
The overall system response time, T,
should be measured several times and the
highest value recorded, plus a suitable
allowance for brake deterioration, should
be used in the calculation of the
minimum separation distance.
1.6.1.3 USE AS PRESENCE SENSING
DEVICE
When the system is used solely as a
presence sensing device it is normally
used as a secondary guarding device in
conjunction with a separate primary
guarding device. The primary guarding
device would normally, as a minimum,
operate as a trip device. The position of
the trip device should be determined
according to the manufacturers
instructions. The primary guarding device
could be an interlocking fence, photo-
electric curtain or similar device.
In this case it is necessary to ensure that
the dangerous area, between the primary
guarding device and the machine is
completely covered by the active area of
the sensor(s), such that it is impossible
for a person to stand between the primary
guarding device and the dangerous parts
of the machine without standing on the
active area of the mat(s).
1.6.1.4 USE AS A TRIP DEVICE
When the system is used solely as a trip
device the minimum separation distance,
i.e. the distance from the front edge of the
active zone of the mat to the nearest
dangerous parts should be calculated as
described in section 1.6.1.2.
The minimum width of the active zone of
the mat should be 750 mm (i.e 810 mm
overall) to ensure that an operator cannot
inadvertently step over the mat into the
dangerous area without actuating the mat.
See Figure 6.
MACHI E
750mm
MI
MI SEPARATIO DISTA CE (S)
Figure 6—Mat solely used as a trip device

11
1.6.2 ORDERING INFORMATION
1.6.2.1 MAT SENSORS
When ordering mat sensors the following order code should be used. See Figure 7 for
lead position details:
Figure 7 - Lead position options
1.6.2.2 CONTROL UNIT
When ordering control units simply use
the control unit type designation i.e.
PRSU/ .
1.6.2.3 AE-13 MAT EDGING
AE-13 Mat Edging is for use with the
CKP/S1 Mats. The edging can be
supplied in kit form already prepared,
or in D-I-Y form for the edging to be
prepared when the mat is being
installed.

12
2. TECH ICAL DESCRIPTIO
2.1 SYSTEM OVERVIEW
A Tapeswitch safety mat system consists
of two elements: a sensor and a control
unit. The sensor may consist of a single
mat sensor or a combination of mat
sensors. When a person stands on the
sensor a stop signal is transmitted to the
control unit. On receiving a stop signal
from the sensor the control unit switches
off its output relays causing dangerous
motion to cease or be prevented.
The control unit contains the system
power supply, the sensor monitoring
circuit and the safety output relays. The
safety output relay contacts must be
connected into the machine control
circuit such that when the output relays
are switched off, power to the machine
primary control element(s) is removed.
A machine primary control element or
MPCE is defined as ‘an electrically
controlled element which directly
controls the normal operating motion of a
machine such that it is the last (in time)
to operate when motion is initiated or
arrested’.
NOTE: On low to medium risk machines
a single MPCE is normally used. If two
MPCE’s are provided their function
should be such that each of them is
capable of stopping the machine,
regardless of the state of the other.
2.2 SE SORS
2.2.1 MAT SENSORS
The construction of the CKP/S1 sensor is
shown in figure 8. A network of
Tapeswitch ribbon switching elements is
sandwiched between two thick sheets of
PVC material. The switching elements
are connected in series. The switch
elements are glued to the bottom layer.
The top and bottom layers are sheets of
ribbed, heavy duty matting material. This
material is of laminated construction and
is PVC based with special additives and
fillers to increase its abrasion and
chemical resistance. This material can
withstand years of pedestrian traffic and
is resistant to most chemicals commonly
found in an industrial environment
including water, coolant, oil and
hydraulic fluid. The top sheet is 6.5
millimetres thick and the bottom sheet is
5 millimetres thick.
TOP LAYER
SWITCH LAYER
BOTTOM LAYER
Figure 8 - Construction of CKP/S1 sensor

13
The construction of the Tapeswitch
elements is shown in Figure 9. Each
switching element is a long normally
open switch. The switch consists of two
copper plated steel conductors held apart
at the sides by an insulator. When
pressure is applied to the bead, the two
conductors are forced together in the
centre, closing the switch.
All the upper conductors of all the switch
elements are connected together and all
lower conductors are connected together,
effectively creating a single normally
open switch. Heavy gauge copper-plated
steel wire is used for all internal wiring
and all connections to the switching
elements are direct solder joints. The
switches are self-bottoming and as a
result they can withstand very high loads
and repeated operation. Several million
operations is typical.
PVC SLEEVE
PVC SLEEVE
UPPER CO DUCTOR
PVC SLEEVE
UPPER CO DUCTOR
LOWER CO DUCTOR
LOWER CO DUCTOR
2.2.2 COMBINATION OF SENSORS
When a number of mat sensors are used
in combination, sensors with two 2-core
leads should be used. The sensors should
be connected in series such that the
control unit ‘sees’ a single normally open
switch. One of the 2-core cables can be
considered to be the inlet cable and the
other the outlet cable. When connecting a
number of sensors together the outlet
cable of the first sensor is connected to
the inlet cable of the second sensor and
so on. This leaves the inlet cable of the
first sensor and the outlet cable of the last
sensor to be connected to the control unit
as illustrated in Figure 10.
Figure 9 - Construction of Tapeswitch
elements
Figure 10-Construction of sensors in series
TO
CO TROL
U IT
TO
CO TROL
U IT
MAT
SE SOR
MAT
SE SOR

14
3. I STALLATIO
WARNING
TAPESWITCH SAFETY MAT SYSTEMS ARE DESIGNED TO PROTECT
OPERATORS WORKING AT OR NEAR DANGEROUS MACHINES. THEY CAN
ONLY PERFORM THAT FUNCTION IF THEY ARE CORRECTLY FITTED AND
INTERFACED TO A SUITABLE MACHINE. EVERY EFFORT HAS BEEN MADE
IN THE PRODUCTION OF THIS MANUAL TO PROVIDE COMPREHENSIVE
AND ACCURATE INFORMATION. IT IS THE RESPONSIBILITY OF THE USER
TO ENSURE THAT ALL PERSONS INVOLVED IN THE INSTALLATION OF THE
PRODUCT HAVE THE KNOWLEDGE, TRAINING AND EXPERIENCE
NECESSARY AND THAT THEY ARE FULLY CONVERSANT WITH ALL LAWS,
RULES, REGULATIONS AND CODES OF PRACTICE PERTAINING TO THEIR
TASK.
3.1 GE ERAL
The attention of the installer is drawn to
following general requirements for the
installation of a Tapeswitch safety mat system:
(a) The machine must be electrically
controllable.
( ) It must be possible to stop the
dangerous motion of the machine at any
point in its operation, in any operating
mode.
(c) The control system as a whole must
be designed to provide the level of safety
integrity determined by the risk
assessment.
(d) Steps must be taken to prevent
access to the dangerous parts of the
machine from any direction not covered
by the sensor. Such steps could include
fixed or interlocking fences or screens,
additional pressure sensitive mats or
photo-electric devices.
(e) Steps must be taken to prevent a
person standing in the dangerous area
without standing on the sensor. The inner
surfaces of fixed mechanical fencing
should be designed
such that there are no ledges or steps on
which a person could stand and thereby
avoid the sensor. It may be necessary to
fit additional mechanical barriers, covers
etc. to cover any surfaces within the
dangerous area on which a person could
stand, such as the feet of the machine.
Particular attention should be paid to the
edge of the mat nearest to the machine.
Ensure that a person tip-toeing at the
front of the machine will still be standing
on the active area of the mat. See Figure
11.
(f) Wherever possible rectangular mats
of standard sizes should be used. Where
this is not possible, due to obstructions,
mats with edge or corner cutouts and
even with holes can be specified. This
should only be done where the
obstructions are permanent.
(g) Under no circumstances should a
mat sensor be cut or drilled. It is not
possible for the user to modify the size or
shape of a mat sensor.

15
(h) Great care should be taken when
handling mat sensors. Never pick the
sensor up or drag it around using the
cables. Never bend a mat at a radius less
than 300 millimetres. Keep mat sensors
flat whenever possible. Always store
flat. Mat sensors with one edge longer
than 1 metre should be handled by two
people.
(i) No devices other than those
specified in this manual should be
connected to the internally generated
power supply of the system.
(j) After installation the machine/mat
system must be commissioned in
accordance with section of this
manual.
(k) Any covers removed dur ing
installation must be replaced as soon as
possible.
3.2 SE SOR I STALLATIO
3.2.1 SENSOR MOUNTING SURFACE
The surface on which the sensor is
mounted must be sound and reasonably
flat. The sensor can tolerate minor
irregularities but sharp edges or
projections greater than 1mm may cause
premature degradation. Where the surface
is rough, cracked or breaking up, it
should be treated using proprietary
sealing and levelling compounds.
3.2.2 SENSOR FI ING
The sensor(s) must be fixed permanently
in position. Tapeswitch aluminium
edging should be used around the outer
edge of the sensor. This specially
designed edging comes in two parts, a
base and a cover. The cover provides a 20
degree ramp to prevent a tripping hazard
at the outer sensor edges. The base can
accommodate sensor wiring which
protects the cables from damage and acts
as a conduit to route the cables to the
control unit. Type AE-13 edging is
illustrated in Figure 12 and AE-C corner
pieces in Figure 13. At the junction of
several mats, the mats should be fixed to
the floor using double sided tape.
SLOPI G SKIRT
FIXED TO MACHI E
MAT
OPERATOR O
TIPTOE ALWAYS O
ACTIVE ZO E OF
SE SOR
Figure 11 - Ensure operator is always
standing on active area of sensor
71
8
17
Figure 12 - AE-13 Sensor Edging

16
3.2.3 INSTALLATION PROCEDURE
Step 1 - Plan the layout. Mark out on the
floor the position and size of each
sensor. Take care to use the overall
dimensions of mat sensors.
Step 2 - Cut all edging to size. Remove
any burrs and sharp edges with a file.
Note: If AE-C corner pieces are used
then:
the cut length = mat dimension - 12mm
of AE-13
Step 3 - Mark the positions of the sensor
cables and cut slots in the inner face of
the edging base extrusion to allow access
for the sensor cables.
Figure 13 - AE-C Corner piece
94
69
32
32
69
94
17
Step 4 - Position the base sections around
the mat and fit AE-C corner pieces as
shown in figure 1 . Drill pilot holes
through each corner piece and holes in
the base sections if applicable. Remove
base sections / corner pieces and drill and
plug the floor. Refit base sections and
corner pieces and secure in position with
the screws provided, ensuring the cable
exits neatly through the slot(s) in the base
section.
Figure 14 - AE-13 & AE-C Installation
Step 5 - In the case of a combination of
sensors connect the sensors in series as
shown in Figures 15 and 16. Special
grease filled waterproof connectors are
available from Tapeswitch Ltd. for this
purpose. If necessary cut the cables to
length. Always leave some slack in the
cables in order that a sensor can be
disconnected and reconnected at a later
date. The connectors are fitted using a
pair of pliers. Make sure that they are
fully mated.
NOTE: MAT SENSORS MUST BE
FITTED WITH THE LABEL SIDE UP.

17
Step 6 -Route the cable(s) to the control
unit. The cable(s) should exit from the
edging as close to the control unit
position as possible. The cables should
be protected in suitable conduit between
the edging and the control unit. Protect
any edges over which the cables pass
with grommet strip or similar.
Step 7 - Fit the cover extrusion of the
edging using suitable self-tapping
screws.
SEE FIGURE 17
SEE FIGURE 17
Figure 15 - Connection of sensors in series
Figure 16 - Wiring of two mat sensors each with 2 x 2 core ca les
GREASE-FILLED
TERMI ALS
OTE: CO ECT THE CABLES
COLOUR TO COLOUR USI G THE
GREASE-FILLED TERMI ALS
MAT SE SOR MAT SE SOR

18
3.3 CO TROL U IT
3.3.1 GENERAL
The connections for the PRSU/ control unit are shown in Figure 17. Crimped
ferrules should be fitted on all stranded wires. It is recommended that electrical
installation is performed in the order described below.
3.3.2 SENSOR CONNECTION
Connect the sensor cables to the control unit according to Table 1, taking particular
care that there are no stray strands which could cause a short between adjacent
terminals.
3.3.3 POWER CONNECTION
Connect +2 V to terminal A1 and 0V to terminal A2 as shown in Figure 17. The
maximum power consumption is 5VA.
Figure 17 - Control unit connection
SE SOR CO ECTIO
S11 S21 S12 S22
Single Lead -wire Brown Blue or
Green
Black or
Yellow
White
Dual Lead -wire Brown 1 White 1 Brown 2 White 2
SE SOR TYPE
Ta le 1

19
3.2.4 RESET INPUT CONNECTION
For auto reset mode connect a link across terminals S33 & S3 as shown in Figure 18.
For manual reset mode connect a normally-open switch across terminals S33 & S3 as
shown in Figure 19
If the machine has two MPCEs, a pair of normally-closed auxiliary contacts from each
MPCE can be connected in series with the reset input as shown in Figure 20. This
provides cross-monitoring of the MPCEs such that if they are in disparity due to a
fault, reset will be prevented until the fault is rectified
Figure 18 - Auto Reset
Figure 19 - Manual Reset
Figure 20– Cross Monitoring of
MPCEs
RESET TERMI ALS
RESET TERMI ALS
RESET TERMI ALS

20
3.2.5 SAFETY OUTPUT CONNECTION
Three normally-open safety outputs are provided. In low to medium risk applications
the machine is normally provided with a single MPCE.
In such cases both safety outputs should be connected in series with the MPCE coil as
shown in Figure 21. If the machine is fitted with two MPCEs, one safety output should
be connected in series with each MPCE coil as shown in Figure 22.
To protect the contacts of the safety output relays from the effects of switching
inductive loads, it is recommended that arc suppressors should be fitted in parallel
with the MPCE coils as shown Figures 21 and 22. Arc suppressors must not be fitted
across the safety relay contacts.
To protect against the possibility of both safety outputs welding in, due to an
overcurrent fault in the machine circuit, 2A fuses should be fitted in series with the
MPCE coils as shown in Figure 21 and 22. This limits the current through the safety
output contacts to well below that which could cause the contacts to weld.
Figure 21– Safety Output Connection (single MPCE)
Figure 22– Safety Output Connection (Two MPCEs)
Table of contents
Other Tapeswitch Accessories manuals
Popular Accessories manuals by other brands

Keating Of Chicago
Keating Of Chicago Flexible Tubing to Hard Piping 055173 Service instructions

IFM
IFM TS502A operating instructions

Kübler
Kübler IN8 Series installation instructions
Franklin Fueling Systems
Franklin Fueling Systems FMP-HFS2 installation guide
ab
ab AB-UVC-STRL user manual

Martin Yale
Martin Yale 1648 user manual
