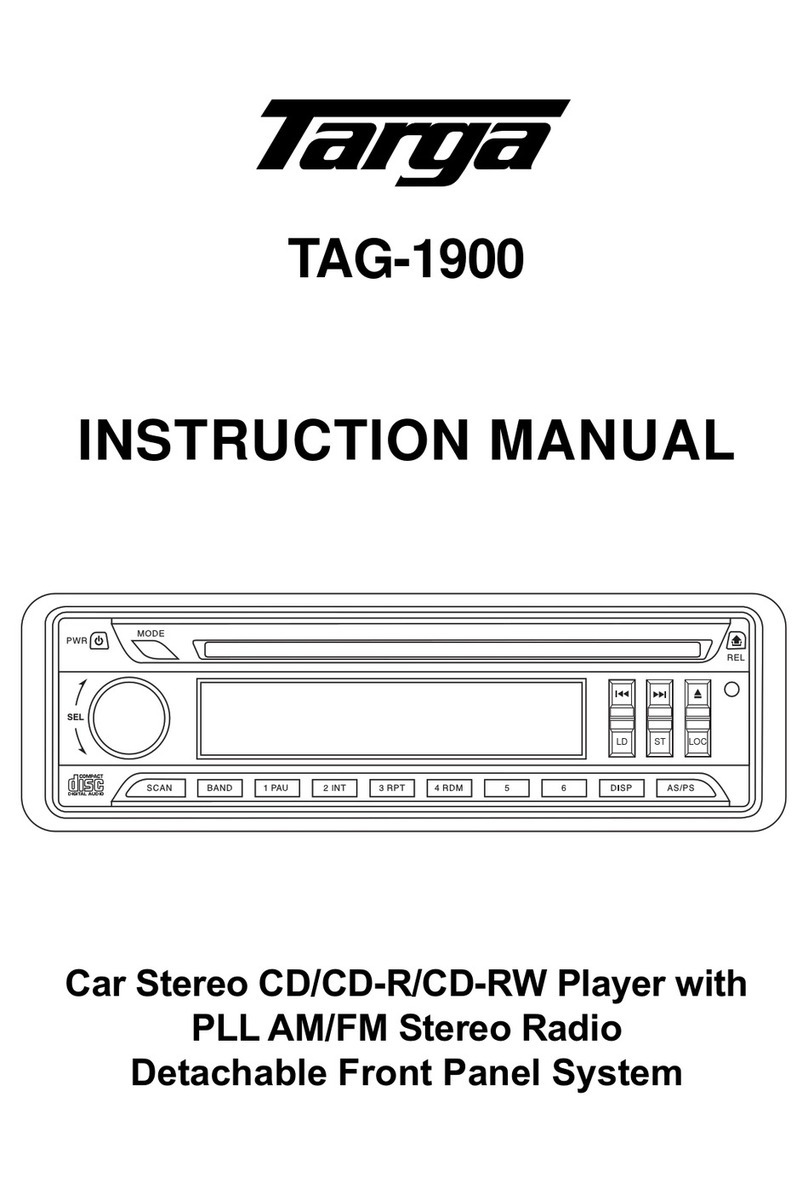
Targa TAG-7000 User manual

TAG-7000
INSTRUCTION MANUAL
Car Stereo CD / CDR / CDRW / MP3 Player
with PLL AM / FM Stereo Radio
USB / MMC / SD Card Input
Flip Down and Deatachable Front Panel System

E-1
LOCATIONS OF CONTROLS
1. POWER ON/OFF ( )
2. FUNCTION SELECT BUTTON: BASS/TREBLE/BALANCE/
FADER / AUDIO DSP/ESP/BEEP/SEEK/VOL LAST (SEL)
3. VOL UP/VOL DOWN FOR BASS/TREBLE/BALANCE/FADER
4. PRESET STATIONS (1,2,3,4,5,6)
5. STEREO/MONO BUTTON (ST)
6. LOUDNESS BUTTON (LOUD)
7. LOCAL/DISTANT SELECT (LOC)
8. DISPLAY BUTTON (Set the Clock) (DISP)
9. MODE BUTTON (MD)
10. BAND SELECTOR SWITCH (BND)
11. AUTOMATIC OR MANUAL TUNING (FREQ UP OR FREQ
DOWN )
12. AUTOMATICALLY STORE STATIONS (A/PS)
13. ‘SCAN’ AUTOMATIC TUNING CONTROL (SCN)
14. MUTE BUTTON (MU)
15. LCD DISPLAY
16. OPEN PANEL BUTTON ( )
17. CD SLOT
18. CD EJECT BUTTON ( )
19. PAUSE BUTTON
20. INTRO BUTTON (Preview all Tracks) ‘INT’
21. REPEAT BUTTON ‘RPT’
22. RANDOM BUTTON ‘RDM’
23, 24. 10 TRACK UP/DOWN SELECT: (In case of MP3 files)
25 RESET BUTTON
26. USB Port
27. MULTI-MEDIA CARD (MMC) / SD CARD SLOT
1
11
10
4
2 93
242123
22
19 20 12 8
(1-6)
POWER
2
INT
3
RPT
MP3
1
PAUSE
MODE
DISP
5 64
RDM
AS/PS
BAND
SEL
ENTER
VOL
VOL
TUNE/SEEK
4
(1-6)
15 16 271113 8 101 2 312
914 19 20 21 22 23 24 7 6 5 26
RESET
25
18 17

E-2
INSTALLATION
PRECAUTIONS
• Choose the mounting location carefully so that the unit will not interfere with the normal
driving functions of the driver.
• Avoid installing the unit where it would be subject to high temperatures, such as from direct
sunlight or hot air from the heater, or where it would be subject to dust, dirt or excessive vibration.
• Use only the supplied mounting hardware for a safe and secure installation.
• Be sure to remove the front panel before installing the unit.
Mounting angle adjustment
Adjust the mounting angle to less than 20°.
MOUNTING EXAMPLE
Installation in the dashboard
Note: Keep the release key in the safe place as you may need it in future to remove the unit
from the car.
Detaching and attaching the front panel
The front panel of this unit can be detached in order to prevent the unit from being stolen.
FOLDING DOWN AND DETACHING/ATTACHING THE FRONT PANEL
Before detaching the front panel, be sure to press the PWR button (1) OFF first.
Then press the OPEN button (16), let the Front Panel arrive in horizontal position and detach
the panel by pulling it towards you as illustrated.
Notes:
• Do not press the front panel hard against the unit when attaching it. It can be easily attached
by pressing it lightly against the unit.
• When you carry the front panel with you, put it in the supplied front panel case.
• Do not press hard or give excessive pressure to the display window of the front panel when
attaching it to the unit.
Bend these
claws, if necessary
Release screw and
bracket 2182mm
53mm
34
TAP
1
2
13
1
2

E-3
TO SUPPORT THE UNIT
ISO CONNECTOR
RCA Jack Line Out Line In
: Red (right) : Red (right)
: White (left) : White (left)
CONNECTOR A
1.
2.
3.
4. MEMORY +12V
5. AUTO ANTENNA OUTPUT
6.
7. +12V (TO IGNITION KEY)
8. GROUND
Note: (connector A no. 7) must be connected by car ignition key in order to avoid that car
battery becomes weak when the car will be not used for long period.
CONNECTOR B
1. REAR RIGHT SPEAKER (+)
2. REAR RIGHT SPEAKER (-)
3. FRONT RIGHT SPEAKER (+)
4. FRONT RIGHT SPEAKER (-)
5. FRONT LEFT SPEAKER (+)
6. FRONT LEFT SPEAKER (-)
7. REAR LEFT SPEAKER (+)
8. REAR LEFT SPEAKER (-)
Maintenance
FUSE REPLACEMENT
If the fuse blows, check the power connecton and replace the fuse. If the fuse blows again after
the replacement, there may be an internal malfunction. In this case, consult your nearest re-
pairing center.
Warning
Use the specified amperage fuse for each lead. Use of a higher amperage fuse may cause
serious damage.
2468
1357 B
2468
1357
A
1. UNIT
2. RELEASE CASE
3. DASH BOARD
4. HEX NUT
5. LOCK WASHER
6. PLAIN WASHER
7. CAR BODY
8. REAR SUPPORT STRAP
9. TAPPING SCREW
10.M5 X 15 HEX BOLT
Dashboard
10
7
1
2
34
4
4
5
5
6
6
8
9

E-4
OPERATING INSTRUCTIONS
1. POWER ON/OFF
By pressing this key, the unit is switched on and off.
This unit is turned on by pressing any key.
2. SELECT
3. VOLUME UP/DOWN
Turning the VOL knob Right or Left (3), you can adjust VOL/BASS/TREB/BAL/FAD. To
select other functions, press the SEL (2) button shortly until the desired functions is shown
on the display. Figure 1 shows how control functions are selected using the SEL button.
Fig. 1 Selection of sound control functions
1. VOL 2. SEL 3. BAS 4. TRE 5. BAL 6. FAD
Turning the VOL knob Right or Left. Increase or decrease the volme by turning
VOL
or
VOL
.
These buttons can be used to adjust the BASS, TREBLE, BALANCE and FADER.
AUDIO DSP CONTROLS (2)
When press the SEL button for more than 2 seconds, it is activated as selecting mode of
these function.
ESP MODE (2)
When press the SEL button for more than 2 seconds, it is activated as 12 sec. or 45 sec. of
ESP mode can be selected.
MULTI CD SECTION MODE (2)
When press the SEL button for more than 2 seconds, it is activated as selecting mode of
these function.
CD MULTI ON/OFF mode is selected by
VOL
or
VOL
key. CD MULTI ON: Read multi
section CD. CD MULTI OFF: Read first section only.
BEEP MODE (2)
When press the SEL button for more than 2 seconds, it is activated as selecting mode of
these function.
BEEP ON: BEEP sound can be heard from speaker when the buttons are pressed.
1 3
24
25
26
22
DSP
SEL
2 sec.
POP M --- ROCK M --- CLASS --- FLAT M --- DSP OFF
VOL
ESP 12s. / 45s.DSP
SEL
2 sec.
SEL ESP
VOL
CD MULTI ON/OFFDSP
SEL
2 sec.
SEL MULTI
ESP SEL
VOL
ESP SEL
DSP
SEL BEEP
SEL
2 sec.
SEL MULTI BEEP ON/OFF
VOL

E-5
SEEK MODE (2)
When press the SEL button for more than 2 seconds, it is activated as selecting mode of
these function.
SEEK 1: When SEEK 1 mode is activated, AUTO SEEK SCAN is stopped when station is
detected even user still push SEEK button.
SEEK 2: Auto SEEK SCAN is not stopped even station is detected if user push SEEK
button. When release this SEEK button, then stop when station is defected.
4. PRESET STATIONS
Six numbered preset button store and recall stations for each band.
Storing a station:
1. Select a band (if needed)
2. Select a station
3. Hold a preset button longer than one second. Preset station number appears in the
display when station is saved.
Recall a station:
1. Select band (if needed)
2. Press a preset button for less than one second to select stored station.
5. STEREO/MONO SELECTOR
When FM stations are weak and are disturbed, listening can be improved by selecting
MONO. Press the button once, reception will then be in MONO. Repress to go back to
FM-stereo mode, “ST” appears on the display.
6. LOUDNESS CONTROL
Press this button to operate. The bass and treble response will be boosted. Push this
button again to return the player to its normal operation. This function is useful when listening
at low levels. The loudness control will boost the bass and treble response thus giving a
more lively performance.
While this function is operating, the display shows “LOUD”.
7. LOCAL/DISTANT BUTTON
Press this button to select “Local” position in areas with strong signals to let radio stop at
only strong stations during manual tuning (LOC appears). Press to Distant position in areas
with weak signals to listen to all stations.
8. DISPLAY BUTTON (Set the Clock)
Selects radio frequency or clock display.
To set the clock:
1. With clock display selected, hold down (DISP) button until clock display starts flashing.
2. Rotating
VOL
to change minutes,
VOL
to change hours.
3. Press (DISP) button to start clock.
9. MODE BUTTON
By pressing this key, user can select. AUX/TUNER/CD-MP3/USB or MMC/SD mode.
10. BAND SELECTOR SWITCH
Push this switch to select the desired band. Selection is made in regular sequence as FM1-
FM2-FM3-AM1-AM2.
ESP SEL
DSP
SEL SEEK
SEL SEL
2 sec.
SEL MULTI BEEP SEEK1 / SEEK 2
VOL

E-6
11. AUTOMATIC OR MANUAL TUNING (FREQ UP OR FREQ DOWN )
(A) RADIO MODE
When pressed for less than 1 second, these keys operate as manual tuning mode.
When pressed longer than 1 sec., they are operated as SEEK tuning mode.
If the keys are not pressed for 3 seconds, they will return to SEEK mode again.
(B) CD PLAYER MODE
When pressed for less than 1 second, they will operate as TRACK UP or TRACK DOWN mode.
When pressed longer than 1 sec., they will operate as CUE or REVIEW mode.
12. AUTOMATICALLY STORE STATIONS
Select six strong stations and store them in current band.
1. Select a band (if needed)
2. Hold A/PS button for more than three seconds. The new stations replace stations already
stored in that band.
Preset Scan
Scan stations stored in current band
1. Select a band (if needed)
2. Touch A/PS for more than one second but less than three seconds. Radio pauses for
five seconds at each station. Touch A/PS again to stop scanning when desired station is
reached.
13.‘SCAN’ AUTOMATIC TUNING CONTROL (SCN)
This key is operated as RADIO SCAN. The operation is similar as normal search but different
thing is holding 5 seconds on every station detected in RADIO SCAN mode.
14. MUTE Button (MU)
Press this button to mute the sound at once. Press again to return to previous volume level.
15. LCD DISPLAY
The Liquid Crystal Display will display the current state of the unit.
16. OPEN FRONT PANEL BUTTON
Press button and the front panel will be open.
CD CONTROL LOCATION OF PARTS
11. TRACK/SEARCH BUTTON
FORWARD AND REVERSE TRACK SEARCH
Press and release to advance to next track or to return to the beginning of the current track
(track number will be displayed). Press and hold to fast forward or reverse. Play will begin
at the point when you release the button.
17. CD SLOT
18. CD EJECT BUTTON
Press the EJECT button to remove the CD. The receiver will automatically switch to radio
mode.
19. PAUSE BUTTON
Press to pause CD playback. Press again to resume playback.

E-7
20. INTRO BUTTON (Preview all Tracks) ‘INT’
When this button is pressed, ‘INT ON’ indication is displayed and the first several seconds
of each track of the disc is played. Press again to stop intro and listen to track.
21. REPEAT BUTTON ‘RPT’
When this button is pressed, ‘RPT ON’ indication is displayed and the selected track will be
continually repeated until the Track repeat mode is cancelled by pressing ‘RPT’ button
again.
22. RANDOM BUTTON ‘RDM’
When this button is pressed, ‘RDM ON’ indication is displayed and each track on the disc is
played in random order instead of normal progression. To cancel RANDOM mode, press
‘RDM’ button (22) again.
23, 24. 10 TRACK UP/DOWN SELECT: (In case of MP3 files)
M5: 10 Track down / M6: 10 Track up
HOW TO SELECT MP3 FILES
1. Searching Track:
• Press “A/PS”, then search track is activated.
• Press “SEL”, then the first digit will flash.
• With “VOL
VOL
/ VOL VOL ” knob, select first digit desired.
• Press “SEL”, then the first digit is fixed and second digit will flash.
• With “VOL
VOL
/ VOL VOL ” knob, select 2’nd 3’rd respectively.
• Then automatically the song selected will start.
2. Searching File Name:
• Press “A/PS” twice, then file search is activated.
• Press “SEL”, then the first directory is displayed.
• With “VOL
VOL
/ VOL VOL ” knob, you can select the desired directory.
• Press “SEL” again, then the directory is fixed and the first file name is displayed.
• With “VOL
VOL
/ VOL VOL ” knob, you can select the file you want.
• Press “SEL”, then the song selected will start.
3. Searching Character:
• Press “A/PS” 3 times, then character search mode is activated.
• Press enter “SEL” button, then “A” character is displayed.
• With “VOL
VOL
/ VOL VOL ” knob, you can select the desired letter.
• Press enter “SEL” key longer than 2 sec.
• The song with the same character you selected is displayed.
• With “VOL
VOL
/ VOL VOL ” knob, you can select the desired song.
• Press enter “SEL” key, then the song selected will start.
• RESET
Reset button (25) is placed on the housing.
The reset button is to be activated for the following reason:
• Initial installation of the unit when all wiring is completed.
• All the funciton button do not operated.
• Error symbol on the display.

E-8
Connecting it to Portable MP3 Player
26. USB Port
Using USB cable to connect Your Portable MP3 Player.
27. MULTI-MEDIA CARD (MMC) / SD CARD SLOT
Support MP3 ID3 format music only.
* IMPORTANT INFORMATION:
BECAUSE OF THE GREAT VARIETY OF PRODUCTS WITH USB,SD AND MMC CARD
PORTS AND THEIR SOMETIMES QUITE MANUFACTURER-SPECIFIC FUNCTIONS WE
CAN NEITHER GUARANTEE THAT ALL DEVICES WILL BE RECOGNIZED NOR THAT ALL
OPERATING OPTIONS THAT ARE POSSIBLE IN THEORY WILL ACTUALLY WORK.

E-9
SPECIFICATIONS
CD/MP3 PLAYER SECTION
Signal to Noise Ratio > 60 dB
Channel Separation > 60 dB (1kHz)
Frequency Response 20 Hz - 20 kHz
TUNER (FM)
Frequency range 87.5-108 MHz
Intermediate frequency 10.7 MHz
Sensitivity 2.8 µV
Stereo separation 30 dB
Signal to noise radio 100 dB
Channel step 100 kHz
TUNER (AM)
Frequency range 530-1620 KHz
Intermediate frequency 450 KHz
Usable Sensitivity 32 dBµV
LINE-OUT
Output 1000 mV
Impedance 10 kOhm
GENERAL
Power Supply 12 V DC (10.8-15.6V allowable)
Speaker impedance 4 or 8 ohm
Output power 50W x 4CH
Note: Specifications and the design are subject to possible modification without notice due to
improvement.

TAG-7000
MANUAL DE INSTRUCCIONES
Reproductor estéreo de CD/CDR/CDRW/MP3
para automóvil con
Radio estéreo AM/FM PLL
Entrada de tarjeta USB/MMC/SD
Sistema de panel frontal desmontable/Basculante

SP-1
UBICACIÓN DE CONTROLES
1. ENCENDIDO/ APAGADO ( )
2,3 BOTÓN SELECTOR DE FUNCIÓN: GRAVES/ AGUDOS/
BALANCE/ FADER/ AUDIO DSP/ ESP/ CD MULTI/BEEP/
BÚSQUEDA”SEEK” (SEL)
4. ESTACIONES PRE-PROGRAMABLES
5. BOTÓN ESTÉREO/ MONO (ST)
6. INTENSIDAD DE SONIDOS (LOUD)
7. SELECTOR DE ESTACIONES LOCAL/ DISTANTE (LOC)
8. BOTÓN DISPLAY (Programa el reloj)
9. SELECTOR DE MODO (MD)
10. SELECTOR DE BANDA (BND)
11. SINTONIZADOR AUTOMÁTICO O MANUAL (AUMENTO DE
FRECUENCIA O DISMINUCIÓN DE FRECUENCIA 9)
12. ESTACIONES ALMACENADAS AUTOMÁTICAMENTE (A/PS)
13. CONTROL DE SINTONIZACIÓNAUTOMÁTICA“SCAN” (SCN)
14. BOTON MUTE (MU)
15. DISPLAY LCD.
16. BOTÓN “OPEN” ( )
(para liberar el panel desmontable)
17. RANURA PARA CD
18. BOTÓN EXPULSOR DE CD
19. BOTÓN DE PAUSA ( )
20. BOTÓN INTRO (REPRODUCE LOS PRIMEROS
SEGUNDOS DE CADA PISTA) “INT”
21. BOTÓN REPETIR “RPT”
22. BOTÓN RANDOM “RDM” (Al AZAR)
23, 24. SELECTOR DE 10 PISTAS HACIA ARRIBA (TRACK UP)/
HACIA ABAJO (DOWN): (En el caso de archivos MP3)
25. BOTÓN RESET
26. PUERTO USB
27. RANURA PARA TARJETA MULTI-MEDIA (MMC)/ TARJETA SD
1
11
10
4
2 93
242123
22
19 20 12 8
(1-6)
POWER
2
INT
3
RPT
MP3
1
PAUSE
MODE
DISP
5 64
RDM
AS/PS
BAND
SEL
ENTER
VOL
VOL
TUNE/SEEK
4
(1-6)
15 16 271113 8 101 2 312
914 19 20 21 22 23 24 7 6 5 26
RESET
25
18 17

SP-2
INSTALACIÓN
PRECAUCIONES
• Elija el lugar donde se va a instalar el equipo cuidadosamente para que la unidad no
interfiera con las funciones de operación normales.
• Evite instalar la unidad donde se encuentre sujeta a altas temperaturas tales como luz
directa del sol o aire caliente proveniente de estufas, o donde haya polvo, suciedad o
vibraciones excesivas.
• Para una instalación segura utilice únicamente el equipo y accesorios suministrados.
• Asegúrese de remover el panel frontal antes de instalar la unidad.
Ajuste de ángulo de montaje
Ajuste el ángulo de montaje a menos de 20°.
EJEMPLO DE MONTAJE
Instalación en el tablero
Nota: Tener la llave de desbloqueo en un sitio seguro para el momento en el que fuese necesario
quitar el aparato del coche.
COMO SEPARAR Y UNIR EL PANEL ANTERIOR (FRONTAL)
El panel anterior (frontal) de este aparato puede ser separado para evitar que éste sea robado.
COMO SEPARAR/INTRODUCIR EL FRONTAL
Antes de separar el frontal, asegúrense de haber oprimido el botón en OFF. Entonces apriete
el botón (16) de OPEN, permitió que el Entrepaño Anterior llegue en la posición horizontal y
separe el entrepaño tirandolo hacia usted ilustró como.
Notas:
• No oprimir con fuerza el frontal contra el aparato cuando el primero se vuelve a conectar;
es suficiente una ligera presión hacia el aparato mismo.
• Cuando lo lleven con ustedes, vuelvan a ponerlo en su estuche
• No presionen fuerte o ejerzan demasiada presión sobre el display del frontal cuando lo
conecten al aparato.
Doble ls aletas
próximas al borde interno
Retire los tornillos
de transporte 2182mm
53mm
34
TAP
1
2
13
1
2

SP-3
SOPORTE DE LA UNIDAD
CONECTOR ISO
Salida para Jack RCA Entrada
: Rojo (derecha) : Rojo (derecha)
: Blanco (izquierda) : Blanco (izquierda)
CONECTOR A
1.
2.
3.
4. MEMORIA + 12 V
5. SALIDA PARA ANTENA.
6.
7. +12V (PARA LLAVE DE ENCENDIDO)
8. TIERRA
Nota: El cable rojo (conector A N°7) debe conectarse por la llave de encendido para evitar que
la batería del automóvil se debilite al no ser utilizado por un período prolongado.
CONECTOR B
1. PARLANTE TRASERO DERECHO (+)
2. PARLANTE TRASERO DERECHO (-)
3. PARLANTE FRONTAL DERECHO (+)
4. PARLANTE FRONTAL DERECHO (-)
5. PARLANTE FRONTAL IZQUIERDO (+)
6. PARLANTE FRONTAL IZQUIERDO (-)
7. PARLANTE TRASERO IZQUIERDO (+)
8. PARLANTE TRASERO IZQUIERDO (-)
Mantenimiento
CAMBIO DE FUSIBLES
Si se quema el fusible, verifique la conexión de encendido y reemplace el fusible. Si el fusible
se quema nuevamente luego del cambio, puede haber un mal funcionamiento interno. En ese
caso, consulte al servicio técnico más cercano.
Atención
Utilice el fusible con el amperaje adecuado para cada cable. Utilizar un fusible de mayor
amperaje puede provocar serios daños.
2468
1357 B
2468
1357
A
1. Unidad
2. Compartimiento de extracción
3. Tablero
4. Tuerca
5. Arandela de fijación
6. Arandela plana
7. Cuerpo del automóvil
8. Correa trasera de soporte
9. Tornillo
10. Perno M5 X 15
10
7
1
2
34
4
4
5
5
6
6
8
9

SP-4
INSTRUCCIONES DE OPERACIÓN
1. ENCENDIDO/ APAGADO
Al presionar esta tecla, se enciende y se apaga la unidad.
Este equipo comienza a funcionar presionando cualquier tecla.
2. SELECTOR
3. CONTROL DE VOLUMEN
Gire la llave VOL hacia la derecha o izquierda (3) para ajustar VOL/ BASS/ TREBLE/ BAL/
FAD. Para seleccionar otras funciones, presione el botón SEL (2) hasta que se muestre en
el display la función deseada. La figura 1 muestra cómo se seleccionan las funciones de
control utilizando el botón SEL.
Fig. 1 Selección de las funciones audio
1. VOL 2. SEL 3. BAS 4. TRE 5. BAL 6. FAD
Gire la perilla VOL hacia la derecha o izquierda. Aumente o disminuya el volumen
girando
VOL
o
VOL
. Estos perillas se pueden utilizar para ajustar los graves (BASS),
Agudos (TREBLE), BALANCE y FADER.
CONTROLES AUDIO DSP (2)
Al presionar el botón SEL por más de 2 segundos, se activa como modo selector de estas
funciones.
MODO ESP (2)
Cuando se presiona el botón SEL por más de 2 segundos, se puede seleccionar activar
como 12 o 45 SEC. de modo ESP.
MODO MULTI CD (2)
Cuando se presiona el botón SEL por más de 2 segundos, se activa como modo selector
de esta función.
Se selecciona el modo MULTI CD al girar la llave
VOL
o
VOL
. Encendido de la función
MULTI: Lee la multi sección CD.
Apagado de la función MULTI: Lee únicamente la primera sección.
MODO BEEP (2)
Cuando presione el botón SEL por más de 2 segundos, se activará como modo selector de
esta función.
1 3
24
25
26
22
DSP
SEL
2 sec.
POP M --- ROCK M --- CLASS --- FLAT M --- DSP OFF
VOL
ESP 12s. / 45s.DSP
SEL
2 sec.
SEL ESP VOL
CD MULTI ON/OFFDSP
SEL
2 sec.
SEL MULTI
ESP SEL
VOL
ESP SEL
DSP
SEL BEEP
SEL
2 sec.
SEL MULTI BEEP ON/OFF
VOL

SP-5
BEEP ENCENDIDO: Se puede escuchar por el parlante el sonido BEEP cuando se
presionan estos botones.
MODO BÚSQUEDA (SEEK) (2)
Cuando presione el botón SEL por más de dos segundos, se activará como modo selector
de esta función.
SEEK 1: Cuando se activa el modo de búsqueda 1, la búsqueda automática (AUTO SEEK
SCAN) se detiene al detectar una estación aún cuando el usuario continúe presionando el
botón SEEK.
SEEK 2: La búsqueda (SEEK SCAN) no se detiene aún cuando se detecte una estación si
el usuario presiona el botón SEEK. Después de soltar este botón de búsqueda (SEEK), la
búsqueda se detiene cuando se encuentra una estación.
4. ESTACIONES PRE-PROGRAMABLES
Seis botones numerales pre-programados almacenan y sirven para volver a traer estaciones
para cada banda.
Almacenar Estaciones:
1.Seleccione una banda (si es necesario)
2.Seleccione una estación
3.Mantenga presionado el botón numeral por más de un segundo. El número de la estación
pre-programada aparece en el display cuando se almacena la estación.
Volver a una estación pre-programada:
1.Seleccione la banda (si es necesario)
2.Presione el botón pre-programado por menos de un segundo para seleccionar una
estación almacenada previamente.
5. SELECTOR ESTÉREO/ MONO
Cuando las señales de estaciones FM son débiles, se puede mejorar la escucha al seleccionar el
modo MONO. Presione una vez el botón para que la recepción sea en MONO. Presione nuevamente
para volver al modo FM estéreo y aparecerá en el display “ST”.
6. INTENSIDAD DE SONIDOS
Presione este botón para que funcione dicha función. Se aumentará la respuesta de graves (BASS)
y agudos (TREBLE). Presione nuevamente este botón para que el reproductor vuelva a su normal
funcionamiento. Esta función es útil al escuchar en niveles bajos. La intensidad de sonidos
aumentará la respuesta de graves y agudos dando una ejecución más vívida.
Al utilizar esta función, el display muestra “LOUD”.
7. Botón LOCAL/ DISTANTE
Presione este botón para seleccionar la posición “LOCAL” en áreas con señales fuertes para que
la radio se detenga sólo en las estaciones de mayor potencia durante la sintonización manual
(aparecerá LOC). Presione la posición “DISTANTE” en áreas con señales de menor potencia para
escuchar todas las estaciones.
8. BOTÓN DISPLAY (Programación del reloj)
Selecciona la frecuencia de radio o muestra la función Reloj.
Programación del reloj:
1. Seleccione la función Reloj, presione el botón (DISP) hasta que el display titile.
2. Gire
VOL
para cambiar los minutos, y
VOL
para cambiar la hora.
3. Presione el botón (DISP) para que comience a funcionar el reloj.
ESP SEL
DSP
SEL SEEK
SEL SEL
2 sec.
SEL MULTI BEEP SEEK1 / SEEK 2
VOL

SP-6
9. BOTÓN MODO
Al presionar esta tecla, el usuario puede seleccionar el modo AUX/ RADIO/ CD-MP3/ USB
o MMC/ SD.
10. LLAVE SELECTORA DE BANDA
Presione esta tecla para seleccionar la banda deseada. Le selección se leva a cabo en
una secuencia regular: FM1- FM2- FM3- AM1-AM2.
11. SINTONIZACIÓN AUTOMÁTICA O MANUAL (FREQ UP O FREQ DOWN )
(A) MODO RADIO
Al presionar por menos de un segundo, estas llaves funcionan como modo de sintonización
MANUAL.
Al presionar por más de un segundo, las mismas funcionan como modos de sintonización
SEEK.
Si por 3 segundos no se presionan estas teclas, se volverá al modo SEEK nuevamente.
(B) MODO REPRODUCTOR DE CD
Al presionar estas teclas por menos de un segundo, las mismas funcionan como modos
de búsqueda de pistas TRACK UP (hacia arriba) o TRACK DOWN (hacia abajo)
Al ser presionadas por más de un segundo, éstas funcionan como modos de AVANCE
(CUE) o RETROCESO (REVIEW).
12. ESTACIONES ALMACENADAS AUTOMÁTICAMENTE
Seleccione 6 estaciones con señales potentes y almacénelas en la banda actual.
1.Seleccione una banda (si es necesario)
2.Mantenga presionado el botón A/PS por más de tres segundos. Las nuevas estaciones
reemplazan a las almacenadas anteriormente en esa banda.
Rastreo de Estaciones Pre-programadas
Rastree estaciones almacenadas en la banda actual.
1.Seleccione una banda (si es necesario)
2.Presione el botón A/PS por más de un segundo pero menos de tres. La radio hace una
pausa de 5 segundos en cada estación. Presione A/PS nuevamente para detener el
rastreo cuando se encuentre la estación deseada.
13. CONTROL DE SINTONIZACIÓN AUTOMÁTICA “SCAN” (SCN)
Esta tecla funciona como RADIO SCAN.
El funcionamiento de la misma es similar a la búsqueda normal pero permanece por 5
segundos en cada estación detectada en el modo RADIO SCAN.
14. BOTON MUTE (MU)
La tecla MUTE permite poner mudo al sonido. Apretar MUTE de nuevo para devolver el
nivel de sonido normal.
15. DISPLAY LCD
El visor de cristal líquido mostrará el estado actual de la unidad.
16. BOTÓN OPEN (para liberar el panel desmontable)
Presione el botón y se liberará la parte derecha del panel.

SP-7
UBICACIÓN DE CONTROLES DE CD
11. BOTÓN DE RASTREO/ BÚSQUEDA
BÚSQUEDA HACIA DELANTE O HACIA ATRÁS
Presione y suelte el botón para avanzar a la pista siguiente o para retroceder al comienzo
de la pista actual (se mostrará el número de pista). Presione y mantenga presionado el
botón para adelantar retroceder rápidamente. Se comenzará a reproducir en el momento
en que suelte el botón.
17. RANURA PARA CD
18. BOTÓN DE EXPULSOR DE CD
Presione el botón EJECT para retirar el CD. El receptor cambiará automáticamente al
modo RADIO.
19. BOTÓN PAUSA
Presione el botón para hacer una pausa en la reproducción. Presione nuevamente para la
volver a la reproducción.
20. BOTÓN INTRO (Reproduce los primeros segundos de cada pista) “INT”
Cuando se presiona este botón, aparece en el display la indicación “INT ON” y se reproducen
los primeros segundos de cada pista del disco. Presione nuevamente para detener la
función INTRO y escuchar la pista.
21. BOTÓN REPETIR “RPT”
Cuando se presiona este botón, aparece la indicación “RPT” en el display y se reproduce
continuamente la pista seleccionada hasta que se cancele el modo de repetición al presionar
una vez más el botón “RPT”.
22. BOTÓN RANDOM (AL AZAR) “RDM”
Cuando se presiona este botón, aparece en el display la indicación “RDM ON” y se
reproducen al azar todas las pistas del disco en vez de hacerlo en orden progresivo. Para
cancelar el modo RANDOM, presione el botón “RDM” (22) nuevamente.
23, 24. SELECTOR DE 10 PISTAS HACIA ARRIBA (TRACK UP) / HACIA ABAJO (TRACK
DOWN) : (En el caso de archivos MP3)
M5: Rastreo de 10 pistas hacia abajo / M6: Rastreo de 10 pistas hacia arriba
SELECCIÓN DE ARCHIVOS MP3
1. Búsqueda de pistas
• Presione “A/PS” para activar la búsqueda de pistas.
• Presione “SEL” y el primer dígito titilará.
• Con la perilla “
VOL
/
VOL
” seleccione el primer dígito deseado.
• Presione “SEL” para confirmar el primer dígito y el segundo comenzará a titilar.
• Con la perilla “
VOL
/
VOL
” seleccione el segundo y tercer dígito respectivamente.
• Luego se reproducirá automáticamente la canción seleccionada.

SP-8
2. Búsqueda de Nombres de Archivos:
• Presione dos veces “A/ PS” y se activará la búsqueda de archivos.
• Presione “SEL” y se mostrará el primer directorio.
• Con la perilla “
VOL
/
VOL
” seleccione el directorio deseado.
• Presione “SEL” nuevamente para confirmar el directorio y se mostrará el nombre del
primer archivo.
• Con la perilla “
VOL
/
VOL
” puede seleccionar el archivo deseado.
• Presione “SEL” y se reproducirá la canción seleccionada.
3. Búsqueda de caracteres:
• Presione el botón “A/PS” tres veces para activar el modo de búsqueda de caracteres.
• Presione el botón “SEL” y se mostrará el caracter “A”.
• Con la perilla “
VOL
/
VOL
” seleccione la letra deseada.
• Presione la tecla “SEL” por más de 2 segundos.
• Se mostrará la canción que tenga el mismo caracter que usted haya seleccionado.
• Con la perilla “
VOL
/
VOL
” seleccione la canción deseada.
• Presione la tecla “SEL” y se reproducirá la canción seleccionada.
RESET
El botón RESET (25) se ubica en la cubierta plástica.
Se activa en los siguientes casos:
• Instalación inicial de la unidad una vez finalizada la conexión.
• No funciona ninguna de las teclas de función.
• Aparición de un símbolo de error en el display.
Conexión a Reproductor MP3 portátil
26. PUERTO USB
Utilice un cable USB para conectar su Reproductor MP3 portátil.
27. RANURA PARA TARJETA MULTI-MEDIA (MMC) /SD
Sólo registra el formato de música MP3 ID3.
*INFORMACIÓN IMPORTANTE
A CAUSA DE LA GRAN VARIEDAD DE PRODUCTOS CON USB, CON SD Y LOS PUERTOS
DE TARJETA DE MMC Y CON SUS FUNCIONES A VECES BASTANTE FABRICANTE-
ESPECIFICOS NOSOTROS NI PUEDE GARANTIZAR QUE TODOS DISPOSITIVOS SE
RECONOCERAN NI QUE TODAS OPCIONES OPERADORAS QUE SON POSIBLES
TEORICAMENTE TRABAJARA REALMENTE.

SP-9
ESPECIFICACIONES
REPRODUCTOR DE CD/ MP3
Índice Señal/ Ruido >60 dB
Separación de Canal >60 dB (1kHz)
Respuesta de Frecuencia 20 Hz-20 kHz
SINTONIZADOR (FM)
Rango de Frecuencia 87.5-108 MHz
Frecuencia Intermedia 10.7 MHz
Sensibilidad 2.8 uV
Separación Estéreo 30 dB
Índice Señal/ Ruido 100 dB
Paso de Canal 100 kHz
SINTONIZADOR (AM)
Rango de Frecuencia 530-1620 kHz
Frecuencia Intermedia 450 kHz
Sensibilidad 32 dBuV
SALIDA
Salida 1000 mV
Impedancia 10 kOhm
GENERAL
Fuente de Alimentación 12V DC (10.8-15.6V aceptada)
Impedancia del Parlante 4 o 8 ohm
Potencia de Salida 50W x 4CH
NOTA: Las especificaciones y el diseño de la unidad se encuentran sujetos a cambio por
mejoras sin previo aviso.
Table of contents
Languages:
Other Targa Car Receiver manuals
