TBK TBK-CON003 User manual

TBK-CON003 IP Keyboard User Manual
www.tbkvision.com 1
User Manual
IP Keyboard TBK-CON003
Please read this manual carefully for correct use of the product and preserve it for
reference purposes
IP KEYBOARD

TBK-CON003 IP Keyboard User Manual
www.tbkvision.com 2
INDEX
Overview ......................................................................................................................................... 3
Features .......................................................................................................................................... 3
Technical Specification ................................................................................................................. 3
Package Contents ......................................................................................................................... 3
1. Appearance ................................................................................................................................ 4
1.1 Front panel and function keys introduction ......................................................................... 4
1.2 Rear panel interface introduction ......................................................................................... 4
2. Function & Operation ................................................................................................................ 5
2.1 Connection ............................................................................................................................... 5
2.2 Power on and add device ...................................................................................................... 5
2.2.1 User management ............................................................................................................... 5
2.2.2 Add device ............................................................................................................................ 6
2.3 PTZ control and image switching ......................................................................................... 8
2.3.1 Device switching .................................................................................................................. 8
2.3.2 Joystick and key operation ................................................................................................. 8
2.4 Preset operation instruction ................................................................................................... 9
2.4.1 Set preset ............................................................................................................................. 9
2.4.2 Call preset ............................................................................................................................. 9
2.4.3 Delete preset ........................................................................................................................ 9
2.5 Shortcut commend ................................................................................................................ 10
2.6 Language ............................................................................................................................... 10
2.7 Main stream and sub stream switching ............................................................................. 10
2.8 Factory default ....................................................................................................................... 11
2.9 IP address .............................................................................................................................. 11
3.0 Troubleshooting .................................................................................................................... 12

TBK-CON003 IP Keyboard User Manual
www.tbkvision.com 3
Overview
This Network Keyboard can be used to control the speed dome, as well as support 1
channel of video view at up to 1080P encoder. It is easy to operate and configure settings.
Features
5’’ LED screen, 3-axis joystick;
Support H.264, Onvif 2.4 compatible.
Administrator management;
1 channel video display, support encode up to 1080P.
Auto searching connected devices in the same network segment;
Shortcut keys for dome control, setting and callup of preset, tour and pattern;
Technical Specification
Package Contents
Keyboard controller 1 pc
Power supply 1 pc
User manual 1 pc
Model Name TBK-CON003 Network keyboard controller
Control Mode Network
Controllable Device Network High Speed Dome, network PTZ
Screen display 5" LED screen
Interface 1 RJ45, 2 RS485( reserved ), 1 DC12V, 1HDMI output, 1 USB port
Ambient Temp. -20°~55°
Power Supply DC12V/2A
ONVIF ONVIF2.4
Joystick 3D joystick
Language English
Access Device No. No upper limit(display by single image)
Image Switch Mode ID by key
Product Size 260mm*160mm*48mm
Weight Gross: 1.52KG / Net:1.0KG
Carton Size 300mm*210mm*160mm

TBK-CON003 IP Keyboard User Manual
www.tbkvision.com 4
1. Appearance
1.1 Front panel and function keys introduction
Fig.1
1.2 Rear panel interface introduction
Fig.2
Input power : DC12V/2A
Reservation output interface:RS485 (not available now)
Power indicator
④ USB interface :reserved
⑤ RJ45 : for LAN
⑥ HDMI : available to connected to the monitor
TBK-CON003 IP Keyboard User Manual
www.tbkvision.com 5
2. Function & Operation
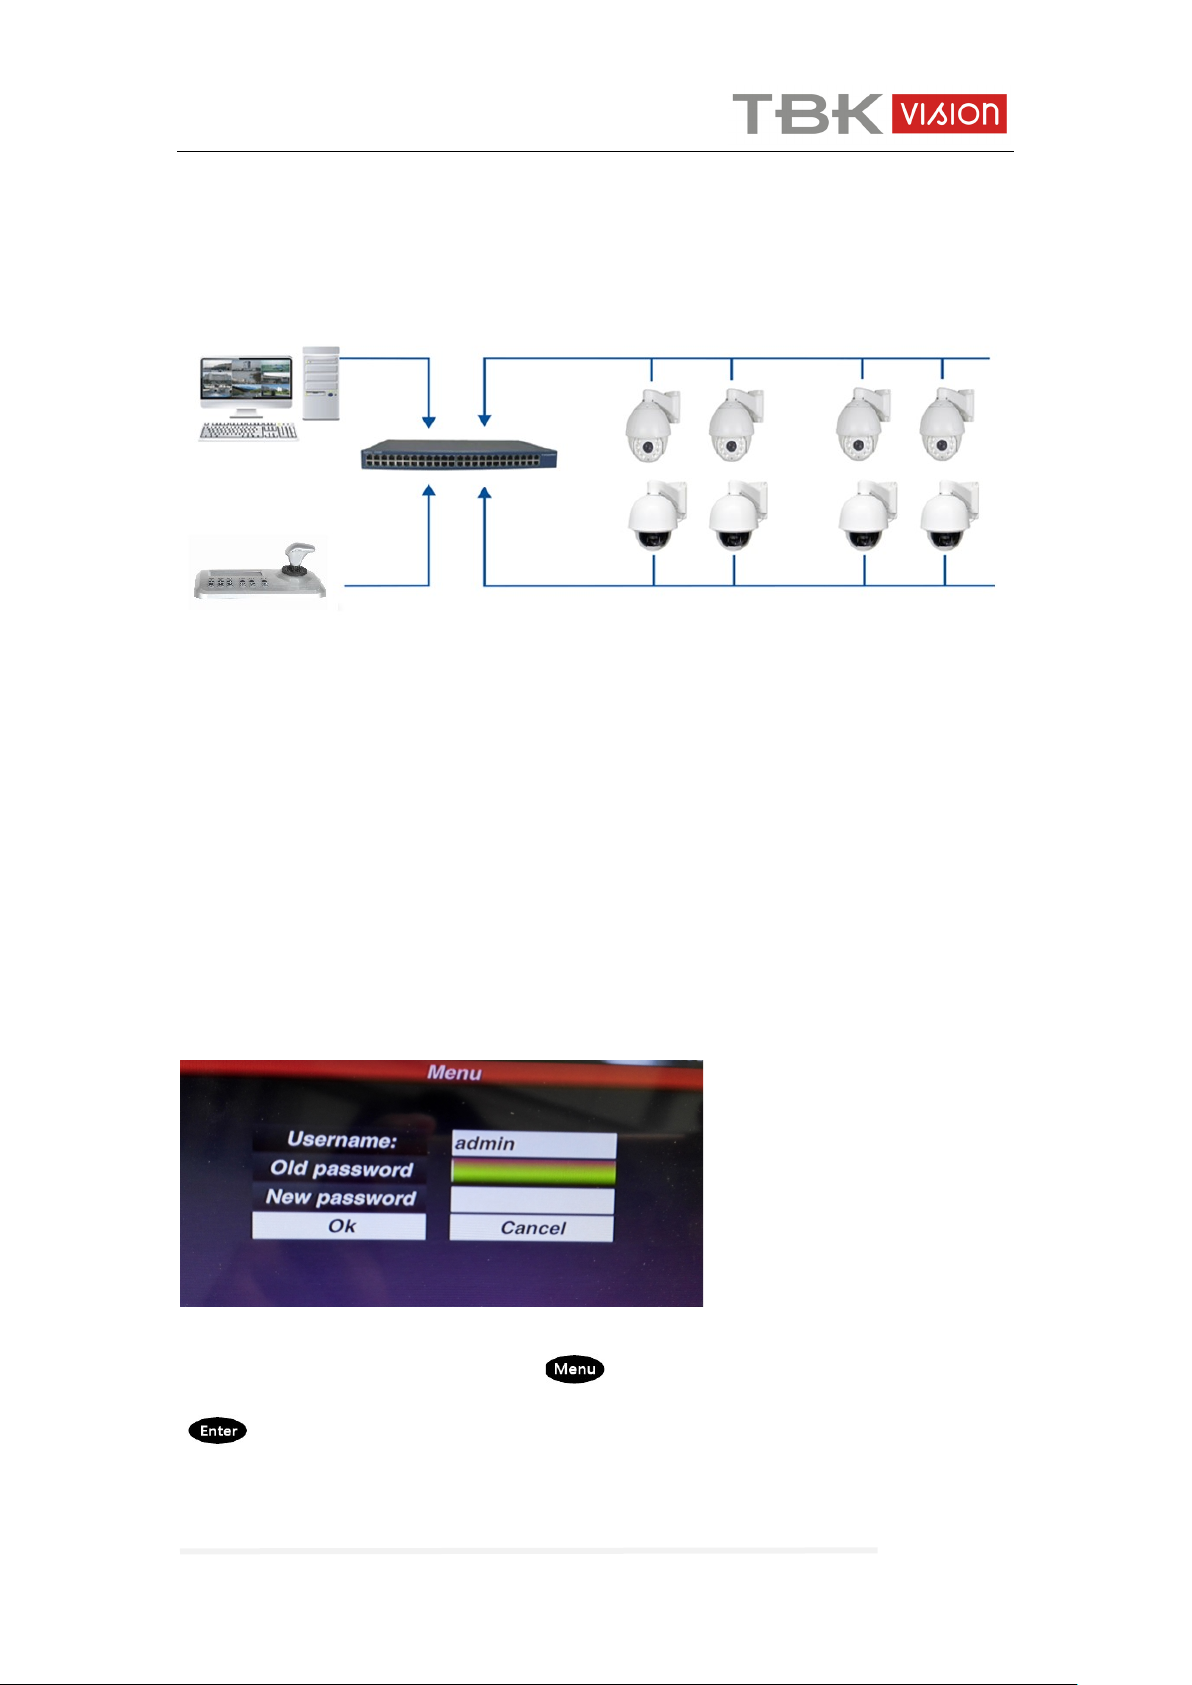
2.1 Connection
Fig.3
As Fig.3 show, make sure the keyboard in the same LAN with the devices.
Remark: The keyboard supports up to 255 device in each segment, when in “0” &“1”
segment, the keyboard can manage the device of both segment together.
2.2 Power on and add device
2.2.1 User management
Log in
After power on 60s, the screen will display the log in interface as below:
Fig.4
Default password is 123456, press “ ”key after enter the password,then press
“ ”to confirm the log.
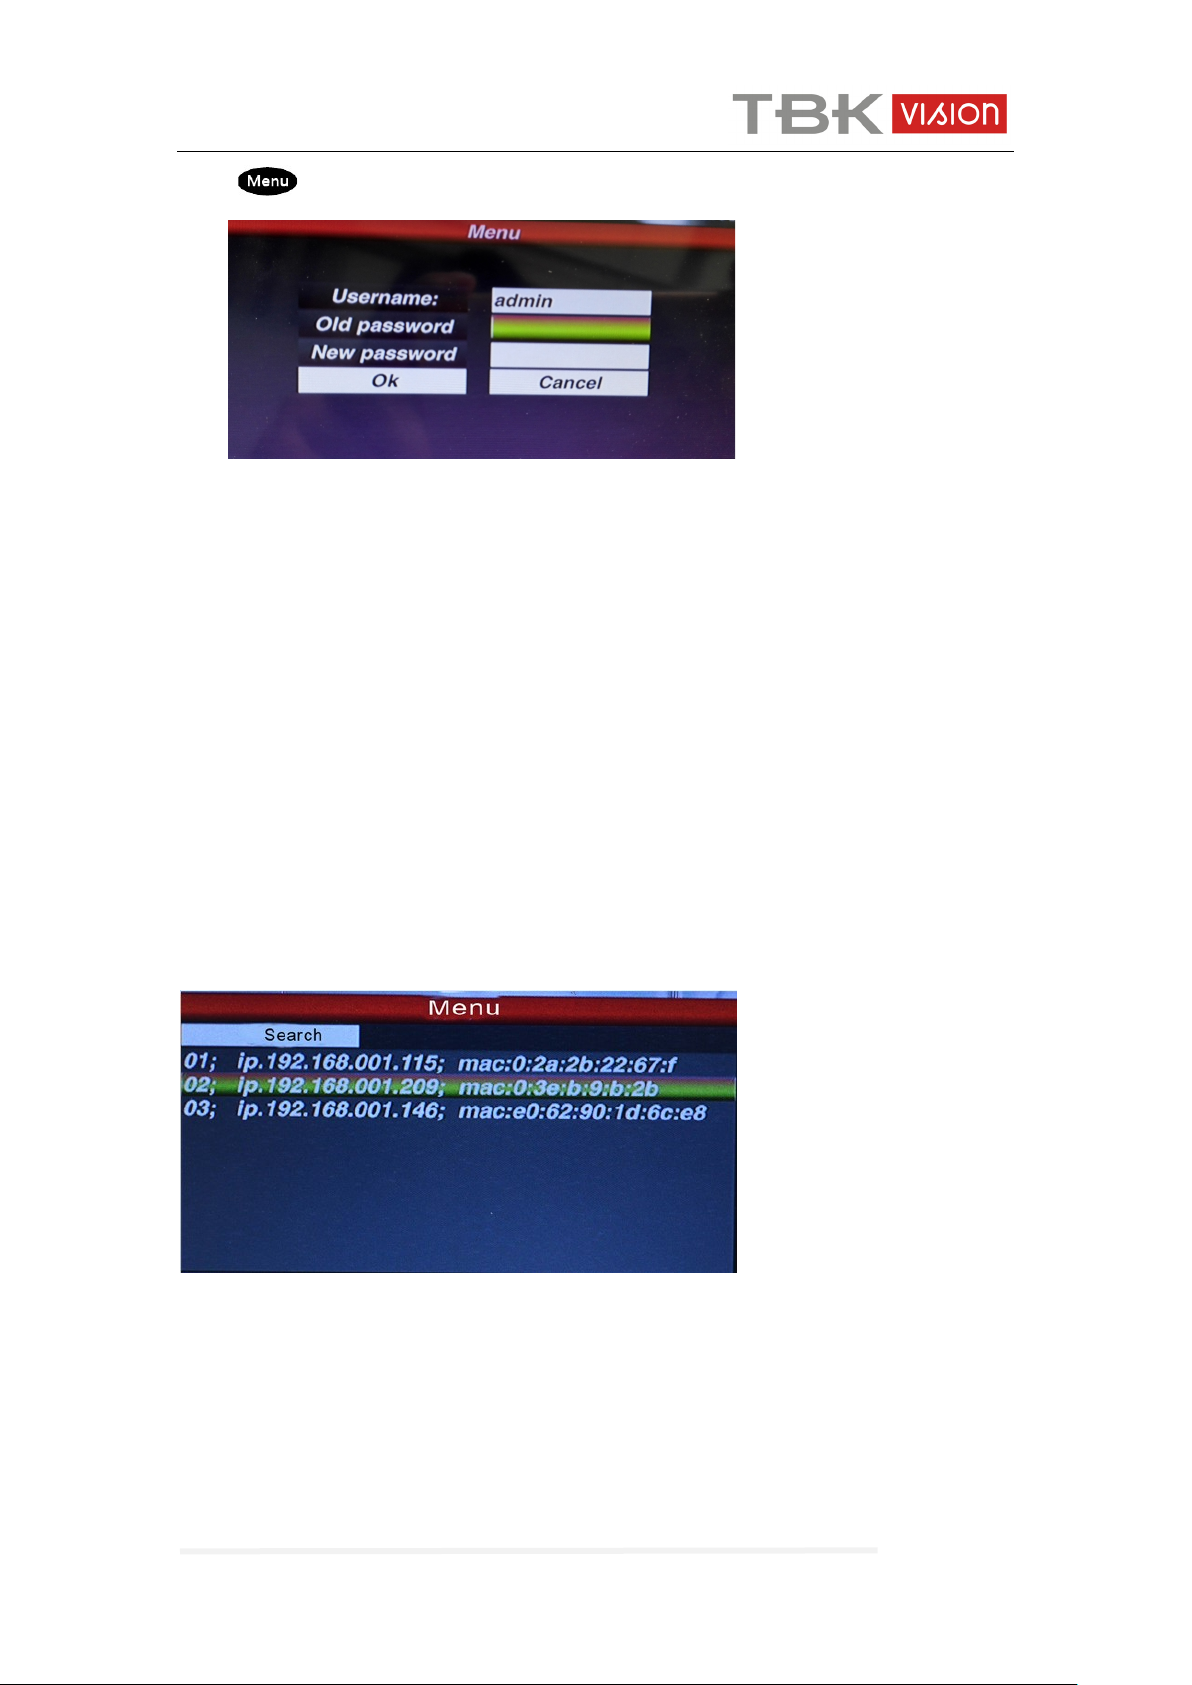
User management
To change the password or add operator.
TBK-CON003 IP Keyboard User Manual
www.tbkvision.com 6
press“ ”key, and then choose user, you will see.
Fig.5
You can change the password or you can create operator and password.
Remark: after create the operator, it can not modified the operator name.
2.2.2 Add device
After log in,the keyboard will search the IP device and assign a Dome ID for each device
automatically, as below picture(Fig.6) shows.
After searching, the IP address of device connected to the keyboard is displaying on the
screen.User can move the cursor up and down by joystick to select IP address ( the
device )which one need to access , and then press ”Enter” to save the device and display
the corresponding image; after get the image of the device,the user could control the PTZ
camera.
Fig.6
Remark : The keyboard is with power-off memory function.After off and power on agai
n, the keyboard is recovered to the status before power off.
User can clear the devices that are off line from the memory list.
2.2.3 Automatic search and manually add device
Automatic search
TBK-CON003 IP Keyboard User Manual
www.tbkvision.com 7
If user want to add the more device, please press the “Menu” button,
Fig.7
move the cursor to choose the “device management” and click “Enter” to enter the sub
-menu, select “Search and Add” to confirm.
Move the cursor to select ”search” and click“enter”, then the keyboard will search and
add the device automatically.
Select the IP address which device need to access, press ”Enter ”to save the corresp
onding image and displayed.
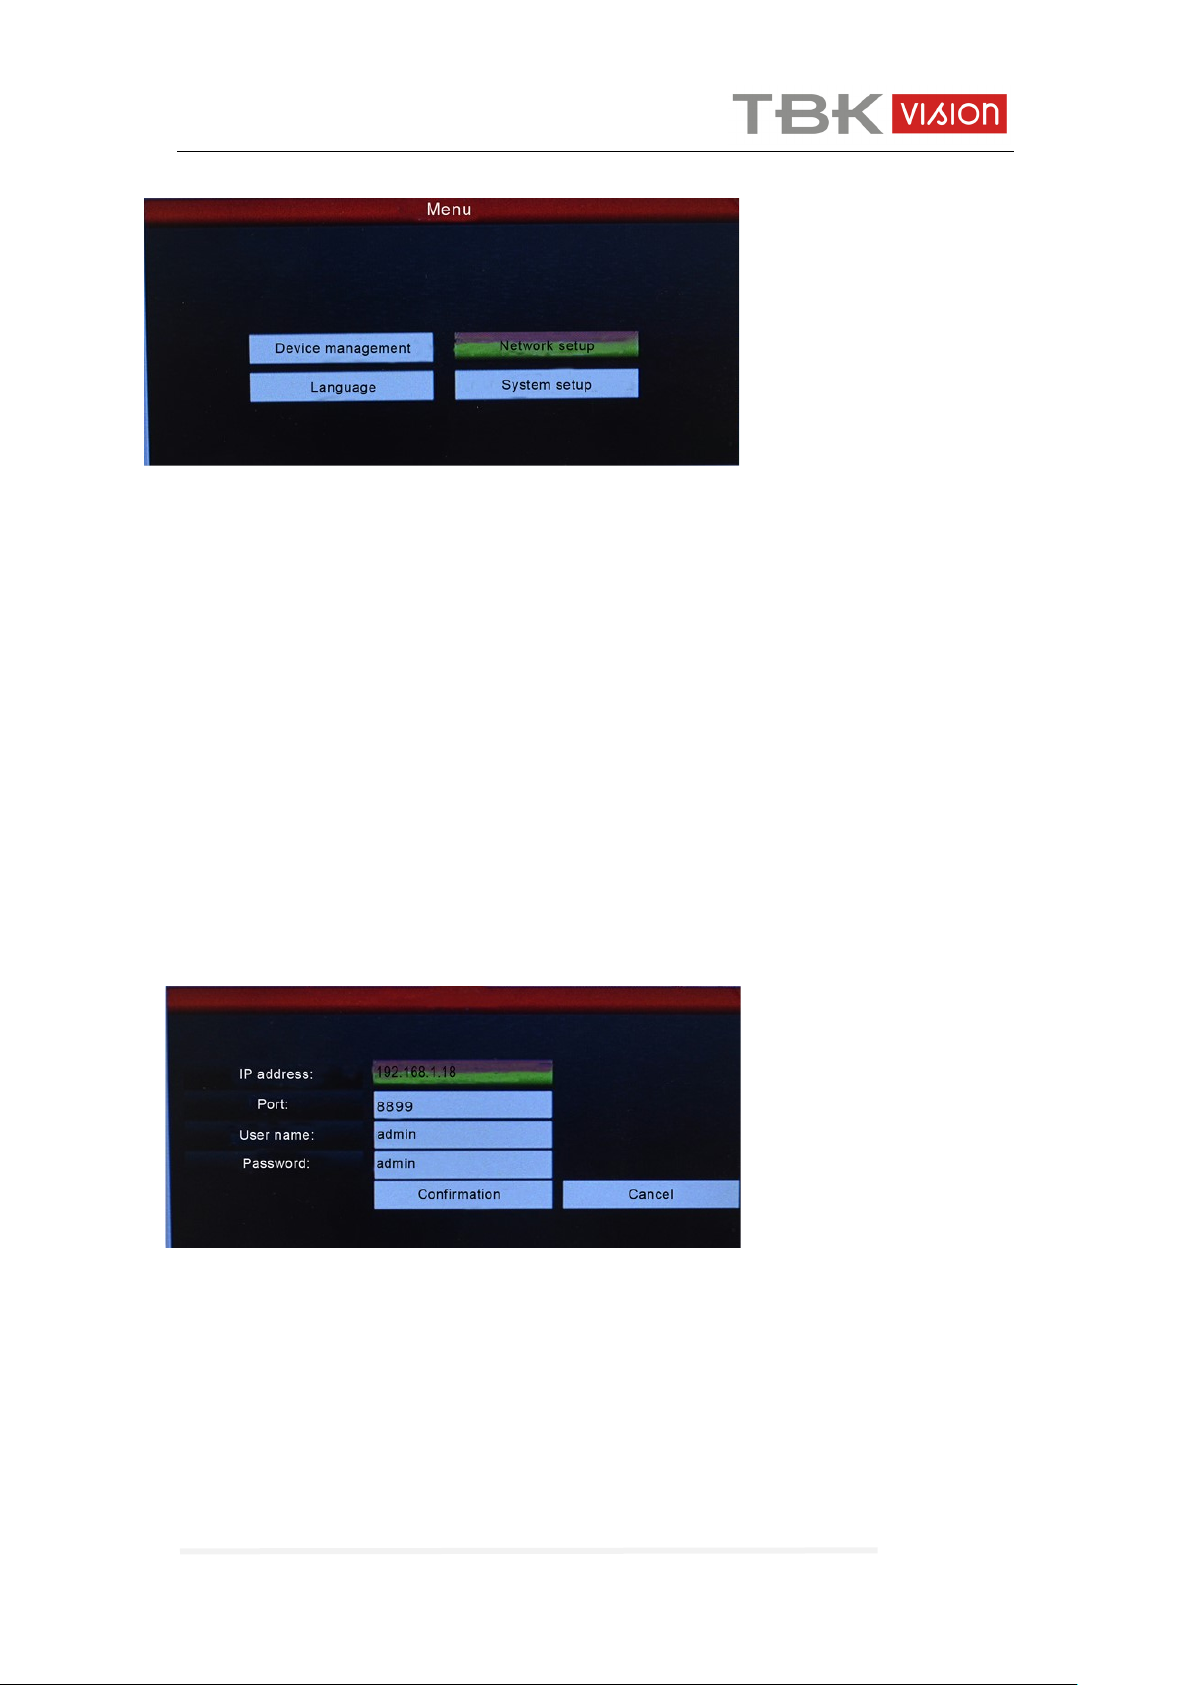
Manually add device
Some camera maybe with limited of different Port or need the Log-in password, the ke
yboard maybe not able to search and add automatically,then the user need to add the
IP devices manually,:
Please click the “Enter”, select “device management”, “manual add”,enter to the followin
g Interface(Fig.6):
Fig.8
On this interface, input “IP address, port, name, password”, then press confirmation,the
n the keyboard will display and save corresponding IP images.
Remark: 1.Please make sure IP port, password and all of information is correct before
add IP address manually
2. Here the “Menu” button is also the return button.

TBK-CON003 IP Keyboard User Manual
www.tbkvision.com 8
2.3 PTZ control and image switching
2.3.1 Device switching
As the above fig. 6 show, the user could switch Dome by the corresponding Dome ID
which is on the left of IP address list.
Press “ ”button , and No. of the corresponding Dome ID then button .
Keyboard will switch to the corresponding IP address.
For example, switching to Fig. 6 192.168.1.146,Please press “ ”button; and press
“No.3”; then press “ ”.
Remark: Device switching is also available from “ equipment management”. Please select
the corresponding IP address and press “Enter” to save to come true.
2.3.2 Joystick and key operation
Joystick Operation
3 Axis joystick outline is as below:
3 Axis Joystick can control speed dome as following:
(1) Control dome camera Pan and Tilt :moving the joystick in any direction, speed dome
will pan or tilt accordingly. User can control the speed of the dome by moving speed of the
joystick.
(2) Zoom Adjust : Rotate the joystick to zoom in and zoom out. Clockwise rotation of
Joystick, zooming in to get closer and larger image; Counterclockwise rotation to zooming
out, image will get farther and smaller.
Key Operation
【Focus+】/【Focus-】: Manual adjust focus value of zoom module to get clear image.
( default of zoom module is auto-focus.)
【Zoom+】/【Zoom-】: zoom+/- get the ideal image.
【Iris+】【 Iris-】: Adjust the aperture to get brighter or darker image gradually. ( Some
zoom module is only with Auto Iris function)
【Setup】: [Setup]+number+[Enter] to set the preset point of the camera or set the short
commands of the keyboard (See 2.5).

TBK-CON003 IP Keyboard User Manual
www.tbkvision.com 9
【Preset】: [Preset]+number+[Enter] to enable the preset point.
【Menu】: press to enter Menu or to Return back.
【Addr】: Address key, [Addr]+ID number+[Enter] to choose the corresponding IP address.
【0】~【9】: Number keys [0], [1], [2], [3], [4], [5], [6], [7], [8], [9].
【Clear】: Delete key, [Clear]+number+[Enter] to delete the preset point.
【Enter】: Confirm key, to confirm the present operation.
【Aux ON】: Aux ON.
【Aux OFF】: Aux OFF.
2.4 Preset operation instruction
Preset instruction
Preset function means that store camera state (horizontal angle, tilt angle and lens
spec) .It can realize recover the setting status in advance and call it.
2.4.1 Set preset
Move PTZ to the target position. Press “ ” and No.key, for example: “ ” and
press “ ” button to confirm preset setting.
Remark: 1. New preset No. will cover the previous one if user used same preset number .
2. Max preset quantity always limited by the IP speed dome, but not the
keyboard controller.
2.4.2 Call preset
Please make sure the setting preset is successful. Otherwise, call preset will not valid
1. Press “ ” button ;
2. Input the preset number ;
3. Press“ ” button. PTZ will automatically run to the preset point setting
2.4.3 Delete preset
1. Press “ ” button;
2. Input the preset point need to delete;
3. Press “ ” to delete preset point.
TBK-CON003 IP Keyboard User Manual
www.tbkvision.com
10
2.5 Shortcut commend
If speed dome supported shortcut commend, user can use the keyboard controller to call
the shortcut commend to enable the function easily.
The following are shortcut commends for the speed dome,please Press the Preset
No.+Enter to enable those function:
Remark: Different speed dome manufacturer may use different shortcut commend.
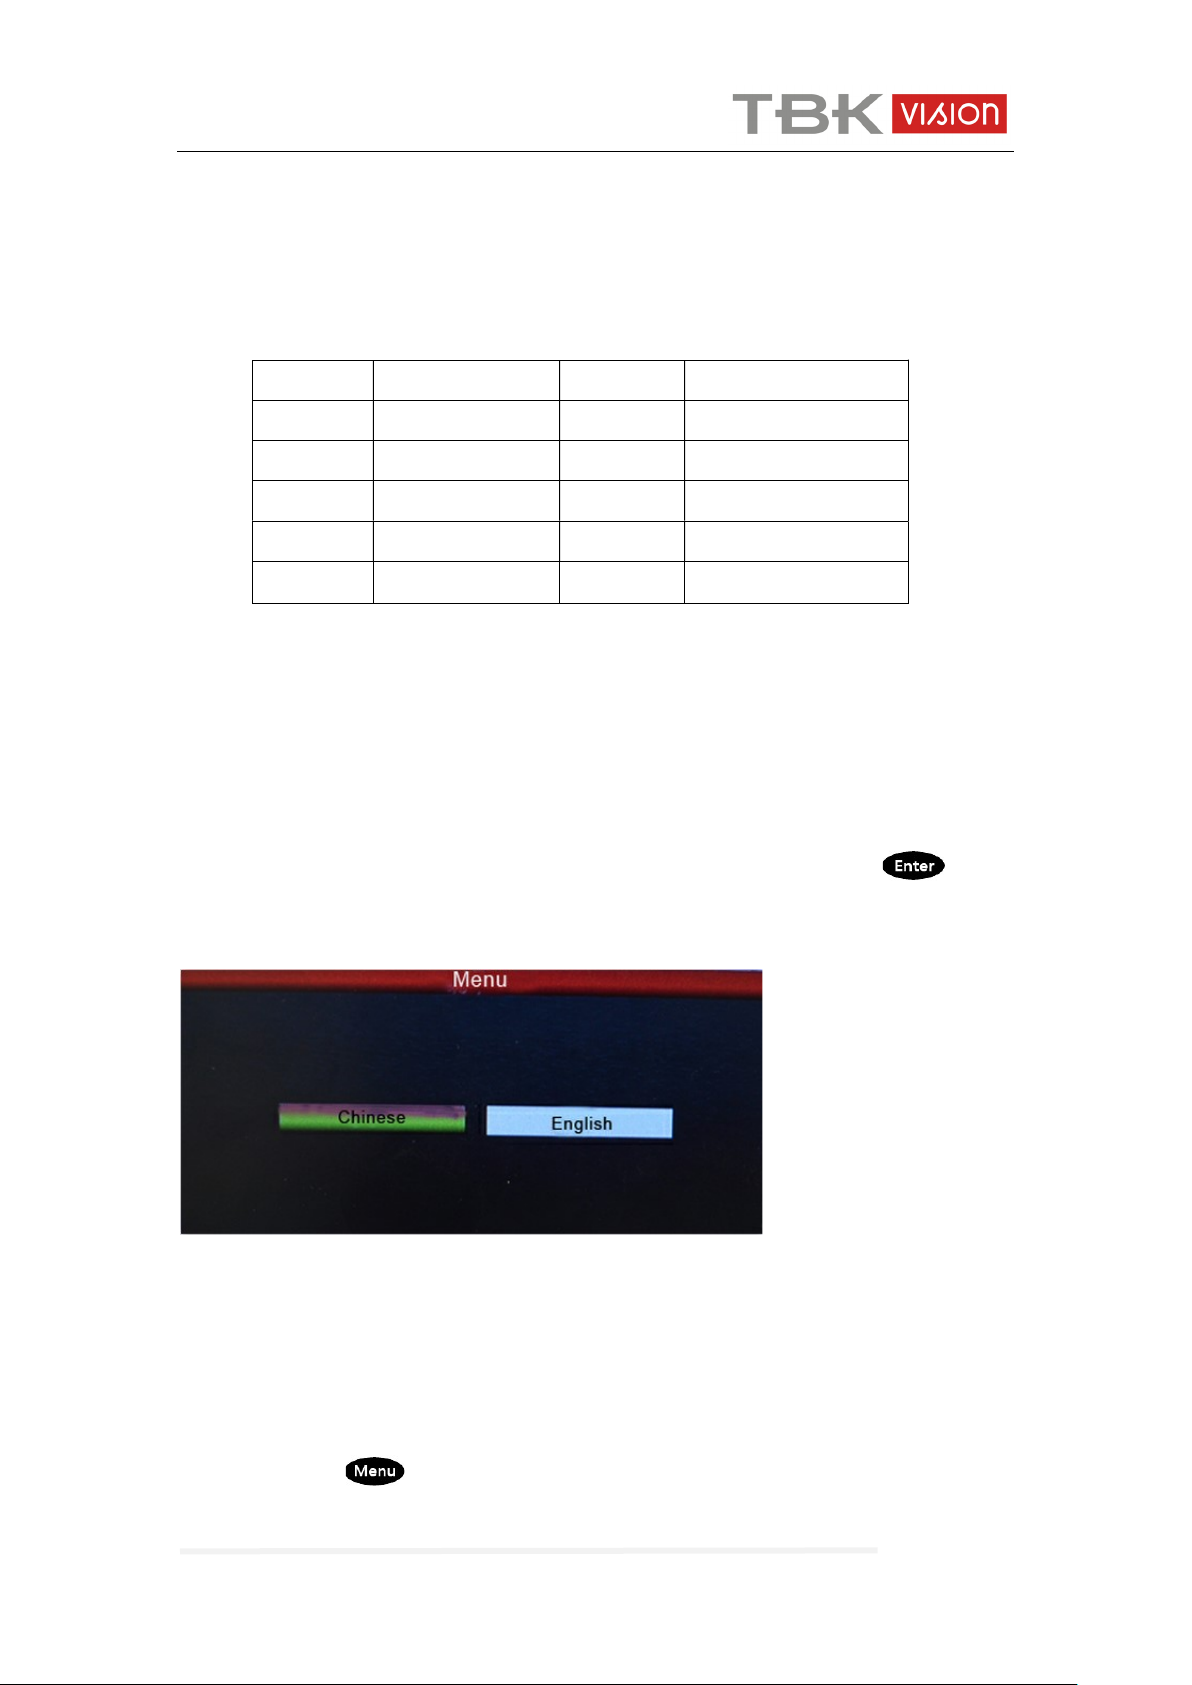
2.6 Language
This keyboard controller is with Chinese and English as optional.
Enter to the Main OSD and select the Language you need,press the button“ ”to
confirm and save.
As below picture show:
Fig.9
2.7 Main stream and sub stream switching
This Keyboard controller with the 5” LED screen, supports both main Stream and
sub-Stream display
Press the button “ ”Enter to the Main OSD, find the “System”item and choose the
“Main Stream”or “Sub Stream” ,press “Enter”
Preset No.
Function Preset No. Function
81 Auto Day/Night 84 Force on Far Light
82 Switch to Night 85 Force on Near Light
83 Switch to Day 92 A-B Scan
98 Tour 1
97 Tour 3
96 Tour 3 99 Pan Scan

TBK-CON003 IP Keyboard User Manual
www.tbkvision.com 11
Remark: 1. The keyboard controller support the encoder max 1080P, for the camera is
more than 1080P, please use Sub Stream, so image will be displayed properly.
2. The keyboard controller is with screen standby function, when the controller is
not operated for long time, the screen will be in standby mode, user can move
the joystick or press any key to wake up the screen.
2.8 Factory default
To enable the factory default, user just need to enter menu, choose” Default config”
Fig.10
2.9 IP address
The Default IP address of the keyboard is “192.168.1.2”
To be sure the controller and dome connected work properly, please make sure they are in
the same network segment, but not same address.
If they are used the same IP address, please change either the dome address or the
keyboard controller address.
Changing the IP address of the Keyboard as following:
Press the button“ ”enter to the main OSD and then find the “Network”,input the IP
address .press the “Enter” to save.after that the keyboard will be reboot, that means
changing address is successful.

TBK-CON003 IP Keyboard User Manual
www.tbkvision.com
12
3.0 Troubleshooting
V1.0
Issue Possible Reason Solution
Can’t add the Camera
IP address of the IP camera and
controller is same
Change either IP address of
keyboard or IP address of
camera
Can’t run the Tour
The command is inconsistent
with dome connected
Check the dome manual, make
sure the right commend to run
tour.
Auto Reboot Input power voltage is too low
Change the correct power
supply
Get the IP address ,but
can’t add the Device
The cursor has been stuck in
the search,when you add the
device,the keyboard research
again
Move the Cursor to the IP
address and confirm to add
After Power on, the
controller can not work,
1.Power supply used is not
correct;
2.The controller is broken
1.Change a correct power
supply
2. Contact your supplier for
replacement.
Controlling is not
sensitivity
Compatibility between controller
and dome
Contact supplier to check the
compatibility
No Image display, but
can control.
The encode of Dome is higher
than 1080P.
Change the the stream to sub
Stream from the controller
Table of contents


