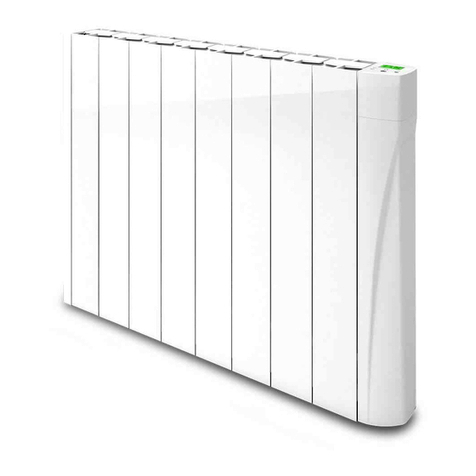
TCP Smart SMAWHOILRAD1500WEX15 User manual

WIFI OIL FILLED RADIATOR
TCP Smart WiFi Oil Radiator is a low cost solution for quickly heating a room. Ideal for home, office or
workshop. Lightweight, silent and portable. Complete with castors so the radiator can be moved from
room to room. The Smart features allow for full voice via Alexa and Google. Direct control via the TCP
Smart App. Save money through efficiently heating the room and not the home.
USER INSTRUCTIONS
MODEL
SMAWHOILRAD1500WEX15
POWER
AC220-240V
50-60Hz
1500W
Class
II
SMAWHOILRAD2000WEX20
AC220-240V
50-60Hz
2000W
Class
II
SMABLOILRAD2000WEX20
AC220-240V
50-60Hz
2000W
Class
II
SMAWHOILRAD2500WEX25
AC220-240V
50-60Hz
2500W
Class
II
IMPORTANT: These instructions are for your safety. Please read thoroughly
before use and retain for future reference.
SAFETY INSTRUCTIONS (to be read before operating the heater).
1.
Before using turn the heater on using the ON/OFF button
which is located at the
front of the heater.
2.
CAUTION:Some parts of this product can become very hot and cause burns. Particular
attention has to be given where children and vulnerable people are present. Children 3
years and younger should be continually supervised when in close proximity to the heater.
Children aged 3 to 8 years shall only switch on/off the appliance provided that it has been
placed or installed in its intended normal operating position and they have been given
supervision or instruction concerning use of the appliance in a safe way and understand the
hazards involved. Children aged 3 to 8 years shall not plug in, regulate and clean the
appliance or perform user maintenance.
3.
Use this heater on a flat or horizontal and stable surface.
4.
Keep the power cord away from the hot body of the heater.
5.
Indoor use only.
6.
Donot use the heater in areas where flammable liquids are stored or where
flammable fumes may be present.
7.
Do not use this heater if it has been dropped; or there is visible signs of damage
8.
Do not place the heater close to curtains or furniture in order to avoid a fire hazard.
9.
Donot leave the heater switched on when your property is vacant.
10.
We do not recommend the use of this appliance through an extension lead or any
external switching device such as a plug in timer or remote control plug in adaptor.All
heating appliances draw high current through the mains supply and any weakness in the
connections or components in these devices can result in overheating of connections
which may result in melting, distortion and even the risk of fire.
11.
Always ensure the heater is operated in a well-ventilated area.


WARNINGS
-
In order to avoid overheating, do not cover the heater.
-
Always use the heater in an upright position.
-
If the supply cord is damaged, it must be replaced by the manufacturer, their
service agent or a similarly qualified person in order to avoid a hazard.
-
Donot use this heater in the immediate surroundings of a bath, a shower or a
swimming pool.
-
In order to avoid a hazard due to inadvertent resetting of the thermal cut out, this
appliance must not be supplied through an external switching device, such as a
timer, or connected to a circuit that is regularly switched on and off by the utility.
-
Do not use the heater to dry your laundry. Never obstruct the intake and outlet grilles to
avoid the danger of overheating.
-
Always use this appliance with feet fixed in place.
INSTALLATION
Your appliance should be used as a portable appliance only.
Install the feet as shown below. Always use your heater with the feet fitted.
MANUAL CONTROL OF RADIATOR
Manual Settings using the LCD screen
Choose a suitable location for the RADIATOR, taking into account the safety instructions
above.
ON/OFF BUTTON
Press the on button until you hear a bleep sound. The display will show . Press button to
turn the heater on.
This feature can be performed using the TCP Smart App.
TEMPERATURE BUTTON
Rotate the mode button clockwise or anticlockwise to increase or decrease the target
temperature. The temperature range is from 5°C to 35°C.

ANTI FROST
This function is used to ensure the product does not freeze during periods of extreme cold.
Once the Anti-frost mode is selected the target temperature will be overridden and the heater will stay
at 7°C until the anti-frost function is turned off.
For this function to work the heater must be turned on with the target temperature set at the lowest
temperature (5°C). Turn the anticlockwise. The screen will display . The target temperature
will then be fixed at 7°C. Exit by turning the clockwise.
HEATING SELECTION
Press this button once. The screen will display H1, H2 or H3. Rotate the button to cycle between
H1, H2 or H3 options. After choosing the desired heating level, wait 5 seconds or press to return
to target temperature display. The heating selection is now set.
Note: H1 is Low Heating, H2 is Medium Heating and H3 is High Heating.
TIMER BUTTON
Press and hold button for 3 seconds until the screen displays . The H will keep flashing. Turn
the button to choose the desired time from 1-24 hours. Wait 5 seconds or press the button to
finish the setting. When the timer has been set the remaining time and target temperature will be
displayed in a continuous cycle 5 secs apart. From the moment the time is set the timer will continue to
count down. Once completed the radiator will switch off.
CLEANING THE HEATER
Allow heater to cool down before cleaning. Clean the outside of the heater by wiping with a damp
cloth and buff with a dry cloth. Do not use any detergents or abrasives.
CORRECT DISPOSAL OF THIS PRODUCT
WARRANTY INFORMATION
The manufacturer provides warranty in accordance with the legislation of the customer’s own country
of residence, with a minimum of 2 years, starting from the date on which the appliance is sold to the
end user.
The warranty only covers defects in material or workmanship.

The repairs under warranty may only be carried out by an authorized service centre. When making a
claim under the warranty, the original bill of purchase (with purchase date) must be submitted. The
warranty will not apply in cases of:
Normal wear and tear
-
Incorrect use, e.g. overloading of the appliance, use of non-approved accessories
-
Use of force, damage caused by external influences
-
Damage caused by non-observance of the user manual, e.g. connection to an unsuitable
mains supply or non-compliance with the installation instructions
-
Partially or completely dismantled appliances.
CERTIFICATION
CONFORMITY
-
Hereby, Technical Consumer Products Ltd declares that the radio equipment type TCP Smart
Wifi Oil Filled Radiator 1500W –White, TCP Smart Wifi Oil Filled Radiator 2000W –White, TCP
Smart Wifi Oil Filled Radiator 2000W –Black, TCP Smart Wifi Oil Filled Radiator 2500W –
White is in accordance with Directive 2014/53/EU.
-
The full text of the EU declaration of conformity is available at the following internet address –
https://tcpi.eu/compliance-data/
REGISTERED
OFFICES
-
TCP UK Ltd, 1 Exchange Court, Cottingham Road, Corby, Northants, NN17 1EW.
-
TCP France, Quai Gabriel P’ri, 1, Joinville Le Point, France, 94340.
CONNECTING
THE
APPLIANCE
TO
WI-FI
Use the QR code below to download the TCP Smart App for control of the heater by voice or TCP
Smart App.
QR code for both android and iOS
To control the heater using the TCP Smart App the unit must be turned on.
Before you get started you will need the following:
•
Smart device such as a mobile phone or tablet
•
Access to the Google or Apple App store, log on and passwords
•
The name of yourWi-Fi network and password to your Wi-Fi network
•
Confirm your home Wi-Fi router is running on 2.4Ghz and not 5Ghz. If you are unsure,
please consult your broadband provider for details on how to change the settings.
•
Turn off anyWi-Fi extenders during set up
•
Check you do not have any limitations on the number of devices with your broadband
provider

Please note: Our products do not work on 5Ghz only 2.4Ghz.
For instructions on how to connect to Amazon Alexa or Google Nest please visit https://www.
tcpsmart.eu/how-to-alexa-google-nest
With the heater turned on, hold down the Mode button for 3 seconds until the WiFi
symbol at the top right hand corner of the screen blinks rapidly. When
connected the symbol will be continuously displayed. The device is now in paring
mode. In the TCP Smart App, enter your WiFi password and follow the instructions in the App to
connect.

CONTROLLING THE RADIATOR VIA TCP SMART
APP BACKGROUND COLOUR
Press other functions button . To turn on slide the button to the right.
The colour at the top of the app screen will change with the target temperature. To turn off this function
slide this button to the left.
ON/OFF BUTTON
Press once to turn on. Press to turn off.
LED DISPLAY SCREEN BRIGHTNESS
Press to dim the LCD screen. Press again to return to normal brightness.
CHILD LOCK
Press to turn on. Press to turn off.
TARGET TEMPERATURE SETTING
Use + and –buttons to set target temperature.
TIMER
Use the + and –buttons to set a countdown, from 1 to 23 hours. From the moment the time is set, the
timer will then continue to count down. Once completed the Radiator will switch off.

MODE
Press . This will take you to the mode screen as below.
Select to choose the following functions:
Heating mode - Set using the temperature scale on the main screen. Press < to return to main
screen.
Anti Frost
Select to turn this function on. Press to turn off. Press < to return to main screen.
Heat Level
Select one of the heat level options:
Low Heat Setting
Medium Heat Setting
High Heat Setting
Press < button to return to the main screen.
TCP LTD, 1 EXCHANGE COURT, COTTINGHAM ROAD, CORBY, NN17 1EW
This manual suits for next models
3
Table of contents
Other TCP Smart Heater manuals
Popular Heater manuals by other brands
Sears
Sears 583.406120 owner's manual
Master
Master B35CED owner's manual
Sealey
Sealey AB3412 quick start guide
Raider
Raider RD-DSH50 user manual
Toyostove
Toyostove Laser 56MH user guide
Pinnacle Climate Technologies
Pinnacle Climate Technologies REMINGTON REM-60V-GFA-O User's manual & operating instructions
