manuals.online logo
Brands
  1. Home
  2. •
  3. Brands
  4. •
  5. Coleman
  6. •
  7. Heater
  8. •
  9. Coleman 513A708 User manual

Coleman 513A708 User manual

How To Use and Enjoy Your
Coleman Gasoline Catalytic Heater
Model 512A708 and Dial-Temp Adjustable.
Models 513A708 and 515A708
U.s. Patent
Nos. RE26976;
225,641;3,876,365;OtherPatents Pending; Canadian Patent 1>68.
Co/emaney
OCO/em
515A708
513A708
1. Canopy
2. Bail
3. Fuelcap
4. "To Open" Knobs(Black)
5. Temperature
Adjustment Lever (Red)
512A708
1. Canopy
2. Bail
3. "To Open"
Clips
4. Fuel cap
(not shown)
,C0/eman
HowToUse and Enjoy Your
ColemanGasoline Catalytic Heater
Model512A708and Dial-Temp Adjustable
Models 513A708 and 515A708
WARNING:
THIS APPLIANCE CONSUMES OXYGEN. PROVIDE
AMPLE VENTILATION UTILIZING AT LEAST TWO
OPENINGS,PREFERA LY ONE HIGH AND ONE LOW
ON OPPOSITE WALLS
PROVIDE ADDITIONA VENTILATION FOR ANY ADDI-
TIONAL FUEL BURNINa APPLIANCES.
Cautions:
1. READ THESE INSTRUCTI NS THOROUGHLY.
2. Neverloosen or remove el cap whilestarter
flame is burning,
heater is near open flame or other heat sources.
3. Store fuel in a clean, p perly marked,metalcontainer
away
from open flame or excessiv heat.
4. ALWAYS LIGHT HEATER UTDOORSIN AN OPENAREA. Starter
flame will burn 2-3 feetundIr normal lighting conditions.
5. Neverallow tents,sleepirp bags, clothingor other
combustible
materials
to come withintwo feet Qf%the
top and one foot on all sides of the heater.
6. OPERATE HEATERIN POSIT}ON ONLY,
7. Do not use aoy device,or part not expressly approvedby the
Coleman Company; Iri*c.
8. This heater
is designed Sa heatingqevice only. Do not use in any
manner not expressly appro ed by the Coleman Company, Inc.
9. KEEP OUT OF REACH O
To
Fill
1. Opencan-ny y pulling spring clips or black knobs at bottom
edge of canop (Fig. 1) Swing canopy back out of theway.
2. Heater
mus ein a levelposition. Do NotTip.
3. Remove
fue ap. (Fig. 2)
4. Use a funne nd fill only with Coleman Liquid Fuel. (Fig. 3)
NEVER USE C TAMINATED
WHITE GASOLINE OR LEADED
GASOLINE. UN EADED GASOLINE-S WILL DRASTICALLY
SHORTEN
TH IFE OF YOUR PRODUCT.
5. Replace
fu cap and tighten. WIPE OFF ANY
SPILLED FU
Caution: Ne
starter flam
or other hea
Tank capacit
6. REFILLIN
flameis bur
heat source.
(Fig. 2)
loosen or remove fuel cap while
burning, heater is near open flame
jurces.
Model512A708 — 2 quarts
513A708
— 3 quarts
515A708— 6 quarts
ever loosen or remove fuel cap while starter
J, heateris near open flame or other
(Fig. 3)
3To Light
Model 512A708
1. ALWAYS LIGHT HEATER OUTDOORS IN AN OPEN
AREA. Starter flame will burn approximately2-3 feet
under normal lighting conditions.
2. Open canopy (Fig. 1) and remove
snuffer
from
heater
head (Fig. 4).
3. Hold heater upside down until a 2" diameter
spot of
fuel appears. (Fig. 5) In temperaturebelow freezing
spot should be 3" to 4"
4. Turn heaterright side up and withcanopyopen
light
fuelspot. (Fig. 6)
5. Allow starter flame to burn until flame completely
goes out.
6. Close canopy. Heatershould reach maximum
output
in 15-20 minutes, slightly longer for new heater.
With
new heaterthere may be slight odor of hotpaint.
7. If no heat is felt after 15 minutes,opencanopy
and
repeat lighting procedure.
CAUTION: Never attempt to repeat lighting procedure
until •starter
flame has gone out.
Models
513A708, 515A708
1. ALWAYS
LIGHT HEATER OUTDOORS IN AN OPEN
AREA. Starter flame will burn approximately 2-3 feet
under
normal
lighting conditions.
2' Open
canopy
(Fig. 1) and remove snuffer from heater
head
(Fig. 4).
3. Set red
adjustment
lever to "Start"
4. Hold
heater
upside down until a 2" diameter spot of
fuel appears
on Model 513A708 (3" diameter spot on
Model515A708). In temperatures below freezing in-
Snuffer Canopy
Heater
crease
diameters
of spots by 1"
5. Turn
heater
rightside up and with
canopy
openlight fuel spot. (Fig. 6)
6. Allowstarter flame to burn until
flame completely goes out.
7. Close
canopy. Heater
should reach
maximum
output in 15-20 minutes,
slightlylonger for new heater. With
newheater
there may be slight odor
of hot paint.
8. If no heatis felt after 15 minutes,
open canopy and repeat lighting
procedure.
CAUTION:Never attempt to repeat
lighting
procedure
until starter flame
has gone out.
Starter
Flame
Head
(Fig. 4)
Adjustment Lever
(Fig. 5)
(Fig. 6)
ToExtinguish
1, Open
c opy cover
—and place
squffer firmly
over heater
head.
2. Close canopy.
NOTE:-
Do not pack heater until it
has cooled
20-30 minutes.
ToTransport
Before truel secure
heater
in upright posi-
tion to avoid possible
fuel spillage
Replacing The Wick
oUSE ONLYCOLEMANLIQUID FUEL. NEVER USE C NTAMINATEDWHITE GASOLINEOR LEADED GASOLINE.
UNLEADED
GASOLINESWILL DRASTICALLY SHO EN THE LIFE OF YOUR PRODUCT.
Model 512A708
1. Remove canopy and head by rotatingto the left, counter-clo k-
wise. (Fig. 7)
2. Using a pipe wrench, removespacer tube. Lift out old w k
assembly and gasket. (Fig. 8)
3. Carefully unwrapcorrugatedprotector
pad from wick. Be s e
sealing tapecomes off clean. DO NOT SLIDE protector
pad off f
the wick—open it up and unwrap it. The new wick is tied w h
asbestos string to prevent
the top of it from frayingout. Be ca -
ful in handling and installing thatthis tie is notdisturbed. Straigh n
bottom of wick so that it will contact bottom of tank.
4. Install new gasket. Set new wick in place. Screw down spacer
tube firmly. Insert fibre-glass filter in top of spacer tube, making
sure filter is %" belowtop of wick tube. (Fig. 9)
5. Reinstall head, reversing instructions.
Models 513A708 and 515A708
1. Set red heatcontrol lever to middle position.
2. Open canopy.
3. Place snuffer on heater
head.
4. Grasp heater head with both hands, exerting downward pres-
sure turn heater head slightly counter clock-wise and lift off. It
may assist in removing the head if you have a helper hold tankfrom
turning. (Fig. 10)
5. Turn metalsleeve on exposedwick until it unlocks and lift out
old wick. (Fig. 11)
6. Replace with new wick, making certain new wick is inserted
intotube in catalytic heater head (Fig. 12).
7. Discardold "0" ring and replace new "O" ring provided.
8. Reinstall
head, reversinginstructions.
(Fig. 7) (Fig. 8) (Fig. 9)
Model 513A708 PART NUMBER DESCRIPTION Model 515A708 PART
88206
NUMBER
88206 Canopy Enamel, Light Green 88207
DESCRIPTION
Canopy Enamel Light Green
Fount EnamelDark Green
88207
513-1401
513-2531
513-2501
513A2771
513-2801
513-6291 513-6031
513A6081
513-6291
51346351
513-6561
513A6601
515-1801
51386351 515-1641
12018717
1201C703
513A6081 1201C703
515-1801 513-6031
Fount Enamel, Dark Green
Fuel Cap Assembly
Fuel Cap Gasket
Bail
''0" Ring
Adjusting Arm Assembly
Crank Assembly
Head Assembly
Canopy Assembly
Snuffer
Wick Assembly
Fount Assembly
Cap and Gasket
Ball Gasket
Push Nut
Pal Nut
@ 12018717
515-1641
513A2771 513-2801
513-6561
513-1401
513A2501
513-2531 513A6601
513-1401
513-2531
513-6031
513A2771
515-1801
515-1641
515A6291 515-2501
515-2801
515A6291
515-6561
515A6081
515A6351
51586601
515A6351 12018717
1201C703
515A6081 1201
C703
515-1801 513-6031
513A2771 515-2801
Fuel Cap Assembly
Fuel Cap Gasket
CrankAssembly
"0" Ring
Cap and Gasket
Ball Gasket
Bail
Adjusting Arm Assembly
Canopy Assembly
Wick Assembly
Head Assembly
Snuffer
Fount Assembly
Push Nut
Pal Nut
515-6561
513-1401
515-2501
513-2531 51586601
Model 512A708
512C5301 Part No.
220C1401
511-1091
Description
Fuel Cap CompletesColeman
Lantern Accessories
80808080000:
511A1311
5118103
512-1321
512-1341
512-5151
512-5251
512-5351
512A1.331 512C5601
512A6061
512-5351 512A1331
512C5301
Wick Gasket
Handle
SupportRod
Pan Insulation
Collar
Head
Ass'y
Pan Ass'y
Snuffer
Fount
Wick Ass'y Package
Filter
Canopy
Ass'y
512-5151
512A6061
512-1321
512-5251
512-1341
08080 511-1091
Durable all-metal case with
bail handle... the easy way to
store and transpo, t your Cole-
man Lantern. Protects lan-
temagainst dirt, dust, dents,
broken globes. Mantles last
longer, too. Soecial plastic
base insures snug fit. Use with
concave side up for lantern
equipped with Colelnan Ac-
cessory Safe. flat cide up
for lantern without safe. Lan-
tern can be stored hut! Just
make sure valve is completely
closed and flarne is off.
OtherColeman Products
COLEMAN SNOW-LITE'
COOLERS. Modern living
demands modern proportions.
Voted exactly right by thousands
of discriminating
customers.ln-
sulated with urethane foam and
featuringnew recessed chrome-
plated handles. Cam-type latch
with protectiveshield locks with
a twist of the wrist, can't be
jarred open—can't be locked
accidentally. Rugged Snow-Lite
used in a seamless interiorand
rust-proof base.
MODEL 513A708 CATALYTIC
HEATER. Here's thesate way
to provide comfortableheat
in tents, trailers, campers,
511A1311
220C1401
Co/emon_
512C5601
duckblinds,ice fishing huts
and hundreds ot other areas
where heat is needed. Two
different models ranging
from 3,000 to 8,000 BTU's
approximate input. Lets
you increase or decrease
heat as needed.
FILTERING FUNNEL, 199B
strainer and filtering
fabric.
Removes water, dirt, im-
puritiesfrom fuel. Replace-
ment Filter 199-1091.
ACCESSORY SAFE, in-
cludes generatorwrench.
two spare mantles and a
generator. Snaps tightly
onto base of lantern.
220A7101 for Coleman
220 or 228 Lanterns.
Join thefun! Select your favorite
model and enjoy deliciousfood
everywhere—and
for less cost
than restaurant
meals. Coleman
Camp Stoves fold likea suitcase,
cook likea range, and cook meals
for days on a tankof Coleman
fuel. Availablein two- or three-
burner models. Also available,
Coleman Camp Oven: lets you
bake to perfection anywhere, and
Teflon Griddle for stove-top
artistry.
WARNING:
THIS APPLIANCE CONSUMEs oxyOEN. PROVIDE
AMPLE VENTILATION UTILIZING, AT LEAST Two
O PENINGS, PREFERABLY ONE HIGH AND ONF LOW
ON OPPOSITE WALLS.
PROVIDE ADDITIONAL VENTILATION FOR ANY ADDI-
TIONAL FUEL BURNING
APPLIANCES.
Cautions:
READ THESE INSTRUCTIONS
THOROUGHLY.
. Neverloosen or removefuel cap While
starter
flameis burning,
eater is near open flame or other heat sources.
3. Store fuel in a clean, properlymarked, metal container
away
from open flameor excessive heat.
4. ALWAYS LIGHT HEATER OUTDOORSIN AN OPENAREA. Startur
flame will burn 2-3 feet under normal lighting%bnditions.
5. Never allow tents, sleeping bags,' clothing or othercombustiblematerials
to come withintwo feet of the top and onefoot on all sides of the heater.
6. OPERATE HEATER IN UPRIGHT POSITION ONLY.
7. Do not use any device or part not expresslyapproved
by the
Coleman Company, Inc.
8. This heateris designed,as a heating device only. Do not use in any
manner not expressly approved by the Coleman Company, Inc.
9. KEEP OUTOF REACH OF CHILDREN.
Things You ShouldKnox
1. APPROXIMATEBTU INPUT AND APPROXIMATE
BURNING
TIME BY MODEL.
Model
514708
513A708
515A708
Approx. BTU Input
3,500
Adjustable
3,000 to 5,000
Adjustable
5,000 to8,000
Approx. BurningTime*
18-20 hours
28-30 hours
on low adjustment
28-32 hours
on lowadjustment
*Approximate burning time from a full tank of fuel.
2. USE ONLY COLEMAN LIQUID FUEL. NEVER USE CON-
TAMINATED
WHITE GASOLINE OR LEADED GASOLINE. UN-
LEADEDGASOLINESWILL DRASTICALLY SHORTENTHE LIFE
OF YOUR PRODUCT.
3. If necessaryto writethe service centeror thefactory, refer
to your heaterby specific model number: 512A708,513A708,
515A708.
4. If heaterfails to operatesatisfactorily,refer to directory
packaged with product for list of Coleman service centers.

This manual suits for next models

1

Other Coleman Heater manuals

Coleman 5034 User manual

Coleman

Coleman 5034 User manual

Coleman 5045B751 User manual

Coleman

Coleman 5045B751 User manual

Coleman SportCat 5035A750 User manual

Coleman

Coleman SportCat 5035A750 User manual

Coleman Powermate 15 000 BTU User manual

Coleman

Coleman Powermate 15 000 BTU User manual

Coleman 5034A729 User manual

Coleman

Coleman 5034A729 User manual

Coleman 5053 User manual

Coleman

Coleman 5053 User manual

Coleman GolfCat 5036A850 User manual

Coleman

Coleman GolfCat 5036A850 User manual
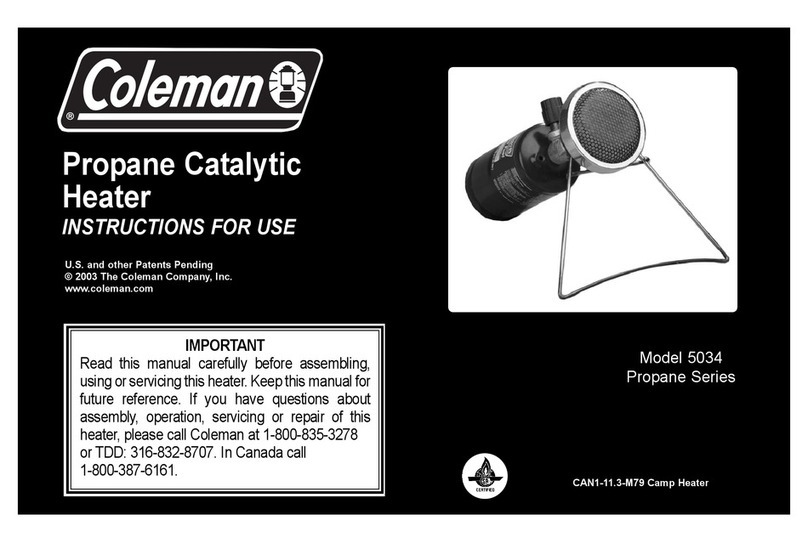
Coleman 5036 Propane Series User manual

Coleman

Coleman 5036 Propane Series User manual

Popular Heater manuals by other brands

Consort CHELSEA WMH3 Installation, operation and maintenance instructions

Consort

Consort CHELSEA WMH3 Installation, operation and maintenance instructions

Atlantic Alcove Installation and operating manual

Atlantic

Atlantic Alcove Installation and operating manual

Clarke XR60DV Operation & maintenance instructions

Clarke

Clarke XR60DV Operation & maintenance instructions

Holmes HCH7502 owner's guide

Holmes

Holmes HCH7502 owner's guide

jcb JCB3UF Installation and operating instructions

jcb

jcb JCB3UF Installation and operating instructions

SEELEY INTERNATIONAL Braemar Invertair SACV10D1S installation manual

SEELEY INTERNATIONAL

SEELEY INTERNATIONAL Braemar Invertair SACV10D1S installation manual

L.B. White I17 Owner's manual and instructions

L.B. White

L.B. White I17 Owner's manual and instructions

Fakir DOPPIO instruction manual

Fakir

Fakir DOPPIO instruction manual

Zehnder Rittling Zenia operating instructions

Zehnder Rittling

Zehnder Rittling Zenia operating instructions

EUROM Safe-T-Convect 2400 user manual

EUROM

EUROM Safe-T-Convect 2400 user manual

Tansun Quartzheat SOR 210IP Reference manual

Tansun Quartzheat

Tansun Quartzheat SOR 210IP Reference manual

elive EV10W instruction manual

elive

elive EV10W instruction manual

NARVI Oy Finland Velvet installation, user and maintenance instructions

NARVI Oy Finland

NARVI Oy Finland Velvet installation, user and maintenance instructions

Sealey IWMH1500 instructions

Sealey

Sealey IWMH1500 instructions

Goldair GECO200 Ecosave operating instructions

Goldair

Goldair GECO200 Ecosave operating instructions

Robur G 30 Instructions for installation, use and maintenance manual

Robur

Robur G 30 Instructions for installation, use and maintenance manual

iGenix IG9010 Instructions for use

iGenix

iGenix IG9010 Instructions for use

Pentair ETi 400 Quick reference guide

Pentair

Pentair ETi 400 Quick reference guide

manuals.online logo
manuals.online logoBrands
  • About & Mission
  • Contact us
  • Privacy Policy
  • Terms and Conditions

Copyright 2025 Manuals.Online. All Rights Reserved.