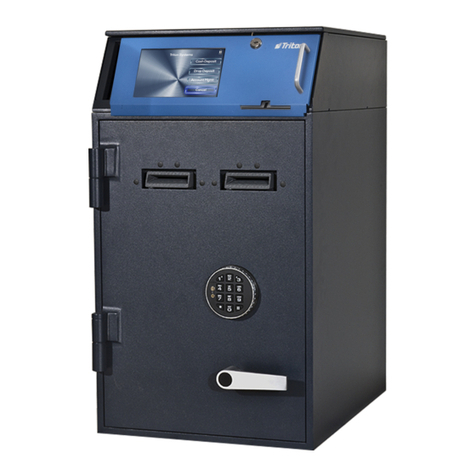
TDL Triton VersaSafe LT User manual

21405 B Street
Long Beach, MS 39560
Phone: 866.7.TRITON
FAX: 228.575.3101
www.triton.com
1
VersaSafe
®
LT, SL, and SLX Configuration
Perform each of the following steps for proper VersaSafe configuration.
1. Power up
•Plug in the power cord.
•Plug in the Ethernet cord (for VersaLink users only)
•Turn the power switch to the on position ( | ).
2. Enter Management Functions
•Press the BLANK key and 1 key together.
•Enter User ID and password. The default master User ID is 00 and the password is 1234.
Enter 001234 or the appropriate master User password 00xxxx, if the password has
already been changed.
•Select 0, Main Menu.
3. Setting up VersaSafe Country Specific Settings (performed only once)
To complete the VersaSafe initialization, country specific settings must be configured. This step
is only performed during the initial set-up of the VersaSafe.
•Select ENTER to load country specific settings.
•Use the ARROW keys to select the appropriate country.
•Select ENTER to confirm the selection.
•Select ENTER until you are back at the Main Menu screen, as indicated at the top-left of
the LCD.
4. Changing the Default Master User Password
•Select 4, Password Maintenance.
•Select 1, Change User Password.
oEnter in a new master password. Remember, management functions login
includes both user ID and password. 00 is the master User ID; it is not part of the
password. 1234 is the default master User password. In this case, you must
change the default master User password (1234). Until the VersaSafe is
deployed, Triton recommends changing the master User password to 1111. In
this case, enter 1111 (or the desired master User password) as the password.
•Select ENTER until you completely exit management functions and return to deposit
mode.
•Enter management functions as described in step 2 to ensure the password was correctly
changed.
•Select 0, Main Menu.
5. Date & Time
•Select 5, System Parameters.
•Select 1, Date & Time.

21405 B Street
Long Beach, MS 39560
Phone: 866.7.TRITON
FAX: 228.575.3101
www.triton.com
2
oSelect 1, Set Date. Configure the date using the ARROW and NUMBER keys.
oSelect 2, Set Time. Configure the time using the ARROW and NUMBER keys.
Use the BLANK key to toggle between AM and PM.
•Select ENTER until you are back at the Main Menu screen, as indicated at the top-left of
the LCD.
6. Terminal ID
•Select 6, Terminal Configuration.
•Select 1, General Parameters.
oSelect 1, Terminal ID. Ensure the Terminal ID matches exactly the terminal
serial number located inside the VersaSafe. The format should be similar to
LVS8341112001234 (16 digits). Ensure there are no leading spaces in the field.
To enter the Terminal ID, do one of the following:
Connect a USB keyboard to an available USB port on the main board.
Type the serial number as the Terminal ID. OR
Press the bottom 1x4 key on the right side of the LCD. An electronic
keyboard will come up. Toggling the BLANK key will toggle ALL
CAPS. Use the instructions at the left of the electronic keyboard to type
the serial number as the Terminal ID. Select the CANCEL key to remove
the electronic keyboard.
oSelect 2, ZIP Code. Enter the location ZIP Code.
•Select ENTER until you are back at the Main Menu screen, as indicated at the top-left of
the LCD.
7. Configure VersaSafe Communications
•Select 2, Diagnostics.
•Select 5, Modem / Ethernet.
•Select 6, Configure Ethernet Settings (note: these are site-specific settings).
If the VersaSafe is configured behind a router (this is very common), then
oSelect 6, Enable DHCP – Ensure the box is checked.
oSelect 7, Incoming – Ensure this is set at 1000. The router must forward
incoming traffic to this port to the VersaSafe.
Otherwise, for a static IP address (this is not common)
oSelect 6, Enable DHCP – Ensure the box is NOT checked.
oSelect 1, IP Address – Enter the static IP address.
oSelect 2, Subnet Mask – Enter the subnet mask (e.g., 255.255.255.0).
oSelect 3, Default Gateway – Enter the default gateway, if applicable.
oSelect 7, Incoming – Ensure this is set at 1000.
•Select ENTER until you are back at the Main Menu screen, as indicated at the top-left of
the LCD.

21405 B Street
Long Beach, MS 39560
Phone: 866.7.TRITON
FAX: 228.575.3101
www.triton.com
3
8. Configure TDL Gateway Wireless Communications (for wireless only)
•Select 2, Diagnostics.
•Select 8, TCP/IP (Wireless).
oSelect 5, Disconnect.
oSelect 1, Signal Strength. For sufficient communications, the signal strength
should be at least 7 or higher. For values less than 7, adjust the location of the
antenna and repeat this step until a sufficient signal strength is achieved.
oSelect 4, Connect. Once a connection is made, an IP address should appear.
•Select ENTER until you are back at the Main Menu screen, as indicated at the top-left of
the LCD.
9. Configure VersaLink
®
Communications
•Select 6, Terminal Configuration.
•Select 3, Communication.
•Select 1, Enable VersaSafe Online – Ensure the box is checked.
•Select 2, Host Address – sckt.versasafe.com. To enter the Host Address, do one of the
following:
oConnect a USB keyboard to an available USB port on the main board. Type the
Host Password. OR
oPress the bottom 1x4 key on the right side of the LCD. An electronic keyboard
will come up. Toggling the BLANK key will toggle ALL CAPS. Use the
instructions at the left of the electronic keyboard to type the host address. Select
the CANCEL key to remove the electronic keyboard.
•Select 3, Host IP Port – 5432.
•Select 4, Protocol. TCP/IP is for hard-wired Ethernet. TCP/IP (Wireless) is for wireless
connectivity using the TDL Gateway wireless modem. Select the appropriate protocol.
•Select 9, Test Host Connection.
oIf this step is successful, select ENTER until you exit management functions and
return to the deposit screen.
oIf this step is unsuccessful, review the process for diagnosing communications.
10. Day Close
Optional – To schedule a day close to close each business day automatically, please perform the
following. Regularly scheduled day closes are recommended in order to denote the conclusion
of a business day.
•Select 1, Terminal Close Functions.
•Select 0, Close Options.
oSelect 1, Auto Day Close During Pick-up Close. Ensure the box is checked.
Having this box enabled will aid in balancing the VersaSafe.
oSelect 2, Serial Entry for Bill Acceptor/Pick-up Close. Enable this feature if your
team intends to use serial number tracking for VersaSafe cassettes.
oSelect 3, Schedule Day Close.
Select 1, Enable Schedule. Ensure the box is checked.

21405 B Street
Long Beach, MS 39560
Phone: 866.7.TRITON
FAX: 228.575.3101
www.triton.com
4
Select 2, Select Time. Configure the time using the ARROW and
NUMBER keys. Use the BLANK key to toggle between AM and PM.
•Select ENTER until you are back at the Main Menu screen, as indicated at the top-left of
the LCD.
11. Terminal Close Functions
Warning: The following procedures will reset all bill acceptor levels and dropped
cash/check levels. Please ensure the VersaSafe is empty of all currency at the conclusion of
these steps. Prior to placing the VersaSafe in service for the first time, please perform the
following:
•Select 1, Terminal Close Functions.
•Select 1, Shift Close.
oUsing the ARROW keys, highlight each user and press the BLANK key to place
check the box. Ensure all users are checked.
oSelect 5, Close Checked Users.
•Select 7, Day Close.
oFollow the on-screen instructions, if you elect to print or save the report.
•Select 9, Pick-up Close.
oA Pick-up Close will reset bill acceptor levels and dropped cash/check levels to 0.
oFollow the on-screen instructions, if you elect to print or save the report.
•Select ENTER until you are back at the Main Menu screen, as indicated at the top-left of
the LCD.
12. Configure VersaSafe Users (for cash management purposes)
•Select 7, User Management.
oSelect 4, Add User.
oAssign a 1 to 4 digit User ID for the user.
oTo enter a User name, do one of the following:
Connect a USB keyboard to an available USB port on the main board.
Type the User’s name. OR
Press the bottom 1x4 key on the right side of the LCD. Toggling the
BLANK key will toggle ALL CAPS. Use the instructions at the left of the
electronic keyboard to type the User ID. Select the CANCEL key to
remove the electronic keyboard.
oRepeat as necessary to add more Users.
•Each new user will have a default PIN of 1234. Once each User logs in for the first time,
that User will be forced to change their PIN.
•Select ENTER until you are back at the Main Menu screen, as indicated at the top-left of
the LCD.
13. Configure VersaSafe Users (for maintenance purposes)
Warning: These users are people that have access to Management Functions. Depending
on the security settings, these users may have access to alter the VersaSafe configuration.

21405 B Street
Long Beach, MS 39560
Phone: 866.7.TRITON
FAX: 228.575.3101
www.triton.com
5
•Select 4, Password Maintenance.
•Select 4, Add User.
oEnter a 2-digit User ID between 01 and 99 for the technician. Remember, the
Master User is assigned User ID 00.
oTo enter a User name, do one of the following:
Connect a USB keyboard to an available USB port on the main board.
Type the User’s name. OR
Press the bottom 1x4 key on the right side of the LCD. Toggling the
BLANK key will toggle ALL CAPS. Use the instructions at the left of the
electronic keyboard to type the User’s name. Select the CANCEL key to
remove the electronic keyboard.
oEnter a password for the User that is between 4 and 8 characters.
oFor the new User to access management functions, the User must know their ID
and password.
•To restrict User access privileges, please perform the following:
oSelect 3, Modify User Access.
oEnter the User ID to modify.
oUsing the ARROW keys, move to the sections where the User’s privileges should
be restricted and uncheck the appropriate boxes using the BLANK key.
•Select ENTER until you are back at the Main Menu screen, as indicated at the top-left of
the LCD.
14. Electronic Journal
Prior to placing the VersaSafe into service, some consideration should be given to the electronic
journal data. Even for those customers retrieving records through VersaLink, eventually, the
electronic journal will become full. These records must be handled in order to prevent the
VersaSafe from going out of service.
•Select 3, Electronic Journal.
•Select 8, Auto Archive.
oSelect 2, Archive When Journal Size Exceeds. By default, this setting is
configured at 4MB.
oSelect 3, Archive All Records Older Than. By default, this setting is configured
at 7 days. This means that at any time, if the customer needs to retrieve records
from the VersaSafe, the customer should only expect to be able to retrieve the last
7 days of records. For customers using VersaLink, records older than the past 7
days can be retrieved. For customers not using VersaLink, the customer may
want to retrieve records older than the past 7 days. It is recommended that this
field be set to a number of days that supports the customer’s business philosophy
of retrieving records (e.g., 30 days).
oSelect 4, Archive Unaudited Records. Ensure the box is checked.

21405 B Street
Long Beach, MS 39560
Phone: 866.7.TRITON
FAX: 228.575.3101
www.triton.com
6
15. Electronic Lock Combination
Warning: Change the default lock combination before placing the VersaSafe into service.
•Ensure the vault door is open prior to performing this function. To open the vault door,
type the default lock combination 123456, turn the dial 90 degrees clockwise, then turn
the vault handle counterclockwise.
•With the vault door open, turn the vault handle clockwise to the locked position and turn
the lock counterclockwise to the locked position.
•To change the combination, perform the following:
oType 000000. Wait for the beeps.
oType the old combination 123456. Wait for the beeps.
oType the new combination xxxxxx. Wait for the beeps.
oType the new combination xxxxxx again. Wait for the beeps.
oType the new combination xxxxxx, turn the lock 90 degrees clockwise to unlock,
and turn the vault handle counterclockwise.
This manual suits for next models
2
Table of contents
Other TDL Safe manuals
