_ 7 _
ENGLISH
Operations
Basic Operation
1. Press the [power] button.
OTurn the amplifier's power on and set
the input switch to CD.
2. Press the [open/close] button.
The disc tray will slide out and "OPEn"
will be indicated in the display. Place
the disc gently on the tray with its label
side facing upward. The disc is set
within the disc guides at the center of
the tray.
3. Press the [open/close] button again.
The disc tray will close and "CLOSE" will
be indicated in the display.
OAfter disc data (TOC) has been read, the
total number of tracks and total disc
playing time are displayed for a few
seconds.
∑Even if the disc tray is open....
Direct access play:
By pressing the numeric buttons
corresponding to the required track, the
tray will close and play starts from the
specified track directly, without your
having to press the play [∏] button.
Example:
To play the 5th track : Press .
To play the 21st track:
Press twice, then .
When the play [∏] button is pressed:
The disc tray will close and playback starts
from the first track.
When the pause [ƒ] button is pressed:
The tray will close and the player will enter
the pause mode at the beginning of the
first track. Press the play [∏] button or
pause [ƒ] button to start playback.
∑To stop play
To stop playback:
Press the stop [∑] button. The player
enters the stop mode.
To temporarily suspend playback
(pause mode):
Press the pause [ƒ] button. Playback
stops at the current position and the Pause
indicator lights steadily. To resume
playback from the same position, press the
play [∏] button or pause [ƒ] button.
4. Press the play [∏] button.
Disc playback starts from the first track,
and the Play indicator will light.
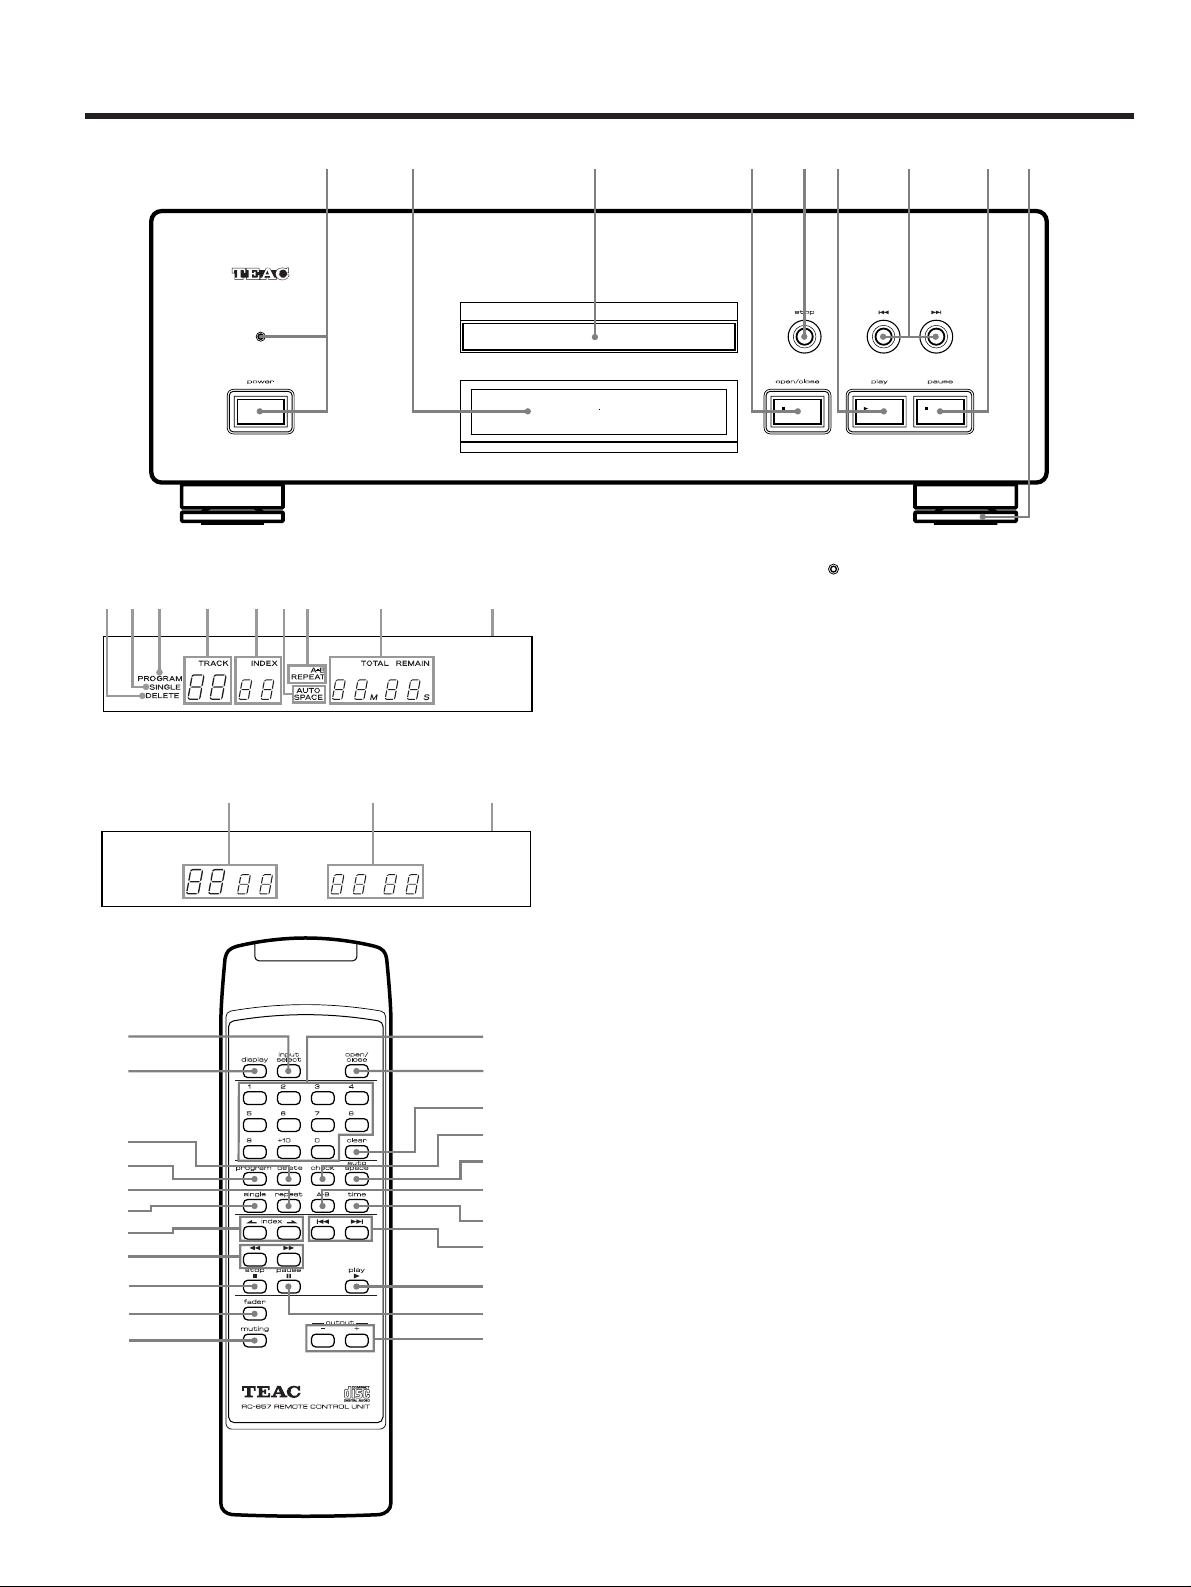
In addition to the basic operation
buttons on the front panel, the remote
control has buttons for control of all the
same functions (except for the [power]
button). The following operation
descriptions assume that the remote
control unit is used unless otherwise
specified.
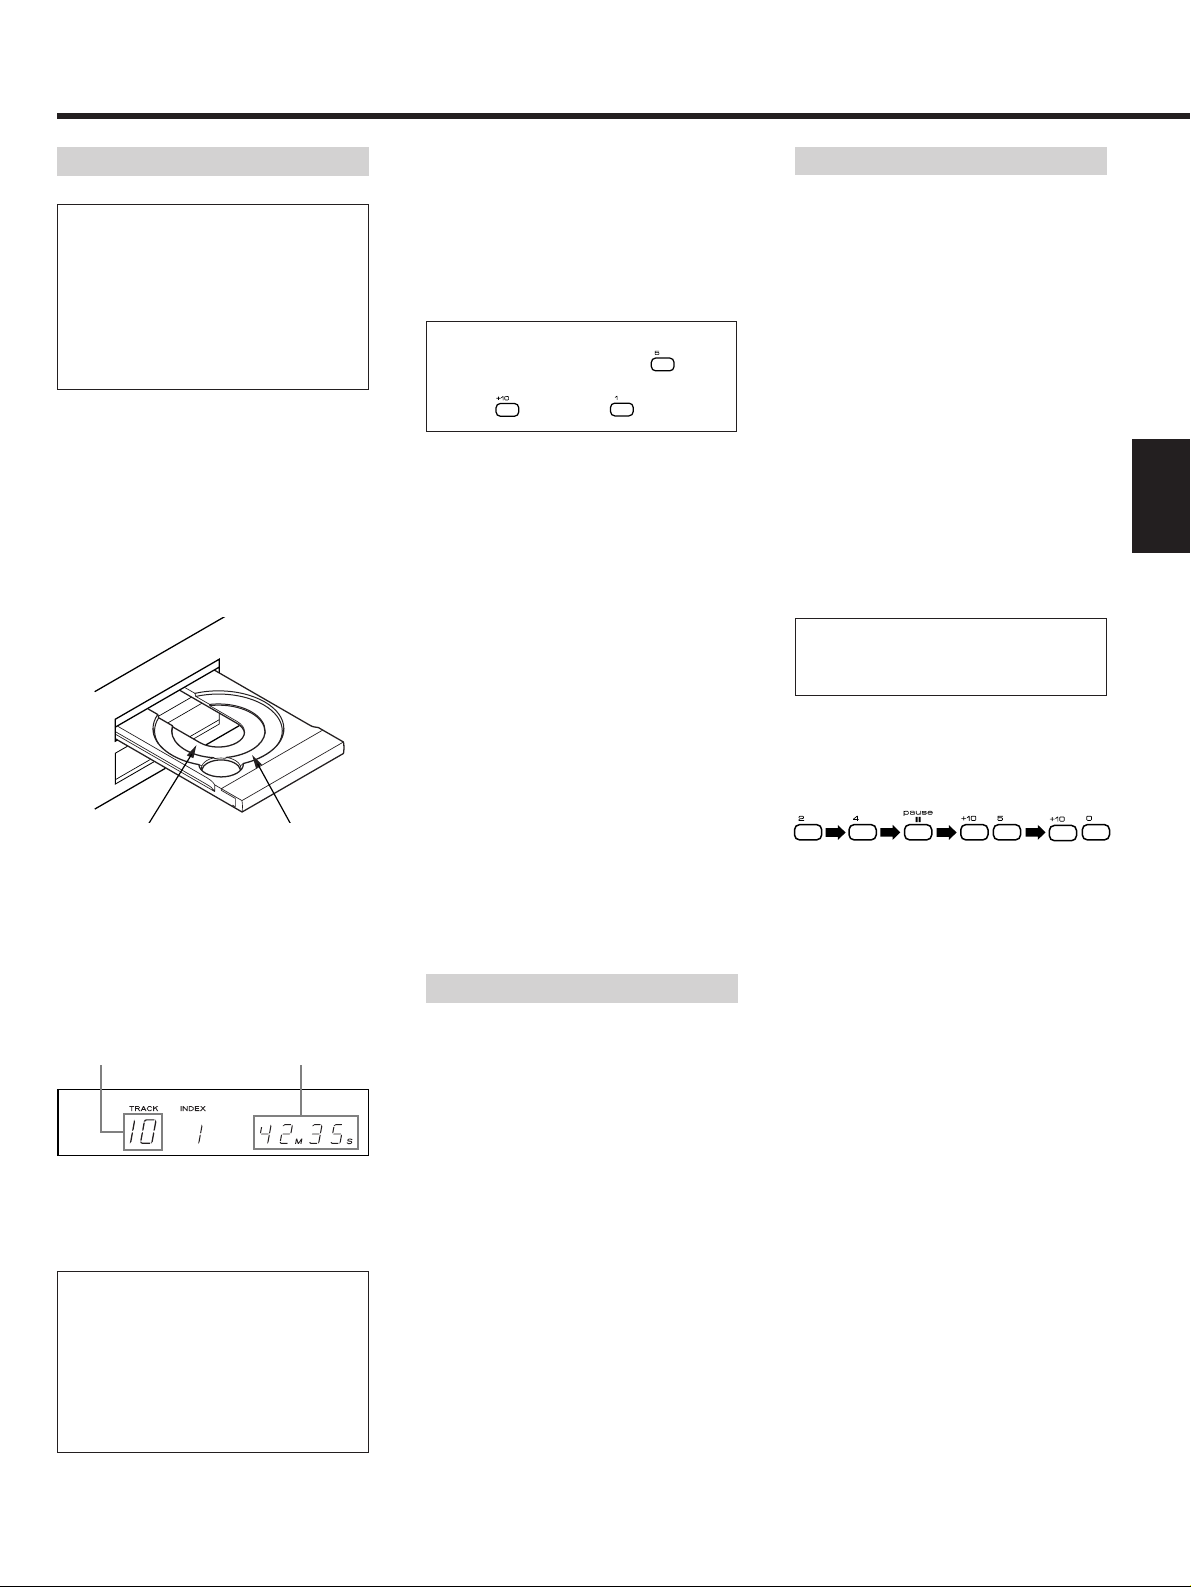
For 8 cm (3-inch)
CD singles
For 12 cm (5-inch)
Compact Discs
Total number of
tracks on the disc
Total playback
time of disc
A single track is played back, after which
the player enters the stop mode.
1. Press the [single] button.
The SINGLE indicator will light in the
display.
2. Select the track by pressing the
numeric buttons or the [Ú/Æ]
buttons.
3. Press the play [∏] button.
OTo release the single mode, press the
[single] button again.
Single Playback
CAUTION :
ODo not force the tray by hand during
opening and closing operations.
ODo not leave the disc tray open when
the player is not in use to prevent
dirt and dust from entering the
mechanism.
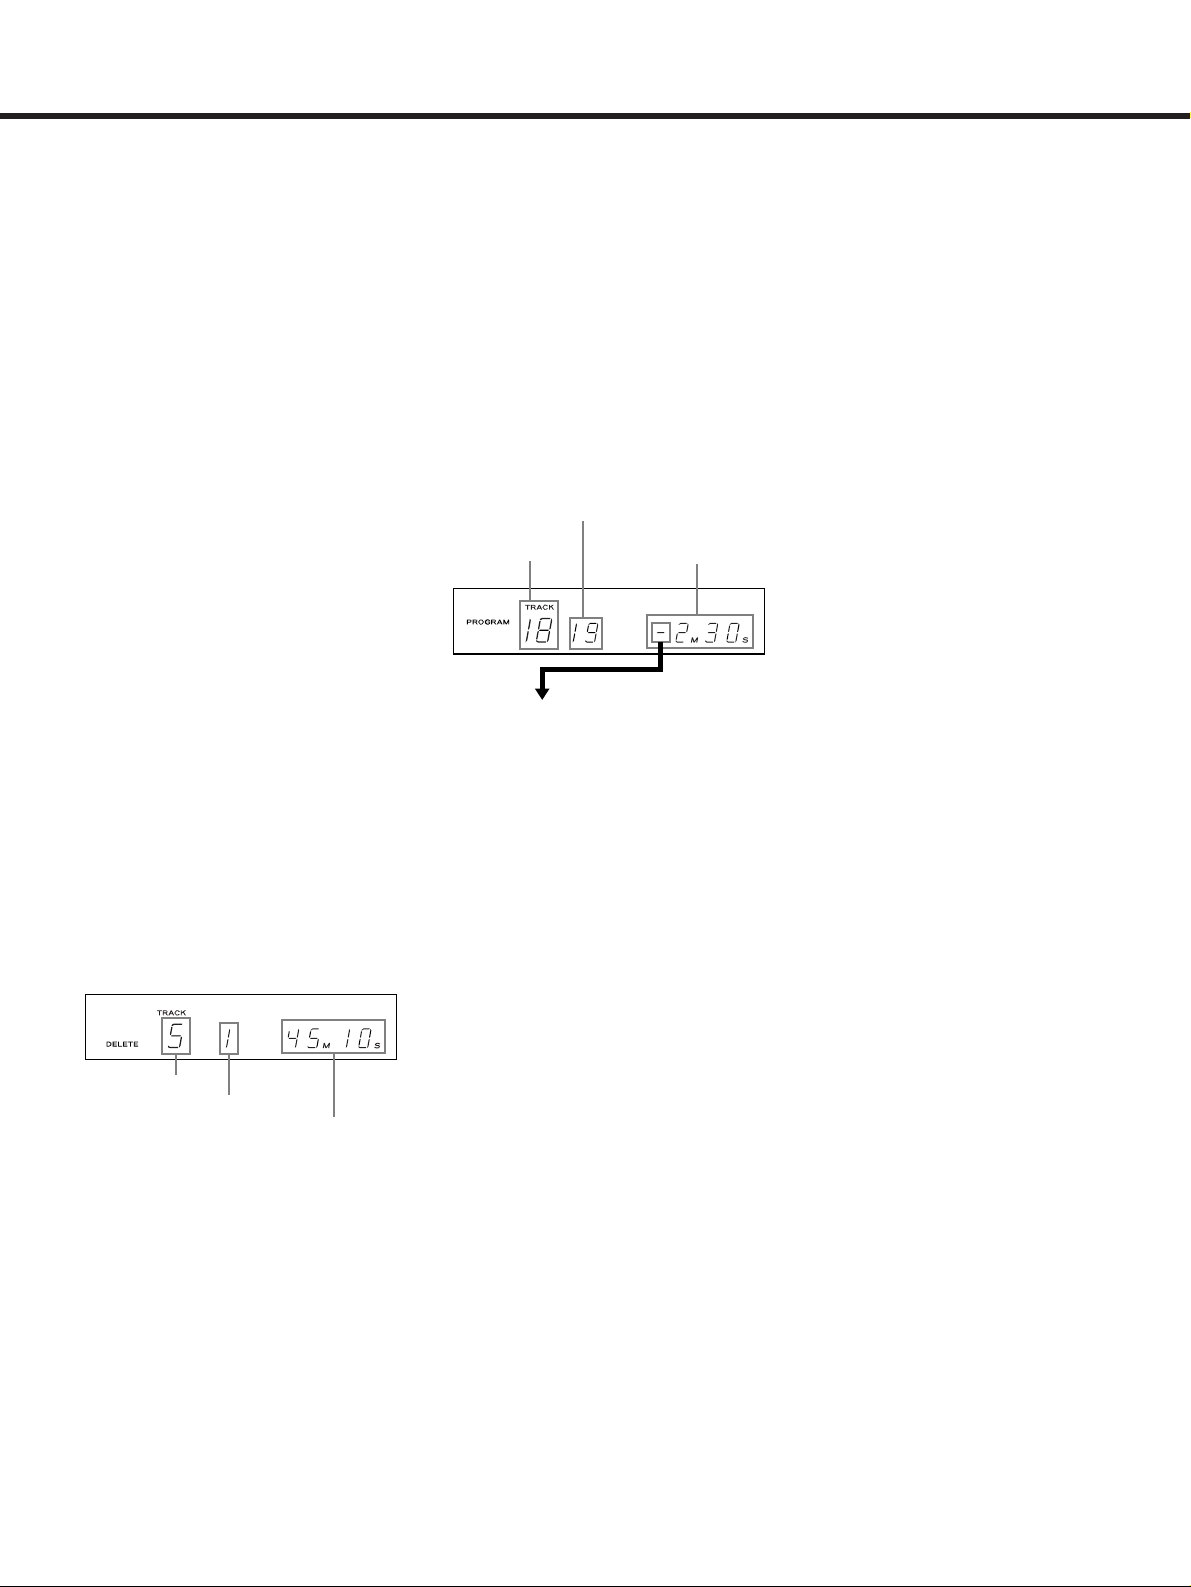
∑Programming required tracks
OIn the playback mode, press the
[program] button. The current track will
be programmed as first track.
OA "pause" cannot be programmed
during playback.
Example:
To program tracks in the order 2 T4
Tpause T15 T10 in the stop mode.
Program Playback
The program playback function allows you
to program up to 30 tunes (tracks)
(including "pause") for playback in any
desired order.
A "pause" can be programmed in the
program memory to stop programmed
playback in the middle. This function is
convenient when you have to turn a
cassette over when recording a CD onto
both sides of the cassette.
1. Press the stop [∑] button.
2. Press the [program] button.
The PROGRAM indicator lights.
3. Press buttons in the following order;
"PA"(pause) will appear in the track
number display with the program
number "3".
They are automatically stored in the
program memory in order.
OIf you make a mistake in the track
number entry, press the [clear] button.
Each press clears the current last track
in the program.
4. Press the play [∏] button.
Programmed playback starts from the
first programmed track.
OWhen a programmed pause is reached,
playback will be temporarily suspended.
To restart playback, press the play [∏]
button or the pause [ƒ] button.
ODuring program playback, when the "PA
" code is programmed, the TOTAL
REMAIN time counter shows the total
remaining time up to the point at which
the "PA" code is programmed. In this
case, when program playback is
restarted, the TOTAL REMAIN time
counter will show the total remaining
time to the end of the program.
OMore than two "PA" codes can be
programmed in one program, however it
is impossible to program a "PA" code
immediately after a previously
programmed "PA" code.