Team Biland SA250 User manual

INSTALLATION GUIDANCE
SA250
Team Biland Kart-Power AG Buchmattstrasse 19
CH-3400 Burgdorf / Switzerland
Fax+41 (0) 34 420 / 62 91 Internet: www.kart-power.com
World – Logistik – Center
Eberhard Hoeckle GmbH Karl Jaggy Str.44
Spare Parts: D 72116 Mössingen / Germany
Tel.+49 (0) 7473 / 373 164
R&D:
Tel.+49 (0) 7473 / 373 158
Central Office:
Fax+49 (0) 7473 / 22661 Internet: www.hoeckle.de
V
01-2004
V
01-2004

Kit
T
ype 2
T
ype 1
1 X preassembled radiator and oiltank package
2 X watertube with preassembled 90° ellbows and spring clamps type 2
Or 1 X watertube assembly type 1
1 X 90° water ellbow
1 X coupling tube
6 X spring clamps for water hose
1 X feed oil hose 4 X spring clamp for oil hose
1 X wiring loom including starter panel plate
1 X battery bracket kit 1 X battery
1 X radiator bracket bottom side
1 X radiator bracket top side1 X oil filter
1 X exhaust manifold
1 X silencer
2 X exhaust spring
V
01-2004

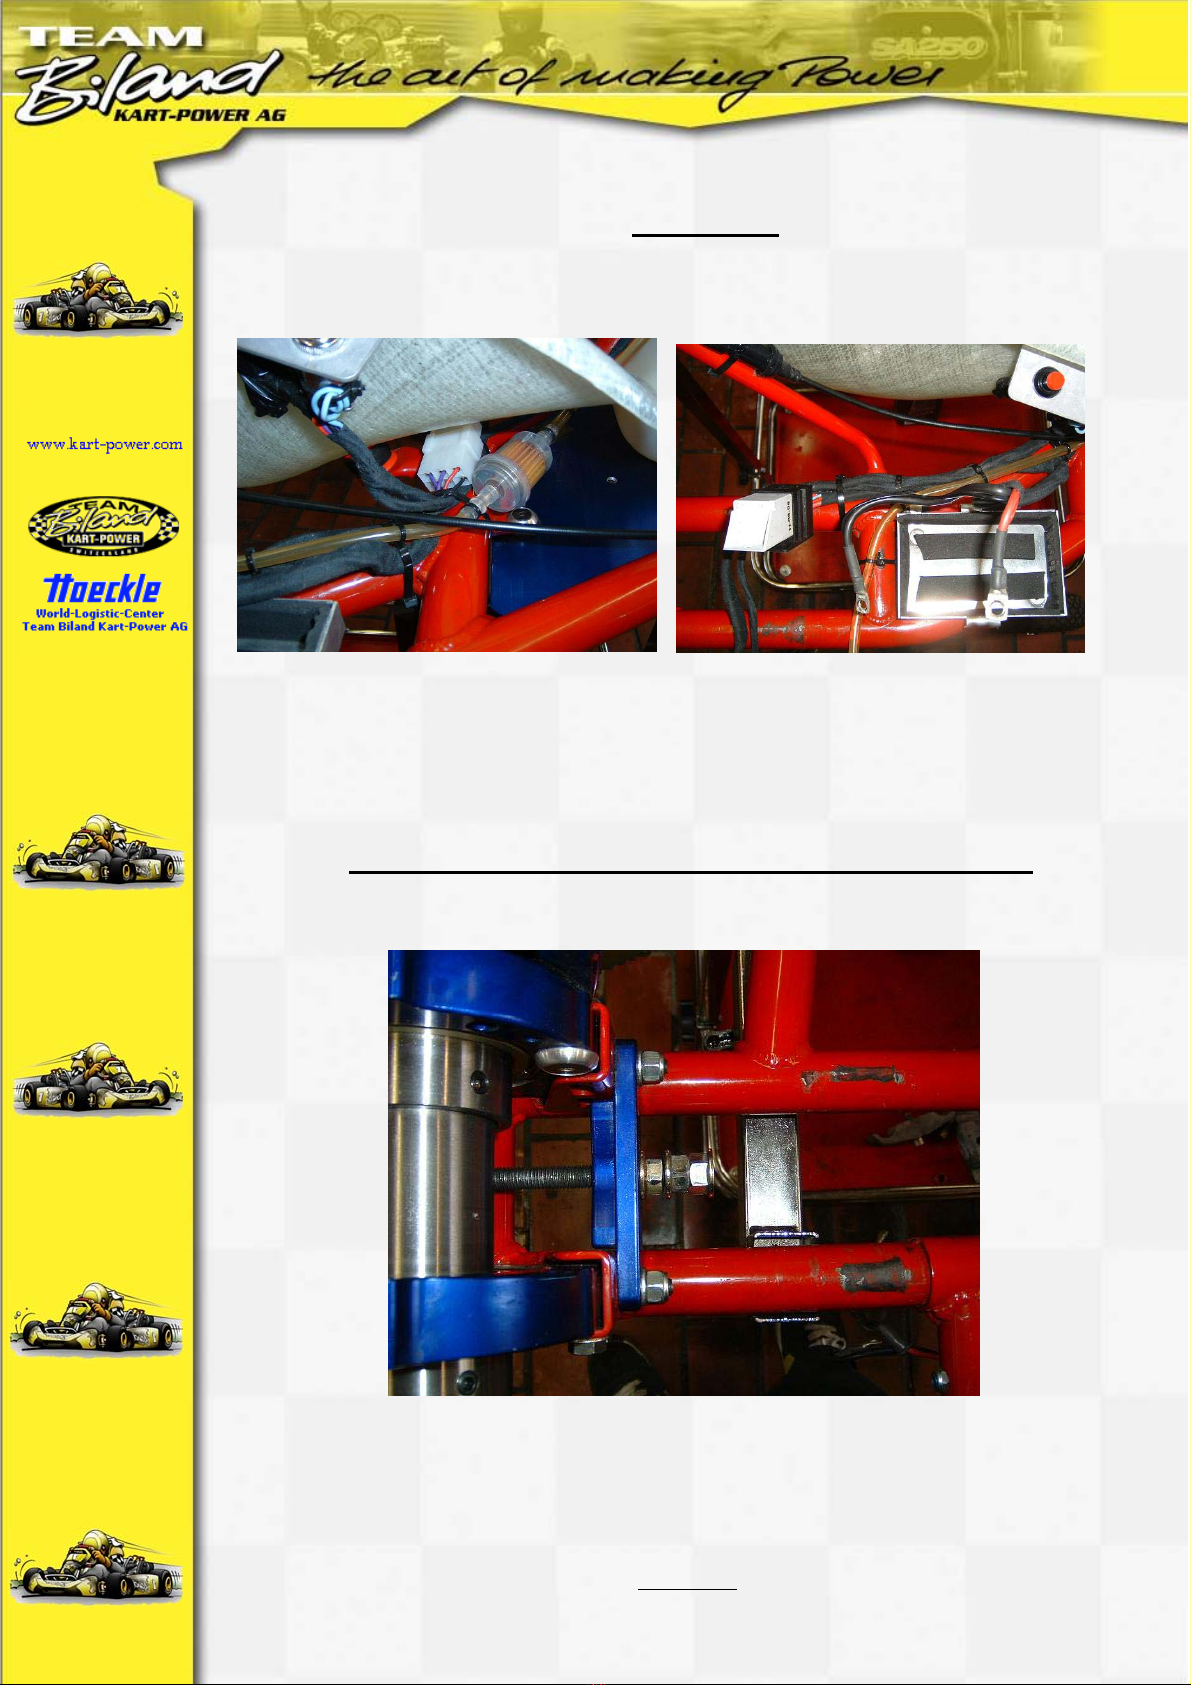
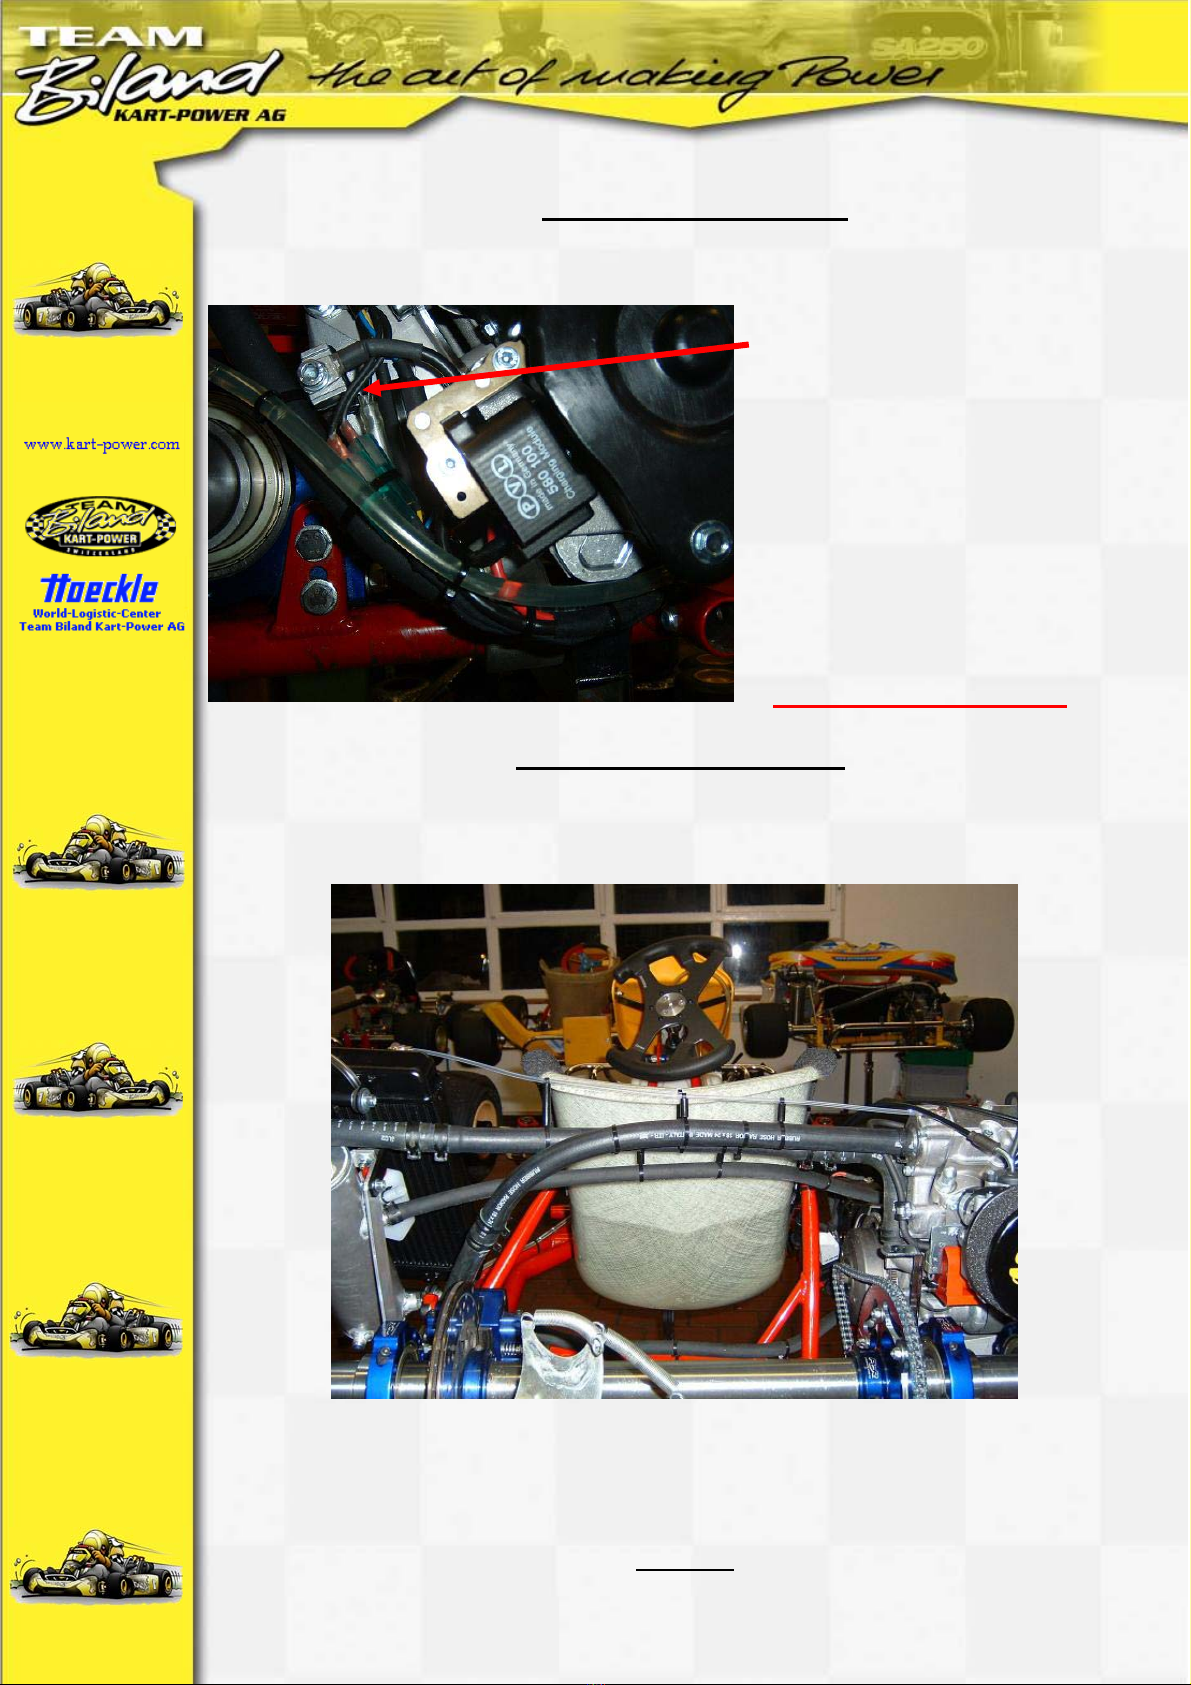
Wiring loom
Fix battery bracket and wiring loom as shown at the pictures
Fix relay bracket at the chassis or at the front engine bracket
Also you can fix the starter panel at the front side of the seat
Cable for oil pressure
Fix oil pressure lamp at the
steering wheel
V
01-2004
Wiring loom
Check for a good solution for chain tensioner as example
V
01-2004
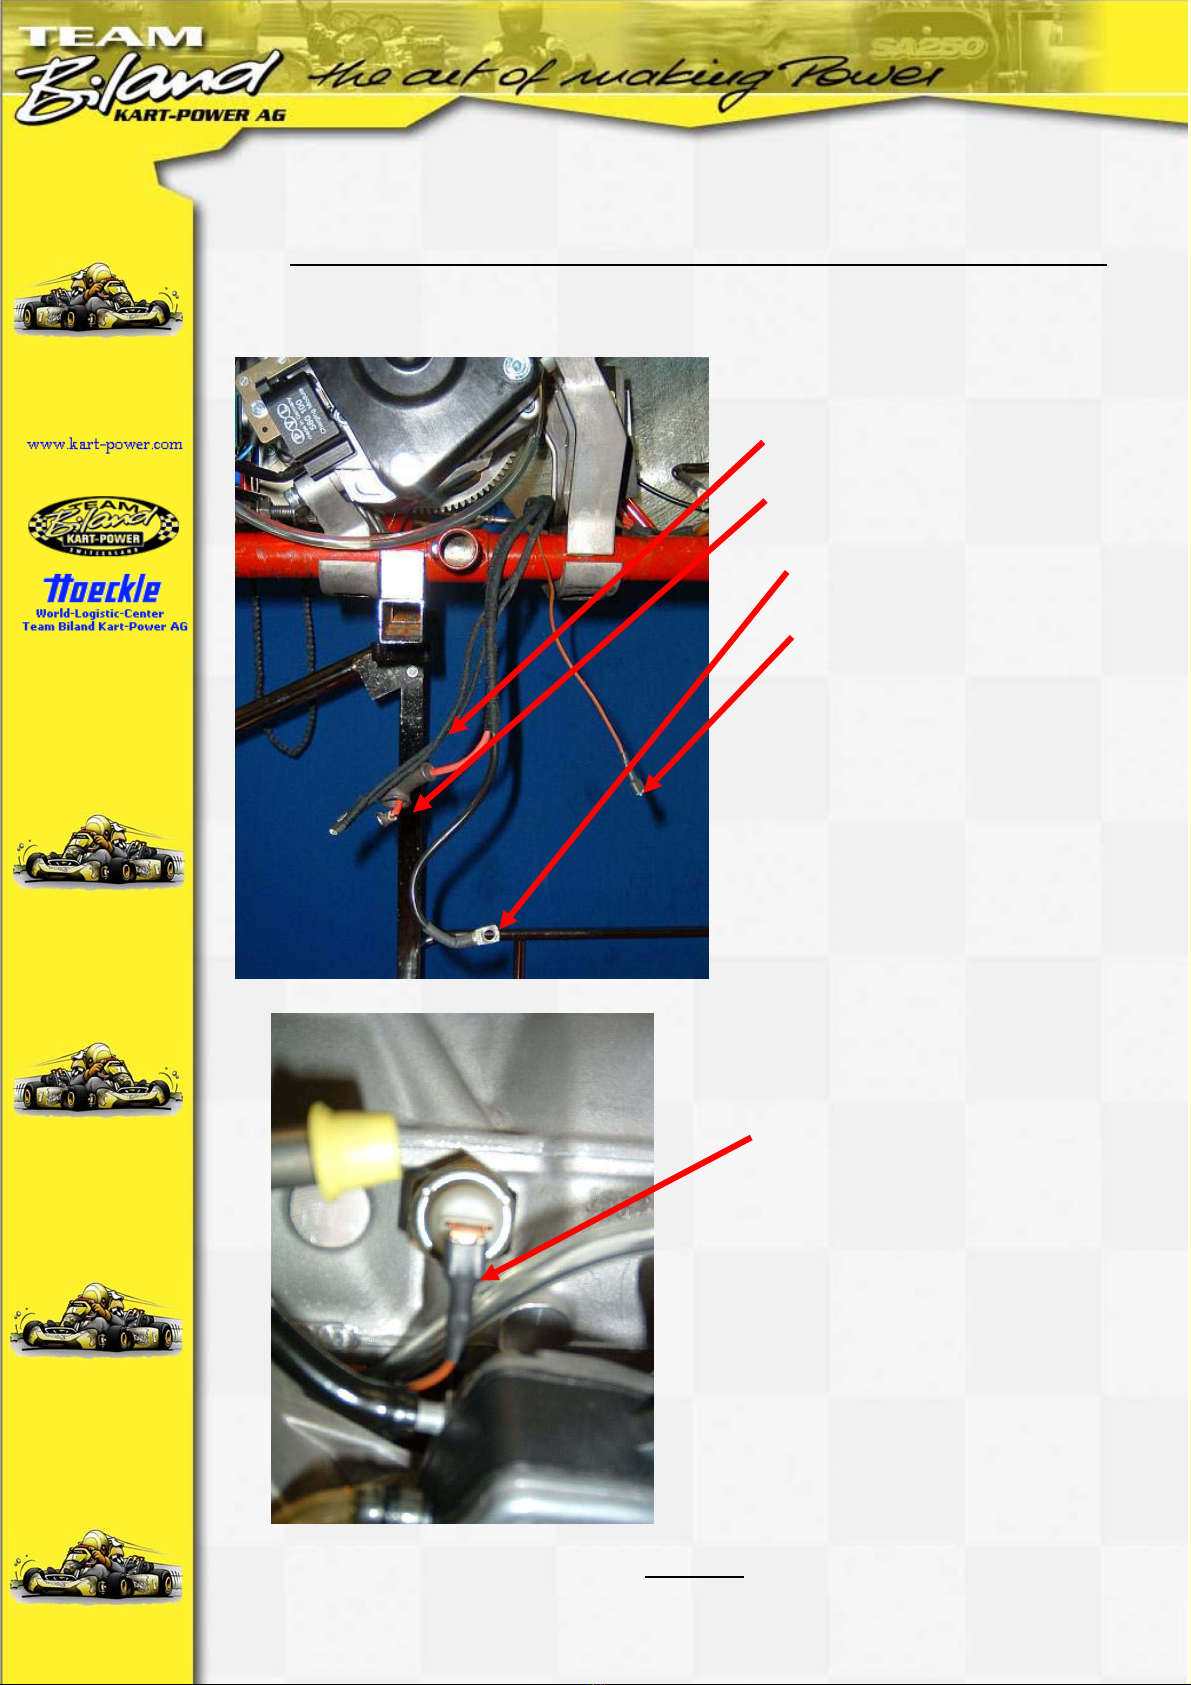
Fix enginge at the frame and fix the cables as shown at the pictures
To kill cable from the
ignition coils
To starter engine +
To ground at the starter
engine
To oilpressure switch
Cable (brown) to oilpressure
switch at the front side of
the engine
V
01-2004

Wiring loom
Ground – (black) to starter engine
Power +(red) to starter engine
Connectors kill cable
Throttle cable
V
01-2004
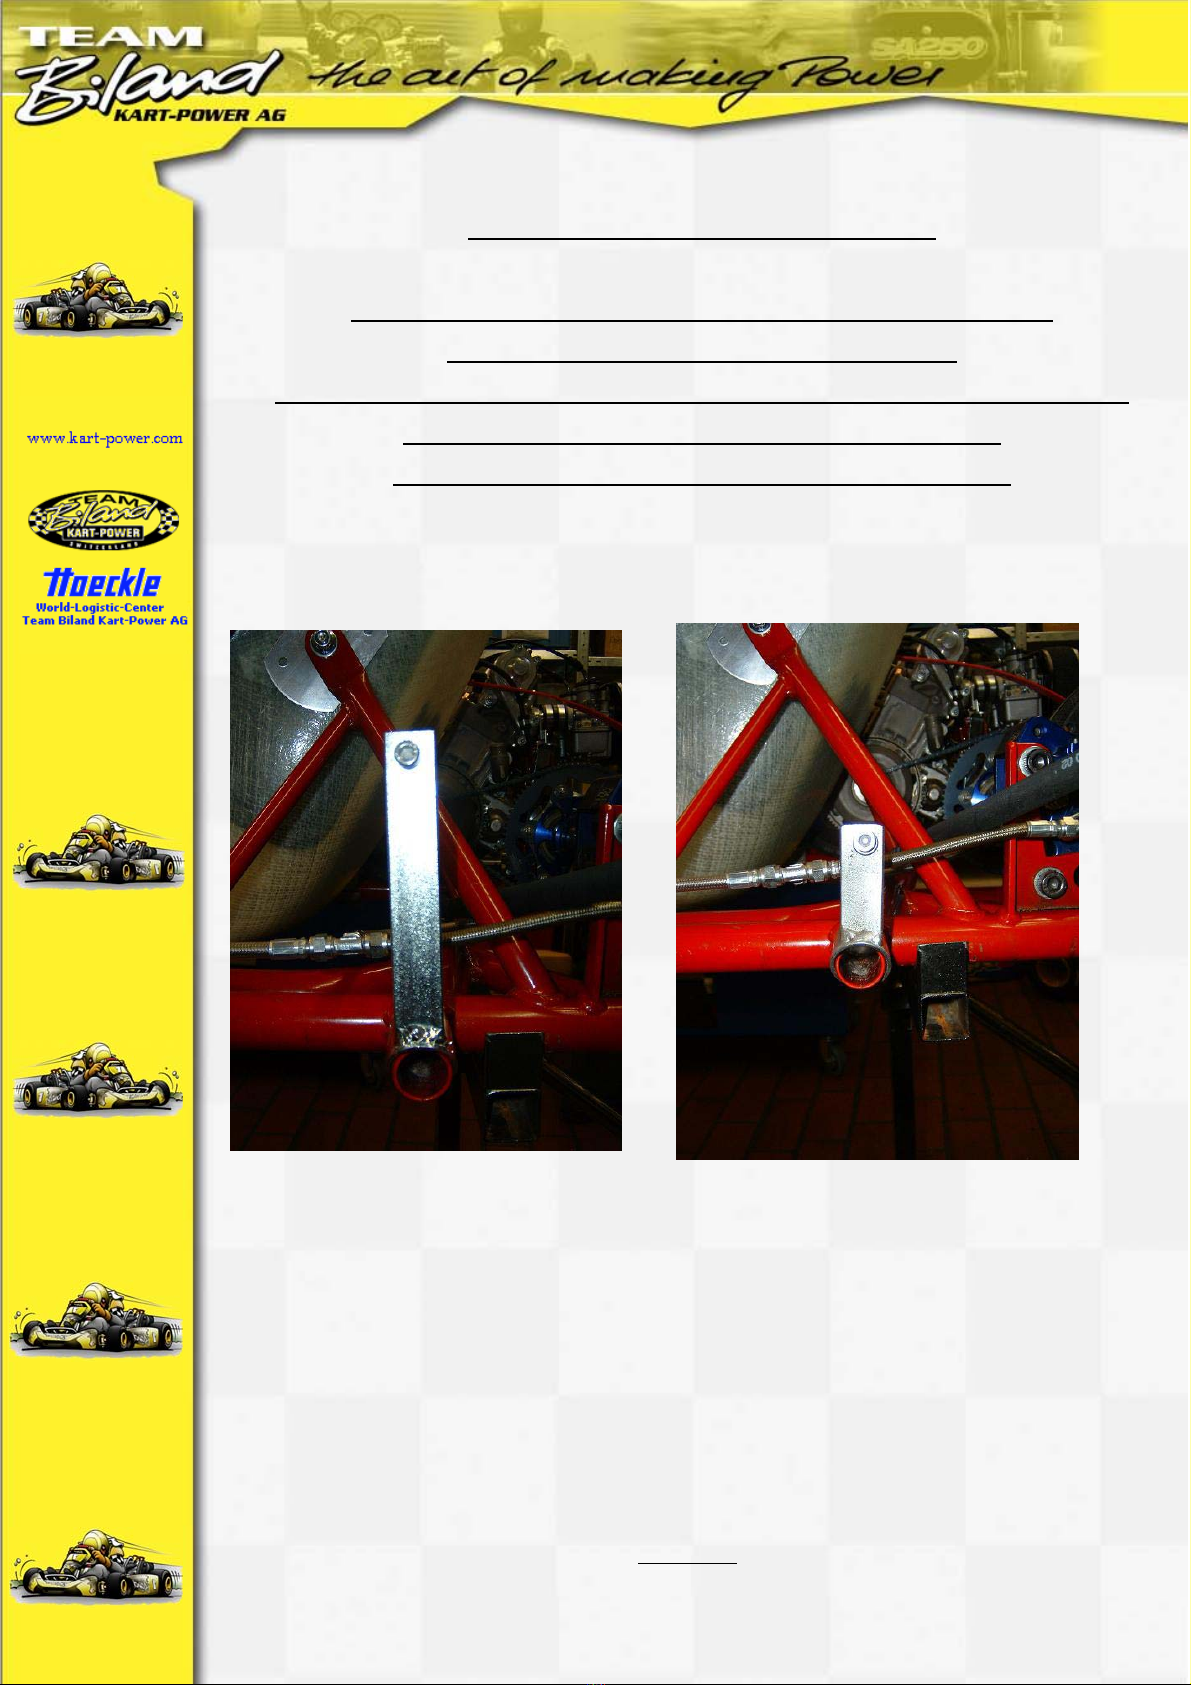
Mounting of radiator / oiltank package
Fit radiator bracket at chassis side as shown in the picture
Check the nesseary hight of the bracket->
The top side of the radiator must be 20 to 30 mm higher as the engine!
Use a saw to cut the bracket to the correct length
and drill a hole (6,2 mm) into the bracket as shown
V
01-2004
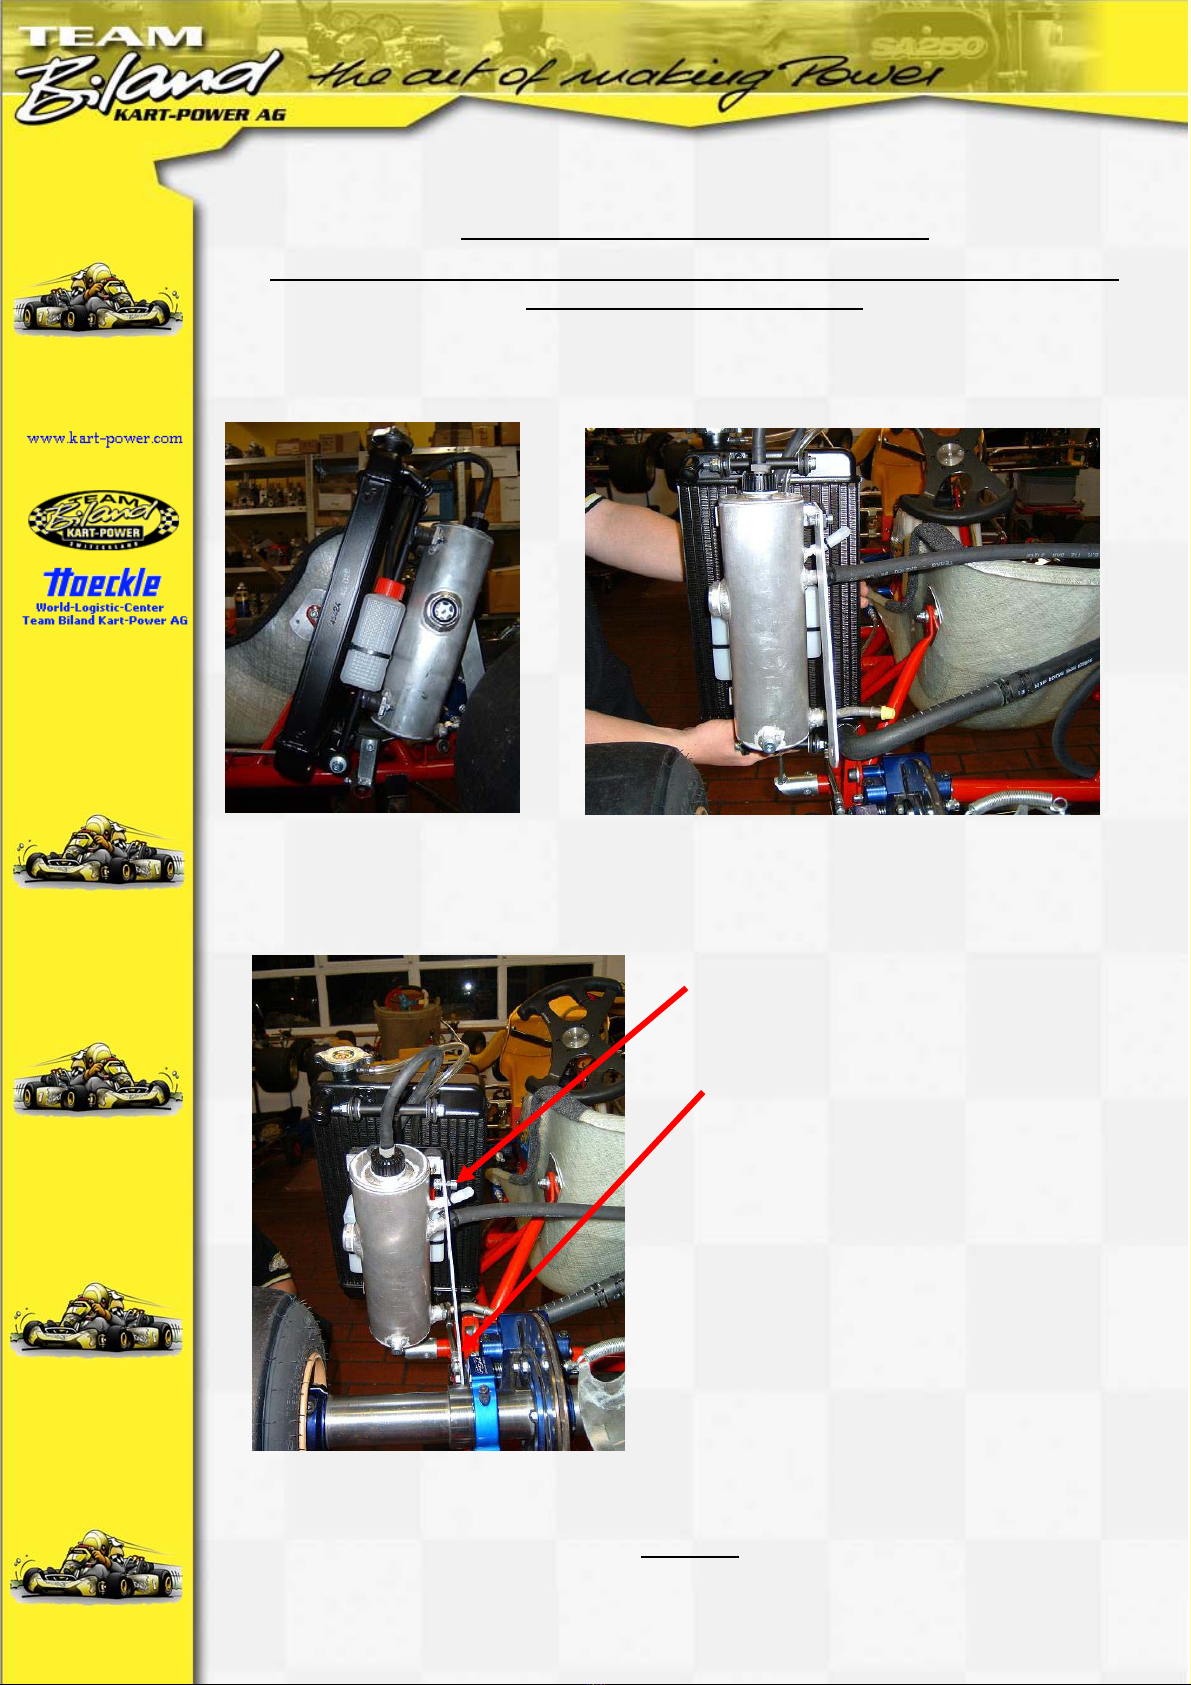
Mounting of radiator / oiltank package
Preassemble the water(90° ellbows to radiator side) and oil hoses and
fix it with the spring clamps
Use a saw to cut the 2nd.bracket
To the correct length for your
Chassis, drill a hole for the
screw you want to use (6 or 8 )
and fit it to the chassis
V
01-2004

Mounting of oil feed hose
Fix the feed oil hose from the bottom side of the oil tank at the chassis
as shown at the pictures routed between the engine brackets to the
right side of the engine and fix the oil hose at the front engine bracket
to avoid touching starter gear
Cut the feed oil hose
(oil tank to oil pressure pump) to the
lengh that’s nesseary for your chassis,
pre assemble the spring clamp and fit
it to the oil pressure pump
Thereafter fix the oil hose with the
spring clamp
Pay attention that there are no kinks
and the oil hose will be placed in a
soft bow!!
Risk of engine damage!!!
V
01-2004
Mounting of oil feed hose
To avoid touching oil hose
at the rear axle fix the oil
hose by using a tie rap at
the place where the ground
cable is fitted at the starter
engine
Fix the fuel tube as shown
and pay attention that there
are no kinks and the
fuel tube will be placed in a
soft bow!!
Do not squisch the tube!
Mounting of oil return hose
Fit the return oil hose as shown at the pictures
V
01-2004


