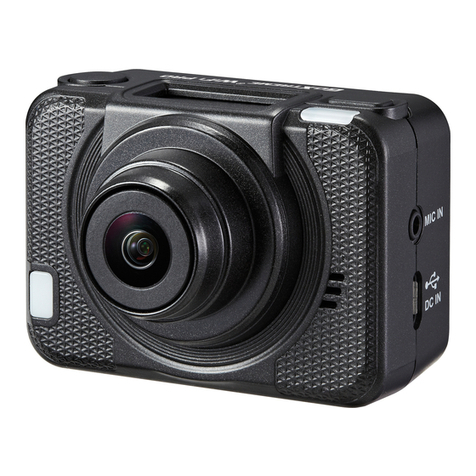
Teche TE720 Pro Guide

Matters need attention
when using
Buyer Reading
Matters need attention
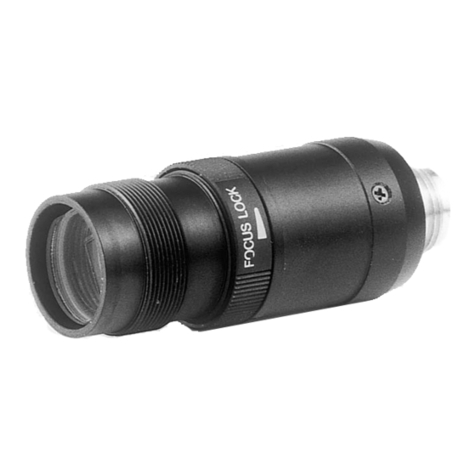
1. The lens is made of glass. Please be careful when handling the lens parts. Please put him in the
attached leather case when not in use.
2. When installing the battery, please check the anode and cathode. If you put it in reverse, it may
cause a short circuit and burn the remote control.
Being Careful
1 Do not allow the camera, battery box, charger, remote control to be affected with damp.
2 Do not use cloth, leather cover and other packages when using the camera.
3. Do not short-circuit the metal on the port.
4.Do not use any devices In a humid environment.
5. If the camera gets dirty outside, use clean cloth (such as glasses cloth), lens pen and so on. Do
not use detergent, or it will cause the camera lens to corrode.
6 .When the camera is covered with a black lens cover, you need to install the filter, otherwise the
black lens cover will wear away the lens.
TE720 Pro REMOTE CONTROL M/N: RC212

Quick Using Guide of Panorama
Camera
1. device attachment
The first step to take out the panoramic camera, and the camera is fixed on a tripod, connect the
power cord to camera, the other end connected to a portable battery and use the cable tie it on a
tripod.
2. Starting up
1). Turn on the right button of the remote control. At this point, the remote control screen shows
the disconnected icon (figure 1) turn on the camera's physics button, and the switch controller is
shown as turned OFF (figure 2).

figure 1 figure 2
2).The remote control is aimed at the camera once again and press the power button 1.5s (figure
1). When the camera and the remote control make a sound, the remote control screen is turned
into TECHE...Icon (figure 2), now the camera is on, wait for a moment, when the screen becomes
the shooting mode, indicating that the camera is turned on successfully (figure 3).
figure 1 figure 2 figure 3
3.Shooting
Fixed a camera on a tripod placed among the shooting scene, and then press the shutter button to
shoot (figure 1), after drops of sound, a remote control indicator light on the right below changes
from yellow to green, the number of photos in screen instruction will display plus one, said
shooting successfully!(figure 2) (refer to the accessories manual for details of the remote control)

figure 1 figure 2
1). show manual shooting;
2). show auto shooting,when switch ,press the shutter button to shoot(figure 1),the
number of photos is increasing when shooting(figure2), when you press shutter button again or
pause button, auto shooting is end;
figure1 figure2
3). show the video recording, press the shutter button to record the video(figure1),it
shows time of recording during the recording(figure2), when press the shutter button or pause
button, it shows that the recording video is finished;

figure1 figure2
Note:1、Do not move the camera immediately after shooting is successful. Wait for one second
to ensure the quality of the photo and give sufficient exposure time.
2、Be sure to take photos when the light is good, and the camera is placed in the shooting
environment, such as the room, the best effect is in the middle.
4. Power off
1).Turn off the camera
Hold the "power " button on the remote control for 3 seconds, and the buzzer on the remote
control will "drop" and then release the "power" button. The remote control screen will be shown
as“TECHE...”, When the camera's physical switch is turned off, the remote control screen shows
that the camera has been turned off .
2).close the remote control
When the camera is completely turned off, Press the unlock on remote control for a while,then
the screen of remote control will be out, and now remote control is turned off successfully
5. Data Transmission
Keep the camera battery connected and turn on the "battery box switch" to keep the camera in
power.(when connecting to a computer, it is necessary to turn on the camera's physical switch)
Connect the data cable interface to the camera interface, and the USB interface is connected to
the computer USB interface;
At this point, wait for the computer to automatically enumerating 8 disks, 8 storage usb flash disk;

Note: connect the camera, it will install the driver for the first time, waiting time will be slightly
long, and if computer not enumerate eight disks, then wait for a minute, pulling out the USB
interface, reconnect the computer side, and desktop computer choose rear panel USB interface as
far as possible .

PD1210
Accessories Introduction Manual

1.Hardware introduction
Camera introduction:
The camera has a built-in battery, which can persist for about an hour and a half when it is full.

remote control introduction:
1(1)As shown, the button is meant to unlock the remote control/ switch on/off of the remote
control, press the unlock button for 3 seconds to turn the remote control on/off. When the screen
light is on, release the unlock button.
(2) the remote control screen will be darkened after 1 minute, and then it will enter the blackout
state to save power in one minute. At this time, hold the unlock button and the shutter button to
unlock the remote control.
(3) press the unlock button to lock the remote control.

2. As shown, When the remote control screen is shown off, which means Physical switch is turned
on , now press the power button on the remote control, camera is on.

3. As shown,When pressing the power button, the remote control screen is shown in the
picture below. The camera is in the startup state, and no operation is required just waiting.
4.As shown, if there is the icon after the remote control is turned on, that means that the physical
switch below the camera is turned off, now it needs to turn on the physical switch below the
camera and use remote control to turn on the camera.(note: if there is the state as shown , this
also may be that remote control is far away from the camera position, and there is interference
signal between the camera and the remote control)

5. As shown,below the remote control interface is cable interface, the other end links the bottom
of the camera, this remote control support wireless communication and wired communication
(note: if you want to use wireless remote control to communicate, the camera at the bottom of
the remote control line not connected again)
6. As shown,on the left side of the remote control is a usb port. The remote control can also be
supported by both battery and usb power.

7.As shown, introduce function of every button
1)manual shooting
2)auto shooting
3)video recording
4)backlit
5)power on /off camera
6)pause of auto shooting/ video recording
7)the shutter button
8)Camera status indicator(red- abnormal, yellow-busy, green-normal, Green light flashing-
working)
9)the screen of remote control

8. As shown,introduce the meaning of every icon.
(1)Left the first icon indicate the camera battery, when the camera is connected to a battery box,
the battery status is in full state and appears lightning icon, when the camera and battery box is
disconnection, the power state is discontent, and lightning icon disappeared.
(2)The second icon is the GPS icon, as shown, it means the camera doesn't position the latitude
and longitude information, when the circle becomes into a solid point, it means the camera
position the latitude and longitude information (the camera without this function)
(3)The battery on the top right represents the battery power of the remote control.
(4)As shown in the figure, the first icon in the second row indicates that the current working
mode of the camera is taken by manual shooting, automatic shooting and recording video.
(5)As shown in the figure, the second icon in the second row represents the photos taken and
the number of video (photos and video records separately)

9. As shown in the figure, this state indicates that the camera is in the open state, the lower right
indicator is green, and the image is taken manually by default. Click the big button below to take
panoramic photos.

10.As shown in the figure, this state indicates that the camera is taking the photo manually, and
the lower right indicator is yellow, indicating that the camera is busy at work. After shooting is
finished, it will become green and the number of picture will be increased by one.
11. As shown, this state represents the camera is in the automatic state, the right light is green,
now pressing shutter button means auto shooting is started, the screen will appear the triangle
icon above ,which indicates automatic shooting is beginning, every 2-3 seconds the camera will
automatically shoot a panoramic photo, when press shutter or press button again, the shooting is
end.

12. As shown, the state means the camera is in the state of video recording. When the right light
is green, press shutter to record videos, the screen will appear the triangle icon above which
indicates video recording is beginning. And it shows the recording time below. when pressing
shutter or pause button, it means video recording is end..


Portable battery:
1. Introduction of using methods.
The power cord is connected to the bottom of the camera, and the other end is connected to a
portable battery to charge the camera.
2. Introduction of battery indicator
Support segmented display electric quantity, press the power button to see the electric quantity,
when the four blue lights are on , it meansfull power.
battery box introduction:
1 voltage introduction:
When press the button, voltage shows 12.6V which mean it is full of electricity quantity. When
shows 10.7V, it means there's no electricity quantity of battery box and it needs to be charged with
its charger.

2 Electric current introduction: estimating whether there is electricity quantity of camera, when
connecting the camera to the battery box, the number of electric current is greater than 0.5A, the
camera is being charged.
When less than 0.1A, the camera is full of electricity quantity.
Power line introduction:
connect the camera to battery box
Table of contents

