manuals.online logo
Brands
  1. Home
  2. •
  3. Brands
  4. •
  5. Techmar
  6. •
  7. Landscape Lighting
  8. •
  9. Techmar Garden Lights ARCO40+ User manual

Techmar Garden Lights ARCO40+ User manual

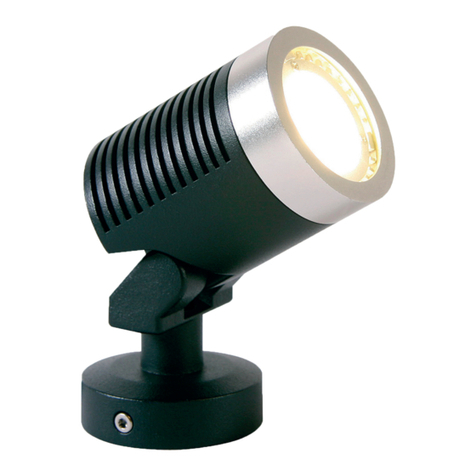
ARCO40+
3196011
MI8088 - 20220420
PLUG
&PLAY
12 volt
Do it yourself!
SMART
DIMMABLE
WITH APP
TIMER
WITH APP
MULTI COLORS
WITH APP
TUNABLE WHITE
WITH APP
2
ARCO40 +
3196011
Techmar B.V.
6279011 / 6277011 / 205A
5
5 Watt
370 Lumen
2.700 - 6.500 Kelvin
25.000 Hours
On/Off 10.000
Dimmable with app
Instant full light
Power factor > 0,5
Failure < 5% after 1.000h
Failure < 10% after 6.000h
Flux > 80% after 6.000h
CRI > 80
408 x 65 x 65 mm
MR16 LED GU5.3 5W 12V AC/DC
Art. 6279011
SMART
3
SMART
Scan QR code
for explanation
Max. 5W
1 m
With remote
230
V O LT
12
V O LT
Transformator
Kabel
Connector
Connector
4
Voet
Sockel
Base
Pied
Steker
Spieße
Spike
Vis
SMART
5
SMART
6
De Garden Lights Arco 40 Plus is een slimme
lamp voor gebruik in combinatie met de 12-volt
buitenverlichting van Garden Lights. Om de slimme
lampen te bedienen is een daarvoor geschikte
smartphone of tablet vereist met daarop geïnstalleerd
de (gratis) Garden Lights app. Ga voor meer informatie
over het gebruik en downloaden van de app naar
www.garden-lights.com/smart
[!] Controleer of alle onderdelen aanwezig zijn in de
verpakking. Voor vragen over onderdelen, service,
eventuele klachten of andere zaken kunt u altijd bij ons
terecht. E-mail: [email protected]
Gebruik
Houd bij plaatsing van de Arco 40 Plus rekening met
de volgende voorschriften:
1. De Arco 40 Plus moet worden aangesloten op een
12-volt systeem van Garden Lights dat permanent
voorzien is van spanning.
2. De Arco 40 Plus is niet te gebruiken in combinatie
met de volgende accessoires:
• Motion Sensor (art.nr. 6156011)
• Receiver (art.nr. 6148011 en 6149011)
3. Denk bij het plaatsen van de smart lampen aan de
afstand tot de smartphone. De lampen hebben een
goede verbinding tot 16 meter. Wordt de afstand
groter, dan vertraagt het signaal.
4. De smart lampen versterken het Bluetooth signaal
naar elkaar. Plaats voor een goede werking de
lampen tot een maximale afstand van 20 meter van
elkaar.
5. De Arco 40 Plus kan niet achter een Switch Plus
(art.nr. 6269011) worden geplaatst omdat deze
continu moet worden verzien van stroom.
Herstellen fabrieksinstellingen
In geval van storing, of wanneer u uw (via de app)
ingestelde wachtwoord bent vergeten kunt de Focus
Plus terugzetten naar de fabriekstellingen. Hiervoor
gaat u als volgt te werk:
[!] Let op: Via deze procedure worden alle Garden
Lights Plus lampen in uw systeem teruggezet naar
fabrieksinstellingen. Koppel lampen waarvan u de
instellingen wilt behouden af van de hoofdkabel
alvorens te beginnen!
1. Zorg dat het systeem voorzien is van spanning.
2. Laat de lampen minimaal 15 tot maximaal 20
seconden branden.
3. Haal de spanning van het systeem (bijvoorbeeld
door de stekker van de lamp uit de kabel te
verwijderen).
4. Wacht minimaal 5 tot maximaal 10 seconden.
5. Voorzie het systeem opnieuw van spanning (plaats
de stekker van de transformator terug in het
stopcontact).
6. Herhaal de stappen (2) t/m (5) enkele keren.
7. Wanneer de stappen (2) t/m (5) drie keer achter
elkaar correct zijn uitgevoerd zullen de Garden
Lights Plus lampen enkele keren rood knipperen.
8. Wacht tot de lampen stoppen met knipperen en wit
oplichten. De fabrieksinstellingen zijn nu hersteld en
de lampen zijn weer klaar voor gebruik.
SMART
NL
7
SMART
EN
The Garden Lights Arco 40 Plus is a smart light, for
use in combination with the Garden Lights 12-volt
outdoor lighting. To operate the smart lights, the (free)
Garden Lights app should be installed on a suitable
smartphone or tablet. For more information on how to
download and use the app, go to
www.garden-lights.com/en/smart.
[!] Make sure all parts are included in the packaging.
You can always contact us with any questions you may
have about parts or service, as well as complaints or
other matters. Email: [email protected].
Use
When installing the Arco 40 Plus, keep in mind the
following regulations:
1 The Arco 40 Plus must be connected to a 12-volt
Garden Lights system with a permanent voltage
supply.
2 The Arco 40 Plus cannot be used in combination
with the following accessories:
• Motion Sensor (art.nr. 6156011)
• Receiver (art.nr. 6148011 and 6149011)
3 When placing the smart lamps, consider the
distance to the smartphone. The lamps have a
good connection up to 16 meters. If the distance
increases, the signal slows down.
4 The smart lights amplify the Bluetooth signal to
each other. For proper operation, place the light up
to a maximum distance of 20 meters from each
other.
5 The Arco 40 Plus cannot be placed behind a
Switch Plus (art.nr. 6269011) because it must be
continuously supplied
with power.
Restore factory settings
In the event of a malfunction, or if you have forgotten
your password (set via the app), the Focus Plus can
be reset to factory settings. To do this, proceed as
follows:
[!] Warning: This will reset all Garden Lights Plus lights
in your system to factory settings. Disconnect any
lights whose settings you want to keep from the main
cable before starting!
1 Make sure the system is supplied with power.
2 Leave the lights on for a minimum of 15 to a
maximum of 20 seconds.
3 Disconnect the power from the system (e.g. by
removing the plug of the lamp from the cable).
4 Wait a minimum of 5 to a maximum of 10 seconds.
5 Reconnect the system (plug the transformer back
into the power outlet).
6 Repeat steps (2) to (5) several times.
7 When steps (2) to (5) have been correctly followed
three times in a row, the Garden Lights Plus lights
will flash red several times.
8 Wait until the lights stop blinking and light up white.
The factory settings have now been restored and
the lights are ready for use again.
8
DE SMART
Die Garden Lights Arco 40 Plus ist eine intelligente
Leuchte zur Verwendung in Kombination mit der
12-Volt-Außenbeleuchtung von Garden Lights.
Zur Verwendung der intelligenten Leuchten ist ein
geeignetes Smartphone oder Tablet mit der darauf
installierten (kostenlosen) Garden Lights App
erforderlich. Weitere Informationen zur Verwendung
und zum Herunterladen der App finden Sie unter
www.garden-lights.com/de/smart.
[!] Prüfen Sie, ob alle Teile in der Verpackung
vorhanden sind. Bei Fragen zu Teilen, Service,
möglichen Beschwerden oder anderen
Angelegenheiten können Sie sich jederzeit an uns
wenden.
E-Mail: [email protected].
Anwendung
Beachten Sie bei der Anbringung der Fcous Plus die
folgenden Vorschriften:
1 Die Arco 40 Plus muss an ein 12-Volt-System
von Garden Lights angeschlossen werden, das
durchgängig mit Strom versorgt wird.
2 Die Arco 40 Plus kann nicht in Kombination mit dem
folgenden Zubehör verwendet werden:
• Motion Sensor (Art.-Nr. 6156011)
• Receiver (Art.-Nr. 6148011 und 6149011)
3 Denken Sie darüber nach beim Platzieren der
Smart-Leuchten den Abstand zum Smartphone.
Die Leuchten haben eine gute Verbindung bis zu 16
Metern. Wenn der Abstand zunimmt, verlangsamt
sich das Signal.
4 Die Smart Leuchten verstärken das Bluetooth-Signal
untereinander. Stellen Sie die Leuchten für einen
ordnungsgemäßen Betrieb in einem maximalen
Abstand von 20 Metern voneinander auf.
5 Der Arco 40 Plus kann nicht hinter einem Switch
Plus (Art.-Nr. 6269011) platziert werden, da er
ständig mit Strom versorgt werden muss.
Werkseinstellungen wiederherstellen
Im Falle einer Störung oder wenn Sie Ihr (über die
App) eingestelltes Passwort vergessen haben,
können Sie die Focus Plus auf die Werkseinstellungen
zurücksetzen. Gehen Sie dazu wie folgt vor:
[!] Achtung: Dieser Vorgang setzt alle Garden
Lights Plus Leuchten in Ihrem System auf die
Werkseinstellungen zurück. Trennen Sie Leuchten,
deren Einstellungen Sie behalten möchten, vor dem
Start vom Hauptkabel ab!
1 Stellen Sie sicher, dass das System mit Strom
versorgt wird.
2 Lassen Sie die Leuchten für mindestens 15 bis
maximal 20 Sekunden eingeschaltet.
3 Trennen Sie das System vom Stromnetz (z. B. durch
Abziehen des Steckers der Lampe vom Kabel).
4 Warten Sie mindestens 5 bis maximal 10 Sekunden.
5 Schalten Sie das System wieder ein (stecken Sie
den Stecker des Transformators wieder in die
Steckdose).
6 Wiederholen Sie die Schritte (2) bis (5) mehrere
Male.
7 Wenn die Schritte (2) bis (5) dreimal hintereinander
korrekt ausgeführt wurden, blinken die Garden
Lights Plus Leuchten einige Male rot.
8 Warten Sie, bis die Leuchten aufhören zu blinken
und weiß werden. Die Werkseinstellungen sind nun
wiederhergestellt, und die Leuchten sind wieder
einsatzbereit.
9
FR SMART
Garden Lights Arco 40 Plus est une lampe intelligente,
à utiliser en association avec le système d’éclairage
extérieur 12 volts de Garden Lights. Afin de
commander cette lampe intelligente, il est nécessaire
de disposer d’un smartphone ou d’une tablette et
d’y installer l’application Garden Lights (entièrement
gratuite). Pour de plus amples informations sur
l’utilisation et le téléchargement de cette application,
nous vous invitons à vous rendre à l’adresse suivante :
www.garden-lights.com/fr/smart.
Attention ! Assurez-vous que l’ensemble des pièces
sont présentes dans l’emballage. Pour toute question
sur les pièces, le service, ou une réclamation, n’hésitez
pas à nous contacter à l’adresse e-mail suivante :
[email protected].
Utilisation
Lors de l’installation de la lampe Arco 40 Plus, veuillez
tenir compte des consignes suivantes :
1 La lampe Arco 40 Plus doit être reliée à un système
d’éclairage 12 volts de Garden Lights, alimenté en
permanence.
2 La lampe Arco 40 Plus ne doit pas être utilisée en
association avec les accessoires suivants :
• Détecteur de mouvement (art. n° 6156011)
• Récepteur (art. n° 6148011 et 6149011)
3 Lorsque vous placez les lampes intelligentes, tenez
compte de la distance par rapport au smartphone.
Les lampes ont une bonne connexion jusqu’à 16
mètres. Si la distance augmente, le signal ralentit.
4 Les lampes intelligentes amplifient le signal
Bluetooth entre elles. Pour un fonctionnement
correct, placez les lampes à une distance maximale
de 20 mètres l’une de l’autre.
5 Le Arco 40 Plus ne peut pas être placé après
le Switch Plus (art. n° 6269011) car il doit être
alimenté en continu.
Rétablir la configuration d’usine
En cas de panne, ou si vous avez oublié votre mot de
passe (défini grâce à l’application), il vous est possible
de rétablir la configuration d’usine de la lampe Focus
Plus.
Attention ! Cette manipulation rétablit la configuration
d’usine de toutes les lampes de votre système. Avant
de commencer, veillez donc à déconnecter du câble
principal les lampes dont vous souhaitez conserver le
paramétrage actuel !
1 Veillez à ce que le système soit sous tension.
2 Laissez les lampes briller pendant 15 secondes
minimum et 20 secondes maximum.
3 Mettez le système hors tension (par exemple, en
retirant la fiche de la lampe du câble).
4 Attendez 5 secondes minimum et 10 secondes
maximum.
5 Rétablissez l’alimentation du système (rebranchez
la prise du transformateur sur le secteur).
6 Répétez à quelques reprises les étapes 2 à 5.
7 Lorsque les étapes 2 à 5 auront été effectuées trois
fois consécutives, les lampes Garden Lights Plus
émettront quelques clignotements rouges.
8 Attendez que les lampes cessent de clignoter et
émettent une lumière blanche. Les paramètres
d’usine ont maintenant été réinitialisés, et vos
lampes sont à nouveau prêtes à l’emploi.
10
NL - Voor vragen over onderdelen, service, eventuele
klachten of andere zaken kunt u altijd bij ons terecht.
E-mail: [email protected].
EN - For questions about parts, service, any complaints
or other matters, you can contact us at any time.
E-mail: [email protected].
DE - Wenn Sie Fragen zu Einzelteilen oder zum Service
haben, oder wenn Sie uns eine Beschwerde oder
andere Hinweise übermitteln möchten, können Sie sich
jederzeit an uns wenden.
E-Mail: [email protected].
FR - Pour tout renseignement concernant les pièces
de rechange et les réparations ou pour les éventuelles
plaintes et autres problèmes, n’hésitez pas à nous
contacter à l’adresse suivante:
E-Mail: [email protected].
NL - Afgedankte elektrische apparatuur mag niet in het
huisvuil terechtkomen. Breng, indien mogelijk, deze
apparaten naar een recyclingbedrijf. Voor informatie
over recycling kunt u terecht bij een gemeentelijk
afvalverwerkingsbedrijf of bij uw dealer.
EN - Discarded electrical equipment must not be put in
the household waste. If possible, take it to a recycling
company. For details of recycling, contact a municipal
waste processing company or your dealer.
DE - Entsorgen Sie elektrische Geräte nicht im Hausmüll.
Nutzen Sie die Sammelstellen in ihrer Gemeinde. Fragen
Sie Ihre Gemeindeverwaltung nach den Standorten der
Sammelstellen.
FR - Ne pas jeter les équipements électriques usagés
dans la poubelle domestique. Si possible, remettez-les à
une entreprise de recyclage. Pour tout détail concernant
le recyclage, contactez un organisme municipal de
traitement des déchets ou votre revendeur.
NL - Dit product voldoet aan de EU normen voor
gezondheid, veiligheid en milieubescherming.
EN - This product meets the EU standards for health,
safety and environmental protection.
DE - Dieses Produkt entspricht den EU-Standards für
Gesundheit, Sicherheit und Umweltschutz.
FR - Ce produit répond aux normes de l’UE en matière de
santé, de sécurité et de protection de l’environnement.
NL - Het product voldoet aan de eisen van de
toepasselijke UK richtlijnen.
EN - The product meets the requirements of the
applicable UK guidelines.
DE - Das Produkt entsprichtden Anforderungen der
geltenden britischen Richtlinien.
FR - Le produitest conforme aux exigences des
directives britanniques applicables.
NL - Verpakking en product dienen apart te worden
gesorteerd voor recycling.
EN - The packaging and product must be sorted
separately for recycling.
DE - Verpackung und Produkt müssen für das Recycling
getrennt sortiert werden.
FR - L’emballage et le produit doivent être triés
séparément pour le recyclage.
NL - Dit product voldoet aan de veiligheidseisen
gespecificeerd in de voorschriften van de EAEU.
EN - This product answers to the safety requirements
specified in the regulations of the EAEU.
DE - Dieses Produkt entspricht den in den Vorschriften
der EAWU festgelegten Sicherheitsanforderungen.
FR - Ce produit est conforme aux exigences de sécurité
spécifiées dans les réglementations de l’EAEU.
11
NL - INSTALLATIE VAN DE LAMPEN
• Plaats de producten op de gewenste plaats en leg
de kabels zodanig dat deze ruimschoots op de
transformator of kabels kunnen worden aangesloten.
• Als producten voorzien zijn van een afvoergat voor
water dan moet dit gat naar beneden worden gericht.
• Gebruik corrosievaste bevestigingsmaterialen
(standaard meegeleverd) als u de producten wilt
vastschroeven.
• Sluit de stekkers van de producten aan op de
hoofdkabel met behulp van de connector zoals
aangegeven op afbeelding op pag 5.
• Raadpleeg de handleiding van uw transformator voor
meer informatie.
EN - INSTALLATION OF THE LIGHTS
• Install the products in the desired position and lay
the cables so they can be comfortably connected to
the transformer or main cable.
• If products are provided with a drain hole for water,
this hole must be pointing downwards.
• Use non-corrosive fixing materials (supplied as
standard) if you want to bolt the products down.
• Connect the lights to the main cable by using the
connector as shown in figure on page 5.
• Consult the manual of your transformer for more
information.
NL - VEILIGHEID
• Monteer dit product altijd zodanig dat het bereikbaar
blijft voor onderhoud. Dit product mag niet vast
worden ingegoten of ingemetseld.
• Schakel het systeem uit door de stekker van de
transformator uit de wandcontactdoos te nemen
voor het plegen van onderhoud.
• Reinig het product regelmatig met een zachte,
schone doek. Vermijd schuurmiddelen die het
oppervlak kunnen beschadigen.
• Reinig producten met RVS onderdelen eenmaal per
6 maanden met RVS reiniger.
• Gebruik geen agressieve chemische reinigings-
middelen bij het schoonmaken van het product,
dit kan onherstelbare schade aan het product
veroorzaken.
• Beschermingsklasse III: dit product mag alleen
worden aangesloten op veilgheidslaagspanning tot
maximaal 12 volt.
• Dit product is bestand tegen een omgevings-
temperatuur van: -20 tot 50°C.
• Gebruik dit product niet in ruimtes waar brandbare
gassen, dampen of vloeistoffen opgeslagen zijn.
EN - SAFETY
• Always fit this product so that it can still be accessed
for servicing or maintenance. This product must not
be permanently embedded or bricked in.
• Turn off the system by pulling the plug of the
transformer from the socket for maintenance.
• Regularly clean the product with a soft, clean cloth.
Avoid abrasives that can damage the surface.
• Clean products with stainless steel parts with a
stainless steel cleaning agent once per six months.
• Do not use aggressive chemical cleaning agents
when cleaning the product. This can cause
irreparable damage.
• Protection class III: this product may only be
connected to safety extra-low voltage up to a
maximum of 12 Volt.
• This product is suitable for outside temperatures of:
-20 to 50°C.
• Do not use this product in areas where combustible
gases, fumes or liquids may be stored.
DE - INSTALLATION DER LAMPEN
• Installieren Sie das Produkt in der gewünschten
Position und verlegen Sie die Kabel so, dass
sie einfach mit dem Transformator oder dem
Hauptkabel verbunden werden können.
• Wenn Produkte über eine Wasserablauföffnung
verfügen, muss diese nach unten zeigen.
• Wenn Sie die Produkte fest in Boden verankern
möchten, verwenden Sie dazu Befestigungsmaterial
aus nicht-rostenden Materialien (als Standard
mitgeliefert).
• Verbinden Sie die Leuchten an den Hauptkabel mit
dem Konnektor wie auf Bild auf Seite 5 gezeigt wird.
• Weitere Informationen finden Sie in Ihrer Anleitung
zum Transformator.
FR - INSTALLATION DES LAMPES
• Installez les produits dans la position désirée et
positionnez les câbles de telle sorte qu’ils puissent
être raccordés confortablement au transformateur
ou au câble principal.
• Si les produits sont équipés d’un orifice d’évacuation
de l’eau, orientez celui-ci vers le bas.
• Utilisez des équipements de fixation non corrosifs
(fournis en standard) si vous souhaitez visser les
produits.
• Raccordez les prises des produits au câble principal
comme indiqué dans l’image à la page 5.
• Consultez le mode d’emploi de votre transformateur
pour de plus amples informations.
WWW.GARDEN-LIGHTS.COM
by Techmar
DE - SICHERHEIT
• Bringen Sie dieses Produkt stets so an, dass es
zu Bedienungs- und Wartungszwecken zugänglich
bleibt.
• Schalten Sie das System aus, indem Sie den
Transformator zur Wartung aus der Steckdose
ziehen.
• Reinigen Sie das Produkt regelmäßig mit einem
weichen, sauberen Tuch. Vermeiden Sie Schleifmittel,
die die Oberfläche beschädigen können.
• Reinigen Sie Produkte mit Edelstahlteilen einmal alle
6 Monate mit Edelstahlreiniger.
• Verwenden Sie bei der Reinigung des Produkts keine
aggressive chemische Reinigungsmittel, da dies zu
irreparablen Schäden am Produkt führen kann.
• Schutzklasse III: Dieses Produkt darf nur mit Schutz-
Kleinspannung bis maximal 12 Volt verbunden
werden.
• Geeignet für Umgebungstemperatur ca: -20 tot 50°C.
• Verwenden Sie diese Produkt nicht in Bereichen, in
denen brennbare Gase, Dämpfe oder Flüssigkeiten
auftreten oder gelagert werden können.
FR - SÉCURITÉ
• Installez ce produit de telle sorte qu’il soit accessible
pour la réparation ou l’entretien. Ce produit ne doit
jamais être encastré ou imbriqué de façon permanente.
• Débranchez le système en retirant la fiche de la prise
de courant murale avant d’effectuer l’entretien
• Nettoyez régulièrement le produit avec un chiffon
doux et propre. Evitez les produits abrasifs qui
peuvent endommager la surface.
• Nettoyez les produits avec des éléments en inox une
fois tous les 6 mois avec un nettoyant pour acier
inoxydable.
• N’utilisez pas de nettoyants chimiques agressifs
pour nettoyer le produit, cela peut entrainer des
dommages irréparables pour le produit.
• Classe de protection III: ce produit ne peut être
raccordé qu’à une très faible tension de sécurité
d’une puissance maximale 12 Volts.
• Ce produit est adapté à une température extérieure
de: -20 à 50°C.
• N’utilisez pas ce produit dans des lieux de stockage
de gaz inflammables, de sources d’émanations ou
de liquides.
TECHMAR B.V. | CHOPINSTRAAT 10 | 7557 EH HENGELO | THE NETHERLANDS
Article No.: 3196011
UK Authorised Representative
(for authorities only)
ProductIP (UK) Ltd.
8, Northumberland Av.
London WC2N 5BY
NL - Vereenvoudigde Europese verklaring van
conformiteit
Techmar B.V. verklaart hierbij dat de radioapparatuur
van onze (SMART) tuinverlichting voldoet aan Richtlijn
2014/53/EU.
De volledige tekst van de Europese verklaring
van conformiteit is beschikbaar op de volgende
internetpagina: www.garden-lights.com/DoC
EN - Simplied Declaration of Conformity
Hereby, Techmar declares that the Radio Equipment
type (SMART) Garden Lighting is in the compliance
with the Radio Equipment Regulations 2017 (S.I.
2017/1206).
The full text of the UK declaration of conformity is
available at the following internet adress:
www.garden-lights.com/DoC
DE - Vereinfachte EU-Konformitätserklärung
Hiermit erklärt Techmar B.V., dass das
FunkÜbertragungsgeräte (SMART) Gartenbeleuchtung
der EU-Verordnung 2014/53/EU entspricht.
Der Volltext der EU-Konformitätserklärung ist unter
folgender internetadresse verfÜgbar:
www.garden-lights.com/DoC
FR - Déclaration de conformité Européenne simpliée
Aux termes des présentes, Techmar B.V. déclare que
le type d’équipement radio du (SMART) éclairage
extérieur repond à la 2014/53/EU.
L’ensemble du texte de la déclaration européenne
de conformité est disponible à la adresse Internet
suivante : www.garden-lights.com/DoC.

This manual suits for next models

1

Other Techmar Landscape Lighting manuals

Techmar Garden Lights ARCUS + User manual

Techmar

Techmar Garden Lights ARCUS + User manual

Techmar Garden Lights GILVUS + User manual

Techmar

Techmar Garden Lights GILVUS + User manual

Techmar Garden Lights ACIS User manual

Techmar

Techmar Garden Lights ACIS User manual

Techmar Garden Lights GILVUS + User manual

Techmar

Techmar Garden Lights GILVUS + User manual

Techmar Garden Lights FOCUS + SET User manual

Techmar

Techmar Garden Lights FOCUS + SET User manual

Techmar Garden Lights ACIS 3x User manual

Techmar

Techmar Garden Lights ACIS 3x User manual

Techmar Garden Lights MAURI User manual

Techmar

Techmar Garden Lights MAURI User manual

Techmar Garden Lights GOURA User manual

Techmar

Techmar Garden Lights GOURA User manual

Popular Landscape Lighting manuals by other brands

Eternal Flame EF001S user manual

Eternal Flame

Eternal Flame EF001S user manual

Luminar Outdoor 93863 Owner's manual & safety instructions

Luminar Outdoor

Luminar Outdoor 93863 Owner's manual & safety instructions

LIGMAN SANDY 2 installation manual

LIGMAN

LIGMAN SANDY 2 installation manual

LIGMAN JET 54 installation manual

LIGMAN

LIGMAN JET 54 installation manual

Global Light & Power LCC FOTIS SP880484 Installation instruction

Global Light & Power LCC

Global Light & Power LCC FOTIS SP880484 Installation instruction

SLV TCR50-SE/LED operating manual

SLV

SLV TCR50-SE/LED operating manual

Kichler Lighting 15495CBR manual

Kichler Lighting

Kichler Lighting 15495CBR manual

LIGMAN SANDY 8 installation manual

LIGMAN

LIGMAN SANDY 8 installation manual

AMP Lighting HydraPro AUL-8001-25-B-BZ Installation & maintenance guide

AMP Lighting

AMP Lighting HydraPro AUL-8001-25-B-BZ Installation & maintenance guide

Volt VHS-605-4-FPG installation instructions

Volt

Volt VHS-605-4-FPG installation instructions

LIGMAN ALD-30061 installation manual

LIGMAN

LIGMAN ALD-30061 installation manual

AMP Lighting AFL-4014-4-B-BZ Installation & maintenance guide

AMP Lighting

AMP Lighting AFL-4014-4-B-BZ Installation & maintenance guide

LIGMAN NYB-30201 installation manual

LIGMAN

LIGMAN NYB-30201 installation manual

Nave 52375 Series manual

Nave

Nave 52375 Series manual

HAMPTON BAY HDC33945 instructions

HAMPTON BAY

HAMPTON BAY HDC33945 instructions

LIVARNO LUX Z31096 Assembly, operating and safety instructions

LIVARNO LUX

LIVARNO LUX Z31096 Assembly, operating and safety instructions

superbrightleds PLC-F installation manual

superbrightleds

superbrightleds PLC-F installation manual

HAMPTON BAY HD33013ST quick start guide

HAMPTON BAY

HAMPTON BAY HD33013ST quick start guide

manuals.online logo
manuals.online logoBrands
  • About & Mission
  • Contact us
  • Privacy Policy
  • Terms and Conditions

Copyright 2025 Manuals.Online. All Rights Reserved.