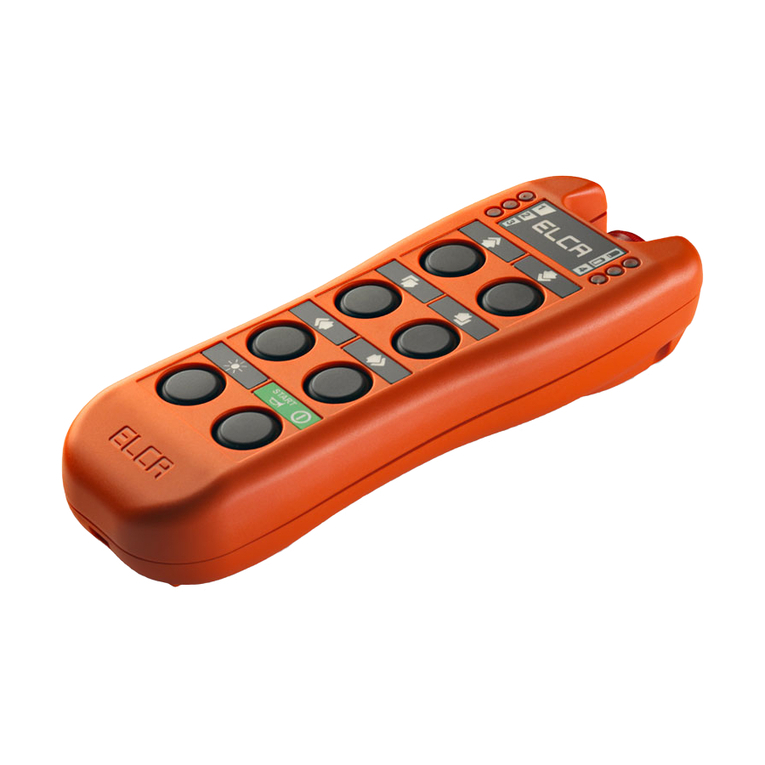
Technibel Climatisation K70D042ZAA User manual

SaveThese Instructions!
Conserver ce mode d’emploi
Bewahren Sie bitte diese
Bedienungsanleitung auf.
Conservate queste istruzioni
Guarde estas instruções
Φυλάξτε τις οδηγίες αυτές
Guarde estas instrucciones
K70D042ZAA
•
INSTRUCTION MANUAL
•
MODE D’EMPLOI
•
BEDIENUNGSANLEITUNG
•
ISTRUZIONI PER L’USO
•
MANUAL DE INSTRUÇÕES
•
MANUAL DE INSTRUCCIONES
•ΕΓΧΕΙΡΙ∆ΙΟ Ο∆ΗΓΙΩΝ
Simplified Remote Controller For Split System
Air Conditioner
Télécommande simplifiée pour climatiseur à
deux blocs
Vereinfachte Fernbedienung für Split-System-
Klimagerät
Telecomando semplificato per condizionatore
d’aria a sistema split
Controlador remoto simplificado para o
aparelho de ar condicionado de sistema split
Απλοποιηµένο Τηλεχειριστήριο Για
Κλιµατιστικ Αέρος ∆ιαιρετο Συστήµατος
Mando a distancia simplificado para el
sistema de aire acondicionado de dos
unidades

22
Contents Page
Product Information........................................................................................2
Alert Symbols ..................................................................................................3
Features ...........................................................................................................3
Specifications ..................................................................................................3
Installation Location........................................................................................4
Electrical Requirements..................................................................................4
Safety Instructions ..........................................................................................4
Remote Control Unit .......................................................................................5
Operation .........................................................................................................8
Troubleshooting ..............................................................................................9
Tips for Energy Saving ...................................................................................9
Product Information
If you have problems or questions concerning your Remote Controller,
you will need the following information.
Model No. K70D042ZAA
Date of purchase
Dealer’s address
Phone number
DECLARATION OF CONFORMITY
This product is marked « » as it satisfies EEC Directive No. 89/336/
EEC, 73/23/EEC and 93/68/EEC.
This declaration will become void in case of misusage and/or from non
observance though partial of Manufacturer’s installation and/or operating
instructions.
OI-724-02EG

3
Alert Symbols
The following symbols used in this manual, alert you to potentially
dangerous conditions to users, service personnel or the appliance:
This symbol refers to a hazard or unsafe
practice which can result in severe
personal injury or death.
This symbol refers to a hazard or unsafe
practice which can result in personal
injury or product or property damage.
Features
• Mode button (AUTO, HEAT, DRY, COOL, FAN)
• Fan Speed Selector (AUTO, HI., MED., LO.)
• Alarm Message Code
• Temperature Setting
• Central Control Indication
Specifications
Dimensions (mm) 120 (height) x 70 (width) x 16 (depth)
Power supply DC 16V (supplied from the indoor unit)
OI-724-03EG
CAUTION

4
Installation Location
•We recommend that this remote controller be installed properly by
qualified installation technicians in accordance with the Installation
Instructions provided with the remote controller.
•Do not install this remote controller where there are fumes or
flammable gases, or in an extremely humid space such as a
greenhouse.
•Do not install the remote controller where excessively high heat-
generating objects are placed.
Electrical Requirements
1. All wiring must conform to the local electrical codes. Consult your
dealer or a qualified electrician for details.
2. Wiring must be done by a qualified electrician.
To warm up the system, the power
mains must be turned on at least five
(5) hours before operation. Leave the
power mains ON unless you will not
be using this appliance for an
extended period.
Safety Instructions
•Read this booklet carefully before using this air conditioner. If you still
have any difficulties or problems, consult your dealer for help.
•This air conditioner is designed to give you comfortable room
conditions. Use this air conditioner only for its intended purpose as
described in this Instruction Manual.
•Never use or store gasoline or other flammable vapors or liquids
near the air conditioner — doing so is very dangerous.
•This air conditioner has no ventilator for intaking in fresh air from
outdoors.You must open doors or windows frequently when you
use gas or oil heating appliances in the same room, which consume
a lot of oxygen from the air.
Otherwise there is a risk of suffocation in an extreme case.
•Do not turn the air conditioner on and off from the power mains
switch. Use the ON/OFF operation button.
•Do not stick anything into the air outlet of the air conditioner. Doing
so is dangerous because the fan is rotating at high speed.
•Do not let children play with the air conditioner.
•Do not cool or heat the room too much if babies or invalids are
present.
CAUTION
Power mains
ON
CAUTION
OI-724-04EG

5
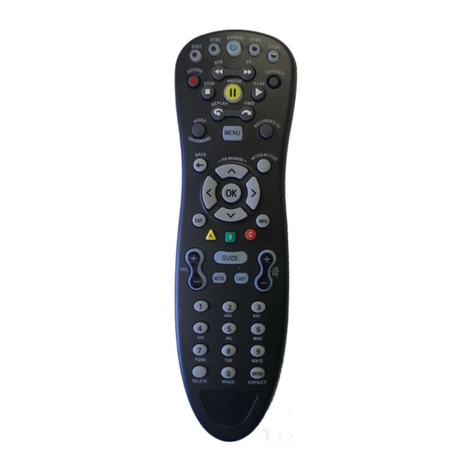
A: ON/OFF operation
button
B: MODE button
(AUTO)
(HEAT)
(DRY)
(COOL)
(FAN)
C: Temperature setting
buttons
Remote Control Unit
D: FAN SPEED selector
button
B: MODE button
E: FLAP button
C:Temperature setting
buttons
A: ON/OFF operation
button
G:Test button
F:Temperature Sensor
(Internal)
This button is for turning the air conditioner on and off.
Use this button to select one of the following five operating modes.
: Used to automatically set cooling or heating operation.
Only for single heat pump type (temperature range: 17 ~ 27 °C)
: Used for normal heating operation.
Only for heat pump type (temperature range: 16 ~ 26 °C)
: Used for dehumidifying without changing the room temperature.
(temperature range: 18 ~ 30 °C)
: Used for normal cooling operation. (temperature range: 18 ~ 30 °C)
: Used to run the fan only, without heating or cooling operation.
: Press this button to increase the temperature setting.
: Press this button to decrease the temperature setting.
OI-724-05EG

6
: The air conditioner automatically decides the fan speed.
: High fan speed
: Medium fan speed
: Low fan speed
1. Use this button to set the airflow direction to a specific angle.
• In the cool mode and dry mode, if the flaps are set in a downward
position, condensation may form and drip around the vent.
• Do not move the flap with your hands.
Although the temperature sensor in the indoor unit normally detects the
temperature, this internal sensor can detect the temperature around the
remote control unit. For more information, contact the dealer where you
made the purchase. (Do not make any settings if group control is being
used.)
This button is used only when servicing the air conditioner.
Do not use theTEST button for normal operation.
Remote Control Unit (continued)
D: FAN SPEED selector
button
(AUTO)
(HI.)
(MED.)
(LO.)
E: FLAP button
NOTE This function is available only for models ASS, AS2S, ASBS, ACS and
AWS.
F: Temperature sensor
(Internal)
G: TEST button
CAUTION
NOTE When two remote control units are being used in one group control*
system, the most recent button that is pressed on any remote control unit
is effective.
* Group control means that maximum up to 8 indoor units can be
concurrently controlled with a remote control unit.
OI-724-06EG

7
Display (Remote Control Unit)
Description
A: This is displayed to indicate that the system controller is being used
for control.
When indicator is flashing on the display, the operation is not
accepted by the system controller.
B: When the unit is in the heating standby mode, the indicator
appears.
C: This displays the temperature setting.
D: This displays alarm messages when an error occurs.
E: This is displayed when using the temperature sensor in the remote
control unit.
F: This is displayed only if an abnormality occurs within a unit.
G: The currently selected FAN SPEED is displayed.
H: When theTEST button is pressed, theTEST indicator appears.
I: The currently selected operation mode is displayed.
B
A
C
D
E
I
H
F
G
OI-724-07EG

8
Operation
NOTE To warm up the system, the power mains must be turned on at least five
(5) hours before operation.
STEP 1 To start the air conditioner
Press the ON/OFF operation button ( ).
STEP 2 Setting the mode
Press the MODE button ( ) to select the mode of your
choice.
[(AUTO), (HEAT), (DRY), (COOL) or (FAN)]
STEP 3 Setting the fan speed
Press the FAN SPEED button ( ) to select the fan speed of
your choice.
[(AUTO), (HI.), (MED.) or (LO.)]
If AUTO is selected, the fan speed switches automatically.
STEP 4 Setting the temperature
Use the or button as appropriate to change the
temperature setting as desired.
(reduces the temperature, and increases the
temperature.)
STEP 5 To stop the air conditioner
Press the ON/OFF operation button ( ) again.
OI-724-08EG
STEP 3
STEP 2
STEP 5
STEP 4
STEP 1

99
Troubleshooting
If your air conditioner does not work properly, first check the following points before requesting service. If it
still does not work properly, contact your dealer or a service center.
Trouble
Air conditioner does
not run at all.
Compressor runs but
soon stops.
Poor cooling (or heating)
performance
is displayed.
Possible Cause
1. Power failure
2. Leakage circuit breaker has
tripped.
3. Line voltage is too low.
4. Operation button is turned off.
5. The remote control unit or heat
pump is malfunctioning. (ERROR
and characters such as El, PI, FI,
etc., appear on the display.)
1. Obstruction in front of condenser
coil
1. Dirty or clogged air filter
2. Heat source or many people in
room
3. Doors and/or windows are open.
4. Obstacle near air intake or air
discharge port
5. Thermostat is set too high for
cooling (or too low for heating).
6. (Outdoor temperature is too low).
7. (Defrosting system does not
work.)
1. Trouble in the system
Remedy
1. Restore power.
2. Contact service center.
3. Consult your electrician or dealer.
4. Press the button again.
5. Consult your dealer.
1. Remove obstruction.
1. Clean the air filter to improve the
airflow.
2. Eliminate heat source if possible.
3. Shut them to keep the heat (or
cold) out.
4. Remove it to ensure good airflow.
5. Set the temperature lower (or
higher).
6. (Try to use a back-up heater)
7. (Consult your dealer.)
1. Contact service center.
Tips for Energy Saving
Avoid •Do not block the air intake and outlet of the unit. If either is obstructed,
the unit will not work well, and may be damaged.
• Do not let direct sunlight into the room. Use sunshades, blinds or
curtains. If the walls and ceiling of the room and warmed by the sun, it
will take longer to cool the room.
Do • Always try to keep the air filter clean.
A clogged filter will impair the performance of the unit.
• To prevent conditioned air from escaping, keep windows, doors and
any other openings closed.
NOTE Should the power fail while the unit is running
If the power supply for this unit is temporarily interrupted the unit will
automatically resume operation (once the power is restored) with the
same settings that were in effect before the power was interrupted.
OI-724-09EG

10
Table des matières
Page
Informations sur le produit .......................................................................... 10
Symboles d’avertissement ........................................................................... 11
Particularités .................................................................................................. 11
Caractéristiques ............................................................................................. 11
Emplacement d’installation .......................................................................... 12
Instructions relatives à l’alimentation ......................................................... 12
Conseils de sécurité ...................................................................................... 12
Télécommande .............................................................................................. 13
Fonctionnement ............................................................................................ 16
Guide de dépannage ..................................................................................... 17
Conseils pour économiser l’énergie ............................................................ 17
Informations sur le produit
Pour tout problème ou toute question relatifs à la télécommande, il
faudra les informations ci-dessous.
No. de modèle ______________________________________________________
Date d’achat ________________________________________________________
Adresse du concessionnaire _________________________________________
Numéro de téléphone __________________________
DÉCLARATION DE CONFORMITÉ
Ce produit est marqué « » puisqu’il est conforme aux Directives CEE
N° 89/336, 73/23 et 93/68.
Cette déclaration sera nulle en cas d’une utilisation différente de celle
déclarée par le Constructeur et/ou de la non-observation, même si
partiale des instructions d’installation et/ou d’usage.
OI-724-02F
K70D042ZAA

11
OI-724-03F
Symboles d’avertissement
Les symboles suivants utilisés dans ce manuel avertissent d’un danger
potentiel pour l’utilisateur, le personnel d’entretien ou l’appareil
proprement dit :
Ce symbole signale un danger ou des
opérations dangereuses qui risquent
d’entraîner des blessures physiques
graves, ou mortelles.
Ce symbole signale un danger ou des
opérations dangereuses qui risquent
d’entraîner des blessures physiques ou
des dommages matériels, notamment du
produit.
Particularités
• Touche de mode (AUTO, HEAT, DRY, COOL, FAN)
• Sélecteur de vitesse de ventilation (AUTO, HI., MED., LO.)
• Code de message d’alarme
• Réglage de température
• Indication de commande centralisée
Caractéristiques
Dimensions (mm) 120 (hauteur) ×70 (largeur) ×16 (profondeur)
Alimentation 16 V CC (fournie depuis le bloc intérieur)
AVERTISSEMENT
ATTENTION

12
Emplacement d’installation
•Il est recommandéde faire installer la télécommande par un
technicien qualifiéet conformément aux instructions fournies avec la
télécommande.
•Ne pas installer la télécommande dans un local oùl’on détecte des
émanations gazeuses ou des gaz inflammables, ni dans un endroit
extrêmement humide, une serre par exemple.
•Ne pas installer la télécommande dans des endroits abritant des
objets dégageant une chaleur excessive.
Instructions relatives à l’alimentation
1. Tous les câbles doivent respecter les codes électriques locaux.
Pour les détails, consulter le magasin ou un électricien qualifié.
2. Les raccordements devront être confiés à un électricien qualifié.
Pour permettre la mise en température du
système, le climatiseur devra être mis sous
tension cinq (5) heures au moins avant le
fonctionnement. Laisser le climatiseur sous
tension (ON), sauf si l’on ne prévoit pas
d’utiliser le climatiseur pendant longtemps.
Conseils de sécurité
•Lire attentivement ce mode d’emploi avant de faire fonctionner le
climatiseur. Si l’on rencontre des difficultés ou des problèmes,
consulter le concessionnaire.
•Le climatiseur est conçu pour créer un environnement confortable
chez soi. Ne l’utiliser qu’à des fins pour lesquelles il a étéprévu, en
suivant les instructions de ce manuel.
•Ne jamais utiliser ni entreposer d’essence ni aucune autre vapeur ou
liquides inflammables près du climatiseur —cela serait
extrêmement dangereux.
•Le climatiseur ne possède pas de ventilateur l’admission d’air frais
extérieur. Il faudra donc ouvrir fréquemment les portes ou les
fenêtres si l’on utilise dans la même pièce des appareils de
chauffage àgaz ou au mazout, qui consomment beaucoup
d’oxygène. Sinon, il y aurait risque d’asphyxie dans les cas
extrêmes.
•Ne pas mettre le climatiseur sous et hors tension en le branchant et
en le débranchant. Utiliser la touche de marche/arrêt de
fonctionnement (ON/OFF).
•Ne rien introduire dans la sortie d’air de l’élément extérieur. Cela est
très dangereux car le ventilateur marche àgrande vitesse.
•Ne pas laisser les enfants jouer avec le climatiseur.
•Ne pas trop refroidir ou chauffer une pièce oùse trouvent des bébés
ou des malades.
AVERTISSEMENT
AVERTISSEMENT
ATTENTION
OI-724-04F
Secteur
Sous
tension
(ON)
ATTENTION

13
: Sa poussée fait augmenter la température programmée.
: Sa poussée fait baisser la température programmée.
OI-724-05F
Télécommande
D: Sélecteur de vitesse de
ventilation (FAN SPEED)
B : Touche de mode (MODE)
E : Touche de volet (FLAP)
C : Touches de réglage de
température
A : Touche de marche/arrêt
de fonctionnement
(ON/OFF)
G : Touche d’essai (TEST)
F : Capteur de température
(interne)
A : Touche de marche/arrêt
de fonctionnement
(ON/OFF)
Elle commande la mise en service et hors service du climatiseur.
Elle permet de choisir un des cinq modes de fonctionnement :
(AUTO) : Utilisé pour régler automatiquement le refroidissement ou le
chauffage.
Seulement pour type pompe à chaleur simple
(Plage de température : de 17 à 27 °C)
(HEAT) : Utilisé pour un chauffage normal.
Seulement pour type pompe à chaleur
(Plage de température : de 16 à 26 °C)
(DRY) : Utilisé pour enlever l’humidité de l’air sans changer la
température.
(Plage de température : de 18 à 30 °C)
(COOL) : Utilisé pour un refroidissement normal.
(Plage de température : de 18 à 30 °C)
(FAN) : Utilisé pour actionner uniquement le ventilateur sans
refroidissement ou réchauffement.
C : Touches de réglage de
température
B : Touche de mode
(MODE)

14
1. Utiliser cette touche pour régler la direction du flux d’air à un
angle particulier.
• En mode refroidissement ou séchage, une condensation
risque de se former et de s’écouler de l’évent si les volets
sont dirigés vers le bas.
• Ne pas déplacer le volet avec les mains.
REMARQUE Cette fonction est disponible uniquement sur les modèles ASS,
AS2S, ASBS, ACS et AWS.
OI-724-06F
Télécommande (suite)
D:Sélecteur de vitesse de
ventilation
(FAN SPEED) (AUTO) : L’appareil choisit lui-même la vitesse de la ventilation.
(HI.) : Vitesse de ventilation élevée
(MED.) : Vitesse de ventilation moyenne
(LO.) : Vitesse de ventilation faible
E : Touche de volet
(FLAP)
F : Capteur de température
(interne)
Ce capteur interne détecte la température autour de la
télécommande tandis que le capteur de température du bloc
intérieur détecte normalement la température. Pour plus
d’informations, s’adresser au revendeur. (N’effectuer aucun
réglage si l’on utilise la commande de groupe.)
G : Touche d’essai
(TEST)
Elle s’emploie uniquement lors de l’entretien du climatiseur.
Ne pas utiliser la touche (TEST) pour le fonctionnement ordinaire
de l’appareil.
ATTENTION
REMARQUE Si on utilise deux télécommandes dans un système de contrôle groupé*,
c’est la touche actionnée en dernier lieu sur n’importe quelle
télécommande qui agit.
* “Contrôle groupé” signifie qu’un maximum de 8 éléments intérieurs
peuvent être simultanément contrôlés par une télécommande.

15
Affichage (Télécommande)
Description
A: S’affiche pour indiquer que le contrôleur du système est utilisé pour
la commande.
Lorsque l’indicateur clignote sur l’affichage, ceci indique que
l’opération n’est pas acceptée par le contrôleur du système.
B: Lorsque l’appareil est en mode d’attente de chauffage, l’indicateur
s’affiche.
C: Indique le réglage de température.
D: Affiche des messages d’alarme en cas d’erreur.
E: S’affiche lors de l’utilisation du capteur de température de la
télécommande.
F: S’affiche seulement en cas d’anomalie dans un appareil.
G: Indique la vitesse de ventilation (FAN SPEED) actuellement
sélectionnée.
H: Lorsqu’on appuie sur la toucheTEST, l’indicateurTEST s’affiche.
I: Le mode de fonctionnement actuellement sélectionné s’affiche.
OI-724-07F
B
A
C
D
E
I
H
F
G

16
Fonctionnement
REMARQUE Pour roder le système, l’interrupteur d’alimentation secteur doit être
allumé au moins cinq (5) heures avant la mise en service.
ÉTAPE 1 Mise en marche du climatiseur
Appuyer sur la touche de marche/arrêt (ON/OFF) ( ).
ÉTAPE 2 Réglage du mode
Appuyer sur la touche MODE ( ) pour choisir le mode
souhaité : automatique, chauffage, refroidissement ou
ventilation
[(AUTO), (HEAT), (DRY), (COOL) ou (FAN).]
ÉTAPE 3 Réglage de la vitesse de ventilation
Appuyer sur la touche FAN SPEED ( ) pour choisir la
vitesse de ventilation appropriée [ (AUTO), (HI.),
(MED.) ou (LO.).]
Si la position AUTO est choisie, la vitesse de ventilation
s’ajuste automatiquement.
ÉTAPE 4 Réglage de la température
Utiliser la touche ou pour ajuster la température
souhaitée.
(La touche réduit la température, tandis que la touche
l’augmente.)
ÉTAPE 5 Arrêt du climatiseur
Appuyer une nouvelle fois sur la touche de marche/arrêt (ON/
OFF) ( ) .
OI-724-08F
STEP 3
STEP 2
STEP 5
STEP 4
STEP 1
ÉTAPE 3
ÉTAPE 2
ÉTAPE 5
ÉTAPE 4
ÉTAPE 1

17
OI-724-09F
Guide de dépannage
Si le climatiseur ne fonctionne pas correctement, vérifier d’abord les points suivants avant de faire appel à
un personnel de service. S’il ne fonctionne pas convenablement après ces vérifications, contacter le
concessionnaire ou un centre de service.
Problème Cause possible Remède
Le climatiseur ne fonctionne
pas du tout.
Le compresseur fonctionne,
puis s’arrête tout de suite.
Mauvaise performance de
refroidissement (ou de
chauffage).
Le témoin est affiché.
1. Rétablir le courant secteur.
2. Consulter un centre de service.
3. Consulter un électricien ou le
concessionnaire.
4. Appuyer à nouveau sur cette touche.
5. Consulter le concessionnaire.
1. Enlever l’obstacle.
1. Nettoyer le filtre d’air pour améliorer
le flux d’air.
2. Si possible, éliminer la source de
chaleur.
3. Fermer portes et fenêtres pour éviter
la chaleur externe (ou le froid).
4. Enlever l’obstacle pour améliorer le
flux d’air.
5. Régler la température à un niveau
plus bas (ou plus haut).
6. (Essayer d’utiliser un chauffage
d’appoint.)
7. (Consulter le concessionnaire.)
1. Contacter un centre de service.
1. Panne d’électricité.
2. Le disjoncteur a fonctionné.
3. La tension de ligne est trop faible.
4. La touche de fonctionnement est sur
OFF.
5. La télécommande ou la pompe de
chaleur ne fonctionne pas
convenablement.
(Le message ERROR et une indication
telle que El, PI, FI, etc. apparaissent sur
l’affichage.)
1. Obstacle devant la bobine du
condenseur.
1. Filtre d’air souillé ou colmaté.
2. Une source de chaleur ou trop de
personnes se trouvent dans la pièce.
3. Des portes et/ou des fenêtres sont
ouvertes.
4. Un obstacle se trouve près de la prise
d’air ou de la sortie d’air.
5. Le thermostat est réglé trop haut pour
le refroidissement (ou trop bas pour le
chauffage).
6. (La température externe est trop
basse.)
7. (Le système de dégivrage ne
fonctionne pas.)
1. Défaillance du système
Conseils pour économiser l’énergie
•Ne pas boucher la prise d’air et la sortie d’air de l’appareil, car celui-ci
ne fonctionnerait pas convenablement et risquerait même d’être
endommagé.
•Ne pas laisser pénétrer directement les rayons du soleil. Utiliser des
persiennes ou des rideaux. Il faudrait plus longtemps pour refroidir la
pièce si les murs ou le plafond étaient chauffés par le soleil.
Choses àfaire :
Choses àéviter :
•Maintenir toujours propre le filtre d’air, car un colmatage du filtre
réduirait les performances de l’appareil.
•Pour éviter une perte de l’air réfrigéré, maintenir fermées les fenêtres,
les portes et autres ouvertures.
REMARQUE En cas de panne d’électricitépendant le fonctionnement de l’appareil
Si l’interruption de l’alimentation n’est que temporaire, l’appareil
recommencera automatiquement à fonctionner (une fois que le courant
est rétabli) selon les mêmes réglages qu’avant l’interruption.

18
Inhalt Seite
Produkt-Information...................................................................................... 18
Wichtige Symbole ......................................................................................... 19
Merkmale ....................................................................................................... 19
Technische Daten........................................................................................... 19
Aufstellungsort ..............................................................................................20
Elektrische Erfordernisse ..............................................................................20
Sicherheitsvorschriften .................................................................................20
Fernbedienung ..............................................................................................21
Betrieb............................................................................................................24
Fehlersuche....................................................................................................25
Nützliche Hinweise für Energieeinsparung.................................................25
Produkt-Information
Falls Probleme oder Fragen zu dieser Fernbedienung auftreten sollten, die
eine Kontaktaufnahme mit dem Kundendienst erforderlich machen,
werden die folgenden Angaben benötigt.
Modellnummer K70D042ZAA
Kaufdatum
Anschrift des Fachhändlers
Telefonnummer
KONFORMITÄTSERKLÄRUNG
Dieses Produkt ist mit dem « »-Zeichen gekennzeichnet, weil es die
Anforderungen der EG-Richtlinien Nr. 89/336/EEC, Nr. 73/23/EEC und Nr.
93/68/EEC erfüllt.
Bei falschem Einsatz des Gerätes und/oder Nichtbeachtung auch nur von
Teilen der Bedienungsanleitung und den Installationsanweisungen wird
diese Erklärung ungültig.
OI-724-02D

19
Wichtige Symbole
In dieser Bedienungsanleitung werden die folgenden Symbole
verwendet, um Benutzer und Kundendienstpersonal auf die Gefahr von
Verletzungen bzw. Sachschäden oder eine mögliche Beschädigung des
Gerätes hinzuweisen:
Dieses Symbol warnt vor einer Gefahr
oder vor unsachgemäßem Betrieb,
wodurchVerletzungen mit
möglicherweise tödlichem Ausgang
entstehen können.
Dieses Symbol warnt vor einer Gefahr
oder vor unsachgemäßem Betrieb, die zu
Verletzungen, einer Beschädigung des
Gerätes und anderen Sachschäden führen
können.
Merkmale
• Betriebsarten-Wahltaste (AUTO, HEAT, DRY, COOL, FAN)
• Gebläsedrehzahl-Wahltaste (AUTO, HI., MED., LO.)
• Alarmmeldungs-Code
• Temperatureinstellung
• Anzeige für zentrale Steuerung
Technische Daten
Abmessungen (mm) 120 (H) x 70 (B) x 16 (T)
Spannungsversorgung 16V Gleichspannung
(Speisung über Inneneinheit)
OI-724-03D
WARNUNG
VORSICHT

20
Aufstellungsort
•Wir empfehlen, diese Fernbedienung von einem qualifizierten
Montagetechniker gemäß der beigefügten Montageanleitung
fachgemäß installieren zu lassen.
•Diese Fernbedienung nicht an einem Ort installieren, an dem
Dämpfe oder zündfähige Gase auftreten, oder an einem extrem
feuchten Ort, z.B. in einem Gewächshaus.
•Die Fernbedienung nicht an einem Ort installieren, an dem sich
starkeWärme erzeugende Geräte befinden.
Elektrische Erfordernisse
1. Die gesamteVerdrahtung muß in Übereinstimmung mit dem örtlichen
Elektrizitätsgesetz erfolgen. Einzelheiten erfahren Sie von Ihrem
Fachhändler oder einem qualifizierten Elektriker.
2. DieVerdrahtung muß von einem qualifizierten Elektriker
vorgenommen werden.
Um das Gerät anzuwärmen, mußdie
Netzstromver-sorgung mindestens
fünf (5) Stunden vor Inbetrieb- nahme
eingeschaltet werden. Die
Netzstromversorgung eingeschaltet
lassen, außer wenn das Gerät längere
Zeit nicht verwendet werden soll.
Sicherheitsvorschriften
•Vor Inbetriebnahme dieses Klimagerätes sollten Sie diese
Bedienungsanleitung aufmerksam durchlesen. Falls Sie danach
immer noch irgendwelche Schwierigkeiten oder Fragen haben sollten,
wenden Sie sich bitte an Ihren Fachhändler.
•Dieses Klimagerät ist so konstruiert, daßes für ein angenehmes
Raumklima sorgt.Verwenden Sie dieses Gerät nur für seinen
beabsichtigten Zweck gemäß der Beschreibung in dieser
Bedienungsanleitung.
•Auf keinen Fall Benzin oder andere zündfähige Gase oder
Flüssigkeiten in der Nähe des Klimagerätes verwenden oder lagern
–Explosionsgefahr!
•Dieses Klimagerät besitzt keinenVentilator zum Ansaugen von
Frischluft.Werden Gas- oder Ölheiz geräte, die viel Sauerstoff
verbrauchen, im gleichen Raum betrieben, so müssen Fenster und
Türen häufig geöffnet werden, um die Luft im Raum zu erneuern.
Anderenfalls besteht in extremen Fällen Erstickungsgefahr!
•Schalten Sie das Klimagerät nicht mit Hilfe des Netztrennschalters
ein und aus.Verwenden Sie dazu grundsätzlich die Betriebstaste
(ON/OFF).
•Stecken Sie keine Gegenstände in den LuftauslaßderAußeneinheit.
Dies ist gefährlich, weil das Gebläse mit hoher Drehzahl rotiert.
•Lassen Sie nicht zu, daßKinder mit diesem Gerät spielen.
•Achten Sie stets darauf, den Raum nicht zu stark zu kühlen oder
heizen, wenn Kleinkinder oder Kranke anwesend sind.
Netztrennschalter
EIN
(ON)
OI-724-04D
WARNUNG
VORSICHT
WARNUNG
VORSICHT
Table of contents
Languages:

