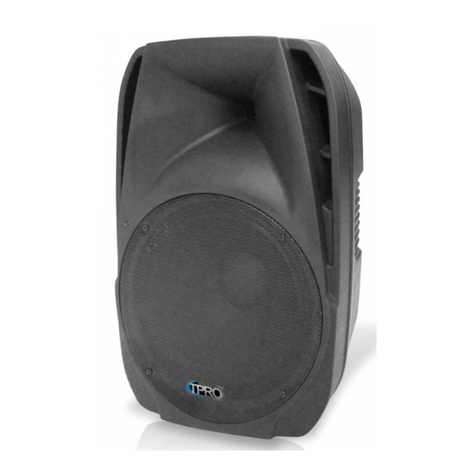
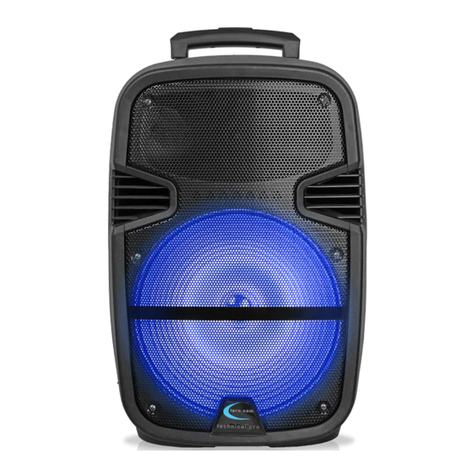
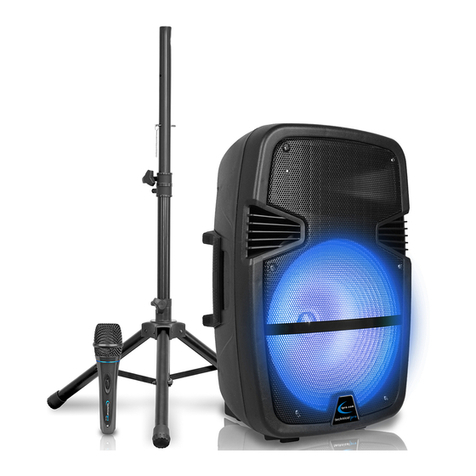
Technical Pro PK15BT User manual

User Manual
15" Bluetooth®Speaker with USB & SD Card Reader
MODEL: PK15BT
QUESTIONS / COMMENTS CALL 888-842-6277

PK15BT
1
WARNING!
CAUTION: To reduce the risk of electric shock, never remove the cover of this speaker or tamper with its
internal components. There are no user-serviceable parts inside. Refer all servicing to a qualified technician!
CAUTION: Thoroughly read this manual before operating this unit!
The lighting flash with arrowhead symbol within an equilateral triangle is intended to alert the user of the presence of
dangerous voltage within product’s enclosure that may be of sufficient magnitude to constitute a risk of electric shock to
humans. Users should exhibit extra safety when this symbol appears in this instruction manual and follow all
precautions as they are stated.
The exclamation point within an equilateral triangle is intended to alert the user to of important operating and
maintenance (servicing) instructions in this manual.
General Operating Information
1. For best performance carefully read this manual.
2. Save these directions for future reference.
3. Heed all warnings and follow all instructions. Failure to do so can result in equipment damage, injury, and even
death.
4. Keep the unit in a cool, dry, clean place away from windows, heat, excessive vibration, dust, moisture, and cold.
5. To prevent fire and electric shock keep the unit away from water and rain.
6. Never modify the unit’s plugs or cords. If the intended outlet does not match the unit’s plug consult a licensed
electrician to upgrade the applicable outlet.
7. Never open the unit or tamper with its components. If something becomes lodged inside the unit contact the
manufacturer.
8. Protect all the cords and wires attached to the unit. When installing the unit place the cords so they will not be
stepped on, bent, or otherwise damaged. If a cord looks damaged consult a licensed electrician and immediately
discontinue use.
9. When wiring and plugging the unit and connected equipment in, make sure all applicable devices are turned off.
10. When operating the unit, apply only gentle force to knobs and controls as directed.
11. When moving the unit, first disconnect all cords.
12. When cleaning the unit, use a clean, dry cloth. Never use chemical solvents on this unit as they may damage the
finish.
13. If the unit does not appear to be operating correctly, first read the TROUBLESHOOTING section in this manual
that addresses common user errors.
14. To prevent lightning damage, unplug the unit during storms.
15. Unplug the during extended periods of disuse.
16. Before placing, installing or wiring the unit, inspect all hardware, electrical equipment, and mounting
components for damage. If a component is missing, not being used as intended, or looks damaged, immediately
discontinue use and consult an appropriate licensed professional. Only use hardware that is rated for the loading

PK15BT
2
conditions of the installation and any possible short-term, unexpected overloading. Never exceed the rating of the
hardware or equipment. Only use electrical equipment designed for use with the unit.
17. Place the unit in a well-ventilated area making sure there is ample space around the unit. Failure to do so can
result in fire or heat damage to the unit.
18. Vibrations generated by the unit can distort playback on TVs and CD/DVD players. To eliminate distortion, move
the unit away from the affected equipment.
19. Even with magnet shielding technology, the magnets in the unit may damage or distort playback on sensitive
electronics. To ensure this does not happen, do not place the unit near electronics that could be affected.
20. To preserve the audio quality of the unit do not play music at high volumes for extended periods of time. Low-
frequency and bass heavy audio may damage the audio quality of the unit when played at high volumes. If
distortion does occur, reduce the volume of the unit.
21. Listening to music at high volumes for extended periods of time may damage hearing. Always ensure the unit is
placed far enough away from listeners and the volume output is set at a level that will not damage hearing.
22. Refer all servicing to qualified service personnel. Servicing is required when equipment has been damaged in
any way. Examples of instances requiring servicing include but are not limited to: when the power supply cord or
plug become damaged, when liquid or other objects have fallen inside the unit, when any equipment has become
exposed to water or rain, when equipment does not operate correctly/normally, when the unit has been dropped,
or when the unit has become damaged in any way.
23. Consult a licensed, Professional Engineer regarding physical equipment installation. Ensure that all local, state,
and national regulations regarding the safety and operation of equipment are understood and adhered to.
24. Secure placement and installation of the unit is the owner’s responsibility. Technical Pro shall not be liable for
any damage caused by improper placement, installation, or use of the PK15BT unit.
Introduction:
Thank you and congratulations for choosing the PK15BT 15" Bluetooth Speaker with USB & SD Card Reader
by Technical Pro. To get the most from your speakers, review all the information provided in this instructions
manual before use.
If you’re an audio veteran, you know the name Technical Pro and what it stands for: incredible performance,
sound, and reliability in any setting. And now, Technical Pro offers its signature technology in a series of
Bluetooth Powered 15” Speakers.
This Package Includes:
1 Speaker
1 AC Adapter
1 DC Power Cable
1 Audio Cable
1 User Manual

PK15BT
3
Control and Inputs Diagram Guide:
1. Mode Button: Press to set input selector to AUX,
USB/SD, or Bluetooth.
2. Repeat Button: Press once to repeat a song played from
USB/SD or twice to repeat all tracks. Press this button a
third time to deselect repeat function.
3. Equalizer Button: Press this button to select one of the
four pre-set equalizer modes for USB/SD input.
4. Previous Track Button: Press to return to the last
USB/SD track. Press and hold to decrease volume.
5. Play/Pause Button: Press to pause or unpause USB/SD
playback.
6. Next Track Button: Press to go to the next USB/SD
track. Press and hold to increase volume.
7. USB Port/SD Reader: Insert USB flash drives and SD
cards here. The unit only supports .mp3 and .wav files.
The maximum storage size for SD cards and flashdrives
is 16 GB.
8. Microphone Priority Switch: Press to boost microphone
output relative to other line outputs.
9. Guitar Volume Knob: Turn this knob to adjust guitar
input volume while leaving other input volumes
unchanged.
10. Guitar 1/4” Input Port: Insert a 1/4” guitar cable here.
11. Woofer LED switch: Flip this switch to turn the LED
effects ON and OFF.
12. Power Switch: Flip this switch to power the unit ON
and OFF.
13. RCA Input Port: Insert RCA audio cables here.
14. Car DC Power/External 12V Input Port: Attach DC
power adapter here.
15. Mic Echo Knob: Turn this knob to set microphone echo
effect.
16. Microphone Volume Knob: Turn this knob to set
microphone volume while leaving other input volume
unchanged.
17. Master Volume Knob: Turn this knob to adjust all
output volume.
18. Bass Knob: Turn this knob to adjust bass output.
19. Treble Knob: Turn this knob to adjust treble output.
20. AUX 1/8” Input Port: Attach MP3 players with a 1/8”
to 1/8” cord here.
21. AC Power Adapter Port: Attach the AC power cable
here
22. Mic 1/4” Input Port: Insert a 1/4” guitar input cable
here.

PK15BT
4
Easy Setup Guide:
NOTE: ALL NUMBERS IN THE “EASY SETUP GUIDE” CORRESPOND TO THE CONTROLS AND INPUTS DIAGRAM
(CID) ON PAGE 3.
Powering the Unit ON
Before powering the unit ON, set volume to zero by gently turning the “Master Volume Knob” (#17) in the counterclockwise
direction until it can no longer be turned with gentle force. Depending on the desired power source, select either the included AC
power cable or included DC power adapter (AC works with most standard outlets whereas DC works with most car’s power). For AC
power insert the female side of the AC power cord into the “AC Power Adapter Port” (#21) and the male side into the desired
compatible outlet. For DC power, insert the female side of a DC power cord into the “Car DC Power/External 12V Input Port” (#14)
and the male side into the desired compatible power source. Then turn the device on and slowly increase the volume to the desired
level by using the “Master Volume Knob”.
USB Flashdrives/SD Cards
To play music from SD cards and USB flashdrives, set input to USB/SD by pressing the “Mode Button” (#1). Then insert a USB
flashdrive or SD card into the “USB Port/SD Reader” (#7). To select songs, use the “Previous Track Button” (#4) and “Next Track
Button” (#6). To plause and unpause playback press the “Play/Pause Button” (#5). To repeat playback press the “Repeat Button” (#2)
once to repeat a single track, twice to repeat all tracks, and three times to deselect the repeat function. Do not attempt to connect a
smart phone, computer or hard drive via this port, it only supports playback from USB flash drives.
Bluetooth
To play music off of a Bluetooth compatible device, set input to Bluetooth by pressing the “Mode Button” (#1). Using the desired
Bluetooth device, search for the PK15BT and pair the device. To select songs, use the “Previous Track Button” (#4) and “Next Track
Button” (#6). To plause and unpause playback press the “Play/Pause Button” (#5). Playback may also be set on the Bluetooth
compatable device paired with the unit.
1/8” AUX Inputs
To play music via the 1/8” AUX input, set input to AUX via the “Mode Button” (#1). Then, insert one side of a 1/8” to 1/8” audio
cable into the “AUX 1/8” Input Port” (#20) and the other side into the desired MP3 player. Select songs using the MP3 player
connected to the unit.
RCA Inputs
Set the input selector to AUX via the “Mode Button” (#1). Insert one side of the RCA cable into the “RCA Input Port” (#13) on the
top of the unit and the other side into the desired unit (RCA equipped computer, DVD player, TV, etc.)
Equalization
For USB flash drives and SD cards, use one of the pre-programmed digital equalization modes. To do this press the “Equalizer
Button” (#3) to select an equalization mode that produces the desired output. For all other outputs (and USB/SD), tailor output with
the “Bass Knob” (#18) and “Teble Knob” (#19) which adjusts output over a specific range.
Wired Mic Setup
Set the “Microphone Volum Knob” (#16) to zero. Insert a mic cable into the “Mic 1/4” Input Port” (#22). Slowly increase mic volume
to the desired setting. To increase mic echo, use “Mic Echo Knob” (#15). To give the microphone priority set the “Microphone
Priority Switch” (#8) to ON. Setting the “Microphone Priority Switch” to ON boosts microphone output relative to line output and is
useful for making sure music doesn’t drown out vocals and other microphone input.
Guitar Setup
Set the “Guitar Volume Knob” to zero (#9). Insert one side of a cable connected to the desired guitar into the “Guitar 1/4” Input Port”
(#10). Slowly increase the “Guitar Volume Knob” to the desired level.

PK15BT
5
Troubleshooting:
SYMPTOM
POSSIBLE CAUSES
REMEDIES
No power
The power cord is not plugged in
The power switch is set to the OFF position
Plug the power cord into an outlet
Set the main power to the ON position
No sound
The master volume control is set to the zero
position
The 1/8” AUX/RCA wires are not connected
securely
The input selector is set to the wrong input
Turn the volume control in the clockwise
direction
Connect the wires securely
Switch the input selector to the correct setting
The mic input isn’t
coming out of the
speakers
The wired mic is not plugged in securely
The wired mic is plugged into the guitar input
instead of the mic input
The mic volume is set to zero
Securely plug in the wired mic
Plug the mic cord into the mic input port
Increase the mic volume to the desired level
Mic output is being
drowned out by the
music
The mic output volume is too low relative to
other inputs
Set mic priority to ON
Increase mic volume relative to master
volume
The guitar input isn’t
coming out of the
speaker
The guitar input cord isn’t securely plugged in
The guitar cord is plugged into the mic input
port
Guitar volume is set to zero
Securely plug the guitar cord into the guitar
input port.
Remove the guitar cord from the mic input
port and insert it into the guitar input port
Increase guitar volume
Audio needs
adjusting
The bass or treble knobs are set incorrectly
The wrong digital equalization mode has been
selected
Adjust the bass and treble knobs to the desired
setting
Select a digital equalization mode that better
fits the music needs
DISCLAIMER!
This device complies with part 15 of FCC rules. Operation is subject to the following two conditions: (1) This device may not cause harmful interference and (2) this
device must accept any interference received, including interference that may cause undesired operation.
Federal Communications Commission Requirements: The equipment has been tested and found to comply with the limits for Class B Digital Device, pursuant to part
15 of FCC Rules. These limits are designed to provide reasonable protection against harmful interference in residential installation. This equipment generates uses and
can radiate radio frequency energy and, if not installed and used in accordance with the instructions, may cause harmful interference to radio communication. However,
there is no guarantee that interference will not occur in a particular installation. If this equipment does cause harmful interference to radio or television reception, which
can be determined by turning the equipment off and on, the user is encouraged to try to correct the interference by one or more of the following measures:
Increase the separation between equipment and receiver.
Connect the equipment into an outlet on a circuit different from that to which the receiver is connected.
Consult the dealer or an experienced radio/TV technician for help.
The changes or modifications not expressly approved by the party responsible for compliance could void the user’s authority to operate the equipment.
FCC Radiation Exposure Statement: The equipment complies with FCC radiation exposure limits set forth for uncontrolled equipment and meets the FCC radio
frequency (RF) Exposure Guidelines in Supplement C to OET65. The Equipment has very low levels of RF energy that it is deemed to comply without testing of
specific absoprtion ratio (SAR).
The Bluetooth word mark and logos are registered trademarks owned by SIG, Inc. and any use of such marks by Technical Pro is under license. Other
trademarks and trade names are those of their respective owners.
Table of contents
Other Technical Pro Speakers manuals

Technical Pro
Technical Pro PW1610PKG User manual

Technical Pro
Technical Pro MBW5000 User manual

Technical Pro
Technical Pro PB14PKG User manual

Technical Pro
Technical Pro PSHAKE800LED User manual

Technical Pro
Technical Pro BSDV15 Assembly instructions

Technical Pro
Technical Pro PB1550LED User manual

Technical Pro
Technical Pro PB1050LED User manual

Technical Pro
Technical Pro PSHAKE1500 User manual

Technical Pro
Technical Pro PB15PKG User manual

Technical Pro
Technical Pro DJPACK2GO User manual