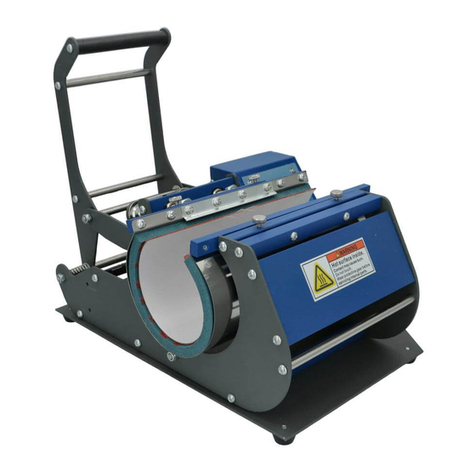
Technotape HPM.MUG.350.005 User manual

MUG PRESS
MOKKENPERS
WITH HEAT ELEMENT FOR STANDARD MUGS Ø7,5 ~ 9,5 CM
MET VERWARMINGSELEMENT VOOR STANDAARD MOKKEN Ø7,5 ~ 9,5 CM
HPM.MUG.350.005
HPM.MUG.350.005
USER MANUAL
HANDLEIDING

FIRST TIME USE
CONTENTS
2
3
4
5
6
7
ACCESSORIES
F.A.Q.
FAHRENHEIT - CELSIUS CONVERSION
USING THE MUG PRESS
CONTROL UNIT SETTINGS
Contents
Changing accessories
Mug Press accessories
Frequently asked questions
Instructions
System instructions
Safety instructions
MUG PRESS
WITH HEAT ELEMENT FOR STANDARD MUGS Ø7,5 ~ 9,5 CM
HPM.MUG.350.005
USER MANUAL
14 WARRANTY CONDITIONS

1
MOKKENPERS
MET VERWARMINGSELEMENT VOOR STANDAARD MOKKEN Ø7,5 ~ 9,5 CM
HPM.MUG.350.005
HANDLEIDING
EERSTE GEBRUIK
INHOUD
8
9
10
11
12
13
15
ACCESSOIRES
F.A.Q.
FAHRENHEIT - CELSIUS GRADENTABEL
GARANTIEVOORWAARDEN
DE MOKKENPERS GEBRUIKEN
BEDIENINGSPANEEL INSTELLEN
Inhoud
Accessoires verwisselen
Mokkenpers accessoires
Veelgestelde vragen
Gebruiksinstructies
Systeeminstructies
Veligheidinstructies

2
FIRST TIME USE
Carefully remove all packing materials.
CHECK THE CONTENTS
Check if the box contains the following contents:
Mug Press
Power cord
Manual
SAFETY INSTRUCTIONS
When you change an accessory, make sure that the
power is switched off.
Make sure that the Voltage is 220V and applicable for
your use.
Do not let the press be switched on when it’s not in
use.
Be aware of the symbols used below:
Only allow qualied personnel to work with the mug
press. Keep children away.
Attention: Hot Attention: High Voltage
Be aware that some elements get hot during the
process. You can recognize these elements by the
yellow marking.

3
Connect the power cord.
Minus button
Safety catch
Switch the press on.
Mode button
Highest-temperature light
Plus button
Set-temperature light
Start / stop button
Sublimation time light
All read-outs are in Celsius. For Fahrenheit see the table on
page 7.
The press will automatically heat up to the set-temperature.
When it has reached this temperature, the press will make
a beeping sound.
To start the sublimation process, press the start / stop
button once. First, the press will heat up to the highest-
temperature. When this has been reached, the press will
count down the set time.
When the press has counted down to zero and the process
has nished, the press will make a long beeping sound.
Press the start / stop button again and it will stop.
To unplug a press accessory, make sure the power is
switched off and the press is cooled down. Press the safety
catch on the right side of the plug to release it (Picture B).
To set the set-temperature (Picture A), press the mode
button once. Then, adjust it with the plus and minus button.
The maximum set-temperature is 180°C.
To set the highest-temperature, press the mode button
for the second time. Then, adjust it with the plus and
minus button. Usually, this is a few degrees above the set-
temperature. The maximum highest-temperature is 200°C.
To set the sublimation time, press the mode button for the
third time. Then, adjust it with the plus and minus button.
To conrm the temperatures and time, press the mode
button for the fourth time.
CONTROL UNIT SETTINGS
SYSTEM INSTRUCTIONS PICTURE A
PICTURE B
NOTE!
The set-temperature is always lower
than the highest-temperature. If you
want to increase the set-temperature,
you need to increase the highest-
temperature rst.

4
USING THE MUG PRESS
INSTRUCTIONS
Before you switch on the mug press, set the correct
diameter of the mug press by adjusting the central screw
(Picture C). The ‘correct diameter’ means that you can close
the press with light pressure.
For temperature and time settings, check the time
and temperature overview at www.technotape.com >
Downloads > Time & Temperature.
Place the sublimation paper with the printed side of the
sublimation paper towards the product and adjust it with
special Technotape Heat Transfer Tape.
Close the press and push the start / stop button button.
It will take some time for the press to reach the highest-
temperature. Once it has been reached, the sublimation
process begins, and the press will count down the set time
automatically.
Once the sublimation time has nished, the press will make
a long beeping sound. Open the press and press the start
button to stop the sound.
When the press has reached the set-temperature, you can
place the product into the press.
Ceramic mug-like products (from 10oz mugs up to
beer mugs)
PICTURE C
PRODUCTION TIP!
For the best and sharpest result, dip
the mug into cold water immediately.
Remove the tape and sublimation paper directly after the
job has nished. But be careful because the mug is very hot.

5
ACCESSORIES
CHANGING ACCESSORIES
Release the safety catch (Picture E).
Unplug the cable.
Carefully remove the cable from the heating mat cable
clamp (Picture F).
Remove the heating mat from the holder and replace it by
another mat.
Carefully connect the cable to the heating mat cable clamp
and plug the cable into the control box.
Do not bend or fold the heating mats.
Before you change any accessory, make sure the
power is switched off and the press is cooled down.
There are different accessories available for the mug press:
Itemcode
Description
HPM.MUG.350.S16
For 8oz and smaller mugs
available separately
Heating Mat
Ø7,0 - 8,0 cm
Itemcode
Description
TRP.SRA.MUG.001
238 x 98 mm
250 sheets
Subpreme Mug Paper
110 gr/m²
Itemcode
Description
10 mm x 66 m
20 mm x 66 m also available
Tape
Heat Resistant
HTT.010.066.201
Safety catch
PICTURE E
Cable clamp 1
Cable clamp 2
PICTURE F
Itemcode
Description
HPM.MUG.350.S15
For 10oz and bigger mugs
Standard installed
Heating Mat
Ø7,5 - 9,5 cm
MUGPRESS ACCESSORIES

6
First, lengthen the sublimation time. If that doesn’t work,
raise the temperature with 3°C. The last option is to give the
press more pressure.
Reduce the sublimation time with 10 seconds.
Reduce the pressure or reduce the temperature.
The temperature is either too high or the sublimation paper
is of poor quality.
Reduce the sublimation time with 20 seconds.
The sublimation paper did not make contact with the
product completely. Usually this means that the surface of
the product is not completely smooth.
F.A.Q.
The transferred image is a little too light.
The transferred image is a little too vague.
The transferred image is not brilliant.
The paper is sticky.
The edges of the mug color brown.
The transferred image is partial vague.
PRODUCTION TIPS!
For the best result of ceramic products, dip
the product immediately into cold water after
sublimating.
To release the Technotape Heat Transfer Tape easily,
double fold one end of the tape.
Use very clean products only to prevent dust to
obstruct clear transfer.
Itemcode
SPM.082.096.002
Sublimation Mug 11oz White
Dishwasher & Microwave Safe

7
FAHRENHEIT - CELSIUS CONVERSION

8
EERSTE GEBRUIK
Verwijder voorzichtig het verpakkingsmateriaal.
CONTROLEER DE INHOUD
Controleer of de doos de volgende inhoud heeft:
Mokkenpers
Netspanningsnoer
Handleiding
VEILIGHEIDINSTRUCTIES
Als je een accessoire wil verwisselen, controleer dan
eerst of de stroom is uitgeschakeld.
Controleer of de voltage 220 Volt is en geschikt voor
gebruik.
Laat de pers niet aan staan als het niet in gebruik is.
Zo voorkom je oververhitting.
Wees alert op de volgende symbolen:
Laat alleen gekwaliceerde medewerkers met deze
pers werken. Houd kinderen uit de buurt.
Attentie: Heet Attentie: Spanning
Een aantal elementen van de pers wordt heet
tijdens gebruik. Wees hier alert op. Je herkent deze
elementen aan de gele markering.

9
Doe de stekker in het stopcontact.
Min knop
Veiligheidspal
Zet de pers aan.
Mode knop
Hoogste-temperatuur instellingslamp
Plus knop
Temperatuur instellingslamp
Start-/stopknop
Sublimatietijd instellingslamp
De temperaturen worden weergegeven in Celsius. De
conversie naar Fahrenheit vind je in de tabel op pagina 13.
Druk op de start-/stopknop en de pers verwarmt
automatisch voor naar de set-temperatuur. Zodra deze
temperatuur is bereikt gaat de pers piepen.
Druk opnieuw op de start-/stopknop en de pers warmt
op tot de hoogste-temperatuur. Zodra deze temperatuur
is bereikt, telt de pers de sublimatietijd af en begint het
sublimatieproces.
Zodra de sublimatietijd is verstreken is de mok klaar.
Dit hoor je aan een lang piepsignaal. Om het signaal te
stoppen druk je nogmaals op de start-/stopknop. Je kunt
dan de mok uit de pers halen.
Wil je van accessoire wisselen, zorg er dan eerst voor dat
de pers is uitgeschakeld en volledig afgekoeld. Druk dan op
de veiligheidspal aan de rechterzijde van de stekker om de
stekker te ontgrendelen (foto B).
Stel de set-temperatuur in (foto A) door één keer op de
modeknop te drukken. Je past de temperatuur aan met de
plus- en minknop. De max. set-temperatuur is 180°C.
Stel de hoogste-temperatuur in door voor de tweede keer
op de modeknop te drukken. Je past de temperatuur aan
met de plus- en minknop. De maximale set-temperatuur is
200°C.
Stel de sublimatietijd in door voor de derde keer op de
modeknop te drukken. Je past de sublimatietijd weer aan
met de plus- en minknop.
Bevestig de temperaturen en tijd door voor de vierde keer
op de modeknop te drukken.
BEDIENINGSPANEEL INSTELLEN
SYSTEEMINSTRUCTIES FOTO A
FOTO B
LET OP!
De set-temperatuur is altijd lager dan
de hoogste-temperatuur. Wil je de set-
temperatuur verhogen, verhoog dan
eerst de hoogste-temperatuur.

10
DE MOKKENPERS GEBRUIKEN
GEBRUIKSINSTRUCTIES
Stel voordat je de mokkenpers aanzet de juiste diameter af.
Dit doe je door de stelring aan te draaien (foto C). Je hebt
de juiste diameter afgesteld als je de mokkenpers met
lichte druk kunt sluiten.
Kijk voor de temperatuur- en tijdsinstellingen op
www.technotape.com > downloads > tijd & temperatuur.
Plaats het sublimatiepapier met de afbeelding op de mok
en zet het vast met Technotape Hittetape. Let op dat de
inktzijde naar de mok toe is.
Sluit de mokkenpers en druk op de start-/stopknop. Het
duurt even voordat de pers de hoogste-temperatuur bereikt
omdat de mok nog koud is. Pas zodra deze temperatuur
bereikt is, telt de pers de sublimatietijd af.
Zodra de sublimatietijd is verstreken geeft de pers een
lange pieptoon. Open de pers en druk één keer op de
start-/stopknop om de piep te stoppen.
Verwijder direct het tape en papier. Wees hierbij voorzichtig,
want de mok is erg heet.
Plaats de mok in de pers zodra de set-temperatuur is
bereikt.
Keramieken producten in de vorm van een mok
(van 10oz mokken tot en met bierpullen).
FOTO C
PRODUCTIE TIP!
Dompel de mok direct onder in koud
water voor het mooiste en scherpste
resultaat.

11
ACCESSOIRES
ACCESSOIRES VERWISSELEN
Druk op de veiligheidspal om de stekker los te maken
(Foto E).
Trek voorzichtig de stekker los.
Verwijder de kabel uit de kabelhouder (Foto F).
Buig of vouw de hittemat nooit, want dit verkort de
levensduur aanzienlijk.
Monteer de kabel weer voorzichtig in de kabelhouder, steek
de stekker weer in het stopcontact.
Verwijder de hittemat uit de houder en vervang deze door
een andere mat.
Voordat je begint met het verwisselen van de
accessoires, controleer of de pers is uitgeschakeld en
volledig afgekoeld.
Er zijn verschillende accessoires beschikbaar, bijvoorbeeld:
Itemcode
Omschrijving
HPM.MUG.350.S16
Voor 8oz en kleinere mokken
Apart verkrijgbaar
Hittemat
Ø7,0 - 8,0 cm
Itemcode
Omschrijving
TRP.SRA.MUG.001
238 x 98 mm
250 vellen
Mokkenvellen
110 gr/m²
Itemcode
Omschrijving
10 mm x 66 m
20 mm x 66 m beschikbaar
Plakband
Hittebestendig
HTT.010.066.201
Veiligheidspal
FOTO E
Kabelhouder 1
Kabelhouder 2
FOTO F
Itemcode
Omschrijving
HPM.MUG.350.S15
Voor 10oz en grotere mokken
Standaard geïnstalleerd
Hittemat
Ø7,5 - 9,5 cm
MOKKENPERS ACCESSOIRES

12
Verleng de sublimatietijd. Helpt dat niet? Verhoog dan de
set-temperatuur en de hoogste-temperatuur met 3°C. Geef
anders meer druk met de pers.
Verminder de sublimatietijd met 10 seconden.
Verminder de druk of verlaag de temperatuur.
De temperatuur is te hoog of het sublimatiepapier is van
matige kwaliteit.
Verkort de sublimatietijd met 20 seconden.
Het sublimatiepapier is niet volledig in contact geweest
met het product. Meestal betekent dit dat het oppervlak
niet volledig vlak is. Dit kun je opvangen door meer druk te
geven.
F.A.Q.
De gesublimeerde afbeelding is iets te licht.
De gesublimeerde afbeelding is iets te vaag.
De gesublimeerde afbeelding is niet glanzend.
Het papier blijft aan het product plakken.
De mok verkleurt bruin aan de randen.
De gesublimeerde afbeelding is gedeeltelijk vaag.
PRODUCTIE TIPS!
Dompel een keramieken product direct na sublimatie
onder in koud water. Want dit levert het scherpste
resultaat op.
Vouw het uiteinde van het tape dubbel zodat je het
weer makkelijk en snel kunt losmaken.
Gebruik altijd zeer schone sublimatieproducten. Want
zelfs het kleinste stofje kan sublimatie op die plek
tegenhouden.
Itemcode
SPM.082.096.002
Sublimatiemok 11oz Wit
Vaatwasser- & Magnetronbestendig

13
FAHRENHEIT - CELSIUS GRADENTABEL

14
WARRANTY CONDITIONS
Technotape warrants that the press and other equipment are free from defects in both
material and workmanship for for a period of a year from the date the customer is invoiced.
For the usage parts of heat presses an overall warranty applies of 3 months from the date
of invoice to the buyer. The heat mat thas a 300 impressions guarantee or a time frame of
3 months, whichever comes rst. The usage parts are marked accordingly. This warranty
covers the repair costs associated with any defects, unless these are damages resulting from
improper installation, accidents, misuse or abuse.
There is no additional warranty or extended warranty beyond the description of what is listed
hereof. Seller disclaims any implied warranty of merchantability and / or implied warranty of
tness for a particular purpose and buyer agrees that the goods are sold as is. Technotape
will not be liable for any damages, including loss of prots, destruction of goods or any other
special, incidental, consequential or indirect damages or indirect damages arising from the use
of the press or its accompanying materials.
1 year warranty. Except usage parts (mug matts): 3 months warranty (or 300 impressions).
Mug Press
HPM.MUG.350.005
Bonne Klein Woolthuis
Managing Director
Techn-O-Parts B.V.
Tolweg 7
3741 LM Baarn
The Netherlands
Technotape International +31 (0)35 541 80 94
Tolweg 7 +31 (0)35 541 18 17
3741 LM Baarn ofce@technotape.com
The Netherlands www.technotape.com

15
GARANTIEVOORWAARDEN
1 jaar garantie. Uitgezonderd verbruiksonderdelen (mokkenmatten): 3 maanden garantie (of 300 bedrukkingen).
Technotape garandeert dat de persen en andere apparatuur vrij zijn van defecten gedurende
1 jaar na aankoopdatum door koper. Voor de verbruiksonderdelen van de hittepers geldt
een garantietermijn van 3 maanden. Voor de mokkenmat geldt een garantie van 300
bedrukkingen of 3 maanden, dat wat het eerste komt. Verbruiksartikelen zijn als zodanig
aangemerkt. Deze garantie dekt alle onderdelen en arbeid welke verricht moet worden om
eventuele defecten te verhelpen, behalve wanneer de defecten zijn ontstaan door onjuiste
installatie, ongelukken of oneigenlijk gebruik.
De garantie geldt niet verder dan voor bovenstaande voorkomende gevallen. Technotape kan
niet aansprakelijk gesteld worden voor enige vermeende garantie door wederverkoop. Koper
accepteert de goederen zoals ze zijn en kan Technotape niet aansprakelijk stellen voor enige
vermeende toepasbaarheid van de apparaten. In geen geval zal Technotape zich aansprakelijk
laten stellen voor enige schade, omzetderving of verlies van winst als gevolg van het gebruik
van de hittepers of het gebruik van de bijbehorende materialen.
Mokkenpers
HPM.MUG.350.005
Bonne Klein Woolthuis
Managing Director
Techn-O-Parts B.V.
Tolweg 7
3741 LM Baarn
Nederland
Technotape International 035 541 80 94
Tolweg 7 035 541 18 17
3741 LM Baarn ofce@technotape.com
Nederland www.technotape.com
Table of contents
Languages:
Other Technotape Power Tools manuals
Popular Power Tools manuals by other brands

Mannesmann Demag
Mannesmann Demag RRI-50T operating manual

Chicago Electric
Chicago Electric 68303 user manual
Atlas Copco
Atlas Copco RT-1 quick start guide
Power Team
Power Team C12-HTR series Operating instructions and parts list
Craftsman
Craftsman CMPBN18SB instruction manual
Raider
Raider RD-CSS01 user manual
