Teka MWX 22 BIS User manual

MWX 22 BIS
.
Bedienungsanweisung DE
Instructions for Use EN
Mode d’Emploi FR

26
EN
Dear Customer:
First of all, we would like to thank you for
preferring our product. We are sure that this
modern, functional and practical microwave oven,
manufactured with the highest quality materials,
will live up to your expectations.
Please read the instructions in this book carefully,
as they will help you to get better results in using
your microwave oven.
PLEASE KEEP THE DOCUMENTATION ON
THIS PRODUCT FOR FUTURE REFERENCE.
Keep your instructions manual close at hand.
If you give the appliance to another person,
remember to give them the corresponding
manual as well!
Tips on environmental protection
Eliminating the packaging
The packaging carries the Green Dot. Use the
right bins when discarding all of the packaging
materials, such as the cardboard, styrene and
plastic films. This will ensure that the packaging
materials are recycled.
Disposal of old electrical appliances
The European Directive 2002/96/EC on Waste
Electrical and Electronic Equipment (WEEE),
requires that old household electrical appliances
must not be disposed of in the normal unsorted
municipal waste stream. Old appliances must be
collected separately in order to optimise the
recovery and recycling of the materials they
contain and reduce the impact on human health
and the environment.
The crossed out “wheeled bin” symbol on the
product reminds you of your obligation, that when
you dispose of the appliance it must be separately
collected.
Consumers should contact their local authority or
retailer for information concerning the correct
disposal of their old appliance.
Before you dispose of your appliance, remove the
power cable, cut it and dispose of it.

27
EN
Table of contents
Safety tips..........................................................................................................................................28
Installation instructions ...................................................................................................................30
Description of the appliance............................................................................................................31
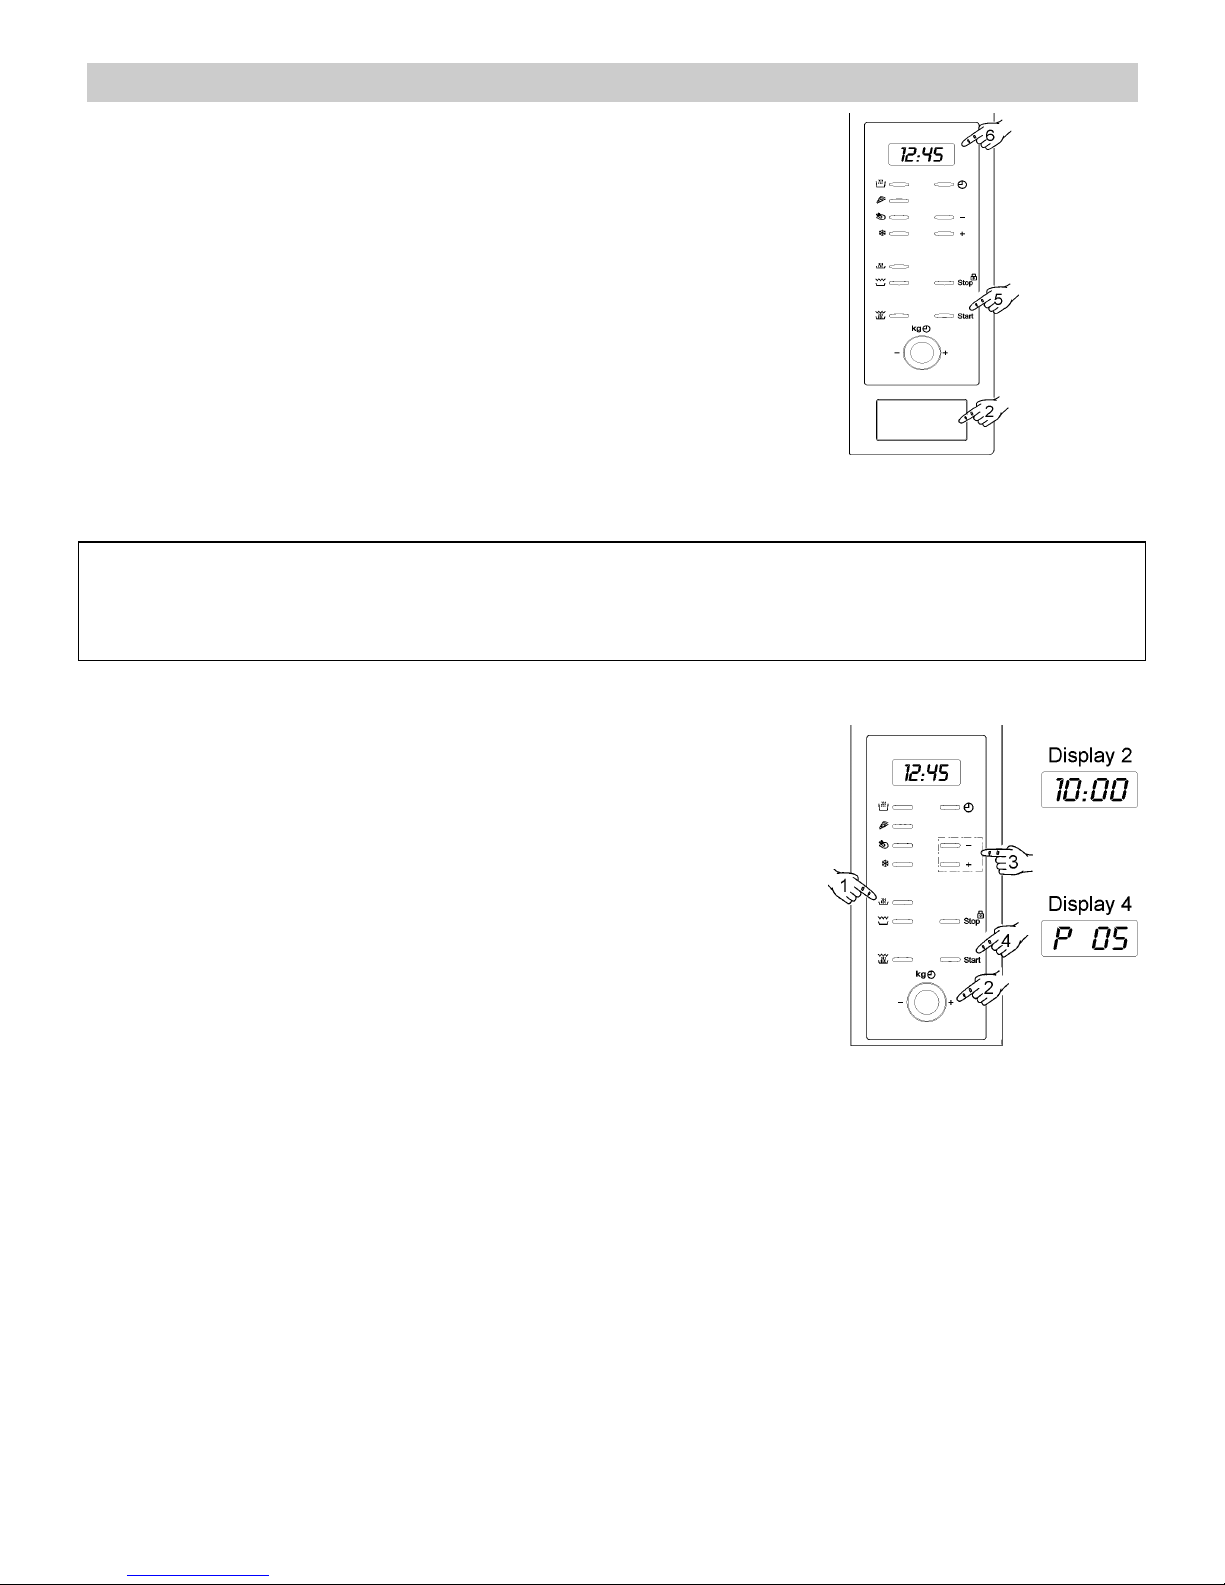
Setting the clock .............................................................................................................................31
Advantages of the microwave oven................................................................................................32
Microwave oven operating mode....................................................................................................32
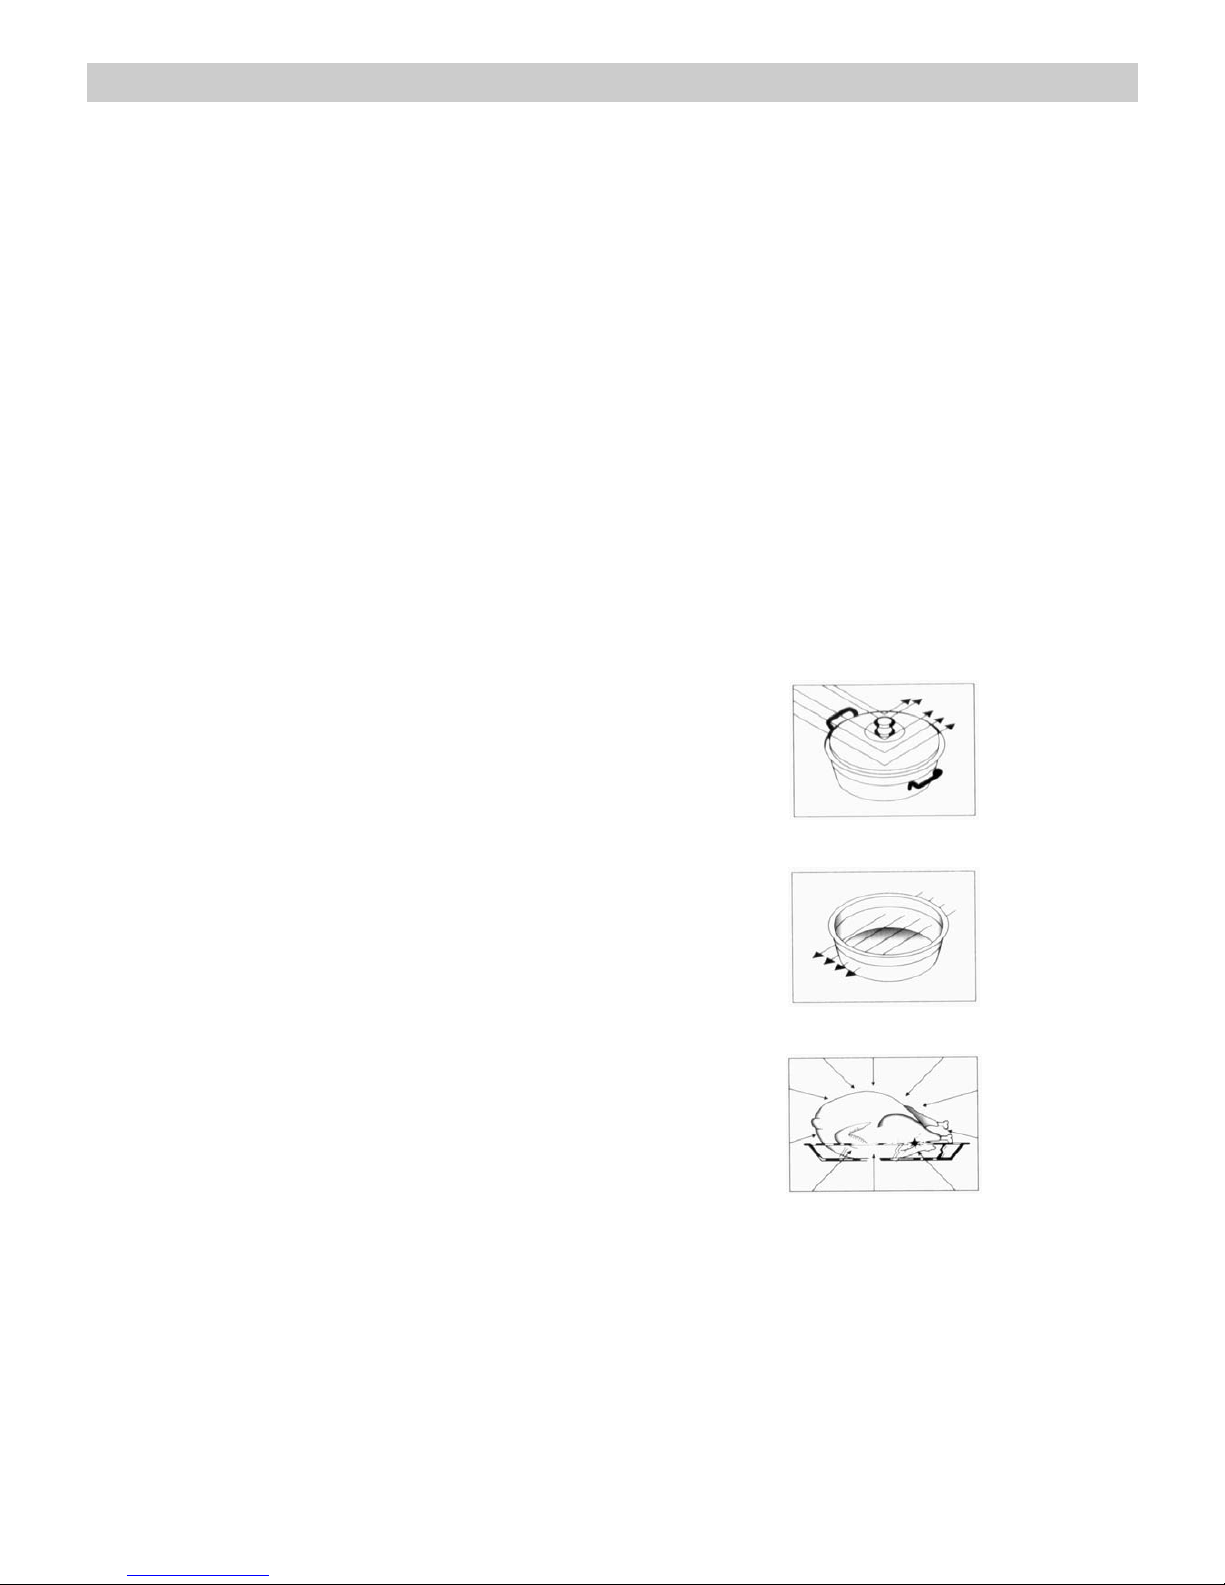
Why the food is heated...................................................................................................................32
Instructions for use ..........................................................................................................................33
Function: Microwave.......................................................................................................................33
Function: Grill .................................................................................................................................34
Function: Microwave + Grill ............................................................................................................34
Function: Defrosting by weight (automatic).....................................................................................34
Function: Defrosting by time (manual)............................................................................................35
Special functions: DRINKS.............................................................................................................35
Special functions: PIZZA ................................................................................................................35
Special functions: CHICKEN ..........................................................................................................35
Programming the microwave...........................................................................................................36
Safety lock......................................................................................................................................36
During operation...............................................................................................................................37
Function interruption.......................................................................................................................37
End of programme..........................................................................................................................37
Energy Saving ................................................................................................................................37
Defrosting..........................................................................................................................................38
General tips for defrosting ..............................................................................................................39
Cooking with microwaves................................................................................................................40
Important tips!.................................................................................................................................41
Tables and suggestions – Cooking vegetables ..............................................................................42
Tables and suggestions – Cooking fish..........................................................................................42
Cooking with Grill.............................................................................................................................43
Tables and suggestions – Grill without microwave.........................................................................44
Tables and tips – Microwave and grill.............................................................................................45
What type of containers may be used? ..........................................................................................46
Microwave function.........................................................................................................................46
Test the dishes ...............................................................................................................................46
Grill function....................................................................................................................................46
Combined function..........................................................................................................................46
Aluminium containers and foils.......................................................................................................46
Lids.................................................................................................................................................46
Table – dishware ............................................................................................................................47
Cleaning and care.............................................................................................................................48
Troubleshooting ...............................................................................................................................49
Technical Features ...........................................................................................................................50
Description of functions of buttons..................................................................................................50
Specifications .................................................................................................................................50

28
EN
Safety tips
•Warning! In order to avoid any type of flame,
only use the microwave when you are there to
supervise. Very high power levels or very long
cooking times may heat the food to excess and
cause fires.
•If you see smoke or fire, keep the door closed,
to put out the flames. Switch off the appliance
and remove the plug from the socket.
•Warning! Children may only use the appliance
under supervision, or if they have been given
instructions, so that they may use the
appliance safely and identify the dangers in
case of incorrect use.
•Warning! Considerable care is required when
the grill is functioning. Keep children away from
the appliance!
•Our appliances meet the necessary regulations
and rules for technical equipment. However,
these do not cover all the possible accident
risks.
•When using inflammable materials, such as
plastics or paper containers, to heat or cook
foods, the cooking process must be monitored
on a continuous basis, because of the risk of
fire.
•Before using dishes or containers in the
microwave, check if they are microwave-save-
Only use microwave-safe dishes.
•The power cable should not touch damp,
sharp-edged objects or the appliance when it is
hot.
•When connecting electrical appliances in the
vicinity of the microwave, ensure that the
power cables do not touch the microwave
when it is hot and that they do not get caught in
the oven door, in order to avoid damage and
danger.
•Pay attention to operating faults. The appliance
may not be used in the following cases:
- If the door does not close properly;
- If the door-hinges are damaged;
- If the contact surfaces between the door and
the front are damaged;
- If the glass in the window is damaged;
- If there is often an electrical arch inside the
oven, without the presence of any metallic
object.
•The ventilation holes may not be covered.
Cleaning/ maintenance:
•Before carrying out any maintenance or
cleaning, remove the plug from the socket.
•Please remember the cleaning tips contained
in the section “Cleaning and care”.
•The contact surfaces (the front of the cavity
and the inside of the door) must be kept quite
clean in order to guarantee correct functioning.
Clean the contact surfaces with a neutral
detergent and a cloth that does not scratch or
cause any type of friction.
•Warning: Never use the appliance if the
contact surfaces are damaged. Only use the
appliance again if it has been repaired by a
technician from the Technical Support Service.

29
EN
Safety tips
The following tips avoid damage to the
appliance:
•Do not switch on the appliance without the
rotating base and respective plate.
•Do not switch on the appliance when it is
empty. This may result in overload, if there is
no food inside.
•Only use microwave-safe dishes.
•Do not keep any inflammable object inside the
oven, because it may go on fire when the oven
is switched on.
•Eggs with shells and whole boiled eggs should
not be heated in microwave ovens because
they may explode.
•Do not heat pure alcohol or alcoholic drinks in
the microwave.
THIS IS A FIRE HAZARD.
•Warning: do not heat liquids or other foods in
closed containers, because they could easily
explode.
Be careful when heating liquids!
•When heating liquids (water, coffee, tea, milk,
etc.), they may almost reach boiling point
inside the appliance and if they are removed
suddenly, may fly out of the container. This
may cause injuries and burns!
•In order to avoid this type of situations, put a
plastic spoon or glass rod in the container
when heating liquids.
Be careful!
•When heating small amounts of food, it is
very important not to select long periods of time
or very high power levels, because the food
may overheat or burn. For example, bread may
burn after 3 minutes if a very high power level
is selected.
•To toast, only use the grill function and
supervise the oven at all times. If you are using
the combined function (microwave and grill) to
toast, the bread will go on fire in a very short
period of time.
•Always heat baby food in jars or bottles
without lids or teats. After heating the food,
shake or stir it well to ensure that the heat is
uniformly distributed. Check the temperature of
the food before giving it to the child, Burning
hazard!
In case of repair:
•¡Warning – Microwaves! The outer
protection should not be removed. Any
repair or maintenance carried out by persons
that have not been authorised by the
manufacturer is dangerous.
•Warning: The light bulb may only be replaced
by the Technical Support Service.
•If the power cable is damaged, only the
Technical Support Service may replace it with
one of the same characteristics, in order to
avoid damage.
•Repairs and maintenance, especially of
charged parts, may only be carried out by
technicians that have been authorised by the
manufacturer.

30
EN
Installation instructions
Use the “open” button to open the door and
remove all packaging materials. Then clean the
inside and the accessories with a damp cloth
and dry them. Do not use abrasive or strong-
smelling products.
Ensure that the following parts are in good
condition:
•Door and hinges
•Front of the microwave
•Inner and outer surfaces of the appliance
DO NOT USE THE APPLIANCE if you notice
any kind of defect in the aforementioned parts. If
this occurs, contact the After Sales Service.
Place the appliance on a stable, flat surface.
Fit the rotating base in the centre of the
microwave cavity and place the rotating plate on
top until it clicks into position. Whenever the
microwave is used, both the rotating plate and
the respective base must be inside the oven and
correctly positioned. The rotating plate turns
clockwise and anti-clockwise.
Warning! The microwave oven may be wrapped
in a protective film. Before switching it on for the
first time, carefully remove this film, starting at
the underside.
In order to ensure proper ventilation for the
appliance, install the microwave in a kitchen
unit with an opening on the top (see attached
sheets).
Warning: after installing the microwave, it is
necessary to guarantee access to the
electrical socket.
During installation, ensure that the power
cable does not come into contact with the
back of the appliance, because the high
temperatures may damage the cable.
If you are installing a microwave and a
conventional oven in the same column, the
microwave must not be placed under the
oven, because of the formation of
condensation.
The appliance must not be placed in the vicinity
of heating elements, radios or television sets.
The appliance is equipped with a power cable
and a plug for single phase current.
WARNING: The microwave MUST ONLY BE
CONNECTED TO GROUNDED ELECTRICAL
SOCKETS.
In case of fault, the manufacturer and the seller
will not accept any responsibility if the
installation instructions have not been properly
followed.
Description of the appliance

31
EN
Description of the appliance
1. Glass window on the door 6. Open button
2. Catch 7. Slot for rotating base
3. Quartz grill 8. Rotating base
4. Mica covers 9. Turntable support
5. Control panel 10. Rotating plate
11. Grill
Setting the clock
1. Press the CLOCK button until the numbers start to flash.
2. Enter the time value by turning the ROTATING BUTTON, in any
direction.
3. Press the CLOCK button again to set the minutes.
4. Enter the minute’s value by turning the ROTATING BUTTON, in
any direction.
5. To finish, press the CLOCK button again.

32
EN
Advantages of the microwave oven
In a conventional cooker, the heat that is radiated
through the resistances or gas burners slowly
penetrates the foods from the outside in.
Therefore, there is a great loss of energy in
heating the air, the oven components and the
containers holding the food.
In the microwave, the heat is generated by the
foods themselves, i.e. the heat goes from the
inside out. There is no loss of heat to the air, the
walls of the cavity or the containers (as long as
they are microwave-safe containers). This means
that only the food is heated.
To sum up, microwave ovens have the following
advantages:
1. Savings in cooking time; in general, there is a
¾ reduction in time compared to conventional
cooking.
2. Ultra fast defrosting of foods, thus reducing the
danger of bacteria developing.
3. Energy-saving.
4. Conservation of the nutritional value of foods
due to the reduction in cooking time.
5. Easy cleaning.
Microwave oven operating mode
The microwave oven contains a high voltage
valve called a Magnetron, which converts the
electrical energy into microwave energy. These
electromagnetic waves are channelled towards
the inside of the oven by a wave guide and
distributed using a metallic disperser or a rotating
plate.
Inside the oven, the microwaves are propagated
in all directions and reflected by the metallic walls,
thus uniformly penetrating the foods.
Why the food is heated
Most foods contain water and the water
molecules vibrate with the microwaves.
The friction between the molecules generates
heat, which raises the temperature of the foods,
defrosting or cooking them or keeping them hot.
Because heat is formed inside the foods:
•The foods may be cooked without any liquids
or oils, or with very little of these;
•Defrosting, heating or cooking in the
microwave oven is faster than in a conventional
oven;
•The vitamins, minerals and nutritious
substances are conserved;
•Neither the natural colour nor the aroma are
altered.
The microwaves go through porcelain, glass,
cardboard or plastic, but not trough metal. For this
reason, metallic containers or containers with
metallic parts should not be used in the
microwave oven.
Microwaves are reflected by metal...
... they go through glass and porcelain...
... and are absorbed by the foods.

33
EN
Instructions for use
Warning! Never use the microwave when it is empty, i.e. when it
does not contain any food.
To operate the microwave, proceed as follows:
1. Plug the appliance into an appropriate electrical socket (see tips
on the last page).
2. To open the door, press the OPEN BUTTON. The inside lighting
of the microwave comes on.
3. Place the container with the food on the plate or on the grille.
4. Select the function and the cooking time, according to the
description contained in the following sections.
5. Close the door and press the start button.
6. The microwave starts to function. The screen shows the
operating time that is left.
IMPORTANT NOTE
The keys on the panel light up to assist you in setting the microwave. At any point in the setting process,
only the buttons that may be enabled will be lit up in green. When a function is selected, the
corresponding button lights up in red.
Function: Microwave
1. Press the MICROWAVE button. The button indicator lights up. It
stays on for the duration of the cooking time.
2. Enter the operating time (e.g., 10 minutes) with the help of the
ROTATING BUTTON, turning it in any direction.
3. To change the power of the microwave, press the “–” and
“+”buttons. If the buttons are not pressed, the appliance
functions at the maximum power. The screen shows the power
level selected (“P 01” – “P 05”). See the section on “Technical
Characteristics”.
4. Press the START button. The microwave starts to function.

34
EN
Instructions for use
Function: Grill
1. Press the grill button. The button indicator lights up.
2. Enter the operating time (for example, 10 minutes) with the help
of the ROTATING BUTTON, by turning it in any direction.
3. Press the START button. The microwave starts to function.
Function: Microwave + Grill
1. Press the MICROWAVE + GRILL button. The button indicator
lights up.
2. Enter the operating time (e.g., 10 minutes) with the help of the
ROTATING BUTTON, turning it in any direction.
3. To change the power of the microwave, press the “–” and “+”
buttons. If the buttons are not pressed, the appliance functions
at the maximum power. The screen shows the power level
selected (P 01 - P 05). See the section on “Technical
Characteristics”.
4. Press the START button. The microwave starts to function.
Function: Defrosting by weight (automatic)
1. Press the button DEFROSTING. The button indicator lights up.
2. Use the “–” and “+” buttons to indicate the type of food (see the
following list). If you do not indicate any type of food, the
appliance will function on default programme 1 (meat).
3. Indicate the weight of the food (e.g. 1.2 kg) using the
ROTATING BUTTON, by turning it in any direction.
4. Press the START button. The microwave starts to function.
5. When the oven stops and starts to beep, move or turn the foods.
To continue, close the door of the microwave and press the start
button, to continue the defrosting process.
The following table shows the programmes for the defrosting by weight function, indicating the weight
ranges, defrosting and resting times (to ensure that the food reaches a uniform temperature).
Programme
Food
Weight
Time
Resting time
Pr 1 Meat 0.1 – 1.5 kg 4 – 45 min 20 – 30 min
Pr 2 Poultry 0.1 – 1.5 kg 4 – 50 min 20 – 30 min
Pr 3 Fish 0.1 – 1.5 kg 4 – 45 min 20 – 30 min
Pr 4 Fruit 0.2 – 0.5 kg 2 – 13 min 5 – 10 min
Pr 5 Bread 0.1 – 0.8 kg 2 – 19 min 5 – 10 min

35
EN
Instructions for use
Function: Defrosting by time (manual)
1. Press the DEFROST button twice. The button indicator lights up.
2. Indicate the defrosting time (for example, 10 min.) using the
ROTATING BUTTON, turning it in any direction.
3. Press the START button. The microwave starts to function.
4. When the oven stops and starts to beep, move or turn the foods. To
continue, close the door of the microwave and press the start button,
to continue the defrosting process.
Special functions: DRINKS
1. Place the drink (150ml to 30ml of coffee, tea, water or milk etc.) in a
heatproof container on the tray.
2. Press the special function DRINKS button. The button indicator
lights up.
3. The time of this function may be increased in intervals of thirty
seconds by successively pressing the special function button
DRINKS. This may also be performed by turning the ROTATING
BUTTON, in any direction.
4. Press the START button. The microwave starts to function.
Special functions: PIZZA
1. Sprinkle a little flour on the tray and place the pizza directly on it.
2. Press the special function PIZZA button. The button indicator lights
up.
3. Press the START button. The microwave starts to function.
4. At the end, there is a wait period of two minutes during which the oven
will continue operation and the button function will flash special
function button PIZZA.
Special functions: CHICKEN
1. Cut up the chicken (400 to 500 g) and place it in a heatproof dish on
the tray. Add oil, spices, salt and other ingredients that are considered
necessary.
2. Press the special function CHICKEN button. The button indicator
lights up.
3. Press the START button. The microwave starts to function.
4. The Total preparation time is thirty minutes divided into four periods of
seven and half minutes. At the end of each of the first three periods,
the oven will switch itself off and beep. Turn the pieces of chicken
over and press the START button in order to continue cooking.
5. At the end, there is a wait period, during which the oven will continue
operation and the button function will flash special function button
CHICKEN.

36
EN
Programming the microwave
The normal functions (microwave, grill, microwave
+ grill, defrosting by weight and defrosting by time)
may be programmed one after each other, up to a
maximum of 3 functions.
For example, to defrost 800 g. of meat, cook it for
10 minutes at power 4 of the microwave function
and then for 8 minutes at power 3 of the
microwave+ grill, proceed as follows:
1. Press the DEFROST button. The button
indicator lights up.
2. The type of food Meat (Type 1) is already
enabled.
3. Use the ROTATING BUTTON to indicate the
weight of the food (0.8 kg).
4. Press the CLOCK/PROGRAMME button and
select the next function.
5. Press the MICROWAVE button. The button
indicator lights up.
6. Use the ROTATING BUTTON to indicate the
desired cooking time (10 min).
7. Press the “–” button to select the microwave at
power 4.
8. Press the CLOCK/PROGRAMME button and
select the following programme.
9. Press the MICROWAVE + GRILL button. The
button indicator lights up.
10. Use the ROTATING BUTTON to indicate
the desired cooking time (8 min).
11. Press the “–” button twice, to set the
microwave to power 3.
12. Press the start button. The microwave
starts to function.
13. The appliance beeps when it goes from
one function (defrosting) to another
(microwave or grill).
14. When the microwave beeps, open the door
and turn the food around. Close the door
again and press the start button.
Safety lock
1. It is possible to block functioning of the appliance (for example,
to prevent it being used by children); to do so, press the STOP
button for 3 seconds. The microwave will beep and the
appliance will be locked. The screen will display four lines and
oven operation will be blocked.
2. The clock may be displayed at any time by pressing the START
button.
3. In order to unlock the microwave, press the START button for 3
seconds. The microwave will beep and the screen will display
the clock again.

37
EN
During operation...
During the cooking process, you may open the
door at any moment, as:
•THE PRODUCTION OF MICROWAVES IS
IMMEDIATELY INTERRUPTED.
•The grill is deactivated and remains at a high
temperature.
•The timer stops and the screen shows the
operating time that is left.
If you wish, you may:
1. Turn around or move the foods to ensure
uniform cooking.
2. Change the power of the microwave, using
the “–” and “+” buttons.
3. Select another function, using the function
buttons.
4. Adjust the operating time that is left, by using
the ROTATING BUTTON.
Close the door again and press the start button.
The appliance will start to function again.
Function interruption
To interrupt the programme, press the STOP
button or open the door of the appliance.
If you wish to cancel the cooking process, close
the door again and press the STOP button. The
oven will beep and the screen will display the
time.
End of programme
When the programme is finished, the microwave
beeps 3 times and the screen displays “End”.
The beeps are repeated every 30 seconds, until
the door is opened or the “STOP” button is
pressed.
Energy Saving
This microwave oven has a special energy
saving mode which is automatically activated at
the end of a ten-minute period of inactivity.
In the energy saving mode, all keys are switched
off and the Display only show two dots which
flash every ten seconds.
The clock may be displayed at any time by
pressing the START key.
The energy saving mode is immediately
deactivated when a function key is pressed.

38
EN
Defrosting
The following table is a general guideline for the
various defrosting and resting times required (to
guarantee that the food reaches a uniform
temperature) according to the type and weight of
the foods. It also contains the respective
recommendations for defrosting different foods.
Food Weight (g)
Defrosting Time
(min) Resting time (min) Comment
Pieces of meat, veal,
beef, pork 100 3-4 5-10 Turn around 1 x
200 6-7 5-10 Turn around 1 x
500 14-15 10-15 Turn around 2 x
700 20-21 20-25 Turn around 2 x
1000 29-30 25-30 Turn around 3 x
1500 42-45 30-35 Turn around 3 x
Stewed meat 500 12-14 10-15 Turn around 2 x
1000 24-25 25-30 Turn around 3 x
Minced meat 100 4-5 5-6 Turn around 1 x
300 8-9 8-10 Turn around 2 x
500 12-14 15-20 Turn around 2 x
Sausage 125 3-4 5-10 Turn around 1 x
250 8-9 5-10 Turn around 1 x
500 15-16 10-15 Turn around 1 x
Poultry, poultry parts 200 7-8 5-10 Turn around 1 x
500 17-18 10-15 Turn around 2 x
Chicken 1000 34-35 15-20 Turn around 2 x
1200 39-40 15-20 Turn around 2 x
1500 48-50 15-20 Turn around 2 x
Fish 100 3-4 5-10 Turn around 1 x
200 6-7 5-10 Turn around 1 x
Trout 200 6-7 5-10 Turn around 1 x
Shrimps 100 3-4 5-10 Turn around 1 x
500 12-15 10-15 Turn around 2 x
Fruit 200 4-5 5-8 Turn around 1 x
300 8-9 10-15 Turn around 2 x
500 12-14 15-20 Turn around 3 x
Bread 100 2-3 2-3 Turn around 1 x
200 4-5 5-6 Turn around 1 x
500 10-12 8-10 Turn around 2 x
800 15-18 15-20 Turn around 2 x
Butter 250 8-10 10-15 Turn around 1 x, keep
covered
Cottage cheese 250 6-8 5-10 Turn around 1 x, keep
covered
Cream 250 7-8 10-15 Remove the lid

39
EN
Defrosting
General tips for defrosting
1. Only use microwave-safe dishes for defrosting
(porcelain, glass, suitable plastic).
2. The defrosting by weight function and the
tables refer to defrosting of raw foods.
3. The defrosting time depends on the quantity
and the height of the food. When freezing
foods, prepare for the defrosting process.
Distribute the food in parts that match the size
of the container.
4. Distribute the food as well as possible inside
the microwave. The thickest parts of the fish or
the chicken legs should be placed on top. The
most delicate parts may be protected using
aluminium foil. Important: the aluminium foil
should not come in contact with the walls of the
cavity, as this could cause an electrical arch.
5. The most dense parts should be turned around
several times.
6. Distribute the frozen food in the most uniform
manner possible, because the thin, narrow
parts defrost fast than the thickest parts at the
top.
7. Foods that are rich in fats, such as butter,
cottage cheese and cream, should not be
entirely defrosted. If they are at room
temperature, they will be ready to serve within
a few minutes. In the case of deep-frozen
cream, if there are little bits of ice, the cream
should be whipped before eating.
8. Place poultry on a turn over plate so that the
juices may drain more easily.
9. Bread should be wrapped in a napkin so that it
does not get too dry.
10. Remove frozen foods from its packaging and
do not forget to remove any metal clips. If the
containers that are used to keep the foods in
the freezer may also be used for heating and
cooking, just remove the lid. Otherwise, place
the foods in containers that are suitable for
microwave ovens.
11. The liquid that results in the defrosting
process, particularly in the case of poultry,
should be discarded and under no
circumstances should it come in contact with
other foods.
12. Bear in mind that a resting period is required
in automatic defrosting function, so that the
food is totally defrosted. This normally takes
between 15 to 20 minutes.

40
EN
Cooking with microwaves
Before using a container, check if it is suitable for
using in a microwave oven (see: “What kind of
containers may be used?”).
Cut the food before starting to prepare it.
When heating liquids, use containers with a large
neck, so that the steam may evaporate easily.
Prepare foods according to the tips and pay
attention to the cooking times and power levels
indicated in the tables.
Remember that the values given are merely a
guideline and that they may vary depending on
the initial state, temperature, humidity and type of
food. We recommend that the times and power
levels be adjusted to each situation. Depending
on the food, the cooking time should be extended
or shortened and the power level should be raised
or reduced.
Cooking with microwaves...
1. The greater the quantity of food, the longer the
cooking time. Remember the following rules:
•Double the quantity - double the time
•Half the quantity – half the time
2. The lower the temperature, the longer the
cooking time.
3. Liquid foods heat faster.
4. Proper distribution of the food on the rotating
plate facilitates uniform cooking. If the solid
foods are placed on the outer part of the plate
and the least solid in the middle of the plate, it
will be possible to heat different kinds of food at
the same time.
5. The door of the appliance may be opened at
any time. The appliance is automatically
switched off. The microwave only continues to
function if the door is closed.
6. Foods that are covered require less cooking
time and their characteristics are better
preserved. The lid must allow the microwaves
to pass through and should have little openings
to allow the steam to come out
.

41
EN
Cooking with microwaves
Important tips!
•Eggs with shells and whole eggs should not be
heated in microwave ovens as they may
explode.
•Before heating or cooking foods with shells or
skin (e.g., apples, tomatoes, potatoes,
sausages) prick them with a fork so that they
do not open up.
•When foods are prepared with very little
humidity (e.g. defrosting bread, making
popcorn, etc.), the humidity evaporates very
fast. The appliance then functions with a
vacuum and the food may be carbonised. This
situation may cause damage to the appliance
and to the container being used. Therefore, the
oven should be set only for the necessary time
and the cooking process should be supervised.
•It is not possible to heat large quantities of oil
(fry) in the microwave.
•Do not heat liquids in airtight containers.
Explosion hazard!
•Alcoholic drinks may not be heated to high
temperatures. Therefore, the oven should be
set only for the necessary time and the cooking
process should be supervised.
•Do not heat any kind of explosive material or
liquid in the microwave.
•Remove precooked foods from the
packaging, because the latter is not always
heat-resistant. Follow the manufacturer’s
instructions.
•If there are various different containers,
such as cups for example, place them
uniformly on the rotating plate.
•Always heat baby bottles or jars of baby food
without lids or teats. After heating, shake or stir
it well to ensure that the heat is uniformly
distributed. The temperature of the containers
is considerably lower than that of the heated
food. Check the temperature of the food before
giving it to the child, to avoid burns.
•Plastic bags should not be closed with metal
clips, but with plastic ones. The bag should be
perforated several times so that the steam may
come out easily.
•When heating or cooking foods, ensure that
they reach a minimum temperature of 70°C.
•During the cooking process, water vapour
may form on the glass window of the door and
may drip down after a time. This is a normal
situation and may even be significant if the
room temperature is low. This does not
represent a hazard for the safety of the
appliance. After cooking, clean the water
resulting from the condensation.

42
EN
Cooking with microwaves
Tables and suggestions – Cooking vegetables
Food Quantity (g) Added liquid
Power
(Watt) Program
Time
(min.)
Resting time
(min.) Tips
Cauliflower
Broccoli
Mushrooms
500
300
250
1/8 l
1/8 l
-
800
800
800
P 05
P 05
P 05
9-11
6-8
6-8
2-3
2-3
2-3
Spread some
butter on top.
Cut in slices.
Peas &
carrots, frozen
carrots
300
250
½ cup
2-3 soup-
spoonfuls
800
800
P 05
P 05
7-9
8-10
2-3
2-3
Cut in cubes
or slices.
Potatoes 250 2-3 soup-
spoonfuls 800 P 05 5-7 2-3
Peel, cut in
equal-
sized
parts.
Peppers
Leeks
250
250
-
½ cup
800
800
P 05
P 05
5-7
5-7
2-3
2-3
Cut in pieces
or slices.
Frozen
Brussels
sprouts
300 ½ cup 800 P 05 6-8 2-3
Cabbage 250 ½ cup 800 P 05 8-10 2-3
Tables and suggestions – Cooking fish
Food Quantity (g)
Power
(Watt) Program
Time
(min.)
Resting
time (min.)
Tips
Fillets of fish 500 640 P 04 10-12 3
Cook with the lid on. Turn
them around when half the
time has elapsed.
Whole fish 800 800
480
P 05
P 03
3-5
10-12
2-3
Cook with the lid on. Turn
them around when half the
time has elapsed. It may be
ne
cessary to cover the ends
of the fish.

43
EN
Cooking with Grill
In order to get the best results from the grill, use
the grille that is supplied along with the appliance.
Place the grille in such a position so that it
does not come into contact with the metallic
surfaces of the cavity, as there is the danger
of an electrical arch being formed, which
could damage the appliance.
IMPORTANT TIPS:
1. When the microwave is being used for the first
time, it produces some smoke and a smell,
which occur because of the use of oils during
the manufacture process.
2. After the grill has been used for the first time, it
is normal that the area with the holes that
protects the grill resistances should start to
deform slightly and turn a golden colour, due to
the high temperatures.
3. The glass in the door reaches very high
temperatures while the grill is being used. In
order that the appliance be out of reach of
children, it should be situated at a minimum
height of 80 cm.
4. While the grill is operating, the walls of the
cavity and the grille reach very high temperatures.
The use of oven gloves is recommended.
5. During a longer use of the grill, it is normal for
the resistances to switch off on a temporary
basis, due to the safety thermostat.
6. Important: when the food is grilled or cooked in
containers, it is important to check if the
container is suitable or not. See the table on
the types of dishes!
7. When using the grill, the splashes of grease
may reach the resistance and be burned. This
is a normal situation and does not represent
any operating fault.
8. After each cooking process, clean the inside
and the accessories, to prevent the dirt from
sticking.

44
EN
Cooking with Grill
Tables and suggestions – Grill without microwave
Food
Quantity (g)
Time (min.)
Tips
Fish
Dorada
Sardine/red scorpion fish
800
6-8 pcs
18-24
15-20
Spread a light layer of butter on the fish.
When half the time has elapsed, turn them
around and sprinkle condiments.
Meat
Sausage 6-8 pcs 22-26
Prick with a fork half way through the
cooking process and turn them around.
Frozen hamburger 3 pcs 18-20
Entrecote (approx. 3 cm thick) 400 25-30
Half way through the process, spread a little
oil or butter on it and turn it around.
Others
Toast 4 pcs 1½-3 Supervise the browning process.
Grilled sandwiches 2 pcs 5-10 Supervise the browning process.
Heat the grill for 2 minutes before use. If there is
no reason not to do so, use the grille. The times
that are indicated are merely indicative and they
may vary depending on the composition and the
quantity of food, as well as on the desired results.
Fish and meat will taste best if they are coated in
a little vegetable oil, herbs and spices and left to
marinade for a few hours before being grilled. The
salt should only be added after cooking on the
grill.
Sausages will not open if they are picked with a
fork before being grilled.
Half way through the grill process, supervise the
cooking and if necessary, turn the food around or
add a little more oil.
The grill is particularly suitable for preparing thin
pieces of meat and fish. Thin pieces of meat need
only be turned once, while larger pieces will need
to be turned several times. In the case of fish, we
recommend that the two ends of the fish be joined
together, the mouth and the tail before placing on
the grill.
Table of contents
Other Teka Microwave Oven manuals

Teka
Teka MM 20 AG User manual

Teka
Teka MGE 201 WS User manual

Teka
Teka MS 622 BIS User manual

Teka
Teka MWR 22 BI User manual

Teka
Teka MCX 45 BIT User manual

Teka
Teka MWX 45 BIS User manual

Teka
Teka ML 825 TFL User manual

Teka
Teka TMW 18 BIG User manual

Teka
Teka MWE 225 G User manual

Teka
Teka MWE 207 FI User manual

Teka
Teka ML 822 BIS User manual

Teka
Teka MWE 210 G User manual

Teka
Teka MCX 45 BIT User manual

Teka
Teka MLH 845 SS User manual

Teka
Teka MWL 20 BIT User manual

Teka
Teka MWL 22 EGR User manual

Teka
Teka MWE 225 FI User manual

Teka
Teka MWE 202 FI User manual

Teka
Teka TMW 18 HG User manual

Teka
Teka MG 209 WS User manual