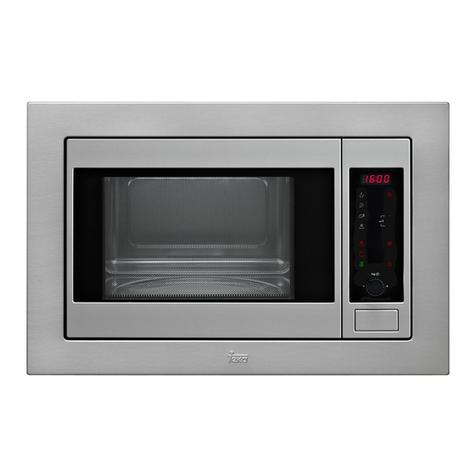
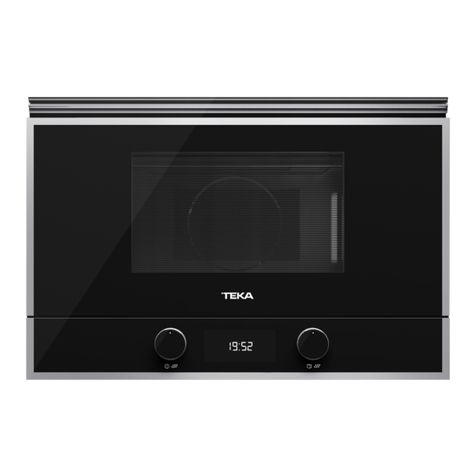
Teka MLH 845 SS User manual

User Manual
www.teka.com
MLH 845 SS
EN ES

PRECAUTIONS TO AVOID POSSIBLE
EXPOSURE TO EXCESSIVE MICROWAVE
ENERGY
(a) Do not attempt to operate this oven with the door open since
operation can result in harmful exposure to microwave energy.
It is important not to defeat or tamper with the safety interlocks.
(b) Do not place any object between the oven front face and the door or allows soil or
cleaner residue to accumulate on sealing surfaces.
(c) Do not operate the oven if it is damaged. It is particular important that
the oven door close properly and that there is no damage to the:
(1) DOOR (bent)
(2) HINGES AND LATCHES (broken or loosened)
(3) DOOR SEALS AND SEALING SURFACE
(d) The oven should not be adjusted or repaired by anyone except properly
qualified service personnel.
open door
S
ly
Specifications
Model:
Rated Voltage:
Rated Input Power(Microwave):
Rated Output Power(Microwave):
Oven Capacity:
Turntable Diameter:
External Dimensions:
Net Weight:
42 L
3
Rated Input Power(Convection):
MLH 845 SS
120V~60Hz
1500W
Approx.
1450W
45mm
29 kg
900W
759X382X417mm
EN-2

WARNING -
1. Read all instructions before using the
appliance.
2. Read and follow the specific:
EXCESSIVE MICROWAVE ENERGY"
found on page 2.
combustible materials are placed inside the oven to facilitate cooking.
only to properly grounded outlet. See
found on page
accordance with the provided installation
instructions.
To reduce the risk of burns, electric shock, fire, injury to persons or exposure
to excessive microwave energy:
3. This appliance must be grounded. Connect
"PRECAUTIONS TO AVOID POSSIBLE EXPOSURE TO
"GROUNDING INSTRUCTIONS"
4. Install or locate this appliance only in
5. Some products such as whole eggs and sealed containers - for example, closed glass
jars - are able to explode and should not be heated in this oven.
6. Use this appliance only for its intended use as described in the manual. Do not use
corrosive chemicals or vapors in this appliance. This type of oven is specifically
designed to heat, cook or dry food. It is not designed for industrial or laboratory use.
supervision is necessary when used
by children.
7. As with any appliance, close
damaged cord or plug, if it is not
working
properly, or if it has been
damaged or dropped.
8. Do not operate this appliance if it has a
by qualified service personnel.
Contact nearest
authorized service
facility for examination, repair, or
adjustment.
9. This appliance should be serviced only
10. Do not cover or block any openings on the appliance.
11. Do not store this appliance outdoors. Do not use this product near water - for
example,
near a kitchen sink, in a wet
basement, near a swimming pool, or
similar location.
1 . Do not immerse cord or plug in water.2
1 . Keep cord away from heated surface.
14. Do not let cord hang over edge of
table or counter.
3
15. When cleaning surfaces of door and oven that comes together on closing the door,
16. To reduce the risk of fire in the oven cavity:
1). Do not overcook food. Carefully attend appliance when paper, plastic, or other
2). Remove wire twist-ties from paper or plastic bag before placing bag in oven.
3). If material inside of the oven ignite, keep oven door closed, turn oven off, and
disconnect the power cord, shut off power at the fuse or circuit breaker panel.
4). Do not use the cavity for storage purposes. Do not leave paper products, cooking
utensils, or food in the cavity when not in use.
point without appearing to be boiling. Visible bubbling or boiling when the container is
removed from the microwave oven is not always present.
17. Liquids, such as water, coffee, or tea are able to be overheated beyond the boiling
IMPORTANT SAFETY INSTRUCTIONS
precautions should be followed, including
When using electrical appliances basic safety
following:the
use only mild, nonabrasive soaps, or detergent applied with a sponge or soft cloth.
or
4.
EN-3

stand in the microwave oven for a short time
before removing the container. spoon or other utensil into the container.
This appliance must be grounded. In the event of an electrical short circuit, grounding
of electric shock by providing an escape wire for the
appliance is equipped with a cord having a
plugged into an outlet that is properly installed and grounded.
GROUNDING INSTRUCTIONS
THIS COULD RESULT IN VERY HOT LIQUID SUDDENLY BOILING OVER WHEN
THE CONTAINER IS DISTURBED OR A UTENSIL IS INSERTED INTO THE LIQUID.
To reduce the risk of injury to persons:
1) Do not overheat the liquid.
2) Stir the liquid both before and halfway through heating it.
3) Do not use straight-sided containers with narrow necks.
4) After heating, allow the container to
5) Use extreme care when inserting a
grounding wire with a grounding plug.
reduces the risk electric current. This
The plug
SA E THESE INSTRUCTIONS
must be
V
toaster oven as they may create a fire or risk of electric shock.
electrical parts involving arisk of electric shock.
24. Do not use paper products when appliance is operated in the toaster mode.
25. Do not store any materials, other than manufacturer's recommended accessories, in
this oven when not in use.
26. Do not cover racks or any other part of the oven with metal foil. This will cause over-
heating of the oven.
on top of the appliance surface when the appliance is in
20. Do not mount over sink.
21. Do not store anything directly
operation.
22. Oversized food or oversized metal utensils should not be inserted in a microwave/
23. Do not clean with metal scouring pads. Pieces can burn off the pad and touch
ease should not be allowed to accumulate on
hood or filter.
Corrosive cleaning agents, such as lye-based
oven cleaners, may damage the filter
r use above both gas and electric cooking equipment.
27. Clean Ventilation Hoods Frequently - Gr
28. When flaming foods under the hood, turn the fan on.
29. Use care when cleaning the vent-hood filter.
30. Suitable fo
operate any heating or cooking appliance beneath the appliance.18. Do not
19. Do not mount unit over or near any portion of heating or cooking appliance.
(Exception: A microwave oven investigated for use above another heating appliance.)
EN-4

1. Operation of the microwave oven may cause interference to your radio, TV
or similar
2. When there is interference, it may be reduced or eliminated by taking the
following
1) Clean door and sealing surface of the oven
2) Reorient the receiving antenna of radio or television.
3) Relocate the microwave oven with respect to the receiver.
4) Move the microwave oven away from the receiver.
5) Plug the microwave oven into a different outlet so that microwave oven
are on different branch circuits.
RADIO INTERFERENCE
equipment.
measures:
and receiver
1. A short power supply cord is provided to reduce the risks resulting from becoming
entangled in or tripping over a longer cord.
2. Longer cord sets or extension cords are available and may be used if care is exercised
in their use.
3. If a long cord or extension cord is used:
1) The marked electrical rating of the cord set or extension cord should be at least as
great as the electrical rating of the appliance.
2) The extension cord must be a grounding-type 3-wire cord.
3) The longer cord should be arranged so that it will not drape over the counter top or
tabletop where it can be pulled on by children or tripped over unintentionally.
-
WARNING - Improper use of the grounding can result in a risk of electric shock.
Consult a qualified electrician or serviceman if the grounding instructions are not
completely or if doubt exists as to whether the appliance is properly grounded.
extension cord, use only a 3-wire extension cord that has a
The marked rating of the extension cord shall be equal to or greater than the electrical
appliance.
understood,
If it is necessary to use an
3-blade grounded plug, and 3-slot receptacle that will accept the plug on the appliance.
rating of the
Electric Shock Hazard
Touching some of the internal components can cause serious personal injury or death.
disassemble this appliance.
DANGER -
Do not
Electric Shock Hazard
Improper use of the grounding can result in electric shock. Do not plug into an outlet until
appliance is properly installed and grounded.
WARNING -
EN-5

Personal Injury Hazard
Tightly-closed utensils could explode. Closed containers should be opened and plastic
pierced before cooking.
Utensil Test:
1. Fill a microwave-safe container with 1 cup of cold
water (250ml) along with the
2. Cook on maximum power for 1 minute.
3. Carefully feel the utensil. If the empty utensil is
warm, do not use it for microwave
4. Do not exceed 1 minute cooking time.
UTENSILS
See the instructions on "Materials you can use in microwave oven or to be avoided in
There may be certain non-metallic utensils that are not safe to use for microwaving. If
utensil in question following the procedure below.
CAUTION -
pouches should be
microwave oven."
in doubt, you can test the
utensil in question.
cooking.
Materials you can use in microwave oven
Utensils Remarks
Follow manufacturer* instructions. The bottom of browning dish must be
at least 3/16 inch (5mm) above the turntable. Incorrect usage may cause
the turntable to break.
Microwave-safe only. Follow manufacturer's instructions. Do not use
cracked or chipped dishes.
Always remove lid. Use only to heat food until just warm. Most glass jars
are not heat resistant and may break.
Heat-resistant oven glassware only. Make sure there is no metallic trim.
Do not use cracked or chipped dishes.
Follow manufacturer* instructions. Do not close with metal tie. Make
slits to allow steam to escape.
Use for short*erm cooking/warming only. Do not leave oven unattended
while cooking.
Use to cover food for reheating and absorbing fat. Use with supervision
for a short-term cooking only.
Use as a cover to prevent splattering or a wrap for steaming.
Browning dish
Glass jars
Glassware
Oven cooking
bags
Paper plates
and cups
Paper towels
Parchment
paper
Dinnerware
EN-6

Materials you can use in microwave oven
Utensils Remarks
Microwave-safe only. Follow the manufacturer* instructions. Should be
labeled "Microwave Safe". Some plastic containers soften, as the food
inside gets hot. "Boiling bags" and tightly closed plastic bags should be
slit, pierced or vented as directed by package.
Microwave-safe only. Use to cover food during cooking to retain
moisture. Do not allow plastic wrap to touch food.
Thermometers Microwave-safe only (meat and candy thermometers).
Wax paper Use as a cover to prevent splattering and retain moisture.
Plastic
Plastic wrap
Materials to be avoided in microwave oven
Utensils Remarks
Aluminum tray
Food carton with
metal handle
Metal or metal-
trimmed utensils
Metal twist ties
Paper bags
Plastic foam
Wood
Metal shields the food from microwave energy. Metal trim may
cause arcing.
May cause a fire in the oven.
Plastic foam may melt or contaminate the liquid inside when exposed
to high temperature.
Wood will dry out when used in the microwave oven and may split
or crack.
May cause arcing. Transfer food into microwave-safe dish.
May cause arcing and could cause a fire in the oven.
EN-7

1) Window
2) Interlock System
3) Door Assembly
4) Turntable Ring Assembly
5) Turntable Shaft
6) Turntable Glass Tray
7) Control Panel
8) Front Vent Grill
OPERATING INSTRUCTIONS
FEATURES OF YOUR
MICROWAVE
CONTROLS
BOTTOM VIEW
1) Surface Lights
2) Ventilation Filters
FRONT
REAR
2
1
1) Microwave
2) Convection
3) Combi
4) Auto Menu
Popcorn Potato Beverage Reheat
6) Defrost Weight
7) Power Level
8) Timer
10) Number Pads
11)
12) Light On/Off
13) Stop/Cancel
FRONT VIEW
1
2
3
4 5 6 7
8
5) Defrost Time
14) Start/ 30Sec.
9) Clock
1
11
2
3
4
5
6
7
8
9
12
13
14
:
, , ,
Exhaust Hi. o.Off
+
16) Wire rack
15) Shelf
15
16
L
EN-8
10

OPERATION
The input time should be within1:00-12:59.
Example: To set 12:12 .
1) Press the " CLOCK" once or twice to select AM or PM, and "A" or "P" will flash on screen
2) Press the number keys
3) Press " CLOCK" to finish clock setting. ":" will flash, and the time will light.
Note: If the clock is invalid, the buzzer will sound twice, and the screen will flash "A/P",
2. Kitchen Timer
1) Press " " , "0:00" is dispalyed.
2) Press the number keys to set the timing within the range of 99 minutes and 99 seconds.
For example:
set kitchen timer as 12 minutes and 12 seconds, please press "1,2,1,2" in turn.
3) Press "
When time counts to "0", the buzzer will sound and the screen displays "OFF". Please
Note: 1) Kitchen timer is a timer .
3. Microwave Cooking
Select different microwave power level and set cooking time as you wish. There are 10
power levels available for choosing. Keep on pressing " POWER .
Level
Power
Display
10
100%
PL10 PL9 PL8 PL7 PL6 PL5 PL4 PL3 PL2 PL1
9
90%
8
80%
7
70%
6
60%
5
50%
4
40%
3
30%
2
20%
1
10%
START/+30SEC. " to start cooking.
1.Clock Setting
Example: If you want to use 80% microwave power to cook for 10 minutes, you can
operate the oven as the following steps.
1) Press "
Press the number buttons "1","0","0","0" in order, the oven will display "10:00"
TIMER
for 1~2 seconds.Then "0:00" will flash on screen.
later display "0:00" .
TIMER" to confirm .
LEVEL" to choose the power
MICROWAVE " once.
2)
4) Press "
3) Press " POWER LEVEL " once.
"1","2","1","2" in order.
Use the number keys to enter power
in the display (80 % power).
level .
PL8 appears
2) During kitchen timer, any program cannot be set except exhaust ventilator and
surface light.
press " " or " " to stop reminding.
TIMER STOP/ CANCEL
EN-9

B. Convection Cooking(Without preheating function)
1) Press "CO
START/+30SEC." button to start cooking.
1) Press the " C" once, the oven will display "100F"
START/+30SEC." pad to start preheating.
START/+30SEC." button to start cooking.
There are ten temperatures of convection: 100 F,150 F,250 F,275 F,300 F,325 F,350 F,
375 F,400 F,425 F.
A. With preheating convection
ONVECTION
2) Press
Place the food in the oven and close the door. Press the number keys to set cooking time.
4. Convection Cooking
temperature key to select the temperature you need.Do not enter cook time now.
3) Press "
4)
5) Press the "
1) Press the " C" once, the oven will display "100F"
will light.
" to comfirm the temperature.
START/+30SEC." button to start cooking.
ONVECTION
2) Press
Press the number keys to set cooking time.
temperature key to select the temperature you need.
3) Press "
4)
5) Press the "
CONVECTION
5. Microwave+Convection Combination Cooking
MBI." once and the screen display "0:00".
Press the number keys to set cooking time.
2)
3) Press the "
1) Press " D
3) Press " START/+30SEC." button to start defrosting.
EFROST
0.1~6.0lb.
2) Press number keys to input weight to be defrosted. Input the weight ranged between
6. Defrost By Weight
WEIGHT" once, "0.0" will display .
1) Press " D
2) Press the number keys to set defrosting time.
3) Press " START/+30SEC.
" button to start defrosting.
EFROST
7. Defrost By Time
TIME" once, "0:00" will display.
7. Defrost By Time
will light.
o o o o o o o
o o o
Whenthe preheating temperature
arrives, the buzzer will sound twice to remind you to put the food into the oven.
And the preheated temperature is displayed and flashes.
(the maximum cooking time is 99 minutes and 99 seconds)
EN-10

If one of the stages is defrosting,then it
should be put in the first stage . The buzzer will ring once after each stage
next stage will begin.
Note: Auto menu cannot be set as one of the multi-stage.
Example: cooking with 80% microwave power for 5 minutes and then 50% microwave
power for 10 minutes. The steps are as follow:
1) Press "MICROWAVE" once;
2) Press number keys "5","0","0" to adjust the cooking time as you need;
START/ +30SEC. " to start cooking.
2) In waiting state, instant cooking at 100% power level with 30 seconds' cooking time can
be started by pressing "START/ +30SEC.". Each press on the same button will
increase
cooking time by 30 seconds. The maximum cooking time is 99 minutes and
1) Instant cooking at 100% power level can be started by selecting cooking
11. Speedy Cooking
time by pressing 1-3 pads
99 seconds.
Note: In microwave, convection or combination cooking , 30 seconds' cooking time can be
added by each pressing of " START/ +30 SEC." button, and it's invalid at the function of
weight defrost, time defrost , auto menu cooking and multi-stage cooking.
automatically
cooking and the
The exhaust ventilation moves steam and other cooking
o f the range below the microwave oven.
To operate the exhaust vent, Touch the
highest speed setting. Touch the pad again to choose the Low speed setting and a 3rd press
to turn the exhaust ventilation off.
pad once for the
" Exhaust HI.LO.OFF"
vapors from the cooking surface
8.Exhaust High/Low/Off
9.Surface Light/On/Off
once for a cooking surface light.
pad again to turn the light off.
Touch the pad
Press the
Press"3)
5) Press number keys "1","0","0","0" to adjust the cooking time as you need.
10.Multi-Stage Cooking
.
" "
Use the number keys to enter power
in the display (80 % power).
level .
" once.
POWER LEVEL
MICROWAVE" once;4) Press "
Press" " pad for 2nd stage.
POWER LEVEL
6) Use the number keys to enter power
level for the 2nd stage. PL5 appears in the display (50 % power).
PL8 appears
7) Press "
At most two stages of cooking can be set.
LIGHT ON. OFF
EN-11

1
Lock: In waiting state, press " STOP/ C " for 3 seconds,
Unlocking : In lock state, press " " for 3 seconds,
12. Auto Menu Cooking
1) In waiting state, press the button of "POPCORN", "POTATO", "BEVERAGE" or
"
2) Press "Start / +30SEC." to start cooking.
1
1) During cooking, press " " or " " to check the
responding power or convection temperature ;
2) During cooking, press "CLOCK" to check the current time, and the time will be displayed
for 3 seconds.
POWER LEVEL
to choose the function and weight of food as you need.
the Lock icon will appear in
the Lock icon will disappear
REHEAT"
3. Lock Function For Children
4. Inquiring function CONVECTION
Auto menu Chart
Menu Weight (Oz)
Popcorn
Beverage
Potato
1.75 Oz
3.00 Oz
3.50 Oz
1 portion
2 portions
3 portions
1 cup
2 cups
3 cups
8.0 Oz
16.0 Oz
4 portions
Reheat
24.0 Oz
Power
100%
100%
100%
100%
ANCEL
STOP/ CANCEL
along with 2 "beep" and return to waiting state.
the display window along with 2 "beep".
EN-12

To avoid risk of personal injury or property damage, do
not operate oven hood without filters properly in place.
Cleaning the exhaust filters
The oven ventilation exhaust filters should be removed and
cleaned often; generally at least once every month.
1. To remove the exhaust ventilation filters, slide the filter to
the rear. Then pull filter downward and push to the other
side. The filter will drop out. Repeat for the 2nd filter.
2. Soak the ventilation filters in hot water using a mild
detergent. Rinse well and shake to dry
Do not use ammonia. The aluminum
on the filter will corrode and darken.
3. To reinstall the exhaust ventilation filter, slide it into the
side slot, then push up and toward oven to lock.
Reinstall the 2nd filter using the same procedure.
Front
Rear
Surface lights
Ventilation
filters
Surface light replacement
To avoid risk of personal injury or property damage, wear
gloves when replacing the light bulbs.
1. Unplug the microwave oven or turn off power at the main
circuit breaker.
2. Remove the bulb cover mounting screws at both light
positions under the microwave.
3. Replace bulb with 30 watt appliance bulb.
4.
5. Plug the microwave back into the power supply or turn
the power back on at the main circuit breaker.
Re-install bulb cover and mounting screw.
CLEANING AND CARE
Disconnect the power cord before cleaning or
leave the door open to deactivate the oven during cleaning.
or wash in
a dishwasher.
EN-13

5HPRYHWKHYHQWJULOOPRXQWLQJVFUHZV
3XOOWKHYHQWJULOODZD\IURPWKHXQLW
5HPRYHWKHFKDUFRDOILOWHUE\SXVKLQJLWLQZDUGV
WKHQWXUQDQGSXOOLWDZD\IURPWKHXQLW
SXOOLQJXSRQWKHIURQWHGJH
HTXLYDOHQWZDWWEXOEDYDLODEOHIURPSDUWV
GLVWULEXWRU%XOEVDUHDOVRDYDLODEOHDWPRVW
KDUGZDUHVWRUHVRUOLJKWLQJFHQWHUV
1RWH'212786(%8/%/$5*(57+$1
:$776
FDUHIXOO\SXVKLQJLQWRSODFH5HSODFHWKH
FKDUFRDOILOWHU3XVKWKHYHQWJULOOEDFNLQWR
SODFHHQJDJLQJERWKWKHERWWRPDQGWRSWDEV
DQGUHSODFHWKHYHQWJULOOPRXWLQJVFUHZV
FDUHIXOO\
Charcoal Filter installed in your microwave oven, is used
for nonvented, recirculated installation. The filter should
be changed every 6 to 12 months depending on use.
1. Disconnect power to the microwave oven at the circuit
breaker panel or by unplugging.
Remove the per instructions 1-4 above and
charcoal filter, if used.
2SHQOLJKWFRYHUORFDWHGEHKLQGILOWHUPRXQWLQJE\
5HPRYHROGOLJKWEXOEDQGUHSODFHRQO\ZLWK
5HSODFHWKHPLFURZDYHRYHQOLJKWFRYHUE\
vent grill
Disconnect the power cord before cleaning or
leave the door open to deactivate the oven during cleaning.
Charcoal filter replacement Oven light replacement
CLEANING AND CARE
EN-14

For best performance and for safety reasons, keep the oven
clean inside and outside. Take special care to keep the
inner door panel and oven fron frame free of food and grease
build-up.
Never use rough scouring powder or pads on the
microwave. Wipe the microwave oven inside and out with a
soft cloth and and warm (not hot) mild detergent solution.
Then rinse and wipe completely dry.
Wipe spatters immediately with a wet paper towel,
especially after cooking greasy foods like chicken or bacon.
Clean your microwave oven weekly or more often, if needed.
Follow these instructions to clean and care for your
microwave oven:
Cleaning suggestions
Keep the inside (cavity) of the oven clean. Food particles
and spilled liquids can stick to the oven walls, causing
the oven to work less efficiently.
Wipe up spills immediately. Use a damp, clean cloth
and mild soap. DO NOT use harsh detergents or
abrasive cleaners.
To help loosen baked-on food particles or liquids, heat 2
cups of water (add the juice of 1 lemon if you desire to
keep the oven fresh smelling) in a 4 cup measuring glass
at High power for 5 minutes or until boiling. Let stand in
oven cavity for 1 or 2 minutes.
Remove the glass turntable tray from the oven when
cleaning the oven cavity or tray. To prevent the glass
turntable from breaking, handle with care and do not put
it in water immediately after cooking. Wash the turntable
tray in warm sudsy water or in the dishwasher.
Clean the outside surface of the microwave with soap
and a clean damp cloth. Dry with a clean soft cloth. To
prevent damage to the operating parts of the oven, do not
let water seep into any vents or openings.
Wash the oven door window with very mild soap and
water. Be sure to use a soft clean cloth to avoid
scratching.
If steam accumulates inside or outside the oven door,
wipe with a soft cloth. Steam can accumulate when
operating the oven in high humidity and in no way
indicates microwave leakage.
Never operate the oven without food in the oven cavity;
this can damage the magnetron tube or glass tray. You
may wish to leave a cup of water standing inside the oven
when it is not in use to prevent damage if the oven is
accidentally turned on.
CLEANING AND CARE
Disconnect the pow er cord before cleaning or
leave t he door open t o deactivat e t he oven during cleaning.
Some spatters can be removed with a paper towel, others
may require a damp cloth. Remove greasy spatters with a
sudsy cloth, then rinse with a damp cloth. Do not use
abrasive cleaners or sharp utensils on oven walls.
To clean the surface of the door and the surface of
the oven that come together upon closing, use only
mild, non-abrasive soaps or detergents using a
sponge or soft cloth. Rinse with a damp cloth and dry.
Never use a commercial oven cleaner on any part
of your microwave.
Removable Turntable and Turntable Support
To prevent breakage, do not place the turntable into water
just after cooking. Wash it carefully in warm, sudsy water
or in the dishwasher. The turntable and support can be
broken if dropped. Remember, do not operate the oven
without the turntable and support in place.
Do not use cleaners containing ammonia or alcohol
on the microwave oven. Ammonia or alcohol can
damage the appearance of the microwave.
Clean the outside of the microwave with a sudsy cloth.
Rinse with a damp cloth and then dry. Wipe the window
clean with a damp cloth.
How to Clean the Inside
How to Clean the Outside
Walls,Floor, Inside Widow, Metal and Plastic Patrs on the
Door.
Case
EN-15

Disconnect t he power cord before cleaning or
leave t he door op en t o deact ivat e t he oven during cleaning.
Wipe with a damp cloth. Dry thoroughly. Do not use cleaning
sprays, large amounts of soap and water, abrasives or sharp
objects on the panel—they can damage it. Some paper towels
can also scratch the control panel.
It is important to keep the area clean where the door seals
against the microwave. Use only mild, non-abrasive
detergents applied with a clean sponge or soft cloth. Rinse well.
If the cord becomes soiled, unplug and wash with a damp cloth.
For stubborn spots, sudsy water may be used, but be certain
to rinse with a damp cloth and dry thoroughly before plugging
cord into outlet.
To clean stainless steel surfaces, use a hot, damp cloth
with a mild detergent suitable for stainless steel surfaces.
Use a clean, hot,damp cloth to remove soap. Dry with a
dry, clean cloth.
If food soil remains, try a general kitchen cleaner, such as
Fantastik ®
, Simple Green®or Formula 409 ®
.
For hard-to-clean soil, use a standard stainless-steel
cleaner, such as Bon-Ami ®or Cameo ®.
Apply cleaner with a damp sponge. Use a clean, hot,
damp cloth to remove cleaner. Dry with a dry, clean cloth.
Always scrub lightly in the direction of the grain.
After cleaning, use a stainless-steel polish, such as
tainless Steel Magic ®
, Revere Copper and Stainless Steel
Cleaner ®or Wenol All Purpose Metal Polish®
. Follow the
product instructions for cleaning the stainless-steel surface.
Control Panel and Door
Door Surface
Power Cord
Stainless Steel
Do not use a steel-wool pad;it will scratch the surface.
CLEANING AND CARE
EN-16

Troubleshooting
Check your problem by using the chart below and try the solutions for each problem. If the
microwave oven still does not work properly, contact the nearest authorized service center.
TROUBLE
Oven will not start
POSSIBLE CAUSE POSSIBLE REMEDY
a. Electrical cord for oven is
not plugged in.
b. Door is open.
c. Wrong operation is set.
a. Plug into the outlet.
b. Close the door and try
again.
c. Check instructions.
Arcing or sparking
a. Materials to be avoided in
microwave oven were
used.
b. The oven is operated when
empty.
c. Spilled food remains in the
cavity.
a. Use microwave-safe
cookware only.
b. Do not operate with oven
empty.
c. Clean cavity with wet towel.
Unevenly cooked
foods
a. Materials to be avoided in
microwave oven were
used.
b. Food is not defrosted
completely.
c. Cooking time, power level
is not suit ble.
d. Food is not turned or stirred.
a. Use microwave-safe
cookware only.
b. Completely defrost food.
c. Use correct cooking time,
power level.
d. Turn or stir food.
Overcooked foods Cooking time, power level is
not suitable. Use correct cooking time,
power level.
Undercooked foods
a. Materials to be avoided in
microwave oven were used.
b. Food is not defrosted
completely.
c. Oven ventilation ports are
restricted.
d. Cooking time, power level is
not suitable.
a. Use microwave-safe
cookware only.
b. Completely defrost food.
c. Check to see that oven venti-
lation ports are not restricted.
d. Use correct cooking time,
power level.
Improper defrosting
a. Materials to be avoided in
microwave oven were used.
b. Cooking time, power level is
not suitable.
c. Food is not turned or stirred.
a. Use microwave-safe
cookware only.
b. Use correct cooking time,
power level.
c. Turn or stir food.
MAINTENANCE
a
EN-17

HORNO DE MICROONDAS DE CONVECCIÓN DE PARED
INSTRUCCIONES IMPORTANTES DE SEGURIDAD
Introducción
Felicitaciones por comprar un producto de alta calidad de Insignia. Su
representa el más moderno diseño de microondas y está diseñado para brindar un
rendimiento confiable y sin problemas.
Cuando utilice equipos electrodomésticos, debe de tener en cuenta ciertas precauciones
básicas que se detallen a continuación:
ADVERTENCIA: Para reducir el riesgo de quemaduras, choques eléctricos, incendios,
lesiones a personas o exposición excesiva a la energía de microondas:
1. Lea todas las instrucciones antes de usar el microondas.
2. Lea y siga las “
” en la página .
3. Este electrodoméstico debe conectarse a tierra. Conecte solamente a un
tomacorriente con conexión a tierra. Refiérase a “Instrucciones de conexión a tierra”
en la página 4.
4. Instale o coloque este aparato solamente de acuerdo con las instrucciones de
instalación.
5. Algunos productos, como los huevos enteros y recipientes sellados (por ejemplo
frascos de vidrio cerrados), pueden explotar y no se deben calentar en este
microondas.
6. Utilice este microondas sólo para la finalidad prevista, como se describe en el manual.
No utilice productos químicos o vapores corrosivos en este electrodoméstico. Este
tipo de horno está diseñado específicamente para calentar, cocinar o secar alimentos.
No está diseñado para uso industrial o de laboratorio.
7. Al igual que con cualquier electrodoméstico, es necesario una estrecha supervisión al
ser utilizado por niños.
8. No opere este electrodoméstico si tiene un cable o enchufe dañado, si no funciona
correctamente o si se ha dañado o se ha caído.
9. Este microondas debe recibir servicio únicamente por personal de servicio calificados.
Contacte el centro de servicio autorizado más cercano para su revisión, reparación o
ajuste.
10. No cubra ni bloquee ninguna abertura en el electrodoméstico.
11. No almacene este electrodoméstico al aire libre. No utilice este producto cerca del
agua, por ejemplo, cerca de un fregadero de la cocina, en un sótano húmedo, cerca
de una piscina o lugares similares.
12. No sumerja el cable ni el enchufe en agua.
13. Mantenga el cable alejado de superficies calientes.
14. No deje que el cable cuelgue sobre el borde de la mesa o mostrador.
15. Al limpiar la superficie entre la puerta y el compartimiento, use únicamente jabones
suaves no abrasivos o un detergente aplicado con una esponja o un paño suave.
16. Para reducir el riesgo de incendio en el interior del horno:
• No cocine demasiado los alimentos. Cuidadosamente preste atención al
electrodoméstico cuando haya papel,
5
MLH 845 SS
PRECAUCIONES PARA EVITAR LA POSIBLE EXPOSICIÓN A
ENERGÍA EXCESIVA DE MICROONDAS
ES-2

plástico u otros materiales combustibles dentro del horno para facilitar la cocción.
• Retire las ataduras de alambre de papel o bolsas de plástico antes de colocar en el
horno.
• Si los materiales dentro del horno se encienden, mantenga la puerta del horno cerrada,
apague el horno y desconecte el cable de alimentación o apague el fusible o el
interruptor del panel.
• No utilice el interior del microondas con fines de almacenamiento. No deje productos
de papel, utensilios de cocina o alimentos en el interior cuando no esté en uso.
17. Los líquidos, como el agua, el café o el té, pueden sobrecalentarse más allá del
punto de ebullición sin que parezca que están hirviendo. El burbujeo o ebullición no
siempre está presente o visible cuando el recipiente se retira del horno de
microondas. ESTO PODRÍA RESULTAR EN LÍQUIDO MUY CALIENTE
REPENTINAMENTE HERVIENDO CUANDO SE MUEVE EL RECIPIENTE O UNA
CUCHARA U OTRO UTENSILIO SE INSERTA EN EL LÍQUIDO. Para reducir el
riesgo de lesiones a personas:
• No caliente demasiado los líquidos.
• Revuelva el líquido antes y durante el calentamiento.
• No utilice recipientes de lados rectos con cuellos estrechos.
• Después de calentar, deje reposar el recipiente en el horno de microondas por un
corto tiempo antes de retirarlo.
• Tenga mucho cuidado al insertar una cuchara u otro utensilio en el recipiente.
18. No monte sobre el fregadero.
19. No almacene nada directamente sobre la superficie del electrodoméstico cuando
esté en funcionamiento.
20. Los utensilios de gran tamaño o los utensilios metálicos muy grandes no deben
insertarse en el microondas, ya que pueden provocar incendios o riesgo de descarga
eléctrica.
21. No utilice productos de papel cuando el electrodoméstico se utilice en modo de
convección.
22. No guarde ningún material, aparte de los accesorios recomendados por el
fabricante, en este horno cuando no esté en uso.
23. No cubra los estantes o cualquier otra parte del horno con papel de aluminio. Esto
causará el sobrecalentamiento del horno.
24. Limpie las campanas de ventilación con frecuencia. No se debe permitir que la grasa
se acumule en la campana o el filtro.
25. Cuando cocine alimentos debajo de la campana, encienda el ventilador.
26. Tenga cuidado al limpiar el filtro de ventilación. Los agentes de limpieza corrosivos,
como los limpiadores de hornos a base de lejía, pueden dañar el filtro.
27. Conveniente para el uso sobre el equipo de cocina de gas y eléctrico.
CONSERVE ESTAS INSTRUCCIONES
ES-3

Instrucciones de conexión a tierra
Este electrodoméstico debe conectarse a tierra. En el caso de un corto circuito. La
conexión a tierra reduce el riesgo de descarga eléctrica proporcionando un cable de
escape para la corriente eléctrica. Este refrigerador viene con un cable de
alimentación que tiene un cable de puesta a tierra con un enchufe de tierra. Este cable
debe enchufarse en un tomacorriente debidamente instalado y con conexión a tierra.
PELIGRO - Peligro de descarga eléctrica
Al tocar algunos de los componentes internos puede causar
lesiones personales graves o la muerte. No desensamble este
equipo.
ADVERTENCIA - Peligro de descarga eléctrica
El uso incorrecto del enchufe de conexión a tierra puede
provocar una descarga eléctrica. No lo enchufe en una toma
de corriente hasta que el electrodoméstico esté instalado y
conectado a tierra correctamente.
Consulte a un electricista o técnico calificado si las
instrucciones de conexión a tierra no se entienden
completamente o si existe alguna duda en cuanto a si el
aparato está correctamente conectado a tierra.
1. Un cable de alimentación corto está suministrado para evitar los riesgos resultando de
un enredo o de tropezar con un cable más largo.
2. Conjunto de cables más largos o extensiones están disponibles y pueden utilizarse si
se tiene cuidado en su uso.
3. Si se utiliza un de cable largo o cable de extensión:
• La potencia eléctrica nominal marcada en el conjunto de cables o cable de extensión
debe ser por lo menos tan grande como la clasificación eléctrica del fabricante del
electrodoméstico.
• El cable de extensión debe ser un cable de 3 conductores con toma de tierra.
• El cable más largo se debe arreglar de manera tal que no cuelgue sobre el borde de
un mostrador de o de una mesa donde puede ser jalado por niños o tropezarse
accidentalmente.
1.El funcionamiento del horno de microondas puede causar interferencia en su radio,
TV o equipo similar.
2. Cuando hay interferencia, se puede reducir o eliminar tomando las siguientes
medidas:
• Cambie la ubicación del microondas con respecto al receptor.
• Limpie la puerta y la superficie de sellado del horno.
• Cambie la orientación de la antena receptora de la radio o la televisión.
• Mueva el receptor lejos del microondas.
• Conecte el receptor a un tomacorriente diferente para que el microondas y el receptor
estén en diferentes circuito.
Interferencia de radio
ES-4
This manual suits for next models
2
Table of contents
Languages:
Other Teka Microwave Oven manuals

Teka
Teka MWL 22 EGR User manual

Teka
Teka MG 209 WS User manual

Teka
Teka MWX 45 BIS User manual

Teka
Teka MM 20 AG User manual

Teka
Teka MCX 45 BIT User manual

Teka
Teka MWL 20 BI User manual

Teka
Teka MWE 225 FI User manual

Teka
Teka MWE 207 FI User manual

Teka
Teka MWE 202 FI User manual

Teka
Teka TMW 18 BIH User manual

Teka
Teka MWE 259 FI User manual

Teka
Teka MWR 22 BI User manual

Teka
Teka ML 825 TFL User manual

Teka
Teka MWX 22 BIS User manual

Teka
Teka MWE 201 FI User manual

Teka
Teka MS 622 BIS User manual

Teka
Teka MS 622 BI User manual

Teka
Teka MC 32 BIS User manual

Teka
Teka MWX 22 BHG User manual

Teka
Teka MW 225 BLANCO User manual