VOT106 - 16.11.2016
© Teknoware Oy 2016
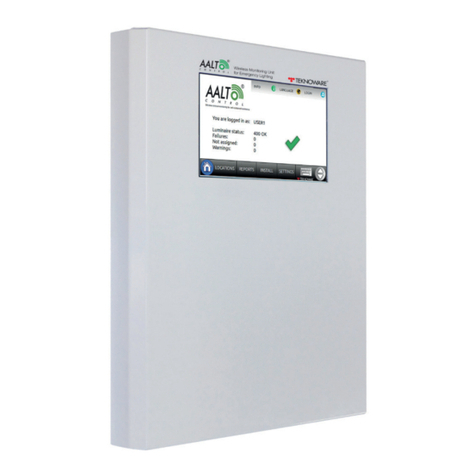
AALTO WMU TST5108 CONNECTION GUIDE
Note! This product may only be installed and
maintained by a qualied electrician.
1. Open the WMU unit by opening the two screws (Image 1)
2. The WMU unit contains 8 holes for the cables. If you
want to use the 4 holes on the lower part of the unit,
bend the metal piece o the cover (from between the
screws in Image 1). Cut a hole for the necessary cables to
the rubber seals, and press the seals to the holes before
pulling through the cables. Push the remaining seals to the
remaining cable holes, wether they are used or not (Image
2).
3. Pull the supply cable and the (oponal) Ethernet cable
inside the unit, and connect the supply cable to the power
connector according to the markings (Image 3/A), and the
Ethernet cable to the Ethernet connector (Image 3/B).
4. Connect the (oponal) relay-based device according to
the markings (Image 3/C). The relay changes state, if a
luminaire in the system reports a failure, or if a luminaire is
not reached for 7 days.
5. Push the cover of the unit in it’s place, and aach the
screws opened in step 1 (Image 1)
AALTO WMU TST5108 KYTKENTÄOHJE
Huom! Laieen asennuksen ja huollon saa suorit-
taa vain sähköalan ammataitoinen henkilö.
1. Avaa WMU-laite kiertämällä auki kaksi ruuvia laieen
alaosassa (Kuva 1)
2. Laieessa on yhteensä 8 kaapelien läpivienreikää. Jos
haluat käyää alaosassa olevia 4 läpivienreikää, taita
niitä suojaava metallilevy ir laieen kannesta (Kohdan
1 ruuvien välistä). Leikkaa mukana tuleviin ivisteisiin
reiät tarviaville kaapeleille, ja paina rei’itetyt ivisteet
valitsemiisi läpivienreikiin ennen kaapeleiden vetoa.
Laita loput ivisteet jäljelle jääviin läpivienreikiin
huolimaa siitä, tulevatko läpivienreiät käyöön (Kuva 2)
Kiinnitä laite seinään neljällä ruuvilla (Kuva 2).
3. Vedä syöökaapeli ja (valinnainen) Ethernet-kaapeli
laieen sisälle. Kytke syöökaapeli merkintöjen mukaises
(kuva 3/A), ja Ethernet kaapeli Ethernet-liimeen (kuva
3/B).
4. Kytke (valinnainen) releohjau laite liimeen (kuva 3/C).
Rele vaihtaa laa, jos järjestelmässä oleva valaisin ilmoiaa
virheestä, tai jos valaisimeen ei olla saatu yhteyä 7
vuorokauteen.
5. Työnnä laieen kansi paikoilleen, ja kiinnitä kohdassa 1
irroitetut ruuvit (Kuva 1).
AALTO WMU TST5108 INSTALLATIONSANVISNING
Obs! Endast en fackman i elbranschen får
installera och underhålla produkten.
1. Öppna WMU-centralen genom a lossa de två skruven
i locket (Bild 1)
2. WMU-centralen har 8 st hål för kablage. Om du vill använda
de 4 hålen i den lägre delen av centralen bänd loss metall
bitarna från locket mellan de 2 skruven (bild 1.) Skär hål för
kablarna i genomföringarna, återmontera och trä kabeln
genom dessa. Låt de genomföringar som inte används sia
kvar (Bild 2).
3. Dra strömkabeln och eventuell nätverkskabel in i enheten.
Anslut strömkabeln enligt märkning på plinten för ingående
matning (Bild 3/A), och nätverkskabeln på avsedd plats.
(Bild 3/B).
4. Anslut llbehör för utgående signal ll NO/NC/COM)
på dess plats om dea skall användas (Bild 3/C). Reläets
llstånd ändrar sig, om en armatur i systemet rapporterar
felet, eller om med nån armatur inte fås kontakt inom 7
dagar.
5. Återmontera locket med de 2 skruvarna som lossades
i steg 1.
AALTO WMU TST5108 INSTALLATIONSANLEITUNG
Achtung! Dieses Produkt darf nur von einem ele-
ktrofachgerecht ausgebildeten Person installiert
und gewartet werden.
1. Önen Sie die WMU-Einheit durch Önen der beiden
Schrauben (Bild 1)
2. Die WMU-Einheit enthält 8 Bohrungen für die Kabel.
Wenn Sie die 4 Löcher auf dem unteren Teil des Gerätes
verwenden möchten, biegen Sie das Metallstück von
der Abdeckung (zwischen den Schrauben, Bild 1) ab.
Schneiden Sie ein Loch für die notwendigen Kabel zu den
Gummidichtungen und drücken Sie die Dichtungen auf die
Löcher, bevor Sie durch die Kabel ziehen. Drücken Sie die
restlichen Dichtungen auf die verbleibenden Kabellöcher,
ob sie verwendet werden oder nicht (Bild 2).
3. Ziehen Sie das Versorgungskabel und das (oponale)
Ethernet-Kabel im Inneren des Geräts und verbinden Sie
das Versorgungskabel mit dem Stromanschluss gemäß den
Markierungen (Bild 3/A) und dem Ethernet-Kabel mit dem
Ethernet-Anschluss (Bild 3/B).
4. Schließen Sie das (oponale) Relais-basierte Gerät gemäß
den Markierungen an (Bild 3/C). Das Relais ändert seinen
Zustand, wenn eine Leuchte im System einen Fehler
meldet, oder wenn eine Leuchte in 7 Tagen nicht erreicht
wird.
5. Schieben Sie die Abdeckung des Gerätes an ihre Stelle und
befesgen Sie die in Schri 1 geöneten Schrauben (Bild 1).
All manuals and user guides at all-guides.com
all-guides.com
