A1234
A1234
A1234
Download the app T-Mate from App Store or Google Play. Check the compatibility with
your device rst. Once downloaded, it is possible to use it in DEMO mode, even without
any TMATE paired.
Pairing
Activate the Bluetooth communication on your device and power TMATExxxAL/BL ON.
Launch the T-Mate app.
Note: In the Android devices the localization function must be activated.
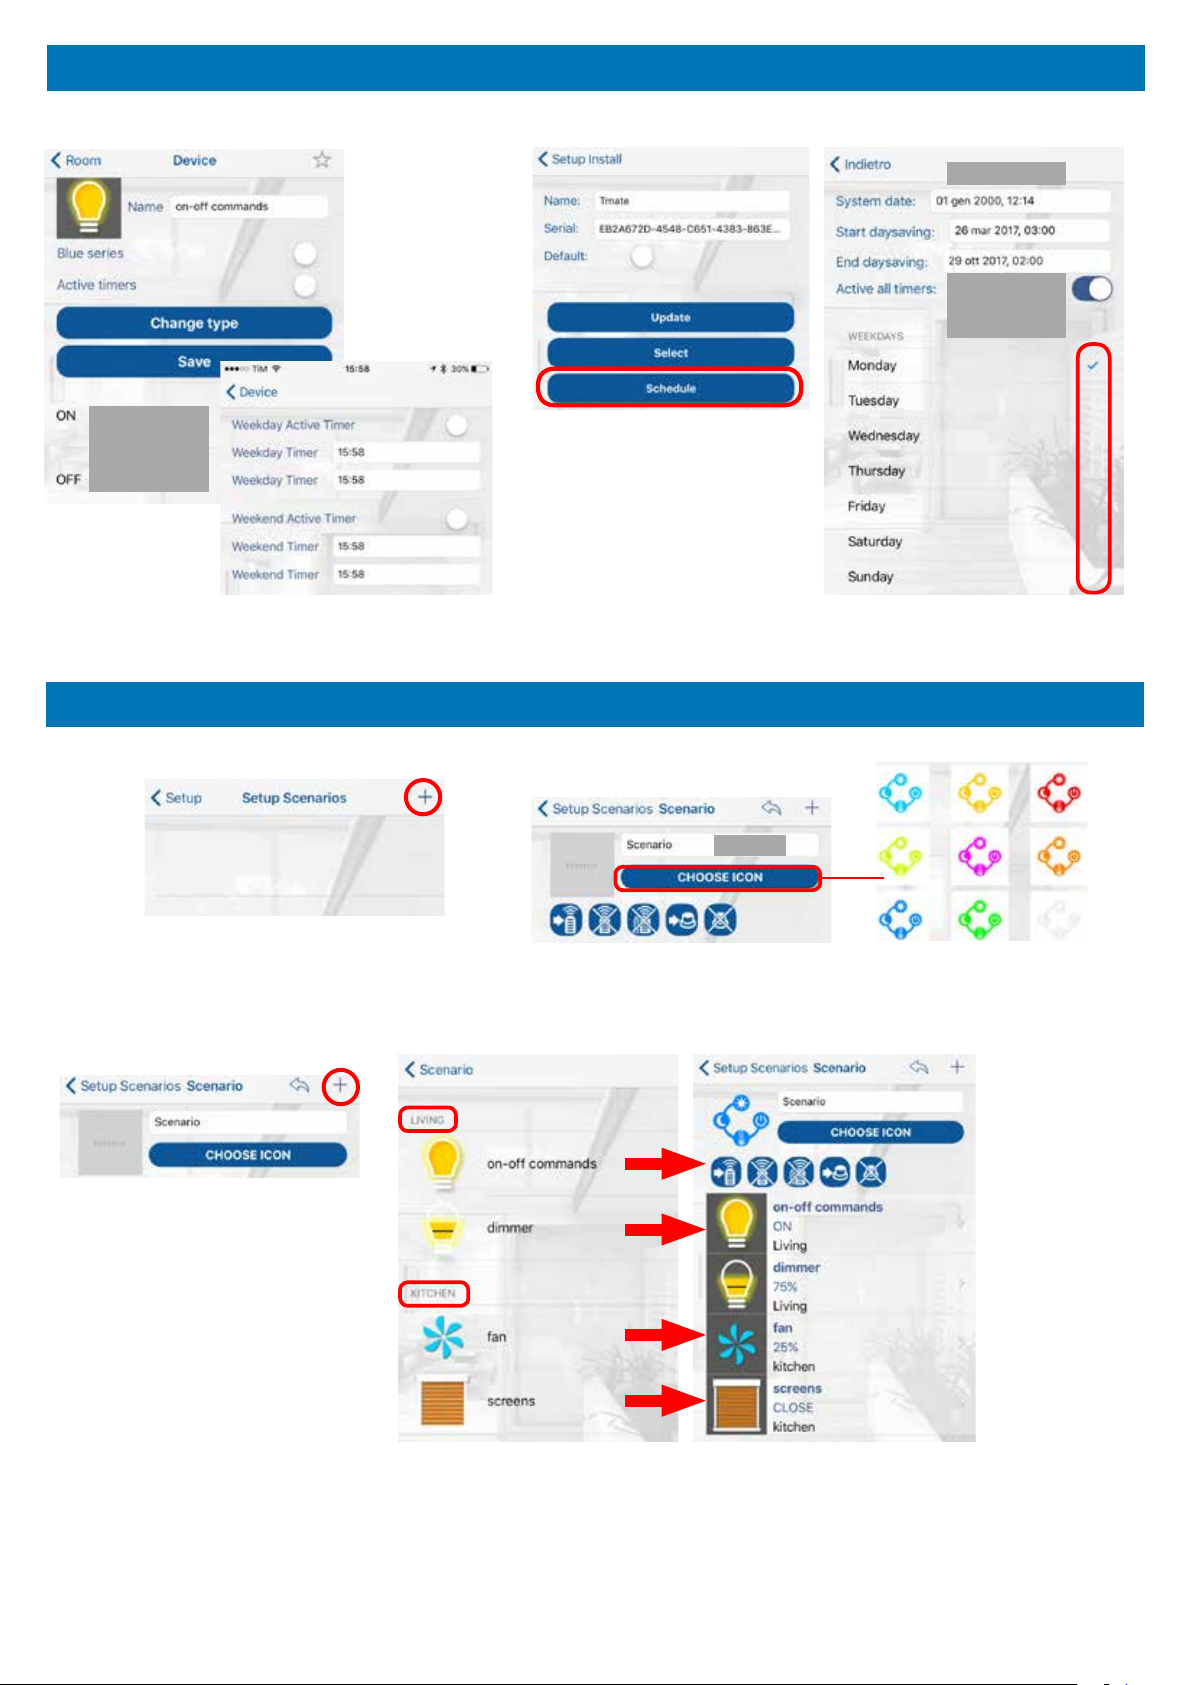
SETUP ROOMS
Open Setup menu ► Detecting boards, tap on “+”, insert the new installation name
and insert the Code of the T-Mate. Tap on “Connect“ button to pair the device.
Tap on the icon to enter in the
room. Set the name and assign
a picture amongst the 6 provided
or select a picture of your device
gallery.
Create new rooms accessing the
menu “Rooms” in Setup.
Tap “+” to add a room
ADDING COMMANDS TO A ROOM
Tap “+” to add remote commands.
Select the type of controlled device
from the list.
Name
Enable if the receiver
is Blue Series
Enable the timer
commands
List of available
commands
Add to
favourites
Note: swipe a listed room left to delete it.
Note: swipe a listed command left to delete it.
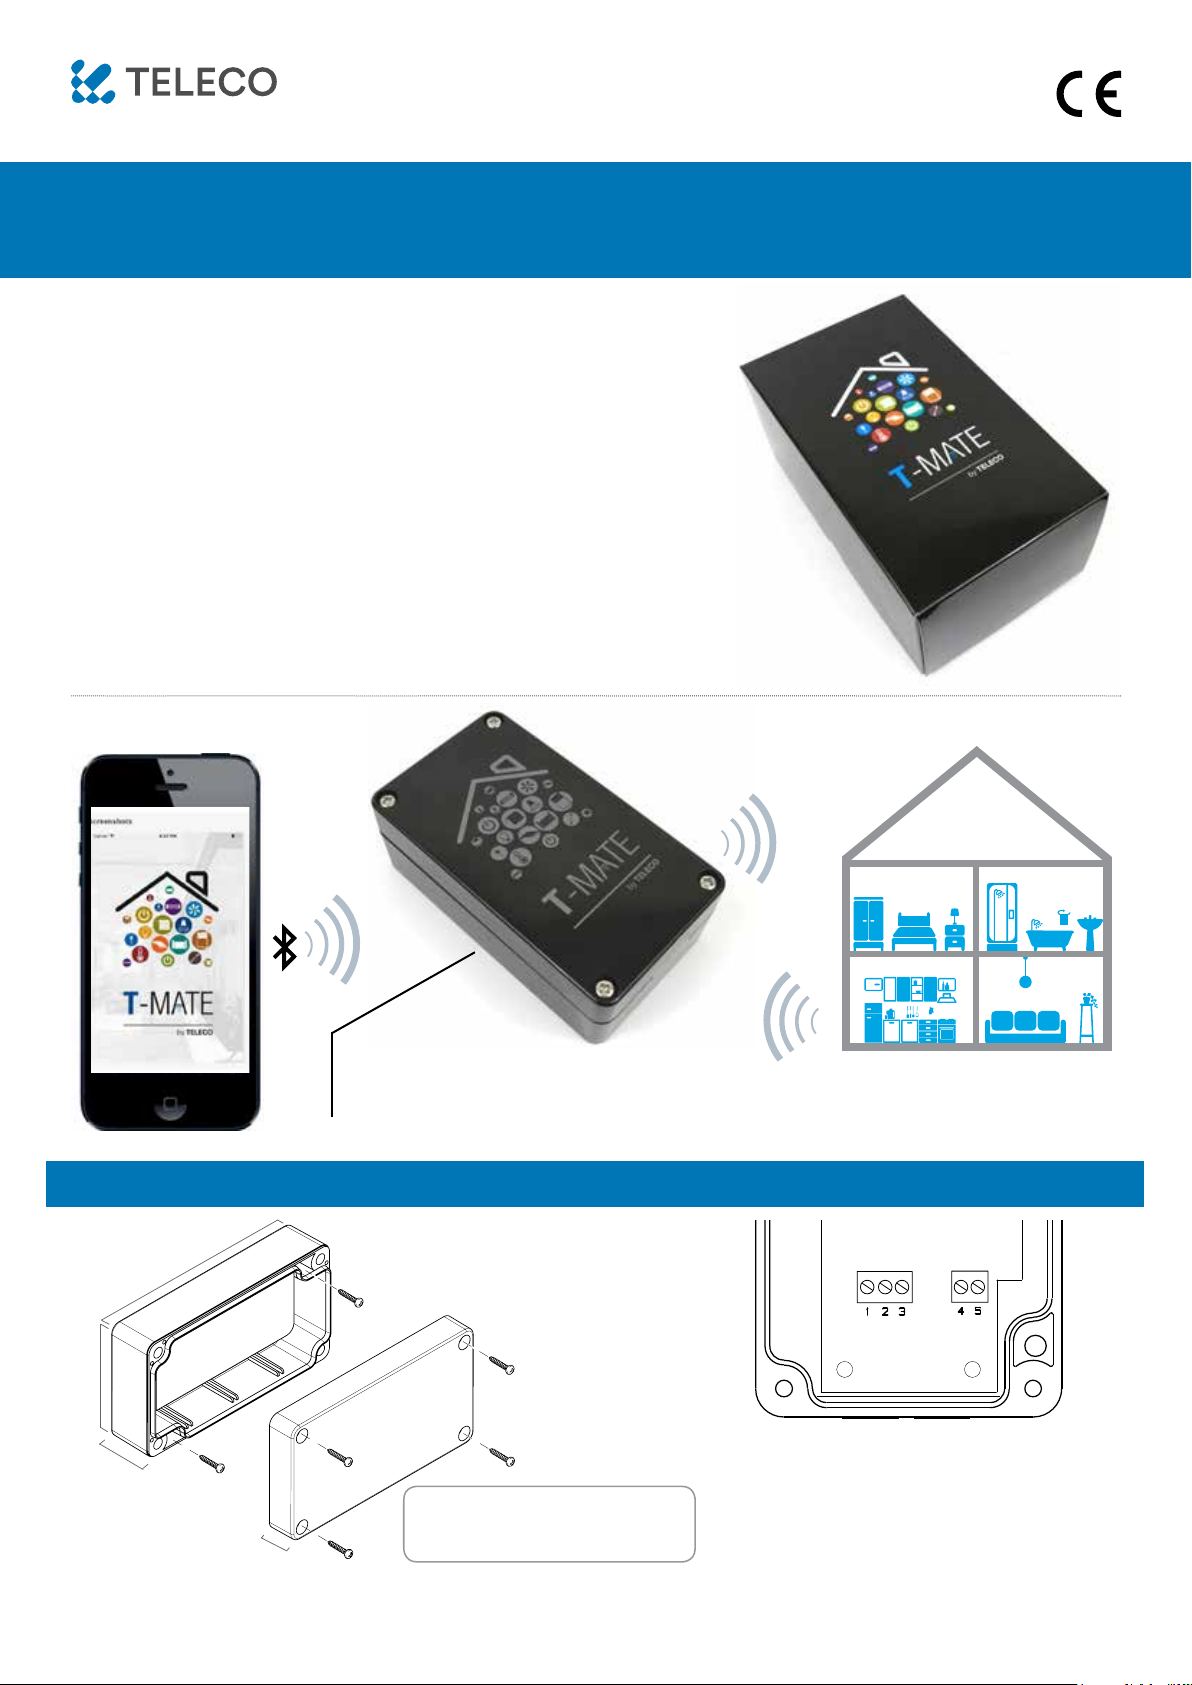
Backside label Internal label
INSTALLATION
Download the app T-Mate from App Store or Google Play. Check the compatibility with
your device rst. Once downloaded, it is possible to use it in DEMO mode, even without
any TMATE paired.
Pairing
Activate the Bluetooth communication on your device and power TMATExxxAL/BL ON.
Launch the T-Mate app.
Note: In the Android devices the localization function must be activated.
SETUP ROOMS
Open Setup menu ► Detecting boards, tap on “+”, insert the new installation name
and insert the Code of the T-Mate. Tap on “Connect“ button to pair the device.
Tap on the icon to enter in the
room. Set the name and assign
a picture amongst the 6 provided
or select a picture of your device
gallery.
Create new rooms accessing the
menu “Rooms” in Setup.
Tap “+” to add a room
ADDING COMMANDS TO A ROOM
Tap “+” to add remote commands.
Select the type of controlled device
from the list.
Name
Enable if the receiver
is Blue Series
Enable the timer
commands
List of available
commands
Add to
favourites
Note: swipe a listed room left to delete it.
Note: swipe a listed command left to delete it.
Backside label Internal label
INSTALLATION