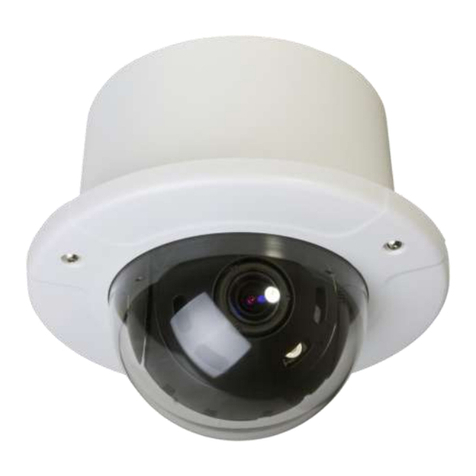
Teledelta HD600+ User manual

2 Packing Box
IR Remote Controller × 1PTZ Camera × 1
12V/ 2.0 A DC
Power Adapter× 1
Ceiling Bracket / Wall
User Manual × 1
UserManuel
②③②
Camera Parameter
Dome Parameter
Number Key Function
1 Power Key After pressing, the camera enters standby mode
2 Afterpressing, the camera enters self-check
3
4
5
6Menu Key Enter/Exist Menu
7Camera PTZ
Control Key
Press HOME button, the camera returnto
the middle position
8 Preset Setting Key Press "Preset"+Number(1-9) to save the
corresponding Preset
9 Preset Reset Key Press "Reset"+Number(1-9) to reset the
corresponding Preset
10 Focus Key
[AUTO]:Automaticfocus
[MANUAL]: Manual focus
[FAR]: Manual focus, make the far object clearer
[NEAR]: Manual focus,makethe near object clearer
11 Zoom Key + increase, - decrease
12 Number Key Cooperate with setting / calling Preset
①
②
③
④
⑥
⑤
⑦
⑧⑨
⑩⑪
⑫
RS-232 to DB 9pin
Cable × 1
DC12V
OUT-RS232-IN
RS485
USB2.0
LAN
HDMI
A-IN
HD MiniPRO VIDEO PTZ CAMERA
User Manuel
1 Camera Interface
2 Packing Box
UserManuel
②③②
①
Camera Parameters
Image Sensor 1/2.7Exmor CMOS Min Lux 0.5lux /0.095 lux
2.7 MP Shutter Speed 1 to 1/10000s
Zoom 10X Optical Horizontal
Field of View 2.9° (T)~72° (W)
Lens f=5.1mm-51mm
F=1.6(W)-3.5(T)
Digital Noise
Reduction 2D&3D
Frame Rates
1 1080P60/50/30/25
2 1080I60/50/30/25
3 720P60/50/30/25
3Remote Controller Specification
( V1.0 )
④ ⑤ ⑥⑦⑧ ⑨⑩
Dome Parameter
Communications
Power supply DC12V Baud Rate 2400/4800/9600/
19200/38400
Power
Consumption12W Protocol VISCA/ PELCO P/D;
ONVIF/ VSICA OVER IP
Address Setting 1~255
Operation Environmental
Pan Rotation -178° ~ +178° Dimensions120mm×120mm×
145mm
Tilt Rotation -30° ~ +90° Operating
Temperature -10~ 50
Presets
Remote Max 9 Presets Gross Weight 1.6kg
PTZ Controller Max
255 Presets
Installation
Method
Wall Mount/
Ceiling/ Tripod
Number Key Function
1 Power Key After pressing, the camera enters standby mode
①
②
③
Effective Pixel
DC12V
OUT-RS232-IN
RS485
USB2.0
LAN
HDMI
A-IN
Frame Rate
No. Explain No. Explain No. Explain
1 Lens 4 DC12V Input 7 RJ45/IP Streaming/POE
2 IR Receiver 5 RS485 8 HDMI
3Power
Indicated Light 6 RS232
10 Audio-IN
④ ⑤ ⑥⑦⑧ ⑨⑩
DC12V
OUT-RS232-IN
RS485
USB2.0
LAN
HDMI
A-IN
Camera Parameter
Frame Rate
④ ⑤ ⑥⑦⑧ ⑨⑩
DC12V
OUT-RS232-IN
RS485
USB2.0
LAN
HDMI
A-IN
2 Packing Box
User
Manuel
②③②
①
Camera Parameter
Frame Rate
3Remote Controller Specification
④ ⑤ ⑥⑦⑧ ⑨⑩
Dome Parameter
Number Key Function
1 Power Key After pressing, the camera enters standby mode
2 Afterpressing, the cameraenters self-check
3
①
②
③
④
⑥
⑤
2 Packing Box
UserManuel
②③②
Camera Parameter
Frame Rate
3Remote Controller Specification
Dome Parameter
Number Key Function
1Power Key Toggles camera standby mode
2P/T RST Key Reset pan / tilt position
3Flip Key
4Camera Select Key Select the camera to be controlled
5BLC Key
6Menu Key Enter/exit Menu
7Camera PTZ
Control Key
Press HOME button, the camera return to
the home position
8Preset Setting Key Press "Preset"+Number(1-9) to save the
corresponding Preset
9Preset Reset Key Press "Reset"+Number(1-9) to reset the
corresponding Preset
10 Focus Key
[AUTO]:Auto focus
[MANUAL]: Manual focus
[FAR]: Focus on far away object
[NEAR]: Focus on near objects
11 Zoom Key + increase, - decrease
12 Number Key Set and Recall preset
①
②
③
④
⑥
⑤
⑦
⑧⑨
⑩⑪
⑫
Invert camera image to flip ( Ceiling Mount)
Turn on/off Back Light Compensation
3 Remote Controller Specification
Preset
Menu
Home
Reset
①
②
③
④
⑥
⑤
⑦
⑧⑨
⑩⑪
⑫
Manual
Near
Far
BLC
CAMERA SELECT
Flip
P/TRST
Auto
1 Camera Interface
HD600+ PTZ CAMERA User Manual ( V1.0 )
123 4

6 FAQ
No Image on output display (HDMI output)
5 Precaution
4 RS232 (Serial Interface)
Graphic Number CAMERA Number CAMERA
1 DTR 5 RXD
2 DSR 6 GND
3 TXD 7 IR OUT
4 GND 8 NC
1 2
345
678
PTZ CAMERA
Electrical Safety
Installers and Operators should follow all electrical and safety
guidelines in accordance with local health and safety laws.
The HD600+ PTZ camera does not have a power on / off switch (this
is achieved by pressing the On/ Off button on the supplied IR
remoted (button no. 1/2 on the IR remote).
Users should unplug the HD600+ PTZ camera from the wall socket
before installing, moving or altering the camera position.
Do not use the camera if there is a risk of water ingress, electrical
shock or fire risk.
The HD600+ PTZ camera is supplied with a 12VDC power supply or
can be operated over POE (power over ethernet).
Transportation
The HD600+ PTZ camera should be transported securely in the
provided packaging to reduce the risk of damage.
Installation
The HD600+ PTZ camera is supplied with a ceiling / wall mounting
bracket included in packaging. If mounting inverted (upside down)
invert the image via the IR remote control (button 3).
Do not move / force the PTZ camera head by hand – doing so may
damage the internal gears (voiding warranty).
Ensure camera is installed on a flat horizontal service and is
securely screwed to the mounting bracket.
HD600+ PTZ CAMERA User Manual ( V1.0 )
Check the camera is connected to mains power (or POE) and the
power is turned on and the power indicator is illuminating on the
camera front.
Turn on the camera via the IR remote control, confirm the camera
“self-checks” – the Lenses will rotate left / right up and down and
return to the home position once complete.
Check the HDMI cable from the camera to the display is in useable
condition.
Ensure the display can support the output resolution and frame
rate of the camera.
1.
2.
3.
4.
Vibration / movement of Image (when zoomed in)
Check the camera is securely fasten to the mounting bracket
Ensure there is no source of vibration near the camera install
position.
Web GUI Login
The HD600+ PTZ has an internal web-GUI where advanced setting /
streaming can be setup. The default camera IP address is 192.168.1.162
Users can view the cameras IP address via the onscreen display
menu (via the IR remote. Menu System - Setup - System Info).
Web GUI Access
Ensure you know the correct / default IP address of the HD600+ PTZ
camera.
Ensure you computer is on the same IP address range as the camera
The web-GUI may not be accessible via all browsers (at time of
release, IE, Chrome, Firefox and Mozilla where suitable.
Consider Network / Firewall issues when accessing camera.
Camera Control
The HD600+ PTZ camera can be controlled by several methods
including, the supplied IR remote control (recommended in most simple
installations), R serial or Web-GUI.
7 Warranty
The HD600+ PTZ camera is covered under a 12-month factory
warranty from the date of purchase. In the first instance of a fault
please contact the purchaser of the goods.
Technical Support
For additional technical information or documentation please contact
TeleDelta Pty Ltd with your enquiry at the below email address.
To assist with your enquiry please supply in the email the following
details
1. Serial Number of HD600+ camera
2. Date of purchase
3. Description of fault / issue.
Please keep your proof of purchase for warranty purposes.
Note on Technical support:
Whilst TeleDelta will provide technical support on the HD600+ PTZ
cameras we are unable to provide support on 3rd party or external
system components (i.e Displays the camera may be connected too,
Webcasting equipment or 3rd Party control systems / connected PCs).
In these circumstances we will provide general guidance and related
information when or if possible.
Australia
AVW Broadcast Pty Ltd
38A, 8 Herbert Street
St Leonards, NSW 2065
Phone: +61 2 8213 0200
Email: [email protected]
New Zealand
AVW Ltd
7 Ra Ora Drive East Tamaki
Auckland 2013, New Zealand
Phone: +64 9 271 4000
Email: [email protected]
Other Teledelta Security Camera manuals

