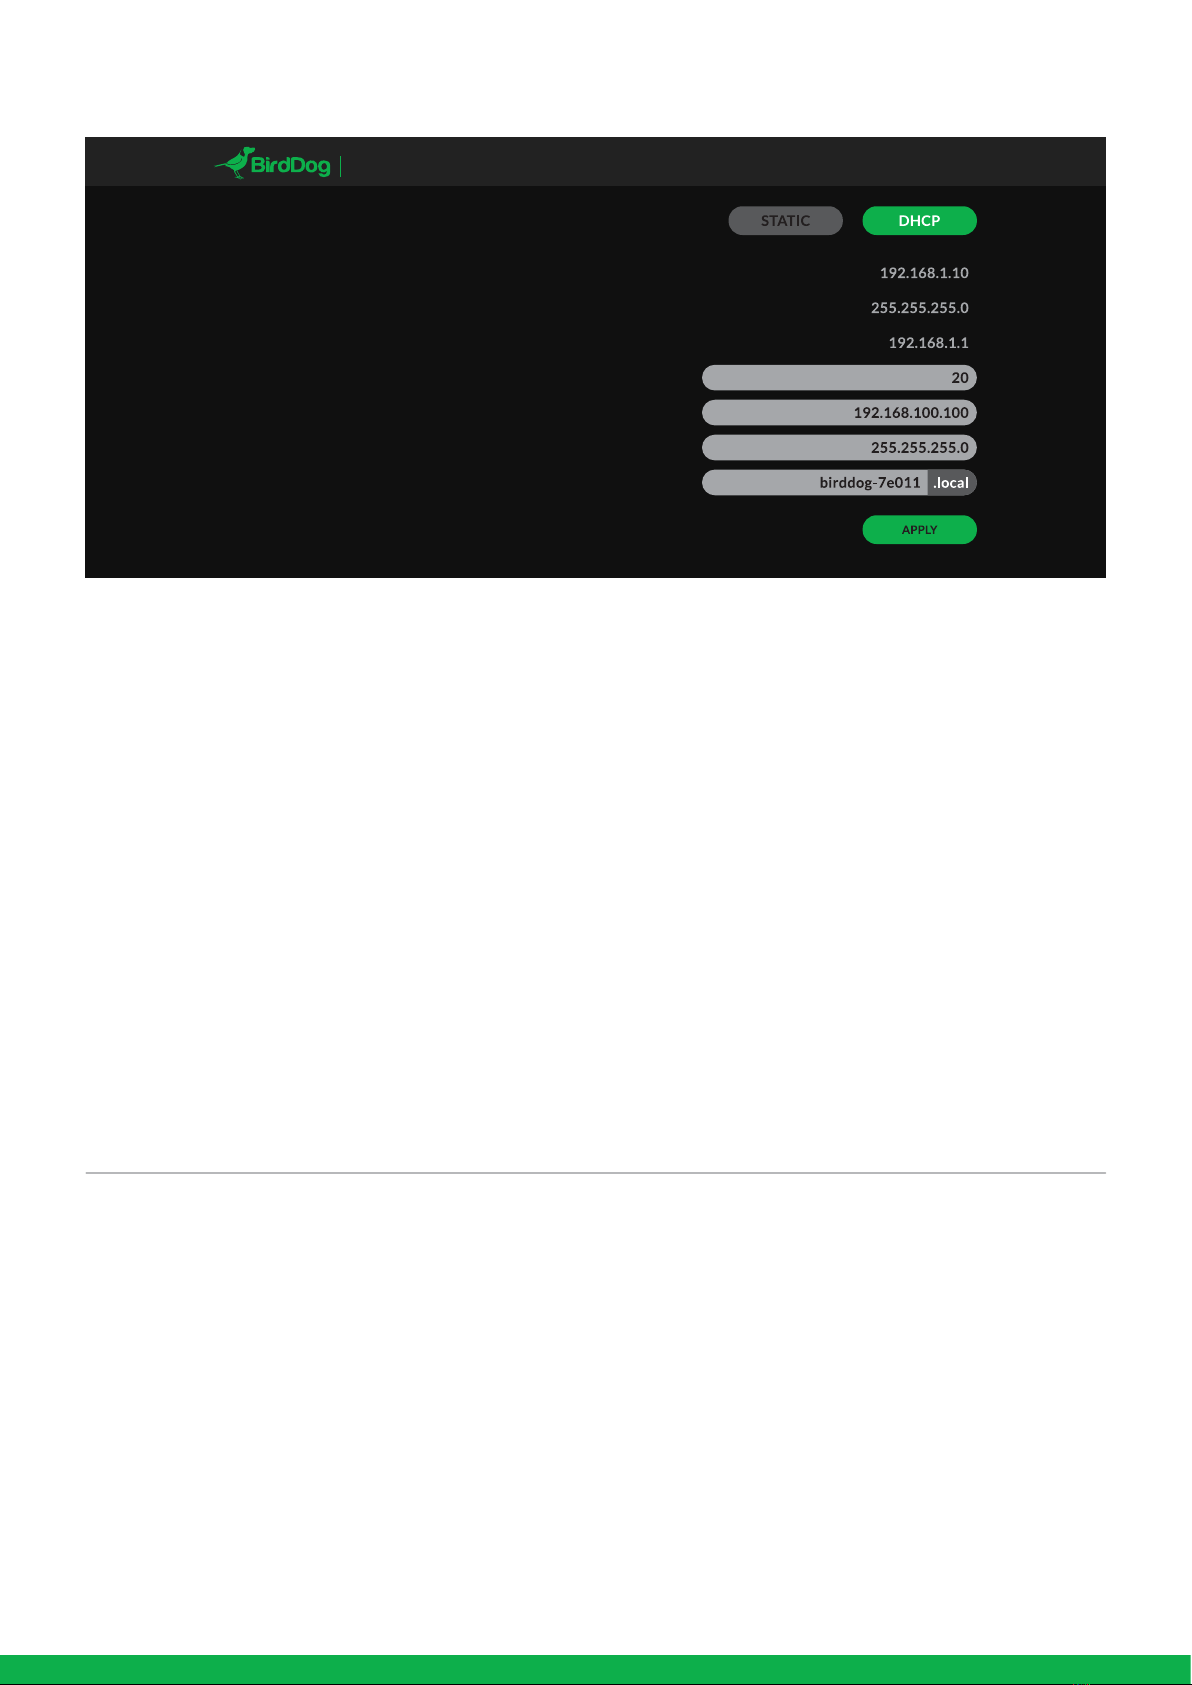
Configuration method:
Address:
Mask:
Gateway:
DHCP timeout:
Static fallback address:
Static fallback mask:
BirdDog Name:
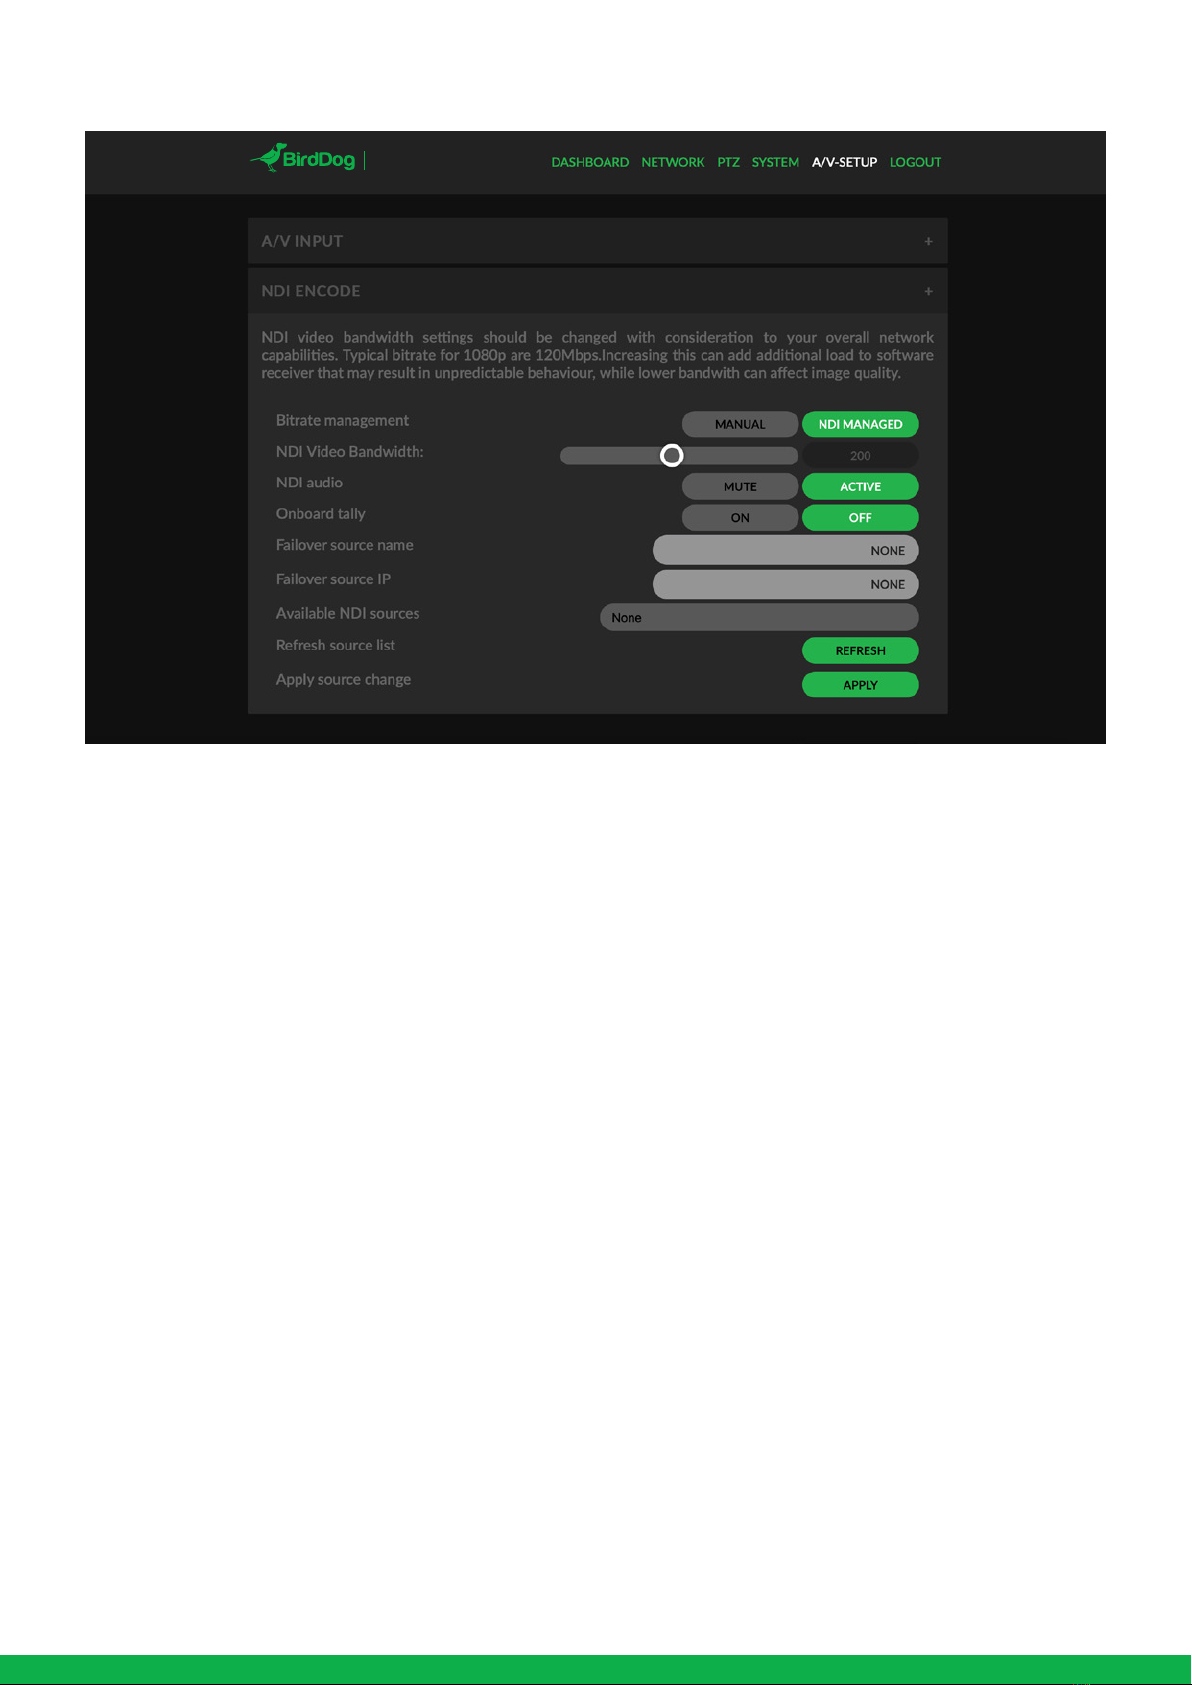
DASHBOARD NETWORK PTZ SYSTEM A/V SETUP LOGOUT
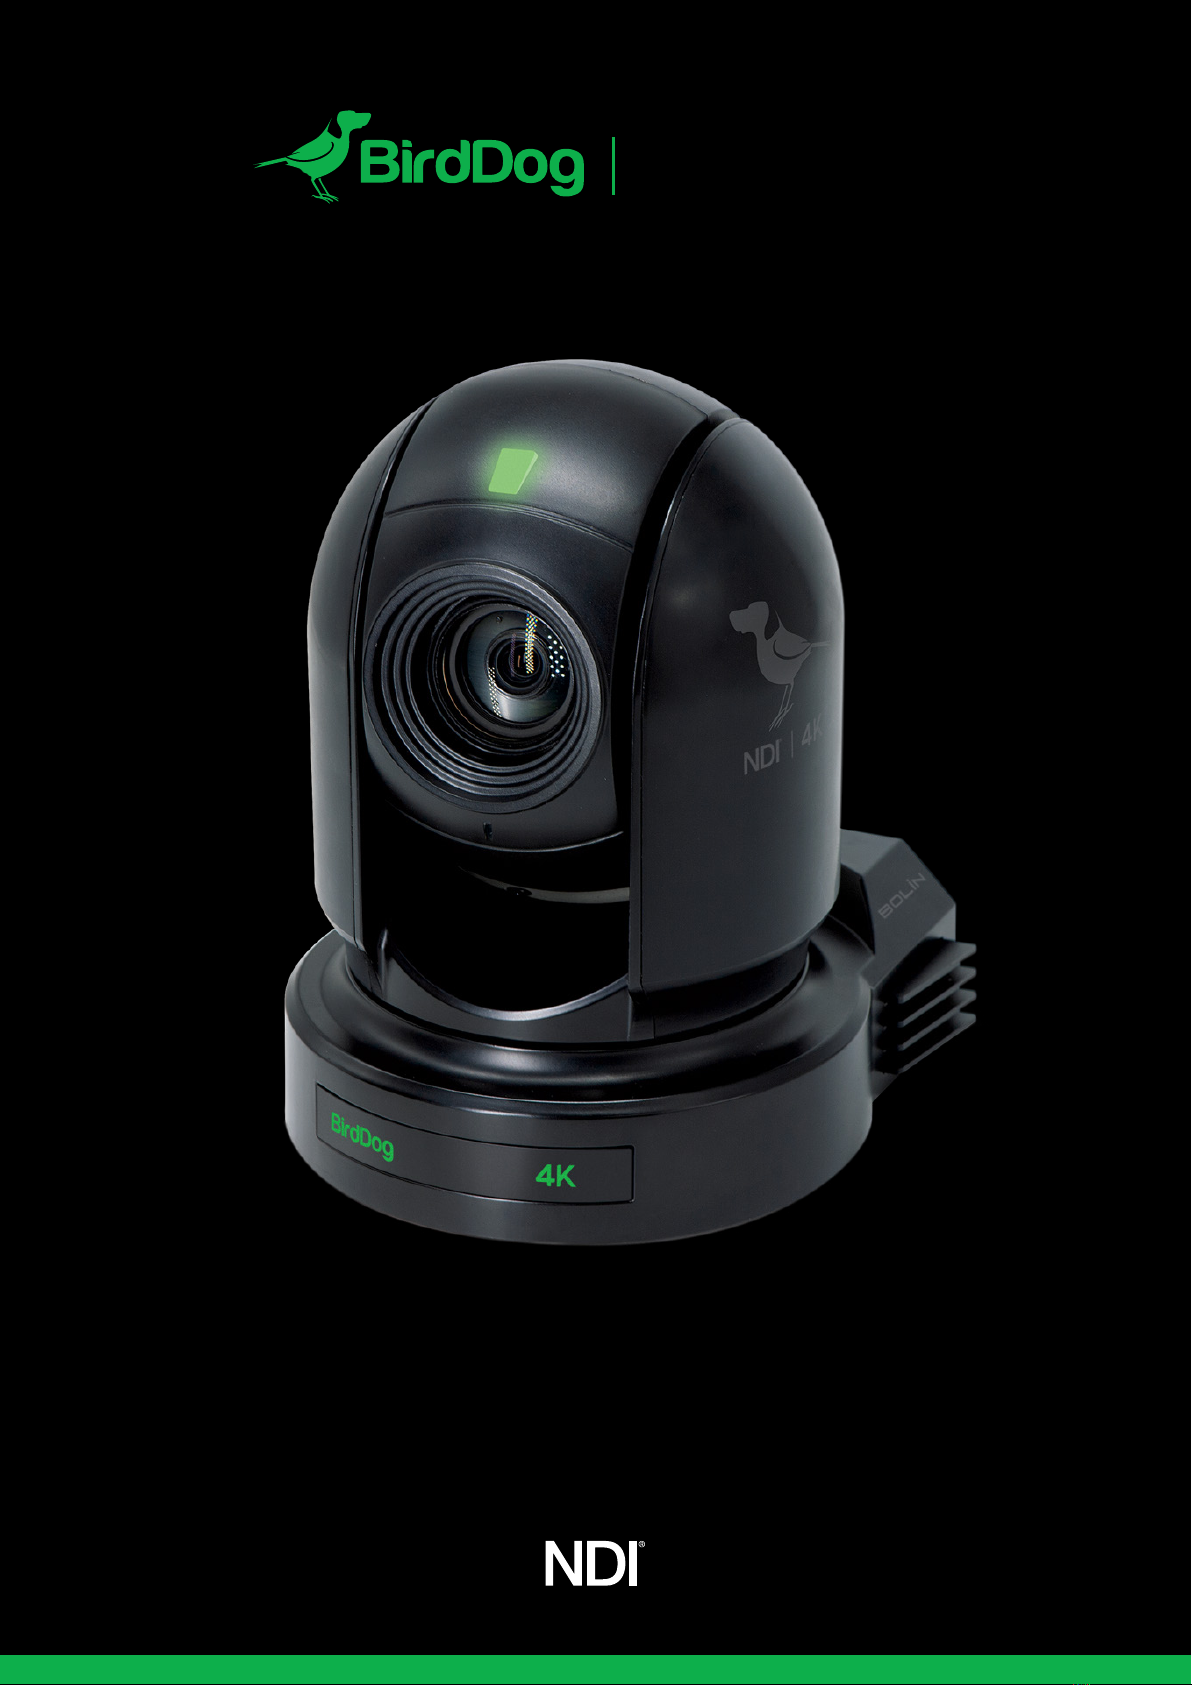
EYES P400
NETWORK
Receiving NDI streams
There are many applications that support receiving the NDI
signal that P400 produces. Each application will vary slightly
on how you choose your source.
NewTek Studio Monitor
NewTek provide a free Studio Monitor application that
allows you to monitor many NDI sources on a standard
Windows computer. Once Studio Monitor is launched on
your computer, simply right click anywhere in the interface
and select your unit from the drop-down list.
Once connected to the P400 you will notice a configuration
cog appears on the bottom right-hand side of the video
display, this is a shortcut to access the P400 web configura-
tion panel.
NewTek TriCaster Series
NewTek TriCaster series devices allow several NDI sources
to be received simultaneously, the amount of simultaneous
connections varies by what model TriCaster you have.
Consult your TriCaster user manual to determine how many
connections are available on your device.
To select P400 as a source on your TriCaster, simply click on
the configuration cog below your desired source location,
this will bring up the Input Setting dialog, select from the
drop-down list your P400 source.
Once connected to the P400 you will notice a configuration
cog appears next to the source drop down window, this is a
shortcut to access the P400 web configuration panel.
10
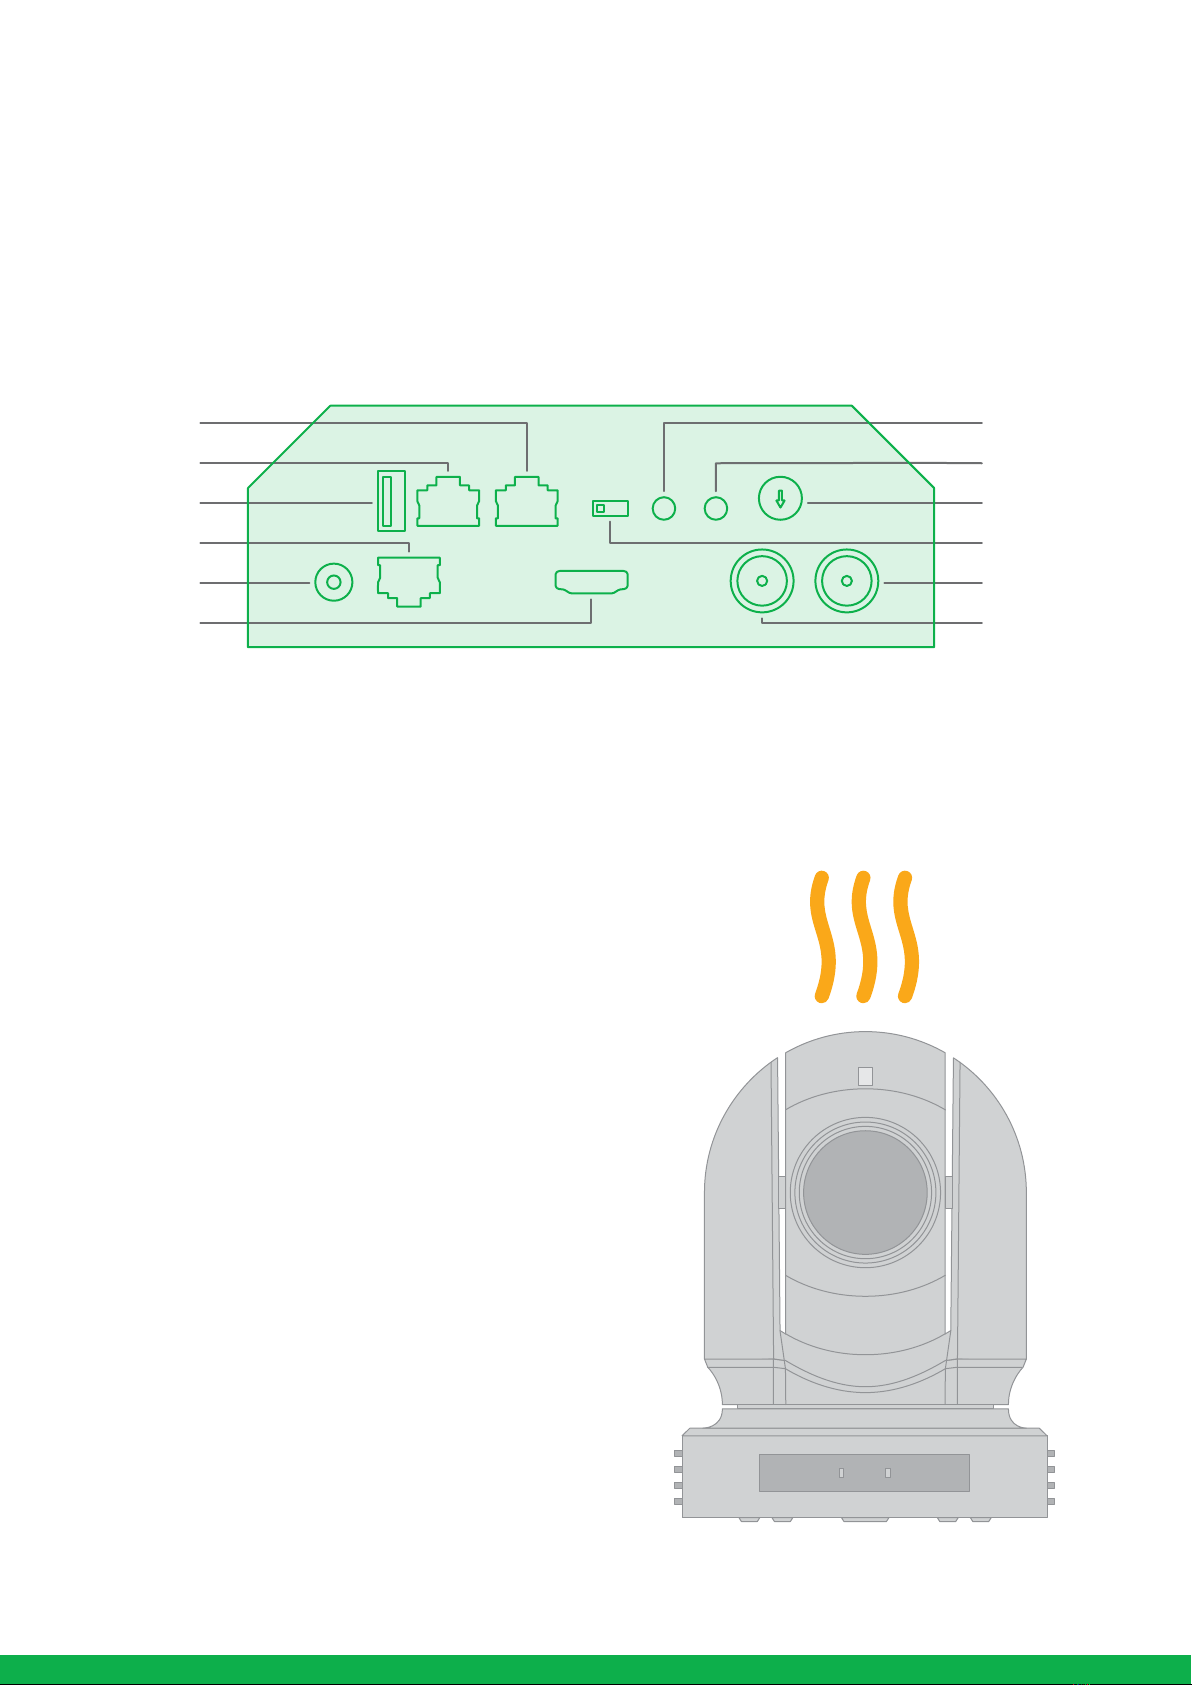
Device naming
When your device is first powered on it defaults to the
naming convention as described in the web configuration
panel section of this manual.
It is possible to change the name along with the network
settings to better suit your environment.
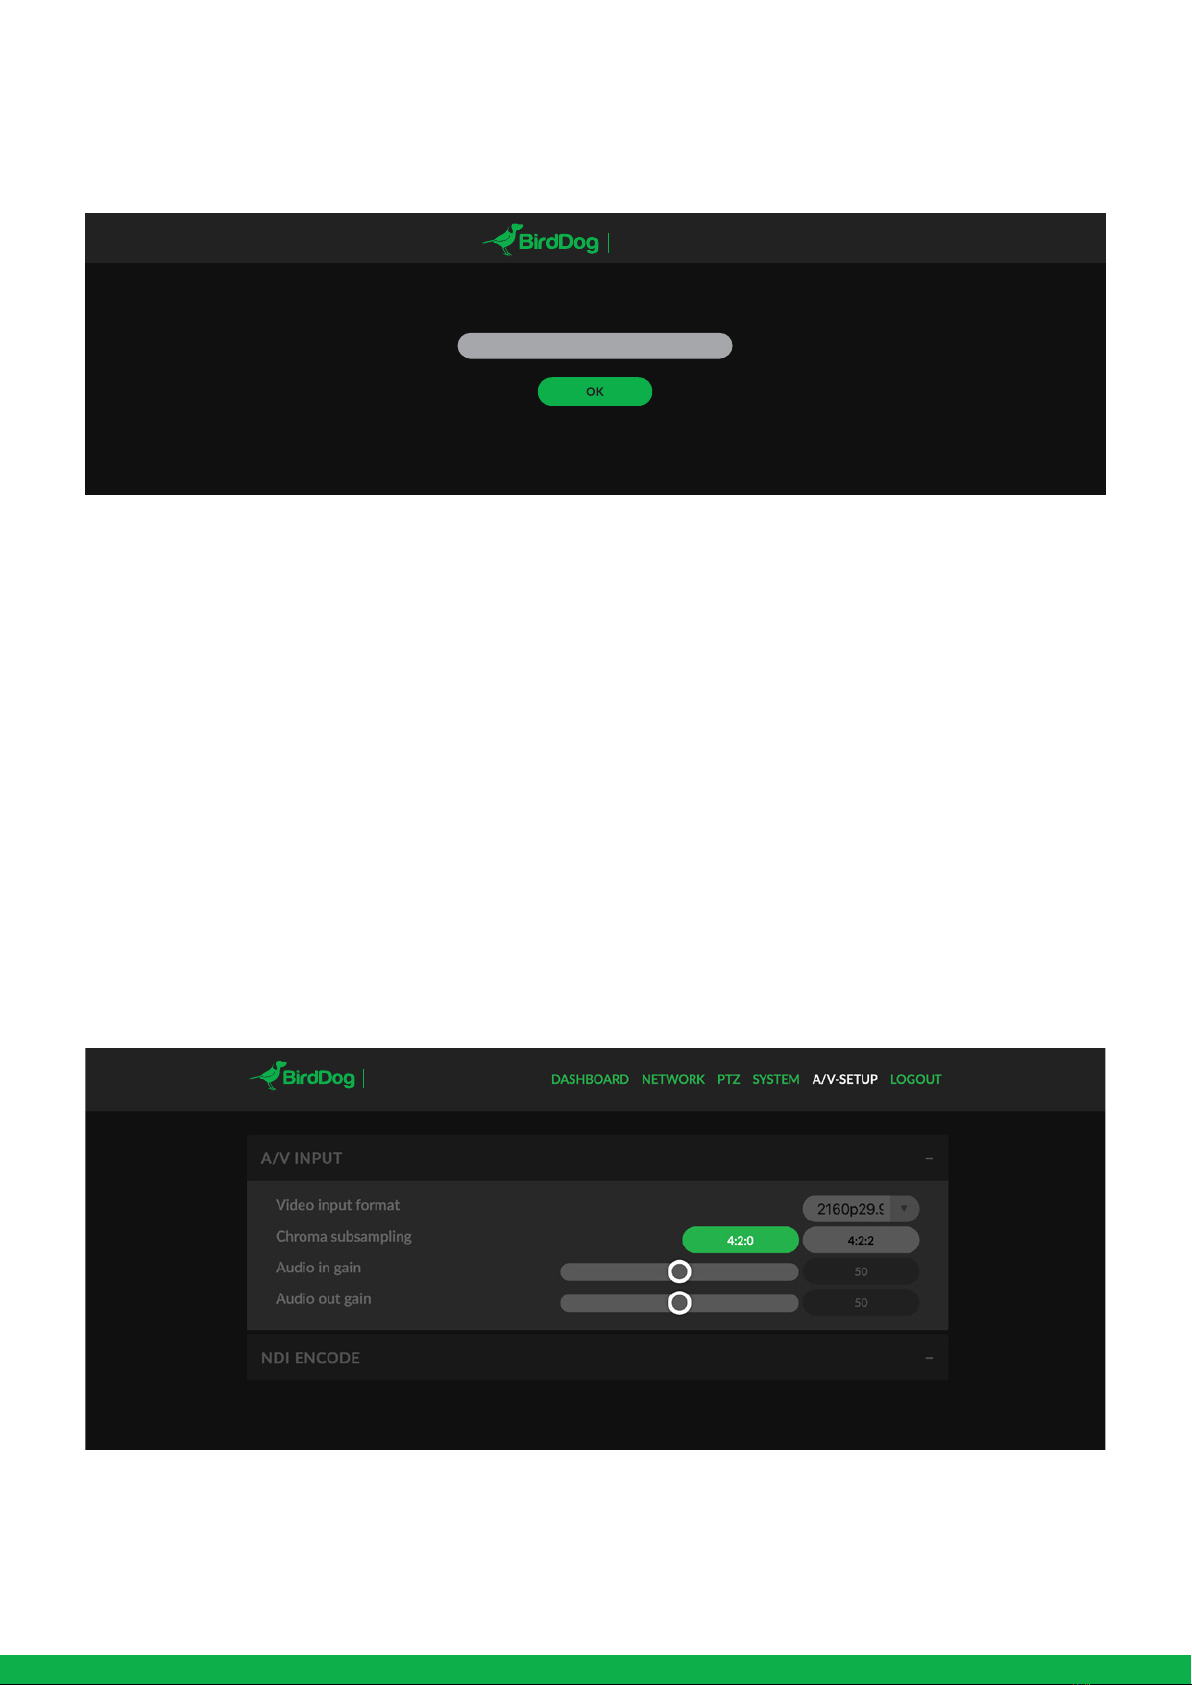
Configuration method
You can configure your device to operate on the network
with a dynamic (DHCP) IP address or a fixed address.
For smaller networks DHCP networking is generally
suitable, however larger networks with managed opera-
tions will often determine each device needs to have a
dedicated and static IP address.
DHCP IP address
DHCP is set as the network configuration by default for
P400.
Static IP address
To enable a static IP address, change configuration method
to static and fill in the details required in Address, Mask and
Gateway. Particular attention should be paid to the Address
and Mask fields as incorrect information entered will result
in device not being visible on the network and a factory
reset will be required in order to recover the unit.
IP address recovery
In the event that the device is not visible on the network,
the network has changed, or the static IP address details
have been lost, reset the BirdDog back to its default settin-
gs by using the Birddog Neuralyzer application available at
bird-dog.tv/firmware
BirdDog name
You can name each unit with a friendly name that makes
sense for each production (Camera 1, Camera 2, etc). This
name will appear on any NDI receiver when it looks for
video coming from P400 over the network. The name must
not include any special characters and can be any combina-
tion of ‘a-z, 1-0, and –‘.
Note: no uppercase characters are valid.
On NDI receiving devices, the device will present as a
source as follows: birddog-name [CAM] when the unit is set
to automatic input.