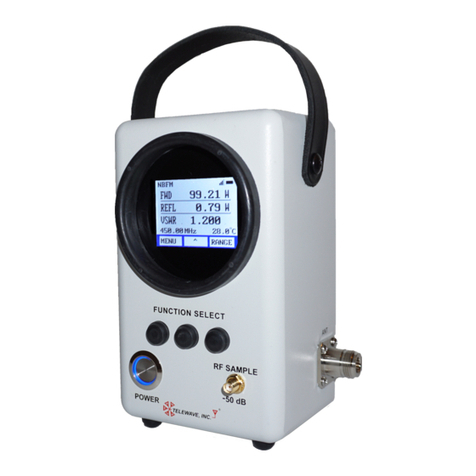
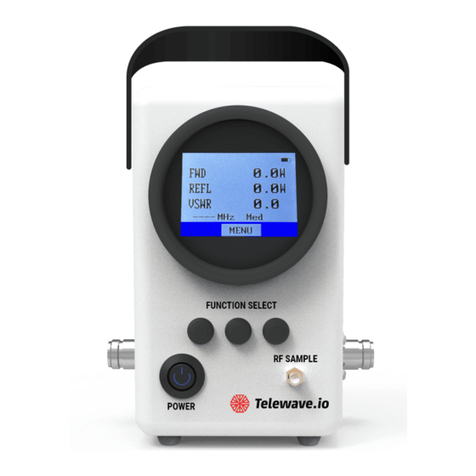
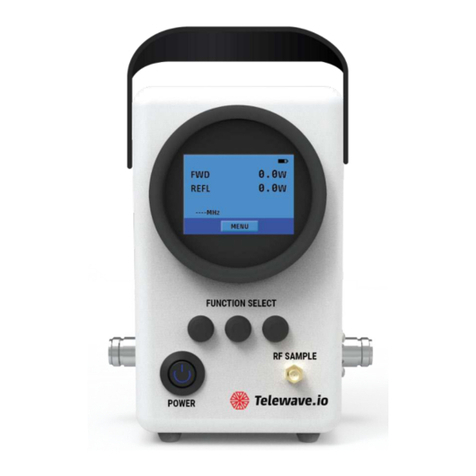
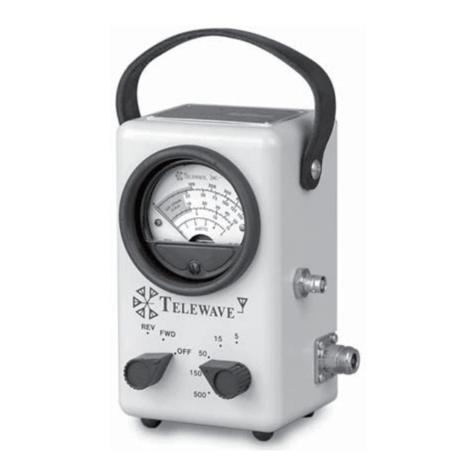
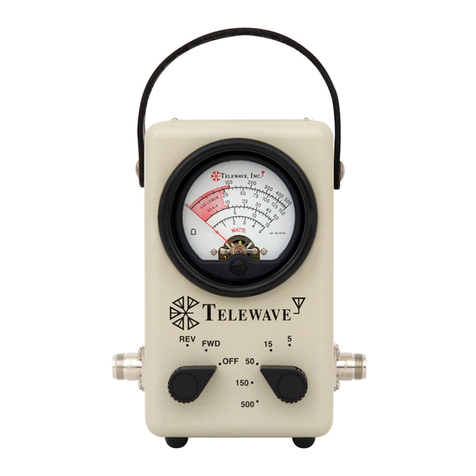
TELEWAVE 44D User manual

44D User Manual
Copyright © 2018 Telewave, Inc. Page 2of 29 Specifications subject to change without notice
3 Jul 2018
Table of Contents
COPYRIGHT/DISCLAIMER/WARRANTY...........................................................................................................4
PRECAUTIONS AND SAFETY INSTRUCTIONS.................................................................................................5
NOTES REGARDING LITHIUM BATTERIES...................................................................................................................5
QUICK START GUIDE .............................................................................................................................................6
OPERATION...............................................................................................................................................................7
CHARGING POWER SUPPLY &INTERNATIONAL POWER ADAPTERS...........................................................................7
CHARGING THE BATTERY..........................................................................................................................................7
POWER CONTROL ......................................................................................................................................................8
SLEEP MODE .............................................................................................................................................................8
MENU TREE...............................................................................................................................................................9
HOME SCREEN AND FIELDS DESCRIPTION ...............................................................................................................9
MAIN MENU.............................................................................................................................................................9
Modulation (no Menu) .......................................................................................................................................10
Frequency Range Menu .....................................................................................................................................10
Settings Menu.....................................................................................................................................................10
Info & Help Menu ..............................................................................................................................................10
SPECIFICATIONS...................................................................................................................................................11
FREQUENCY RANGE ................................................................................................................................................11
POWER RANGE (CONSTANT ENV)MODULATION.....................................................................................................11
POWER RANGE (NON-CONSTANT ENV)MODULATION............................................................................................11
RF AND MEASUREMENT..........................................................................................................................................11
USB CONNECTOR,BATTERY AND CHARGING.........................................................................................................12
MECHANICAL ..........................................................................................................................................................12
ENVIRONMENTAL ....................................................................................................................................................12
Operating ...........................................................................................................................................................12
Storage...............................................................................................................................................................12
WIRELESS CONNECTIVITY (FUTURE).......................................................................................................................13
MISCELLANEOUS: ACCESSORIES, OPTIONS, MAINTENANCE................................................................14
INCLUDED ACCESSORIES.........................................................................................................................................14
OPTIONAL LEATHER CASE ......................................................................................................................................14
OPTIONAL CONNECTOR ADAPTER KIT ....................................................................................................................14
OPTIONAL “QC –QUICK CONNECT”THRU-LINE CONNECTORS..............................................................................14
OPTIONAL THRU LINE ADAPTERS ...........................................................................................................................14
MAINTENANCE ........................................................................................................................................................15
STORAGE.................................................................................................................................................................15
CLEANING ...............................................................................................................................................................15
CALIBRATION..........................................................................................................................................................16
APPENDIX: CONNECTING THE METER TO THE CIRCUIT........................................................................17
CONCEPTS ...............................................................................................................................................................17
METER CONNECTION DIAGRAM ..............................................................................................................................17
CALCULATING THE PRIMARY &SECONDARY CABLE CUT LENGTH ........................................................................18
SAMPLE PRIMARY AND SECONDARY CABLE LENGTHS............................................................................................18
Velocity Factor 66% ..........................................................................................................................................18
Velocity Factor 85% ..........................................................................................................................................20
APPENDIX: RF SAMPLE PORT ISOLATION....................................................................................................22
APPENDIX: SUPPORTED MODULATION TYPES...........................................................................................23
APPENDIX: SPECIAL TEST CASES....................................................................................................................26
POSITIVE TRAIN CONTROL (PTC) RADIOS ..............................................................................................................26

44D User Manual
Copyright © 2018 Telewave, Inc. Page 3of 29 Specifications subject to change without notice
3 Jul 2018
TETRA SUBSCRIBER RADIOS..................................................................................................................................26
MONITORING AN ANTENNA THAT FOLLOWS A TX COMBINER.................................................................................26
APPENDIX: SPECIFICATION VALIDATION....................................................................................................27
MEASURING INSTRUMENTS AND ANCILLARY EQUIPMENT ......................................................................................27
BASELINE TEST SETUP ............................................................................................................................................27
THRU LINE POWER MEASUREMENT VERIFICATION.................................................................................................28
THRU LINE DIRECTIVITY VERIFICATION .................................................................................................................28
THRU LINE MATCH VERIFICATION..........................................................................................................................28
RF SAMPLE PORT MATCH VERIFICATION................................................................................................................28
THRU LINE TO RF SAMPLE PORT ISOLATION VERIFICATION ...................................................................................29
RF SAMPLE PORT TO THRU LINE ISOLATION VERIFICATION ...................................................................................29

44D User Manual
Copyright © 2018 Telewave, Inc. Page 4of 29 Specifications subject to change without notice
3 Jul 2018
Copyright/Disclaimer/Warranty
Copyright:
Copyright © 2018 by Telewave, Inc. All rights reserved.
Printed in the United States of America.
Disclaimer of Liability:
This manual contains Telewave, Inc. proprietary information, which is exempt from disclosure
under the Freedom of Information Act (5 USC 552). No part of this manual may be reproduced
or transmitted in any form or by any means, electronic or mechanical, including photocopying,
recording, or information recording and retrieval systems, for any purpose, without the written
consent of Telewave, Inc.
Warranty:
Products sold by Telewave, Inc. and covered by this Warranty are warranted to be free from defects
in material and workmanship at the time of and for a specified period after delivery to the Buyer.
Seller's entire warranty obligation is limited to making adjustments by repair, replacement, or
refunding the purchase price of any product which is returned to the Seller as provided below within
the specified period from the date of shipment by the Seller. In no event shall Seller be liable for
direct, special, or consequential damages for breach of warranty.
Adjustment will not be allowed for products which have been damaged by lightning, subjected to
abuse, improper application or installation, alteration or accident, or negligence in use, storage,
transportation or handling. Alteration or removal of the serial number or identification markings
voids the Warranty. Seller shall have the right of final determination as to the existence and cause of
a defect, whether adjustment will be allowed, and if allowed, whether adjustment will be by repair,
replacement, or refund. Where adjustment is not allowed, a charge of 5% of the original purchase
price will be made to the Buyer to cover the Seller's cost of inspection and handling.
Shipping and packaging instructions must be obtained from the Seller before products are returned
for adjustment. The Buyer will pay for packing, transportation, and transit insurance costs for
returned products. The Seller reserves the right to discontinue models at any time or change
specifications, design, or price without notice and without incurring any obligation. Products will be
returned to the Buyer with transportation cost collect.
Subject to the provisions of its "Patent Indemnity" clause, the Seller also warrants that it has the right
to sell its products, that the Buyer shall have and enjoy quite possession thereof as against any lawful
claims existing at the time of the sale by the Seller, and that said products are free from any charge of
encumbrance in favor of third persons existing at the time of sale by the Seller.
The foregoing constitutes the Seller's entire warranty, express, implied or statutory with respect to its
products and states the full extent of its liability for breach of Warranty and for damages, whether
direct, special or consequential resulting from any such breach. No change whatsoever thereto shall
be binding upon the seller unless made in writing and signed by a duly authorized representative of
the Seller.
Warranty Periods:
Antennas and antenna mounting hardware - 5 years
All other products - 1 year

44D User Manual
Copyright © 2018 Telewave, Inc. Page 5of 29 Specifications subject to change without notice
3 Jul 2018
Precautions and Safety Instructions
1. Read the user manual carefully. All Warnings and Cautions should be noted.
Contact Telewave Support with any questions.
Keep the user manual(s) for future reference.
2. Keep the meter away from sources of moisture or excessive humidity.
Never pour any liquid into the openings or connectors.
Do not immerse into any liquid. The meter is water resistant, not water proof
3. Do not store this meter in an unconditioned environment for an extended time. Prolonged
exposure to extreme heat, cold or moisture may cause damage.
4. Check the current capacity of the USB charger/power supply before connecting to the meter.
5. Do not attempt to disassemble the meter, there are no user serviceable parts inside.
6. Inspect the meter if it has been dropped or exposed to excessive vibration.
7. Contact Telewave Support if any of the following conditions arise:
There are any obvious signs of damage –case, display, connectors, switches, or etc.
Any liquid appears to have penetrated into the case.
The meter appears to malfunction or is giving obviously incorrect readings.
The meter has been tampered with, or opened by anyone other than Telewave.
8. Follow all normal Radio Frequency safety rules and High Voltage safety rules.
Double check all connections and configurations before applying power to transmitters
Double check all connections and configurations before keying any transmitters
Be mindful of short and long-term exposure risks to Radio Frequency Radiation
WARNING: This symbol alerts you to the risk of personal injury, hardware damage or
irrevocable loss of data.
CAUTION: This symbol denotes situations where instructions must be followed carefully
to avoid personal discomfort or to obtain expected results.
Notes regarding Lithium Batteries
WARNING: The batteries in this meter must be discharged to 1/3 or less capacity before
the unit can be transported by Air. This is a legal and safety requirement for all lithium batteries.
WARNING: The internal batteries are not user serviceable. The meter must be returned
to Telewave for service if the batteries no longer accept or retain a sufficient charge.
Telewave recommends returning the wattmeter to the factory every two years for inspection &
calibration. Calibration must be done at Telewave, contact Telewave sales for a quote.
The inspection includes checking the health of the batteries and creating a battery health report.
To return a meter to Telewave; complete the RMA request form located on our web site
www.telewave.com, or call 408-929-4400 Option 1 if assistance is needed to compete the RMA.

44D User Manual
Copyright © 2018 Telewave, Inc. Page 6of 29 Specifications subject to change without notice
3 Jul 2018
Quick Start Guide
The complete 44D User Manual is available for download at www.telewave.com.
1. Unpack and inspect the 44D and accessories (USB cable, AC power supply, & AC adapter kit)
a. Check the box and contents for any damage immediately after it arrives
b. In case of any damage or missing item, contact Telewave immediately, 408-929-4400 Opt 1.
2. Charge the Batteries
a. Plug the B side of the USB cable into the meter (the connector is located on the back)
b. Plug the A side of the USB cable into the supplied AC power supply or any other USB power
source capable of supplying at least 2.4 amps of charging current
c. Depleted batteries will require about 8 hours of charging time to reach a full charge.
CAUTION: Fully charge the batteries after long term storage.
3. Build or procure “Primary Cables”(see “Appendix - Connecting the Meter to the Circuit”)
4. Press and hold the power button until the blue power indication in the switch illuminates
5. The meter will be functional in three to five seconds as indicated by:
a. Backlight will be illuminated
b. Frequency, temperature & battery indicators are displayed
6. The menu tree is as follows:
HOME
Soft Key MENU ^MEAS ^CALC
V Measurements Calculations
Freq Range > Set low, medium or high frequency range
Settings > Modify some look & feel parameters
Info & Help > Show Version, Telewave contact
Exit > Return to the HOME screen
7. When in any MENU screen other than the HOME Screen, the
function buttons will be UP, SELECT/EXIT, and DOWN.
a. Press SELECT implements the selection & returns HOME
b. Press EXIT aborts the selection and returns HOME
c. On read only screens EXIT returns HOME
8. Set the Frequency Range before use,all other settings are optional
9. Once the meter has been configured, the cables can be connected
a. Connect the primary cable to the port labeled TX on the left side of the meter (RF input)
b. Connect the cable leading to the antenna to the port on the right side of the meter (RF output)
10. The RF Sample port can be connected to any monitor or source test equipment. The sample
port is bi-directional, with connectivity to both the Thru Line TX and Thru Line ANT port.
Wiring Diagram
Original Circuit ½ WL Increment
Insert test cables 44D
& 44D at the TX ANT
Component output
Primary Cable (1/2 WL increment minus 5”) Secondary Cable (Optional = ½ WL increment)

44D User Manual
Copyright © 2018 Telewave, Inc. Page 7of 29 Specifications subject to change without notice
3 Jul 2018
Operation
Charging Power Supply & International Power Adapters
The included power supply for charging the batteries supports 90 to 250 volts at 50 or 60 hertz.
The power plug on the power supply is an IEC international “Plug Type A”.
Type A to Type C, G, and I adapters are included with the wattmeter. This AC adapter kit will
allow the power supply to be safely connected to the power sockets in most countries.
Visit the International Electro technical Commission (IEC) website for a complete list of socket
types, and power voltage/frequencies used in various countries: http://www.iec.ch/worldplugs/.
Description
Picture
Short list of Areas/Countries where the “Type” is used
Type A
Plug on the
power supply
North and Central America, Japan
Directly compatible with Type B sockets
Type C
Universal to
Euro 2P AC
Power Plug
Europe (except UK), Ireland, Cyprus, Malta
Directly compatable with Type E, F, J, K, & N sockets
Type G
Universal to
UK 3P AC
Power Plug
UK, Ireland, Cyprus, Malta, Malaysia, Singapore,
Hong Kong
Type I
Universal to
AUS 3P AC
Power Plug
Australia, New Zealand, Papua New Guinea, Argentina,
China
Charging the Battery
The battery can be charged when the meter is on or off, and can be charged from any USB
source that supports a 2.4 amp load (laptop USB port, vehicle charging adapter, etc.) Connect
the supplied USB cable between the power source and the meter, charging will begin as soon as
the meter detects voltage on the USB connector.
CAUTION: When the meter off the display is blank. There is no indication that the meter
is charging, fully charged, or that the USB cable is disconnected or not suppling charge current.
Battery charge indication:
Bars 3 equals >3/4, 6-8 hours awake time remain
Bars 2 equals >1/2, 4-6 hours awake time remain
Bars 1 equals >1/4, 2-4 hours awake time remain
Flashing equals <1/4, 0-2 hours awake time remain

44D User Manual
Copyright © 2018 Telewave, Inc. Page 8of 29 Specifications subject to change without notice
3 Jul 2018
Though not recommended, the wattmeter can be left connected to the USB power source for an
extended period of time. The internal charging controller can detect when the batteries are fully
charged, and stop charging the batteries until they have been partially discharged.
WARNING: Charge the batteries at least once every six months to prevent battery damage
CAUTION: Fully charge the batteries after removing the meter from long term storage.
Power Control
The meter has a latching push power button in the lower left corner of the front panel.
To turn the meter ON, push the power button until you hear a clicking sound and/or you see that
the power switch rim is illuminated with a blue glow. After a few seconds the display backlight
will illuminate, and the power up sequence will be shown in the display.
The power up sequence, as is seen in the display is:
The screen backlight will illuminate after about two seconds
Then the HOME screen will display
After that the frequency, temperature and battery status indications will be displayed
Once the power up sequence is complete the HOME screen will indicate the settings that were
selected when the meter was previously turned off (units of measurement, backlight level, etc.)
The power switch will remain partially depressed while the meter is turned on.
To turn the meter OFF, push the power button in slightly further, and release. The switch will
return to the flush position, the blue rim light will extinguish, the display backlight will turn off
and the display will become blank. There are no lights or display activity when the unit is off.
Sleep Mode
The meter can be configured to go to “sleep” after few of minutes of inactivity. Inactivity is
defined as no function select buttons have been pushed. If the meter is connected to a transmitter
and is reading power, it will still go to sleep if the sleep timer expires (no buttons were pushed.)
Sleep mode is indicated by the following:
The display backlight will extinguish and the display will be blank/dark
The meter will emit a beep sound as it is going to sleep
The blue ring around power button will remain lit
To wake the meter, turn off the power button and then turn it back on.
The meter will boot back to the previous configuration in a few seconds.
CAUTION: The meter will only go into sleep mode when the HOME screen is displayed.
When any screen other than HOME is displayed and the sleep timer expires, the meter will wait
for the user to complete the pending action; and then go to sleep.
NOTE: RF signals will flow though the through line sensor un-impeded with the wattmeter
power turned on or off. Any live circuits that are monitored with the wattmeter will not be
affected if the wattmeter goes to sleep or is turned off while connected to the circuit.

44D User Manual
Copyright © 2018 Telewave, Inc. Page 9of 29 Specifications subject to change without notice
3 Jul 2018
Menu Tree
HOME Screen and Fields Description
HOME Screen Description
Battery Status
FWD (measured forward power)
Measured Value
Avg (W/dBm) or Peak (W/dBm)
REFL (measured reflected pwr)
Measured Value
Avg (W/dBm)
Calculated Info
Calculated Value
VSWR / Return Loss / Crest
Measured Frequency MHz
Measured Temperature C or F
MENU
^MEAS
^CALC
After the system has completed the power up sequence the default screen configuration is shown.
Top Row indicates the Battery Life
The second and third rows indicate results measured from the main thru line connectors.
These measurements are the primary function of the meter.
The forth row indicates calculated results based on the measurements from rows two and three.
The fifth row indicates the measured frequency of the RF signal, and the ambient temperature of
the critical RF detector circuits. The meter compensates for temperature changes, allowing high
accuracy at any ambient temperature within the specification range.
NOTE: All measured and calculated indications will be zero “0” or dash “---“ until the
average power level detected on the forward through line connector exceeds 1 watt (minimum.)
The bottom row indicates the current function of the three buttons located just below the screen.
The purpose of each of these buttons change as the needed for easy configuration of the meter.
The HOME screen function buttons are:
MENU Open the MAIN menu
^MEAS Rotate the Measured results display between Average or Peak Power
in Watts or dBm.
^CALC Rotate the Calculated results display between VSWR / Return Loss,
and Crest Factor (indicated in dB in place of PAPR, no linear indication)
The meter is auto ranging for any power or frequency within the ranges indicated in the specs.
MAIN Menu
The main MENU allows access to these categories:
FREQ RANGE Configure the meter to High freq (>100 MHz) or Low freq range
SETTINGS Adjust meter display parameters
INFO & HELP Read only meter attributes and Telewave contact information
EXIT Return to the HOME screen
For the main MENU and all Sub-Menus
Scroll up and down in the options by pressing the UP and DOWN buttons.
Pressing the SELECT key will select the currently highlighted item.
Selecting EXIT will return to the HOME screen without making any changes.

44D User Manual
Copyright © 2018 Telewave, Inc. Page 10 of 29 Specifications subject to change without notice
3 Jul 2018
Modulation (no Menu)
There is no menu for selecting the modulation to be measured. The currently supported
modulation types are all accurately measured without any special meter configuration.
A complete listing of the modulation types supported as of the publication of this version of the
User Manual is listed in “Appendix –Supported Modulation Types”.
Frequency Range Menu
The menu will list all modulation types supported by the current hardware & firmware version
88-100 MHz Select for measuring frequencies between 88 and 101 MHz
101-700 Mz Select for measuring frequencies between 101 and 701 MHz
701-1000 M Select for measuring frequencies between 701 and 1000 MHz (1 GHz)
EXIT Return to the HOME screen
CAUTION: The Frequency Range is the only mandatory setting. The meter will not be
able to accurately measure the absolute power of the signal if the range is not set correctly.
Settings Menu
This menu is for setting the units of measurements and other behavioral parameters of the meter:
Power Units Select forward and reverse power display in Watts or dBm
Temperature Select temperature display in Fahrenheit or Celsius
Backlight Select the backlight intensity: Low, Medium, High
Power Saving Select duration of sleep initiation timer
WLAN Select the WLAN radio on or off (future use –leave off)
EXIT Return to the HOME screen
Power saving selections:
OFF Select never sleep
30 Minutes Select sleep after 30 minutes of inactivity
15 Minutes Select sleep after 15 minutes of inactivity
5 Minutes Select sleep after 5 minutes of inactivity
EXIT Return to the HOME screen
Info & Help Menu
This menu is for query of the attributes of the meter:
About Display the hardware and firmware version of the meter
Help Display the phone number and email address of Telewave support
LAN IP Display the IPv4 Address of the internal WLAN Radio (future use)
MAC Add Display the MAC Address of the internal WLAN Radio (future use)
EXIT Return to the HOME screen

44D User Manual
Copyright © 2018 Telewave, Inc. Page 11 of 29 Specifications subject to change without notice
3 Jul 2018
Specifications
If the meter is reading a signal that is outside the range of these specifications; the meter will
indicate that it is “Out of Range”. Accuracy of the meter is compromised when out of range.
Frequency Range
Calibrated Range 88 MHz to 1000 MHz (1 GHz)
Power Range (Constant Env) Modulation
Forward and Reverse (Min to Max) 1 Watt to 500 Watts (30 dBm to 57 dBm)
Power Range (Non-Constant Env) Modulation
Forward and Reverse Average (Min to Max) 1 Watt to 250 Watts (30 dBm to 54 dBm)
Forward Peak (Min to Max) 1 Watt to 500 Watts (30 dBm to 57 dBm)
RF and Measurement
RF Impedance of all RF Ports 50 Ohms
Main RF Connectors Supported (Female) Standard = N (field swappable)
Optional = BNC, TNC, UHF
RF Sample Port Connector (Female) Standard = SMA (only)
Worse case VSWR (Return Loss) 50 Ohm Line < 1.21:1 (> 20.5 dB)
RF Insertion Loss (through main RF connectors) Less than 0.02 dB up to 500 MHz
Less than 0.04 dB up to 1 GHz
RF Sample Port Insertion Loss -50 dB +/- 2 dB from 200 MHz to 1 GHz
-50 dB +0/-12 dB from 88 MHz to 200 MHz
See “Appendix –RF Sample Port Isolation” for isolation by frequency details
Frequency Counter Accuracy +10/-20 KHz at all frequencies
Maximum Settling Time 2 Seconds (Pulsed Digital/Analog)
(Time required to capture, 2 Seconds (Continuous Digital)
Process, and display the result) 1 Second (Continuous Analog)
Thru Line Coupler Directivity Minimum >20 dB
RMS RF Power Measurement Accuracy +/- 6% from 88 MHz to 1 GHz
Peak RF Power Measurement Accuracy +/- 6% from 88 MHz to 1 GHz
Crest Factor 1 to 3 (1:1 to 3:1)
Peak amplitude of the waveform divided by the RMS value of the waveform
Peak-To-Average Power Ratio (PAPR) 0 to 12 dB
Peak amplitude squared divided by the RMS value squared expressed in decibels
CAUTION: Usually the RMS measurement accuracy is greater than the peak measurement
accuracy. When the Crest Factor indicates higher than 3 or the PAPR indicates higher than 12
dB, the RMS measurement becomes inaccurate/unusable, and only the Peak reading is reliable.

44D User Manual
Copyright © 2018 Telewave, Inc. Page 12 of 29 Specifications subject to change without notice
3 Jul 2018
USB Connector, Battery and Charging
Battery Life 8 hours on time for fully charged batteries
Battery Charge Time 8 hours to fully charge depleted batteries
USB Charger VAC Requirements 90 to 250 VAC at 50 or 60 Hz
Universal Power Plug Adapter Kit Charger comes with an IEC Type A plug
IEC (International Electrotechnical Commission) Adapter kit converts to Type C, G or I plug
Compatible Type B, E, F, J, K, & N socket
USB Charger VDC Requirements 5 Volts DC at maximum 2.4 Amps
(Simultaneous charging and operation)
USB Connector USB 2.0 Type B Jack
Mechanical
Meter weight 3 lb (1.4 kg)
Meter dimensions (LWH) inches (CM) 6.75”x 5.50”x 4.00”
Incl. knobs/feet/connectors - not incl. the handle (17.15 x 14.00 x 10.15 cm)
Shipping weight meter only 4 lb (1.8 kg)
Shipping weight with optional case 5 lb. (2.3 kg)
Shipping dimensions (LWH) inches (cm) 10.00”x 8.00”x 6.00"
(25.40 x 20.30 x 15.25 cm)
Environmental
International Protection Marking IEC Standard 60529, IP54 (internal test)
Temperature (High –Storage & Operation) MIL-810-F, Method 501.4
Humidity MIL-810-F, Method 507.4
Shock MIL-810-F, Method 516.5
Humidity Range (Operating / Storage) 35% to 85% non-condensing
WARNING: The meter is water resistant, but not water proof. If it appears that any liquid
has entered the meter (dropped in water), return the meter to Telewave for an internal inspection.
Operating
Operating Temperature Range (USB Connected) +32°F to +113°F (0°C to +45°C)
Operating Temperature Range (USB Disconnected) -4°F to +122°F (-20°C to +50°C)
Storage
Storage (Long Term) Temperature Range +68°F to +86°F (+20°C to +30°C)
WARNING: Charge the batteries at least once every six months to prevent battery damage
CAUTION: Fully charge the batteries after removing the meter from long term storage.

44D User Manual
Copyright © 2018 Telewave, Inc. Page 13 of 29 Specifications subject to change without notice
3 Jul 2018
Wireless Connectivity (Future)
WLAN (Wireless Local Area Network) 2.4 GHz IEEE 802.11b/g/n internal antenna
The WLAN radio is turned off in this firmware. Leave the radio turned off.

44D User Manual
Copyright © 2018 Telewave, Inc. Page 14 of 29 Specifications subject to change without notice
3 Jul 2018
Miscellaneous: Accessories, Options, Maintenance
408-929-4400 Option 1. Refer to the descriptions and part numbers listed below.
Included Accessories
The Wattmeter comes with:
Universal (wall wart type) power supply 10769 Telewave Part Number
USB type A to type B cable 10771 Telewave Part Number
Universal AC Plug Adapter Kit (complete adapter kit) 10770 Telewave Part Number
US to Type C Adapter (1 each) 10776 Telewave Part Number
US to Type G Adapter (1 each) 10777 Telewave Part Number
US to Type I Adapter (1 each) 10778 Telewave Part Number
Optional Leather Case
For transport and storage of the wattmeter and accessories. TC44 Telewave Part Number
Optional Connector Adapter Kit
The Tele-Dapt 2000™ Adapter Kit is available for easy connection of the wattmeter to cables
that do not have the same type of connectors as is fitted on the wattmeter. The kit can also be
used as a general adapter kit when connecting various test equipment to the system under test.
Tele-Dapt 2000™ (complete adapter kit) CO2000 Telewave Part Number
Universal Center Bullet (6 each in kit) CO2013 Telewave Part Number
UHF Male (PL-239) (2 each in kit) CO2001 Telewave Part Number
UHF Female (SO-239) (2 each in kit) CO2007 Telewave Part Number
N Male (2 each in kit) CO2003 Telewave Part Number
N Female (2 each in kit) CO2009 Telewave Part Number
BNC Male (2 each in kit) CO2004 Telewave Part Number
BNC Female (2 each in kit) CO2010 Telewave Part Number
Optional “QC – Quick Connect” Thru-Line Connectors
The wattmeter can be ordered with the following thru-line connectors:
N Female (default) (1 each) QC44N Telewave Part Number
BNC Female (1 each) QC44B Telewave Part Number
TNC Female (1 each) QC44T Telewave Part Number
UHF Female (1 each) QC44S Telewave Part Number
Let the sales representative know what type of connectors are required at the time of order.
The SMA Female connector is the only type supported on the front facing RF Sample Port.
Optional Thru Line Adapters
The wattmeter can be ordered with the following thru-line adapters:
DIN 7/16 F to N-M adapter (1 each) 10772 Telewave Part Number
DIN 4.3-10 F to N-M adapter (1 each) 10773 Telewave Part Number
Mini-UHF F to N-M adapter (1 each) 10774 Telewave Part Number
SMA F to N-M adapter (1 each) 10775 Telewave Part Number

44D User Manual
Copyright © 2018 Telewave, Inc. Page 15 of 29 Specifications subject to change without notice
3 Jul 2018
Maintenance
There are no user serviceable parts inside the wattmeter. Opening the cover voids the warranty.
To return a meter to Telewave; complete the RMA request form located on our web site at
www.telewave.com, or call 408-929-4400 Option 1 if assistance is needed to compete the RMA.
The meter will not be damaged by mist, fog, or light rain. Wipe the moisture off with a dry cloth.
WARNING: The meter is water resistant, but not water proof. If it appears that any liquid
has entered the meter (dropped in water), return the meter to Telewave for an internal inspection.
WARNING: Contact Telewave support at [email protected] or call 408-929-4400
Option 2 if the meter appears to malfunction or is giving obviously incorrect readings.
Storage
The meter can be stored for long periods of time with no damage. It is recommended to store the
meter in the TC44 Case, or it can be wrapped in a cloth and placed into a box or other container.
If the meter is accidently left on or turned on when placed into storage, the power controller will
eventually turn off the meter. Even when turned off, the batteries will discharge during storage.
WARNING: Store the meter in a dry, temperature controlled environment. Long term
exposure to temperatures outside specification, or moisture may damage the meter.
WARNING: Charge the batteries at least once every six months to prevent battery damage.
CAUTION: Fully charge the batteries after removing the meter from long term storage.
Cleaning
To clean the wattmeter, put some mild liquid soap onto a soft but moist cloth. Wipe the dirt
from the wattmeter with a light touch. Use a rinsed moist towel or a second moist towel to clean
any residual soap from the wattmeter. The meter can air dry or be dried with a third soft cloth.
The accessories or optional case can be cleaned using the same procedure as for the meter.
WARNING: Make sure the power supply and USB cable are dry before connecting to AC
power. An electrical shock hazard exists if the components are wet when plugged in to an outlet.
WARNING: Do not use more than a few drops of water or soap when cleaning the meter.
Excessive water or soap could leak into the meter and may cause damage or a malfunction.
CAUTION: Do not use powder or abrasive soap. These soaps may scratch the case or
display cover glass. Scratches or similar damage to the display cover glass are not warrantied.

44D User Manual
Copyright © 2018 Telewave, Inc. Page 16 of 29 Specifications subject to change without notice
3 Jul 2018
Calibration
Telewave recommends returning the wattmeter to the factory every two years for inspection &
calibration. Calibration must be done at Telewave, contact Telewave sales for a quote.
Before each meter is calibrated it will be inspected. A report will be provided detailing any
issues found (including battery health test report.) Any deficiencies will be repaired (warranty
for free, non-warranty if customer authorized) and then the meter will be calibrated. Unrepaired
deficiencies may cause calibration failure. Firmware version will be updated to latest, no charge.
Accuracy is guaranteed as long as the frequency that is measured and the ambient temperature
are within the specified range. There are no field offset tables for frequency or temperature.
CAUTION: Accuracy also depends on properly cabling the wattmeter into the circuit to be
tested. Carefully follow the instructions for connecting the meter as described below.
To return a meter to Telewave; complete the RMA request form located on our web site at
www.telewave.com, or call 408-929-4400 Option 1 if assistance is needed to complete the RMA.

44D User Manual
Copyright © 2018 Telewave, Inc. Page 17 of 29 Specifications subject to change without notice
3 Jul 2018
Appendix: Connecting the Meter to the Circuit
Concepts
RF power will transfer from the source to the destination with the most efficiency when:
The source and load impedance are the same
The source and the load are separated from each other by a cable that has been cut so that the
electrical length of that cable is a ½ wavelength increment.
When the cables are ½ electrical wavelength increment long, any reflected energy from a load or
source mismatch will arrive at the source 180 degrees out of phase compared to the energy
emanating from that source. The reflected energy will cancel a portion of the source energy.
Cutting the cables to the proper length in the LMR environment has the following advantages:
Energy reflected by mismatches is dissipated, rather than bounce back and forth
Power amplifiers and other components will run cooler (less energy to dissipate)
Power meters can more accurately read forward vs. reverse power in the circuit
Impedance mess-matches at an antenna/feed interface are less likely to be masked by the losses
encountered with long feed lines.
Inserting a meter into the circuit has less impact on the behavior of the circuit.
To properly connect the wattmeter to the circuit to be tested, the cables used to insert the meter
into the circuit should be of a length that is close (within 10%) to an increment of ½ wavelength.
These cables are a “Primary Cable” (always need) and a “Secondary Cable” (sometimes need).
When calculating the length of the “primary cable”, subtract 5 inches (12.5 cm) from the length
of the cable to allow for the insertion of the wattmeter.
When calculating the length of the “secondary cable”, do NOT subtract any length for the meter.
This cable should be an exact ½ wavelength increment in length.
It is suggested to have one or two primary cables built for each band that needs to be tested. For
example, a cable built to 159 MHz would cover 144 MHz to 174 MHz. Another cable built for
455 MHz would cover 440 to 470 Mhz. The key is using the same cables in a consistent manner
so that the test results are repeatable, and any system changes are noticed during maintenance.
CAUTION: The formulas for calculating the cut length of the cable does not consider the
length of any lead wire from a connector on a radio, amplifier, cavity or other device in the RF
system. In some situations, the length of internal leads and/or cavity loop lengths may need to be
considered and the length of the primary and secondary cables shortened to properly compensate.
Meter Connection Diagram
Original Circuit ½ WL Increment
Insert test cables 44D
& 44D at the TX ANT
Component output
Primary Cable (1/2 WL increment minus 5”) Secondary Cable (Optional = ½ WL increment)

44D User Manual
Copyright © 2018 Telewave, Inc. Page 18 of 29 Specifications subject to change without notice
3 Jul 2018
Calculating the Primary & Secondary Cable Cut Length
The steps to calculate the length of the cables are:
Find the base cable length:
(Speed of Light in a vacuum (299,792,458 Meters/Second) divided by (Frequency in Hertz))
Times (Velocity Factor of the cable in %) Times (wave length required… 0.5 for ½ etc.)
Sample = ((299792458/445000000) * 0.85 *0.5) = 0.29 meters or 28.6 cm
Subtract 2 cm for the 2 N Male connectors on the end of the cable:
Sample = 28.6 cm minus 2 cm (for two each N Male connectors = 26.6 cm
Subtract 12.5 cm for the meter:
Sample = 26.6 cm minus 12.5 cm (the distance across the thru line meter) = 14.1 cm
In this example, the final cut length for the cable would be 14.1 cm.
If a cable is required after the meter (to reach back to the feed line as an example), that cable
should be built to ½ wave length without compensating for the meter = 26.6 cm cut length
CAUTION: The samples above are for a ½ wave length cable. The cables can be made
longer as needed. Make the cables lengths at a ½ wave length increment: 1.0, 1.5, 2.0, etc.
Sample Primary and Secondary Cable Lengths
The tables assume that the cables will have N Male connectors at each end, thus 2 cm will be
subtracted already for the cable cut length.
CAUTION: The formulas for calculating the cut length of the cable does not consider the
length of any lead wire from a connector on a radio, amplifier, cavity or other device in the RF
system. In some situations, the length of internal leads and/or cavity loop lengths may need to be
considered and the length of the primary and secondary cables shortened to properly compensate.
Velocity Factor 66%
For cables such as: RG-214, RG-213, RG-174, RG-58, and RG-6A

44D User Manual
Copyright © 2018 Telewave, Inc. Page 19 of 29 Specifications subject to change without notice
3 Jul 2018
1 Wave Length Cables
Cable Lengths (Primary Cable and Secondary Cable)
VF
66.0%
Meters
Centimeters
Feet
Inches
WL
1.0
Pri
Sec
Pri
Sec
Pri
Sec
Pri
Sec
MHz
30.0
6.450
6.575
645.0
657.5
21.2
21.6
254.0
258.9
MHz
40.0
4.802
4.927
480.2
492.7
15.8
16.2
189.0
194.0
MHz
50.0
3.812
3.937
381.2
393.7
12.5
12.9
150.1
155.0
MHz
60.0
3.153
3.278
315.3
327.8
10.3
10.8
124.1
129.0
MHz
70.0
2.682
2.807
268.2
280.7
8.8
9.2
105.6
110.5
MHz
80.0
2.328
2.453
232.8
245.3
7.6
8.0
91.7
96.6
MHz
90.0
2.053
2.178
205.3
217.8
6.7
7.1
80.8
85.8
MHz
100.0
1.834
1.959
183.4
195.9
6.0
6.4
72.2
77.1
MHz
110.0
1.654
1.779
165.4
177.9
5.4
5.8
65.1
70.0
MHz
120.0
1.504
1.629
150.4
162.9
4.9
5.3
59.2
64.1
MHz
130.0
1.377
1.502
137.7
150.2
4.5
4.9
54.2
59.1
MHz
140.0
1.268
1.393
126.8
139.3
4.2
4.6
49.9
54.9
MHz
150.0
1.174
1.299
117.4
129.9
3.9
4.3
46.2
51.1
MHz
160.0
1.092
1.217
109.2
121.7
3.6
4.0
43.0
47.9
MHz
180.0
0.954
1.079
95.4
107.9
3.1
3.5
37.6
42.5
MHz
190.0
0.896
1.021
89.6
102.1
2.9
3.4
35.3
40.2
MHz
200.0
0.844
0.969
84.4
96.9
2.8
3.2
33.2
38.2
MHz
210.0
0.797
0.922
79.7
92.2
2.6
3.0
31.4
36.3
MHz
220.0
0.754
0.879
75.4
87.9
2.5
2.9
29.7
34.6
MHz
230.0
0.715
0.840
71.5
84.0
2.3
2.8
28.2
33.1
MHz
240.0
0.679
0.804
67.9
80.4
2.2
2.6
26.7
31.7
2 Wave Length Cables
Cable Lengths (Primary Cable and Secondary Cable)
VF
66.0%
Meters
Centimeters
Feet
Inches
WL
2.0
Pri
Sec
Pri
Sec
Pri
Sec
Pri
Sec
MHz
240.0
1.504
1.629
150.4
162.9
4.9
5.3
59.2
64.1
MHz
260.0
1.377
1.502
137.7
150.2
4.5
4.9
54.2
59.1
MHz
280.0
1.268
1.393
126.8
139.3
4.2
4.6
49.9
54.9
MHz
300.0
1.174
1.299
117.4
129.9
3.9
4.3
46.2
51.1
MHz
320.0
1.092
1.217
109.2
121.7
3.6
4.0
43.0
47.9
MHz
340.0
1.019
1.144
101.9
114.4
3.3
3.8
40.1
45.0
MHz
360.0
0.954
1.079
95.4
107.9
3.1
3.5
37.6
42.5
MHz
380.0
0.896
1.021
89.6
102.1
2.9
3.4
35.3
40.2
MHz
400.0
0.844
0.969
84.4
96.9
2.8
3.2
33.2
38.2
MHz
420.0
0.797
0.922
79.7
92.2
2.6
3.0
31.4
36.3
MHz
440.0
0.754
0.879
75.4
87.9
2.5
2.9
29.7
34.6
MHz
460.0
0.715
0.840
71.5
84.0
2.3
2.8
28.2
33.1
MHz
480.0
0.679
0.804
67.9
80.4
2.2
2.6
26.7
31.7
MHz
500.0
0.646
0.771
64.6
77.1
2.1
2.5
25.5
30.4
MHz
520.0
0.616
0.741
61.6
74.1
2.0
2.4
24.3
29.2
MHz
540.0
0.588
0.713
58.8
71.3
1.9
2.3
23.1
28.1
MHz
560.0
0.562
0.687
56.2
68.7
1.8
2.3
22.1
27.0
MHz
580.0
0.537
0.662
53.7
66.2
1.8
2.2
21.2
26.1
MHz
600.0
0.515
0.640
51.5
64.0
1.7
2.1
20.3
25.2

44D User Manual
Copyright © 2018 Telewave, Inc. Page 20 of 29 Specifications subject to change without notice
3 Jul 2018
4 Wave Length Cables
Cable Lengths (Primary Cable and Secondary Cable)
VF
66.0%
Meters
Centimeters
Feet
Inches
WL
4.0
Pri
Sec
Pri
Sec
Pri
Sec
Pri
Sec
MHz
600.0
1.174
1.299
117.4
129.9
3.9
4.3
46.2
51.1
MHz
625.0
1.121
1.246
112.1
124.6
3.7
4.1
44.1
49.1
MHz
650.0
1.073
1.198
107.3
119.8
3.5
3.9
42.2
47.2
MHz
700.0
0.986
1.111
98.6
111.1
3.2
3.6
38.8
43.7
MHz
725.0
0.947
1.072
94.7
107.2
3.1
3.5
37.3
42.2
MHz
750.0
0.910
1.035
91.0
103.5
3.0
3.4
35.8
40.8
MHz
775.0
0.876
1.001
87.6
100.1
2.9
3.3
34.5
39.4
MHz
800.0
0.844
0.969
84.4
96.9
2.8
3.2
33.2
38.2
MHz
825.0
0.814
0.939
81.4
93.9
2.7
3.1
32.1
37.0
MHz
850.0
0.786
0.911
78.6
91.1
2.6
3.0
30.9
35.9
MHz
875.0
0.760
0.885
76.0
88.5
2.5
2.9
29.9
34.8
MHz
900.0
0.734
0.859
73.4
85.9
2.4
2.8
28.9
33.8
MHz
925.0
0.711
0.836
71.1
83.6
2.3
2.7
28.0
32.9
MHz
950.0
0.688
0.813
68.8
81.3
2.3
2.7
27.1
32.0
MHz
975.0
0.667
0.792
66.7
79.2
2.2
2.6
26.2
31.2
MHz
1000.0
0.646
0.771
64.6
77.1
2.1
2.5
25.5
30.4
Velocity Factor 85%
For cables such as: LMR-400/240, RG-8U, RG-8X, EcoFlex, CXP-1318, and RF600/400/240
1 Wave Length Cables
Cable Lengths (Primary Cable and Secondary Cable)
VF
85%
Meters
Centimeters
Feet
Inches
WL
1.0
Pri
Sec
Pri
Sec
Pri
Sec
Pri
Sec
MHz
30
8.349
8.474
834.9
847.4
27.4
27.8
328.7
333.6
MHz
40
6.226
6.351
622.6
635.1
20.4
20.8
245.1
250.0
MHz
50
4.951
5.076
495.1
507.6
16.2
16.7
194.9
199.9
MHz
60
4.102
4.227
410.2
422.7
13.5
13.9
161.5
166.4
MHz
70
3.495
3.620
349.5
362.0
11.5
11.9
137.6
142.5
MHz
80
3.040
3.165
304.0
316.5
10.0
10.4
119.7
124.6
MHz
90
2.686
2.811
268.6
281.1
8.8
9.2
105.8
110.7
MHz
100
2.403
2.528
240.3
252.8
7.9
8.3
94.6
99.5
MHz
110
2.172
2.297
217.2
229.7
7.1
7.5
85.5
90.4
MHz
120
1.979
2.104
197.9
210.4
6.5
6.9
77.9
82.8
MHz
130
1.815
1.940
181.5
194.0
6.0
6.4
71.5
76.4
MHz
140
1.675
1.800
167.5
180.0
5.5
5.9
66.0
70.9
MHz
150
1.554
1.679
155.4
167.9
5.1
5.5
61.2
66.1
MHz
160
1.448
1.573
144.8
157.3
4.7
5.2
57.0
61.9
MHz
180
1.271
1.396
127.1
139.6
4.2
4.6
50.0
54.9
MHz
190
1.196
1.321
119.6
132.1
3.9
4.3
47.1
52.0
MHz
200
1.129
1.254
112.9
125.4
3.7
4.1
44.5
49.4
MHz
210
1.068
1.193
106.8
119.3
3.5
3.9
42.1
47.0
MHz
220
1.013
1.138
101.3
113.8
3.3
3.7
39.9
44.8
MHz
230
0.963
1.088
96.3
108.8
3.2
3.6
37.9
42.8
MHz
240
0.917
1.042
91.7
104.2
3.0
3.4
36.1
41.0
Other manuals for 44D
1
Table of contents
Other TELEWAVE Measuring Instrument manuals
Popular Measuring Instrument manuals by other brands

Leica
Leica DISTO D2 user manual
PCB Piezotronics
PCB Piezotronics IMI Sensors 080A131 Installation and operating manual
Tenmars
Tenmars TM-4100 user manual
Calsense
Calsense RRe-TRAN user guide
Tenmars
Tenmars TM-183 user manual
PCB Piezotronics
PCB Piezotronics IMI SENSORS 627A71 Installation and operating manual


