Telpad MA7 User manual

TELPAD MA7
Android 4.4 Jellybean | 1.6GHz Quad Core Processor | Infrared Function

1
GETTING STARTED 01
1.1 About your TELPAD 02
2 TELPAD INTRODUCTION 03
2.1 Getting to know your TELPAD 04
2.2 Product Specication 07
2.3 Installation 09
2.3.1Basic Connection 09
2.3.2Installing the dock battery 10
2.3.3Docking and undocking the Tablet 10
3 TABLET FUNCTIONS 11
3.1
Turning the Tablet ON or OFF
12
3.1.1
Turning the Tablet ON
13
3.1.2
Turning the Tablet OFF
13
3.2 Charging the battery 14
3.2.1Charging the Tablet battery 14
3.2.2Charging the dock battery 14
3.3 Working with the keys 15
3.3.1
Using the physical keys
15
3.3.2 Working the touchscreen keys 15
3.4
Using the touch screen
16
3.5 Home screen 17
3.5.1Getting to know the Home screen 17
3.5.2Extended Home screens 18
3.5.3Customizing the Home screen 18
3.6 Locking and unlocking the screen 19
3.6.1Locking the screen 19
3.6.2Unlocking the screen 19
3.6.3Setting up a screen lock 19
3.6.4Setting a screen timeout period 19
3.7 Inputting text 20
3.7.1Entering text using the onscreen keyboard 20
3.7.2Cutting or copying text 21
3.8 Opening and switching applications 22
3.9 Accessing the Settings 22
3.10 Languages & input method & account setting 23
3.11 Setting the date and time 24
3.11.1To automatically set date and time 24
3.11.2 To manually set date and time 24
3.12 Installing or removing the microSD card 25
3.13 Connecting or disconnecting from a computer using USB 26
3.14 Connecting the Tablet to a TV 27
3.15 Wireless networks 28
3.15.1 Opening Wi-Fi settings 28
3.15.2 Turning Wi-Fi on or o 28
3.15.3 Connecting to a Wi-Fi network 29
3.15.4 Turning open network notication on or o 29
3.15.5 Adding a Wi-Fi Network 29
3.15.6 Forgetting a Wi-Fi network 29
3.16 Bluetooth 30
3.16.1 Opening Bluetooth settings 30
3.16.2 Turning Bluetooth on or o 30
3.16.3 Changing the Bluetooth name of your Tablet 30
3.16.4 Connecting to Bluetooth devices 31
3.16.5 Disconnecting from or unpairing a Bluetooth device 31
3.17 Google Services 32
3.17.1 Creating a Google Account 32
3.17.2 Using Play Store 33
3.17.3 Searching for Applications 33
3.17.4 Installing an Application 33
3.17.5 Uninstalling an Application 34
3.17.6 Backing up and restoring apps and settings from a Google account 34
3.18 E-mail 34
3.18.1 Opening E-mail 34
3.18.2 Adding and deleting e-mail accounts 35
3.19 Camera Instructions 37
3.20 Home control 40
3.20.1 IR Universal remote Initial Conguration 40
3.20.2 IR Learning 42
3.20.3 Reservation 43
3.20.4 Reservation Setup 44
3.20.5 Outside Home control 45
3.20.6 Motion detection 47
3.21 Home care 50
3.21.1
Bluetooth body scale User Guide
50
3.21.2
iFever Manage User Guide
54
3.22 Cast Screen Function Operation Guide 63
3.23 DLNA 68
3.23.1 DLNA introduction 68
3.23.2 DLNA functions 68
3.23.3 Control device discovery and connection 69
3.23.4 The brief introduction of interactions
72
4 THE CONNECTION BETWEEN DOCK PHONE AND TABLE 82
4.1 Voice call Services 83
4.1.1 Making a call 83
4.1.2 Answering a call 84
4.1.3 Ending a call 84
4.1.4 Selecting area code 84
4.1.5 Favorites 85
4.1.6 Memo 85
4.1.7 Importing/exporting contacts 85
4.1.8 Changing ringtones 86
4.1.9 Contacts 86
5 BASIC TROUBLESHOOTING FOR THE TELPAD 88
5.1 Tablet not powering up 89
5.2 No dial tone 89
5.3 Distorted audio on speaker 89
5.4 Tablet Dialler cannot make a call 89
5.5 No audio response in the Handset 89
6 FAQs 90
7 WARNINGS AND PRECAUTIONS 96
8 PERSONAL INFORMATION AND DATA SECURITY 101
9 LEGAL NOTICE 103
10 DISCLAIMER OF WARRANTIES 105
11 INDEX 107

1 GETTING STARTED

1.1 About your TELPAD
The TELPAD is the world’s rst landline, broadband, and tablet in one—a device that not only gives you access to
basic communication services, but also brings to your home a world of productivity and entertainment. The TELPAD
is powered by Android, the world’s leader in smartphone technology. With its stunning 7 inch touchscreen display,
built-in camera & Wi-Fi, access to hundreds of thousands of free and paid Android Apps, as well as its infrared
remote controller and wi- smart appliance controller, the TELPAD is denitely the ideal control and communication
center of your home!
02

2 TELPAD INTRODUCTION
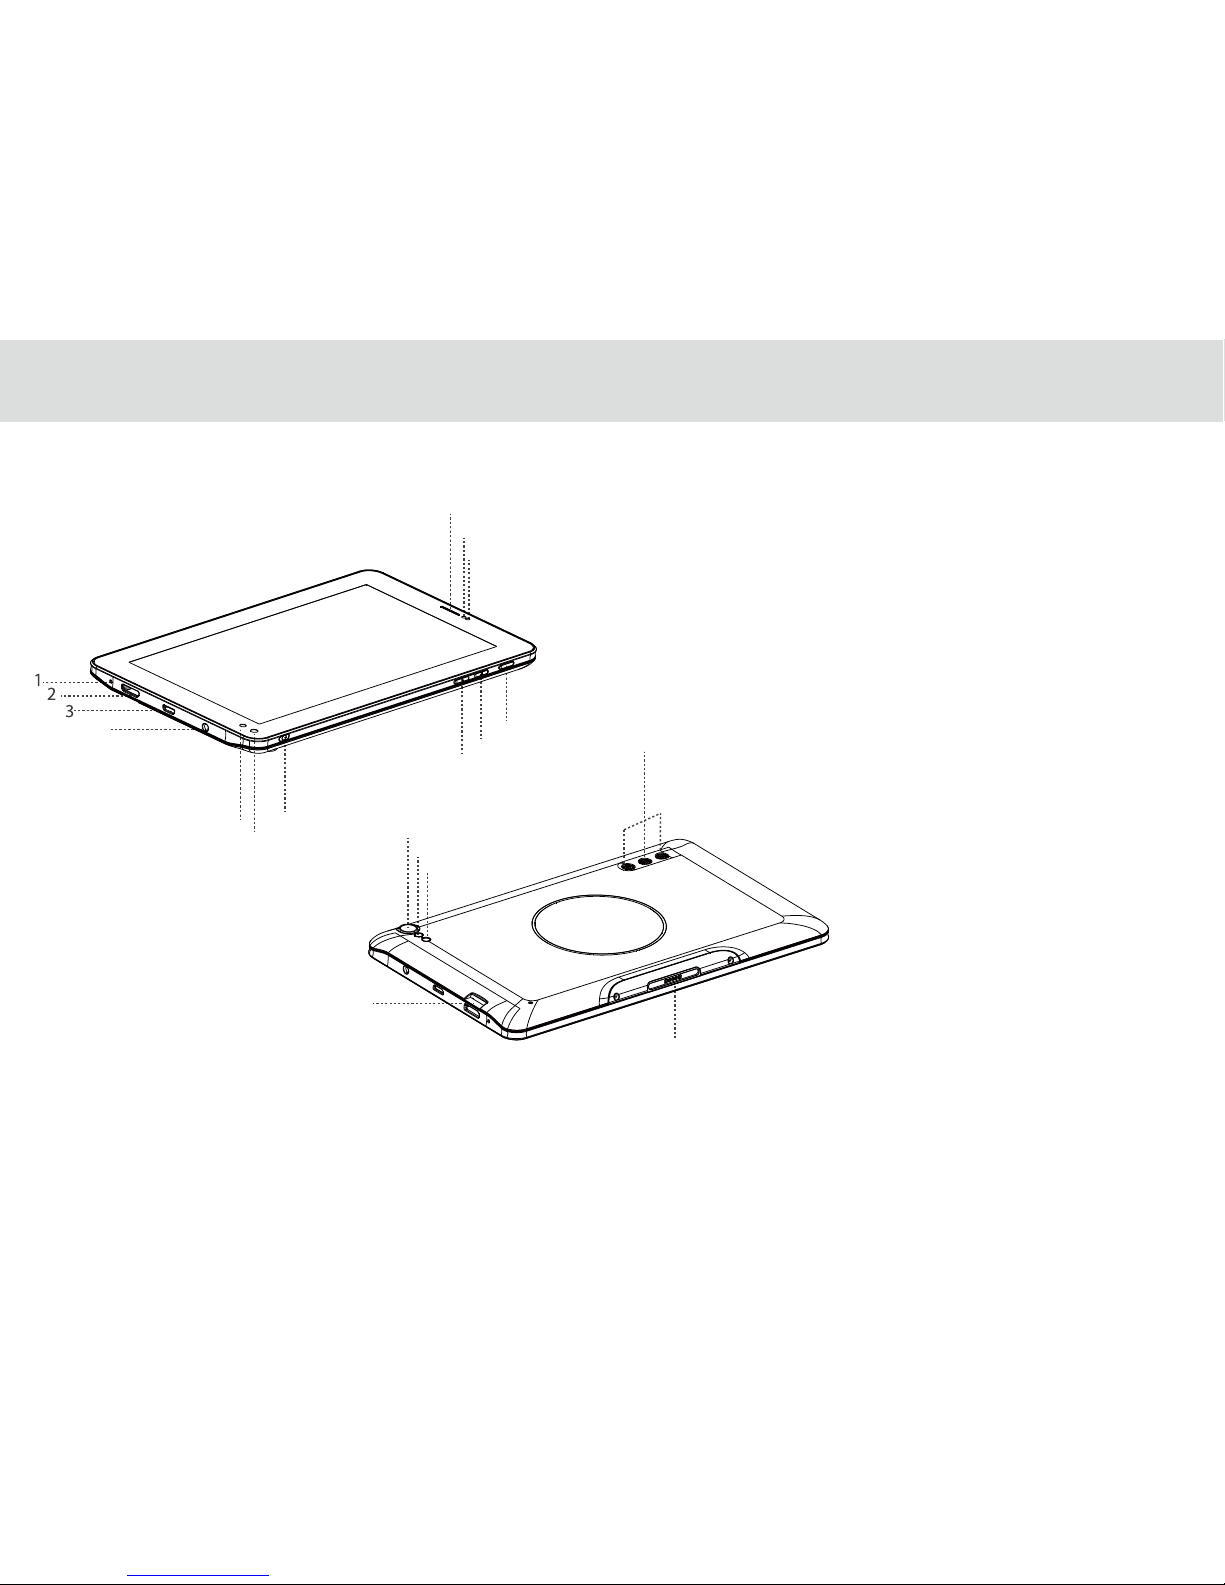
2.1 Getting to know your TELPAD
1.
2.
3.
4.
5.
6.
7.
8.
9.
10.
11.
12.
13.
14.
15.
16.
17.
18.
19.
04
4
56
7
11
12
13
14
15
16
17
18
19
8
9
10
Microphone(tablet)
Mini HDMI Port
USB Port
Earphone Jack
IR1(transmit)
IR2(transmit and receive)
IR3(transmit)
Rear Camera
Light sensor
Proximity sensor
Rear Camera Flash
Front Camera
Micro SD Card Slot
Dock Connection Interface
Power Button
Volume Down Button
Volume UP Button
Speakers(Tablet)
Tablet Receiver

20.
21.
22.
23.
24.
25.
26.
27.
28.
29.
30.
31.
32.
05
20
27
28
29 30 31 32
21
22 2324
25
26
Telephone Receiver/Handset
Speaker(Phone Set)
Flash key
Pause key
Redial key
Hands Free key
Phone Cord Jack
Numeric keypad
Ringtones Volume
Direct Current Input Jack
Extension Cord Jack
Landline Jack
Indicator(Charging/Incoming Calls)

Accessories
USB Data Cable
Coiled Phone Cord
Phone Line
HDMI ConverterUSB Charger USB Power Cable DC4.0
Battery
06

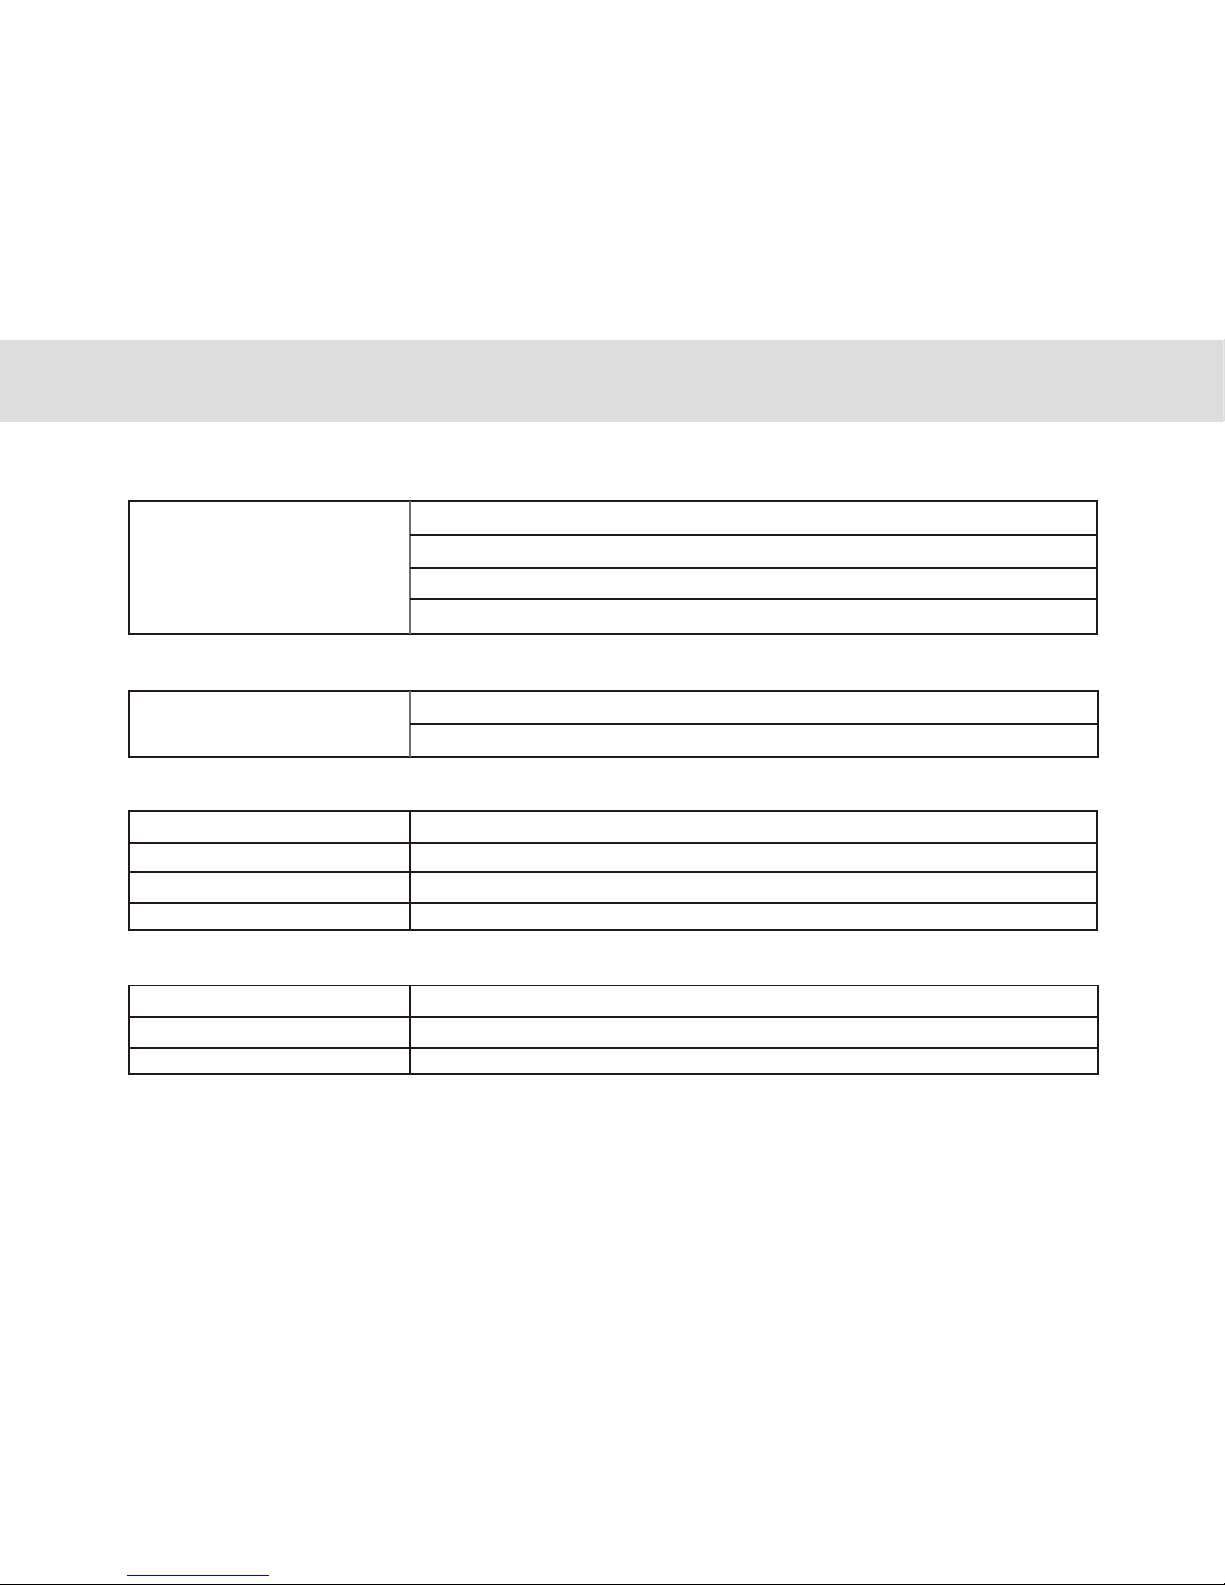
2.2 Product Speciciation
GENERAL SPECIFICATIONS AND DISPLAY
DIMENSION 189mm x 115 mm x 11 mm
7 Inch IPS (1024X600)DISPLAY AND RESOLUTION
Android™ 4.4.4SYSTEM SOFTWARE
Wi-Fi - 802.11b/g/n
24-bit
AIR INTERFACE
Capacitive 5-Points-TouchMULTI-TOUCH PANEL
3 Standard Soft Keys: Home, Back, Recent ApplicationsPRIMARY KEYPAD
DISPLAY COLOR DEPTH
CONNECTIVITY
BLUETOOTH Bluetooth 4.0 + EDR
Micro USB OTG x 1EA/USB Host x 1EA for MEP DockUSB
HDMI V 1.4/ Supports 3D outputDIGITAL TV OUT
1Watt x 1EASPEAKER
Built-in-microphoneMICROPHONE
3-Axis Accelerometer for UI Auto Rotate Ambient Light sensorSENSOR
Standard 3.5 mm headphone jackAUDIO OUT
HANDSET
PSTN Support (POTS) RJ9 (4P4C)
Built-inSPEAKER
Built-inMICROPHONE
07
SMART DIALER
PSTN
Call Hold
Speed Dial
Speaker
Volume Adjustment
COMMUNICATION AND ORGANIZER
EMAIL Protocols: SMTP, POP3 and IMAP4
Supports Exchange Calendar, Contacts synchronous
MEDIA PERFORMANCE
VIDEO DECODING
AUDIO DECODING
3GPP2, 3GPP, RMV, TS, 3GP, VOB, AVI, MP4, FLV, WMV, MKV
AAC, AMR, APE, FLAC, MID, MP3, OGG, WAV, WMA
PICTURE FORMATS
STREAMING MEDIA
JPEG, JPG, BMP, PNG
RTSP/HTTP, Support Download play, Progressive play
BATTERY AND POWER
TABLET BATTERY STD Lithium-Ion Polymer battery, 4100 mAh rechargeable
STD Lithium-Ion Polymer battery, 1000mAh rechargeableDOCK BATTERY
Input - 100 -240 Vac, Output – 5V DC/2.5A 12.5 WPOWER ADAPTER
08
09
Cast Screen Built-in widisplay application
DLNA Built-in eHomeMediaCenter application
infrareduniversal remote,Reservation,
Outside Home Control, motion detection
Body Temperature Monitor,Family Temperature Manager,
Menstrual Cycle,Fertility State
HOME CONNECT AND CONTROL
Home control
Home Care

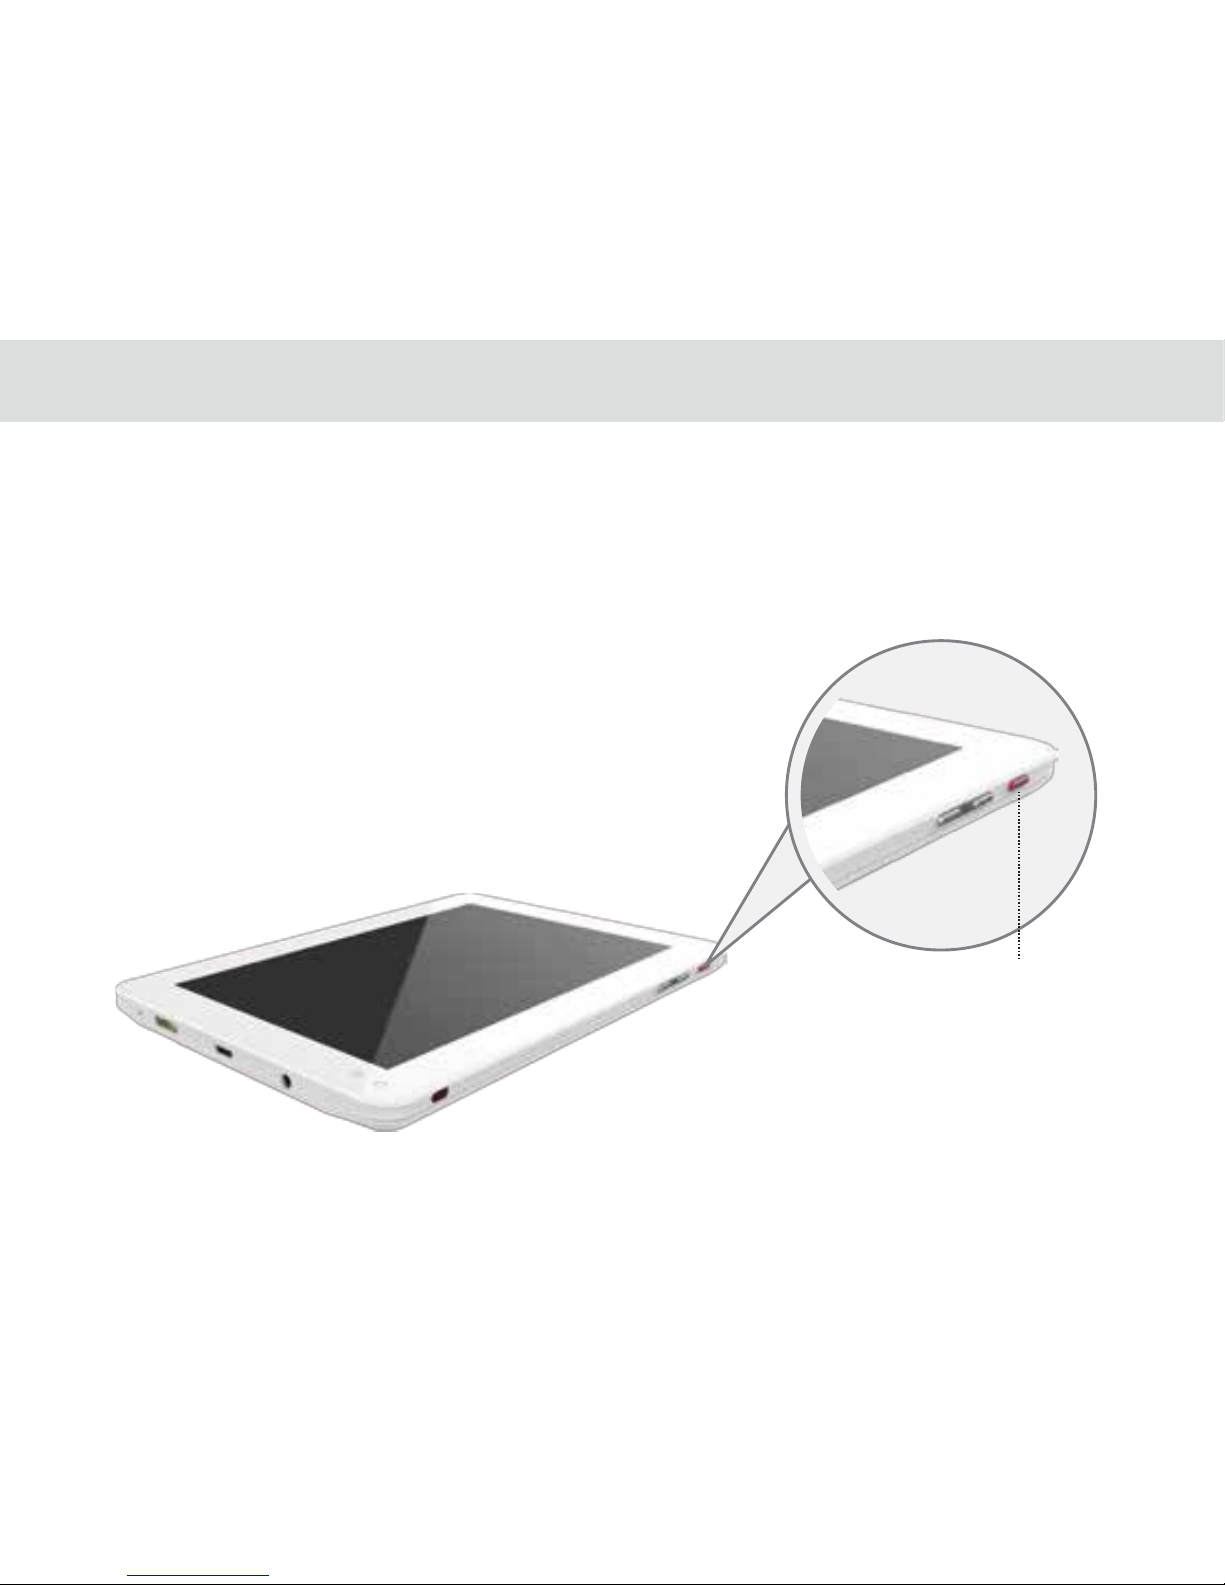
2.3 Installation
USB charger
2.3.1 Basic Installation
Before installing or removing the adapter, telephone line or the dock battery, ensure the tablet is o the dock.
10
USB Power Cable DC4.0

2.3.2 Installing the dock battery 2.3.3 Docking and undocking the Tablet
1. Removing the back cover
To remove the back cover,
refer to the following gure.
2. Installing the battery
To install the battery,
refer to the following gure.
1
2
To install the tablet on to the dock, refer to
the following gure.
To remove the tablet from the dock, do as shown
in this gure.
11

3 TABLET FUNCTIONS
Power key
3.1.1 Turning the Tablet ON
Before you turn on your tablet. ensure that the battery is correctly installed or the Tablet is properly connected to the
power supply.
To turn on your tablet, press the Power key.
3.1.2 Turning the Tablet OFF
1. Press and hold Power key to open the Tablet options menu.
2. Choose Shut Down.
3. Touch OK to conrm shutdown.
3.1 Turning the Tablet ON or OFF
13

USB power cable
3.2.1 Charging the tablet battery
The Tablet is powered by a rechargeable Li-ion battery. There are two ways to charge the Tablet:
1. Place the Tablet on the dock with the power cord supplying power to the dock.
2. Turn the Tablet o, and connect the Tablet to adapter using a USB cable.
3.2.2 Charging the dock battery
Before charging the battery, ensure that the battery is properly installed in your dock.
Connect the dock to the power adapter, as shown in the following gure:
The Tablet also starts charging after being correctly installed on the Dock
USB Micro port
3.2 Charging the battery
14

3.3.2 Working the touchscreen keys
Back
Touch to return to the previous screen.
Touch to exit from the running application.
If the on-screen keyboard is open, touch to close the keyboard.
Home
Touch to open the Home screen. It will bring you to the rst panel of the Home screen.
Navigation
Touch to open a list of thumbnail images displaying recently operated apps.
Touch the thumbnail image of the app to open it.
Touch and hold and ick o rightward to remove the app from the list.
Increase sound Decrease sound
Press to increase sound press to decrease sound
3.3.1 Using the physical keys
Power
Press and hold to power the Tablet on or o.
Press shortly to lock/unlock the screen.
When the Tablet is ringing, press any of the volume buttons if you want to mute the ringer.
On the Home screen, press to increase of decrease the ringtone volume, or set the Tablet to silent mode.
When using other applications, press to control the volume of music, spoken directions, and other audio sounds.
Press and hold to immediately adjust the ringtone volume to the maximum, or minimum.
3.3 Working with the keys
15
Table of contents


