Tensa Outdoor Tensa4 User manual

Tensa4 Hammock Stand
User Guide
Setting up 1...................................................................................................
Adjustment 5...............................................................................................
Anchoring 6..................................................................................................
Pitching a tarp 7...........................................................................................
Tips and tricks 7...........................................................................................
Don'ts 9.........................................................................................................

Tensa4 is a highly portable hammock stand, suitable for outdoors or inside, on flat or
sloping ground, either for recreation or full-time use as a bed. It accommodates
gathered-end hammocks up t0 12 feet long, with a ~30° sag and the foot end higher than
the head, for laying flat on the diagonal. You can also adjust it to hang bridge and
transverse style hammocks. It requires at least one anchor point to set up, ideally two.
Tensa Outdoor rates Tensa4 for users up to 350 pounds, itself weighing 12-14 pounds with
accessories,packing to 20 inches long and less than 6 inches around.
Pre-Columbian petroglyphs at the Puerco Pueblo ruins in the tree-sparse Arizona desert seem to
depict strangely hung hammocks, known as contemporary bedding only in the distant tropics
Tensa4 Hammock Stand User Guide
Copyright © 2020 Tensa Outdoor
All rights reserved
Printed in Portland, Oregon, the United States of America
Version 1.1, June 2020
See http://tensaoutdoor.com/support/ for revisions in PDF format.

Setting up
1. Check to assure your stand is complete,identifying the following:
2. Extend and join the eight telescoping sections to make four 7-segment poles.
Four 4-segment tubing sections,and four
3-segment sections
Four ball-loop connectors
Two ground anchors,either Orange Screws,
Tensa Boomstakes, or a combination
Four lines,webbing or Amsteel: orange baseline,
black ridgeline, and 2 black & orange guylines

3. Arrange the four poles in a figure-8, laying the orange baseline between one pair of
corners (the feet), and the black ridgeline between the other (the apexes).
4. Join the poles and lines at the corners as shown, always inspecting loops for excessive
(>10%) wear:
2
Thread ball loop through one pole
Pass loop through webbing or Amsteel loop
…then through the other
Pull loop over ball to secure

5. Put the stand’s feet near their final
place, spreading the baseline by your
body length or a little more,laying the
apexes together in a V shape. If on a
slope, assure that the feet are level.
A good place provides for a foot-end
anchor a body length or more away in
the direction the V points. See
Anchoring on page 6 for detailed notes.
6. Attach the black end of a guyline to the
bottom (foot end) apex. If the guyline
is webbing,pass one of the upper
daisy-chain loops over either pole end
to leave a tail. If the guyline is Amsteel,
loop directly over the ball.See step 10 for a peek at the end result with webbing.
7. Secure the orange end loop of the guyline to the anchor point.
8. Lift the top (head end) apex to erect the stand.Unwrap any lines from around poles
so they run cleanly across the corners. Adjust the guyline length or feet position so
the stand leans away from the anchor, with the head end lower than the foot.Set the
stand ridgeline to maximum length.
3

9. Attach and anchor the head end guyline. Its main purpose is to prevent the stand
collapsing toward the foot side.Do not tighten it, now or ever.Leave it slack so the
head end apex is free to move at least several inches. This allows both manual and
dynamic adjustments, and avoids overloading the poles.
10. Hang the hammock. Those shorter than 12’ (3.7M) need suspension to make up the
difference with 12. So, a 10’ hammock will need at least 1’of suspension per side. With
webbing, use carabiners in the daisy-chain loops of the guylines. With Amsteel, use
your usual suspension method around one pole end per side, not around both poles.
If your hammock has a ridgeline (cord between gathered ends), you may remove the
stand’s ridgeline to make adjustments simpler.
4

Detail of the finished state of the foot-end apex with webbing option, after the stand’s ridgeline
removed because hammock has its own.
Adjustment
“There’sgonnabealittlebitoftweaking,butonceit’sset,it’sset.”— Sean “Shug” Emery
Test and adjust the hang. Start by sitting in the hammock, always keeping your body
weight centered on the lower (head) side of the baseline. It is normal for the ridgeline to
sag a bit when you sit,but not when you recline. Take heart: setting up the first time
typically takes much longer than later, once the line lengths are set and you develop a
feel.
Problem
Remedies
Seat is too low
• Shorten baseline.
• Shorten hammock suspension.
Seat is too high
• Verify that head end guyline is slack.
• Lengthen hammock suspension.
• Widen baseline.
Problem
5

Anchoring
The foot end anchor must bear at least half of your body weight. Suitable anchors include
the bases of well-rooted shrubs,vehicles, large rocks or chinks in rock features, the hinge
pins of doors, handrails or other architectural features,shoes closed behind strong closet
or built-in cabinet doors, the frames of beds atop which the stand is erected, etc.A truly
portable anchor for places with zero other opportunities is one or more collapsible water
vessels placed directly under the foot apex.
Ground anchors hold best placed as far away from the stand
as the guylines allow, soil conditions permitting.
Orange Screws are the best choice for soft to medium-hard
ground. Use the case as a handle to drive in,then as a toggle
to connect the end loop of the guyline to the eye of the screw.
Ridgeline sags when reclining
• Lengthen hammock suspension.
• Increase stand tilt.
• If hammock has integral ridgeline
(cord between gathered ends),
remove stand ridgeline.
• If hammock has no ridgeline, shorten
stand ridgeline.
Head or feet touch poles
• Widen baseline.
• Shorten hammock suspension
overall, or lengthen on contact end,
shorten on non-contact end .
• If head touches, reduce stand tilt.
• If feet touch, increase stand tilt.
• Verify that stand feet are level.
• Cross poles so those nearest head
and feet are outboard.
Stand tips toward foot end
• Increase stand tilt.
• Shift body weight further toward
head end.
• Shorten head end guyline enough to
prevent tip, but not make taut when
hammock empty.
Remedies
Problem
6

When the ground is too hard for an Orange
Screw, a Tensa Boomstake can usually be
pounded in. In softer ground where the
titanium stake alone is liable to pull out,
add the boom to increase holding power
by redirecting the guyline’s pull to the end
of the boom. First insert the stake through
the holes in the end of the boom tube to
make a figure 7.Point the boom toward the
stand, and drive the stake in at an angle to
keep the boom horizontal. Loop the end of
the guyline over the end of the stake and
under the tang, then twist the guyline around the boom end as shown left.
The most challenging ground lacks any cohesion, like loose sand, pea gravel, or mud. If
possible, excavate or relocate to find firmer ground. Try using both guylines and anchors
on the foot end.If still insufficient,find a log or fill the carry bag with the loose material,
tie guyline around the middle, and bury it crosswise at least several inches deep as a
“dead man’s anchor.”
Pitching a tarp
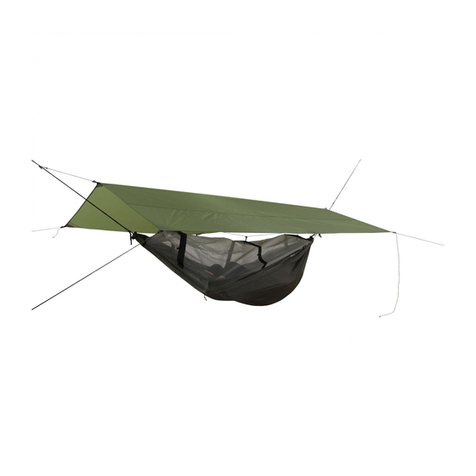
Tarps up to 11’ (3.35M) long fit between the apexes, their staked guylines tensioning. For
more headroom,set up on a slope with the head end pointing upslope to make a roomy
vestibule under the foot end. Longer tarps call for creativity or the Tarp Extensions for
Tensa4 accessory (sold separately) which also increases headroom.Do not tension a tarp
by tightening the head end guyline.
Tips and tricks
Using Amsteel UCRs
Some stands include lines of ultralight and compact Amsteel (Samson Rope’s
trademarked Ultra High Molecular Weight Polyethylene UHMWPE), spliced into Utility
Constrictor Ropes (UCRs). An inner“bury” rope passes through an outer constrictor. Adjust
the length by shortening the constrictor, sliding it along the bury, then“milking the bury,”
gently squeezing and elongating it with your fingers like milking an udder. This grips the
bury. Slipping can occur if the “milking” is insufficient, or if the lines are dirty. For extra
security, tie a slip knot where the buried line enters the constrictor, to prevent entry.
7

Moving and stowing the stand
You can move the stand easily from one place to another with hammock still attached,
either open or collapsed into a column.This is useful for getting further from or closer to
the party, or to adapt to changing light or wind conditions. You can partially collapse the
poles while assembled, to stow by day under a bed or in a closet, to free up space.
Single anchor
We recommend anchoring both sides of the stand to avoid collapses, for instance in high
winds with the stand empty, or when you reach for that zipper pull at your feet, but only
the foot guyline is mandatory. To help stabilize, you may hang a counterweight such as a
pack or water vessel from the head apex instead of or in addition to a head guyline.
Two hammocks, one tree, one Tensa4
Split the stand into two inverted Vs. Hang foot ends of the hammocks from the tree (or
pole, vehicle, etc).Put the open ends of the Vs along the hammock sides, at much the
same shallow angle and width as if setting up normally. Set a ground anchor beneath
each head apex, and secure the feet to the anchor using lines in Vs along the ground to
prevent the feet sliding toward the tree.Hang the head ends from the apexes. Note that
this calls for two additional ball loop connectors or improvised equivalent.
Bridge, spreader-bar, or other tight-pitch hammocks
Set the base to only about 3-4’ (1M) so the poles clear any spreader bars underneath,and
the apexes spread wide and low. Omit stand ridgeline.
Transverse hammocks
Also called 90-degree hammocks. Do not lean the stand, but balance it centered with
both guylines lightly tensioned.
See-saw
If you want head and foot ends to be interchangeable, say in a social setting where
unsupervised users may not understand the asymmetry, adjust the head guyline length
so when the stand tips footward, the stand leans the same amount as it did headward,
switching orientation.
Tensa Solo conversion
Tensa Solo is a hammock stand product sold separately, that uses many of the same
components as Tensa4. Its main advantage is lower weight,pack size,and cost, at the
expense of some reliability since it requires more and stronger ground anchors than
8

Tensa4. You can convert one Tensa4 economically into four Tensa Solos using Tensa4 to
Tensa Solo Conversion Kits, sold separately, to accommodate larger groups.
Joining multiple Tensa4 stands
Two stands can share a common foot-end pole (seven poles altogether) and anchor. Add
more, up to six hammock berths around a single central anchor using only 4.5 complete
stands’ worth of poles in a sociable“flower,” each hammock a petal.
Don’ts
•Don’t tension the head guyline to “pry open” the stand beyond its natural balance point
when the hammock is occupied.
•Don’t push or pull on the poles while anybody is in the hammock.
•Don’t swing in the hammock enough to collide with the poles.
•Don’t collapse the poles when dirty, as they may jam. Wipe them down as necessary,
optionally applying a light lubricant. If you disassemble sections completely for
thorough cleaning, remember to leave one as a re-assembly reference.
•Don’t attach hammock suspension around both poles per end, as this will bend the
poles inward under load, possibly damaging them.
9

A.
B.
RICHARDSON
&
D.
FULLER.
HAMOCK
STANDS
Patented
Aug.
8,
1876.
No.
180,729.
Q
76/75.
Fiefta,
rods
on
a.
Zaz
7zz
f
/224
N.FETERS,
Phoro-LTHOGRAPHER,
WASHINGTON,
oc.
This page intentionally not left blank.
Other manuals for Tensa4
2
Table of contents
Other Tensa Outdoor Hammock manuals


