Tensions XM-173 User manual

RF Optical
Mouse
Bedienungsanleitung
User‘s Guide
Mode d‘emploi
Manual de uso
Manuale de istruzioni XM-173


3
D
GB
F
E
I
Einleitung
Vielen Dank, dass Sie sich für die einzigartige RF
Optical Mouse entschieden haben. Die RF Opti-
cal Mouse vereint Leistung, Funktionalität und
elegantes Design. Moderne optische Abtastung
ermöglicht besonders üssige Zeigerbewegungen
auf nahezu jeder Oberäche.
1. Produkteigenschaften
• Scroll-Rad mit programmierbarer Tasten-
funktion
• Fünf-Tasten-Maus mit programmierbarer
vierter und fünfter Taste
• Ergonomisches Design
2. Lieferumfang
• RF Optical Mouse
• Empfänger/Ladeschale
• USB und PS/2-Schnittstelle
• Treiber-Software
• Bedienungsanleitung
• 2 Akkus

4
D
GB
F
E
I
3. Einlegen der Akkus
1. Entfernen Sie die Abdeckung des
Akkufachs.
2. Legen Sie 2 Akkus des Typs „AA“ ein.
3. Befestigen Sie die Abdeckung des
Akkufachs.
Hinweis: Die LED-Anzeige auf der Maus wird
aueuchten, wenn die Akkus schwach werden.
Laden Sie Ihre Maus dann wieder auf.
Akkuhinweise:
• Bewahren Sie Akkus außerhalb der Reichweite
von Kindern auf.
• Verwenden Sie nicht gleichzeitig alte und neue
Akkus oder verschiedene Sorten. Befolgen Sie
für den Umgang mit Akkus die Anweisungen
des Herstellers.
• Ersetzen Sie alte oder schwache Akkus immer
sofort.
• Entsorgen und recyceln Sie verbrauchte Akkus
gemäß den örtlichen Bestimmungen.

5
D
GB
F
E
I
• Falls ein Akku ausläuft, entfernen Sie alle
Akkus, reinigen Sie das Batteriefach gründlich
mit einem feuchten Papiertuch, oder befolgen
Sie die Anweisungen des Herstellers zur
Säuberung.
4. Anschluss der Maus
Vor Gebrauch, sollten Sie Ihre Maus etwa 14 Stun-
den auaden. Schließen Sie bitte das Netzteil an
der Rückseite des Empfängers an und verbinden
Sie es mit einer Steckdose. Legen Sie dann die
Maus in die Ladeschale
Anschluss über PS/2
1. Schalten Sie Ihren Computer aus.
2. Verbinden Sie den PS/2-Anschluss des
Empfängers mit dem entsprechenden
PS/2-Anschluss Ihres Computers (durch ein
Maussymbol oder eine grüne Farbmarkierung
gekennzeichnet).
3. Schalten Sie Ihren Computer ein.
Hinweis: Die meisten Computer haben zwei PS/
2-Anschlüsse, für Maus und Tastatur.
Einige Computer verfügen jedoch nur über einen

6
D
GB
F
E
I
einzigen PS/2-Anschluss, der für beide Periphe-
riegeräte geeignet ist. An diese Systeme kann
nur eines dieser beiden Geräte angeschlossen
werden.
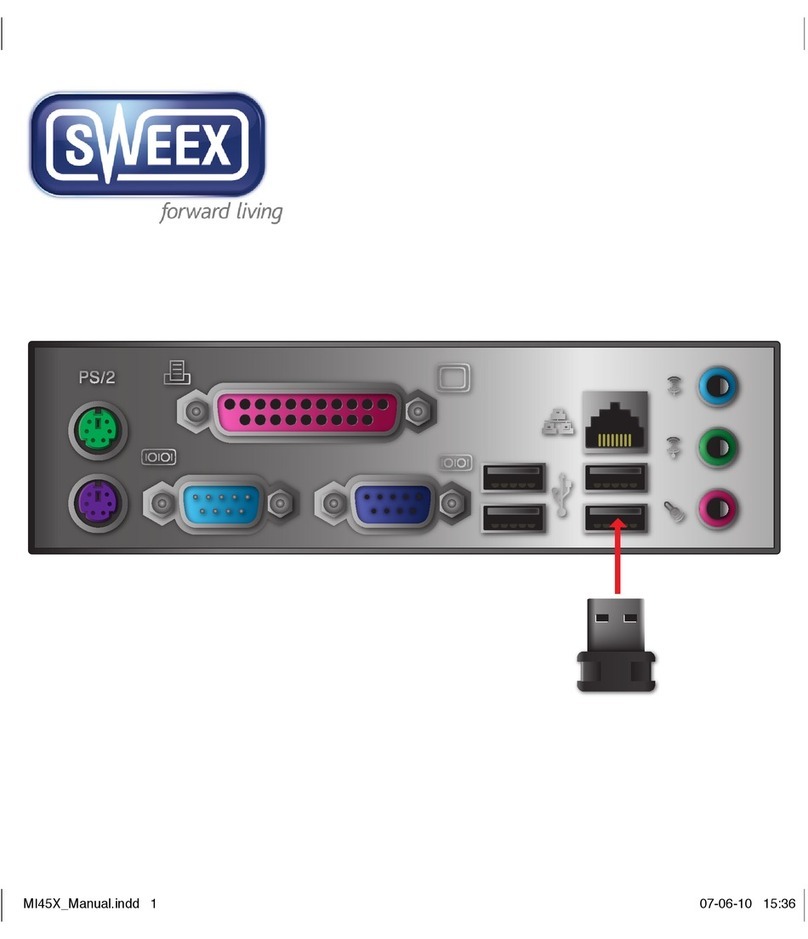
Anschluss über USB
1. Schließen Sie den USB- Anschlussstecker an
den entsprechenden USB-Anschluss Ihres
Computers an. Die Plug&Play-Funktion ihres
Systems wird automatisch feststellen, dass
ein neues Gerät angeschlossen wurde.
Das Betriebssystem wird Sie gegebenenfalls
auffordern die Windows Installations-CD
einzulegen. Folgen Sie den Anweisungen auf
dem Bildschirm. Führen Sie nun die RF-
Kennung durch.
Hinweis: Bitte beachten Sie, dass USB-Betrieb
nicht von Windows 95/NT unterstützt wird.
5. Einstellung RF-Kennung
Um Störungen mit anderen RF-Geräten zu
vermeiden, gibt es 2 Sendefrequenzen (Kanäle),

7
D
GB
F
E
I
die Sie über den Schalter auf der Unterseite der
Maus einstellen können (im Batteriefach):
Wählen Sie über diesen Schalter (z.B. mit Hilfe
eines Stiftes) Frequenz 1 oder 2 aus.
1. Drücken Sie den Knopf auf der Vorderseite
des Empfängers und danach mit einem spitzen
Gegenstand (z.B. einem Stift) den Knopf auf
der Unterseite der Maus.
2. Die LED-Anzeige auf dem Empfänger leuchtet
dabei auf. Wenn Sie die Maus bewegen, wird
die LED blinken.
6. Software Installation unter Windows
95/98/ME/2000/NT /XP
Vergewissern Sie sich, dass kein anderer Maus-
treiber installiert oder gestartet wurde. Um einen
solchen Treiber oder ein solches Programm zu
entfernen, verwenden Sie bitte das Deinstalla-
RF-Knopf

8
D
GB
F
E
I
tionsprogramm, der bereits installierten Maus.
1. Legen Sie die mitgelieferte Treiber-CD-ROM in
Ihr CD-ROM-Laufwerk ein.
2. Das Installationsprogramm wird automatisch
gestartet .
3. Falls das Installationsprogramm nicht auto-
matisch starten sollte, klicken Sie auf „Start/
Ausführen/Durchsuchen“ und wählen Sie Ihr
CD-ROM-Laufwerk aus.
4. Doppelklicken Sie dann auf die Datei
„setup.exe“.
5. Folgen Sie dann den Anweisungen auf dem
Bildschirm.
6. Nach Beendigung der Installation starten Sie
Ihren PC erneut.
7. Machen Sie einen Doppelklick auf das neue
Maus-Icon rechts unten in der Taskleiste, um
Mauseigenschaften einzustellen.
7. Problembehebung
Erkennungsprobleme mit PS/2-Zeigegeräten
Ihr Mausanschluss muss unter Umständen noch
durch das BIOS-Menü Ihres Computers aktiviert
werden. Bitte Überprüfen Sie die Dokumentation

9
D
GB
F
E
I
Ihres Computers in Bezug auf das BIOS-Menü.
Probleme im Umgang mit dem Tastenrad.
Falls Ihre Maus mit einem Tastenrad ausge-
stattet ist und Sie das Rad nicht zum Scrollen
verwenden können, überprüfen Sie folgende
Einstellungen:
Vergewissern Sie sich, dass die Software ord-
nungsgemäß installiert wurde. Es kann unter Um-
ständen auch sein, dass andere Anwendungen
mit Scroll-Funktion für die Maus diese Funktion
stören. Entfernen Sie diese Anwendungen bevor
Sie die Software für diese Maus installieren.
Der Mauscursor bewegt sich gar nicht oder nur
ruckartig.
Reinigen Sie den Optical Sensor mit einem tro-
ckenen Wattestäbchen oder Ähnlichem.
Sicherheitshinweise
• Versuchen Sie nicht, das Gerät selbst zu
warten oder zu reparieren.
• Überlassen Sie jegliche Wartungsarbeiten dem
zuständigen Fachpersonal.

10
D
GB
F
E
I
• Verwenden Sie das Gerät nicht in der Nähe
von Wasser (z.B. Waschbecken, Badewannen
oder Schwimmbecken), und halten Sie es von
Feuchtigkeit, tropfenden oder spritzenden
Flüssigkeiten sowie Regen fern.
Technische Daten
• Fünf-Tasten-Maus
• Reichweite: 1m
• Frequenz: 27 MHz (2 Kanäle)
• Schnittstelle: USB und PS/2
• Kompatibel mit Windows:
95/98/2000/ME/ NT/XP
Garantie
Für dieses Produkt gewähren wir Ihnen eine Ga-
rantie von zwei Jahren ab Kaufdatum auf Verar-
beitung und alle eingebauten Teile.
Falls Sie Hilfe benötigen...
Bei technischen Problemen wenden Sie sich bitte
an unseren technischen Support. Die Hotline-
Nummer nden Sie auf der Rückseite dieser
Bedienungsanleitung.

11
D
GB
F
E
I
Introduction
Thank you for purchasing the unique RF Optical
Mouse. The RF Optical Mouse combines perfor-
mance, functionality and elegant design. Modern
optical motion detection enables exceptionally
uid pointer movement on almost any surface.
1. Product features
• Scroll wheel with programmable buttons
• Five-button mouse with programmable fourth
and fth buttons
• Ergonomic design
2. Kit includes:
• RF Optical Mouse
• Receiver/charger
• USB and PS/2 interface
• Driver software
• 2 accus
• User manual
3. Fitting accus
1. Remove the cover of the accu compartment.
2. Insert 2 accus of type AA.
3. Replace the cover of the accu compartment.

12
D
GB
F
E
I
Note: The LED on the mouse lights when accu
power is low. It’s time to recharge the accus.
Advice on accus:
• Store spare accus out of the reach of children.
• Don’t use new and old accus in the same
device, or different types of accus.
• Follow the instructions of the manufacturer for
handling the accus.
• Always replace old or weak accus as soon as
possible.
• Dispose of and recycle used accus in
accordance with local laws and recommen-
dations.
• If a battery leaks, remove all of the accus,
clean the accu compartment thoroughly with
a moist paper towel, or follow the instructions
of the manufacture on cleaning.
4. Connecting the mouse
Before use, charge your mouse for at least 14
hours. Connect the supplied mains cable to the
back of the receiver and connect it to a power
socket. Place the mouse in the charging cradle.

13
D
GB
F
E
I
Connecting via PS/2
1. Switch off your computer.
2. Connect the PS/2 socket of your mouse to
the appropriate PS/2 socket of your
computer (identied by a mouse symbol or
coloured green).
3. Switch on your computer.
Note: Most computers have two PS/2 sockets,
one for a mouse and one for a keyboard. Some
computers have a single PS/2 socket, however,
which is suitable for both devices – mouse and
keyboard. You can only connect one of these
devices to this computer.
Connecting via USB
1. Insert the USB connector in the appropriate
USB socket of your computer. The plug&play
function of your system will automatically
detect that a new device has been connected.
The operating system may ask you to insert
the Windows installation CD. If so, follow the
instructions on the screen.
Now establish the RF link.

14
D
GB
F
E
I
Note: Please note that USB operation is not
supported by Windows 95/NT.
5. Establishing the RF link
To avoid irritation with other RF units you can
choose between two frequencies (channels) by
using the switch on the bottom of the mouse (in
the interior of the accu compartment). Choose
frequency 1 or 2 by using a pointed device (e.g.
a pen).
1. Press the button on the top of the receiver
and then the button on the bottom of the
mouse by using a pointed device.
2. The LED indicator on the receiver lights when
you do this. When you move the mouse, the
LED blinks.
RF button

15
D
GB
F
E
I
6. Software Installation under Windows
95/98/ME/2000/NT /XP
Make sure that no other mouse drivers are
installed or have been started. To remove such
a driver or program, use the uninstall program
that belongs to the mouse previously installed.
1. Place the supplied driver CD-ROM in your
CD-ROM drive.
2. The installation program should start automa-
tically.
3. If the installation program does not start auto-
matically, click on “Start/Run/Browse” and
select your CD-ROM drive.
4. Double-click on the “setup.exe” le.
5. Then follow the instructions on the screen.
6. When installation is complete, restart your PC.
7. Double-click on the new mouse icon in the
taskbar at bottom right to adjust the mouse
properties.

16
D
GB
F
E
I
7. Troubleshooting
Detection problems with PS/2 target devices
Your mouse connection may also have to be activa-
ted in the BIOS menu of your computer.
To access the BIOS menu for conguration, please
refer to the computer’s documentation.
Problems with the button wheel.
If your mouse is provided with a button wheel and
you are unable to use the wheel for scrolling, check
the following settings:
Make sure the software has been properly installed.
Occasionally, other applications with a scroll function
for the mouse may interfere with this function. Re-
move the application before installing the software
for this mouse.
The mouse cursor does not move or moves in
jerks.
Clean the optical sensor with a dry cotton bud or
similar.
Safety advice
• Do not attempt to maintain or repair the
device yourself.

17
D
GB
F
E
I
• Get an expert to carry out any maintenance.
• Do not use the device in the vicinity of water
(e.g. wash basins, baths or swimming pools)
and keep it away from moisture, dripping or
sprayed liquids and rain.
Technical specications
Five-button mouse
Range of operation:1m
Frequency: 27MHz (two channels)
Compatible with Windows 95/98/2000/ME/
NT/XP
Guarantee
We guarantee this product for two years from
the date of purchase in respect of workmanship
and all built-in components.
If you need help...
In case of technical problems, please contact our
technical support. The hotline number can be
found on the back of this manual.

18
D
GB
F
E
I
Introduction
Merci d’avoir choisi la souris RF Optical Mouse.
Cette souris unique en son genre allie efcacité,
fonctionnalité et élégance. La technique moderne
de balayage optique garantit un déplacement très
uide du curseur sur presque tous les supports.
1. Caractéristiques
• Molette avec fonction de touche programmable
• Souris à cinq touches, quatrième et cinquième
touches programmables
• Design ergonomique
2. Éléments fournis :
• RF Optical Mouse
• Base chargeur/récepteur
• Port PS/2 et USB
• Logiciel pilote
• Deux piles AA
• Mode d’emploi
3. Mise en place des piles (souris)
1. Retirez le cache du compartiment à piles.
2. Introduisez 2 piles de type AA.

19
D
GB
F
E
I
3. Remettez en place le cache du compartiment
à piles.
Remarque : lorsque les piles commencent à s’user,
le témoin lumineux de la souris s’allume. Dans ce
cas, pensez à recharger la souris.
Consignes relatives aux piles :
• Conservez les piles hors de portée des
enfants.
• N’utilisez pas en même temps des piles usées
et neuves ou différentes sortes de piles.
Respectez les consignes du fabricant con-
cernant la manipulation des piles.
• Dès que les piles sont usées, elles doivent être
remplacées.
• Éliminez et recyclez les piles usées conformé-
ment aux directives locales.
• Si l’une des piles coule, retirez les deux piles
et nettoyez bien le compartiment avec une
feuille d’essuie-tout humidiée ou selon les
consignes données par le fabricant.

20
D
GB
F
E
I
4. Raccordement de la souris
Avant d’utiliser la souris, il est recommandé de la
charger durant 14 heures environ.
Raccordez le cordon d’alimentation fourni au dos
du récepteur et branchez-le sur une prise de cou-
rant. Puis placez la souris dans la base chargeur.
Raccordement sur la prise PS/2
1. Éteignez votre ordinateur.
2. Reliez la che PS/2 de la souris au port PS/2
correspondant de l’ordinateur (reconnaissable à
un symbole représentant une souris ou une
marque de couleur verte).
3. Allumez votre ordinateur.
Remarque : la plupart des ordinateurs
possèdent deux ports PS/2, un pour la souris,
l’autre pour le clavier. Toutefois, certains ordina-
teurs sont équipés d’un seul port PS/2 per-
mettant de connecter indifféremment une souris
ou un clavier. Vous ne pouvez alors raccorder
qu’un seul des deux périphériques.
Table of contents
Languages:
