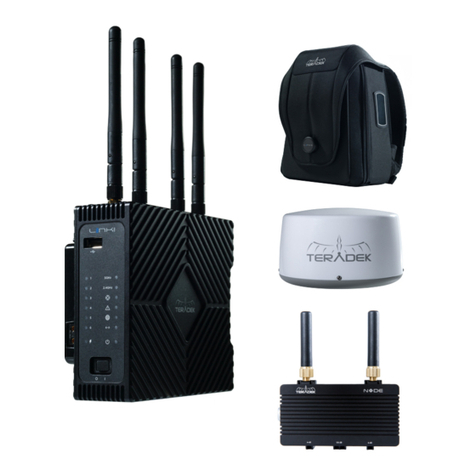
Teradek LINK Pro User manual

© 2018 Teradek, LLC. All rights reserved.
LINK PRO SYSTEM
USER GUIDE
© 2018 Teradek, LLC. All rights reserved.

1
TABLE OF CONTENTS
Physical Properties............................................3
Getting Started....................................................5
Connect to a Network .......................................5
Node .......................................................................6
Connect Nodes to Link Pro ..............................6
Bonding Configuration .....................................7
Network Configuration ....................................8
Link Pro Backpack .............................................. 9
Link Pro Radome.............................................. 10
Technical Specifications ............................... 11
Support Resources ......................................... 13
Disclaimer .......................................................... 13
Warning .............................................................. 13
FCC Statement ................................................. 13
EC Declaration of Conformity ..................... 13

2

3
A: USB port 5
B: Port status
C: Battery status
D: Power switch
E: 5 GHz status
F: 2.4 GHz status
G: Bonding status
H: Fault/Error
I: WAN status
J: LAN status
K: Power status
L: Reset button
M: WAN port
N: LAN port
O: USB port 6
P: Power input
Q: Node inputs
R: 2.4/5GHz Wi-Fi
antenna connectors
S: 1/4”-20 threaded
mount
L
N
M
O
P
E
F
G
H
I
J
K
A
C
D
B
Q
A: 4-pin data/power input
B: SMA connectors
C: Power indicator
D: Network indicator
E: SIM card slot
F: 4-40 threaded mount
B
AE
C D
G
F
NDE
PHYSICAL PROPERTIES
R
Teradek regularly releases new rmware versions to improve performance, add new features, or to x
vulnerabilities. Visit https://www.teradek.com to update your device with the latest rmware.
G: 1/4"-20 threaded mount
S
Link Pro LED Operation
B: Port status
C: Battery status
E/F: Wi-Fi status
G: Bonding status
H: Fault/Error
I: WAN status
J: LAN status
K: Power status
On - Error
On - Charging
O - Not charging/full
Blinking - Battery error
On - Connected
O - Not connected
On - Bonding
O - Not bonding
On - Connected
O - Not connected
O - Not connected
Blinking - Active
O - Not connected
Blinking - Active
On - Power On
O - Power O

4
A: Link Pro assembly
B: Wi-Fi antenna
connectors
C: Node assembly 1
D: Node assembly 2
E: Node assembly 3
F: Node assembly 4
BACKPACK
C
F
E
D
C D
HG
B
A
E
F
A: SIM card slot 1
B: 4-pin data/power input 1
C: SIM card slot 2
D: 4-pin data/power input 2
E: SIM card slot 3
F: 4-pin data/power input 3
G: SIM card slot 4
H: 4-pin data/power input 4
RADOME
NEED MORE HELP?
Support: http://support.teradek.com → Contains tips, information and all the latest rmware & software updates.
A
B
G
G: Battery mount

5
Link Pro packs professional network bonding into
a high performance Wi-Fi access point, giving
broadcasters, production companies, and rst
responders reliable, high speed Internet access at
any location.
Attach the Wi-Fi antennas.
Connect power to Link Pro using the included A/C
adapter, or if the device is equipped with a battery
plate accessory, install a compatible battery (Gold
or V mount).
If using Link Pro with a cable/DSL modem,
connect an Ethernet cable between the modem
and Link Pro’s WAN port .
1
3
2
Connect to one of Link Pro’s Wi-Fi networks:
Link-Pro-XXXXX or Link-Pro-XXXXX 5G
(XXXXX is the last ve digits of the device’s
serial number).
Connect an Ethernet cable between your computer
or a network switch and Link Pro’s LAN port .
Note: If connecting Link Pro to a network with
existing DHCP server, you must disable Link Pro’s
built-in DHCP server.
Open a web browser and navigate to
https://172.16.2.1.
Open a web browser and navigate to Link Pro’s
IP address.
Log in to Link Pro’s conguration interface using
the default credentials shown to the right.
1
1
2
2
3
Wi-Fi DEFAULTS
SSID (2.4GHz) Link-Pro-XXXXX
SSID (5GHz) Link-Pro-XXXXX 5G
Password link051XXXXX
LAN IP
Address 172.16.2.1
LOG-IN DEFAULTS
Web UI
username admin
Web UI
password admin
CONNECT TO A NETWORK
GETTING STARTED
Connect via Wi-Fi
Connect via Ethernet
Assembly and Power
If necessary, you can restore Link Pro to its original settings
by inserting a paper clip into the recessed button (L), then
holding it down for ve seconds.
Reset button

6
Attach two SMA mount antennas (either compact or high gain) to each Node.
Connect Node(s) to Link Pro using the included 18” 4-pin to 4-pin cables.
Remove the SIM cover plate and insert a SIM card into the slot of each
Node. Replace the cover plate and screw.
1
3
2
Node is a small yet eective cellular
modem solution that provides exceptional
connectivity in regions around the world,
allowing video professionals to broadcast
over 3G, 4G, and 4G LTE networks.
NOTE: Node powers up and connects to
the cellular network automatically when
connected to Link Pro.
Node’s power LEDs should illuminate immediately. The network LEDs will
also illuminate once an Internet connection is established.
4
You can use up to four Teradek
Nodes to increase your bandwidth
and establish an Internet connection
when another connection is
unavailable.
CONNECT NODES TO LINK PRO
Assembly and Power
NODE
Connect each Node to Link Pro
using an 18" 4-pin to 4-pin cable.
Node’s power LED should illuminate
immediately. The network LED will
also illuminate once an Internet
connection is established.
1
2

7
After connecting to the device’s web UI, Link Pro needs to be connected to a Core
account with an active Hotspot subscription. Connecting Link Pro to Hotspot
increases your bandwidth and reliability by bonding multiple Internet connections.
To take advantage of these features, visit hotspot.teradek.com and sign up for a
Hotspot subscription, or sign up from your existing Core account by selecting a
subscription plan from the Manage Account page.
From the top menu of the web UI, enter the
Cloud menu, and select Conguration.
Select Core as the service, then click
Save & Apply.
Select a company from the scroll-down
menu, then click Choose Company.
Click the Cloud Conguration shortcut
button, select a region, then click Save &
Apply. (Fig.2).
1
2
4
5
For more information on conguring
streams, recording, and conguring devices
via Core, visit https://core.teradek.com.
View Hotspot Statistics
Congure Core Settings
BONDING CONFIGURATION
From the Core dashboard, tap the
Inventory button and select Hotspots to
view the Hotspots index (Fig.3).
Tap the Details button to see network
statistics such as data usage, data rate,
and connection status (Fig.4).
1
2
Once a connection is established, you can
view Link Pro’s data usage and transfer
statistics by accessing the Hotspots index
from the Core dashboard.
6
Fig. 1
Fig. 2
Fig. 3
Fig. 4
Click Congure Core Account, then enter
your credentials (Fig.1).
3

8
Congure Wireless Settings
Each wireless conguration page (Fig. 5)
contains options to congure the Wi-Fi
channel, network mode (802.11a/b/g/n/
ac), channel bandwidth or HT Mode, SSID,
and security options. After modifying any
settings, click Save if you plan to make
more changes, or Save and Apply to
enable the new conguration.
The LAN Conguration page (Fig.6)
contains Link Pro’s IP address settings,
DHCP server conguration, and other
settings that may need to be changed if
connecting Link Pro to another network.
These settings do not need to be modied
if Link Pro is used as a stand-alone
access point.
When connecting Link Pro to another
network with an existing DHCP server,
uncheck the box next to ‘Enable DHCP
server’ before connecting Link Pro to the
other network to avoid IP address conicts.
The WAN port allows you to connect Link
Pro to a cable/DSL modem for Internet
connectivity. In most cases, WAN settings
will be auto-negotiated when Link Pro
is connected to the modem. The WAN
Conguration page (Fig.7) contains a
number of advanced options that may
be necessary to establish an Internet
connection with some service providers.
From the top menu on the web UI,
navigate to the Wireless Network page,
then click Congure next to the network
you want to set up.
Congure Local Network (LAN) Settings
Congure Internet (WAN) Settings
NETWORK CONFIGURATION
Fig. 5
Fig. 6
Fig. 7

9
Bring high speed Internet connectivity
on the go with the Link Pro Backpack.
Each ergonomic pack includes
four Node modems and a Gold or
V-mount battery plate, which will
power the system continuously for up
to 24 hours. With its lightweight and
weather-resistant design, the Link Pro
Backpack allows the user to focus on
establishing a reliable connection and
not on fatigue or damage from the
elements.
D
A
E
C
BF
A: Link Pro assembly
B: Node assembly 1
C: Node assembly 2
D: Node assembly 3
E: Node assembly 4
F: Battery mount
Remove the Nodes’ SIM cover plates
(Bthrough E) and insert a SIM card into
each slot (see pg. 7). Replace the cover
plates and screws.
Turn the front power switch to the On
position.
Attach a compatible battery (Gold or
V mount) to the battery plate.
1
3
2
Power and Connect
LINK PRO BACKPACK
Teradek regularly releases new rmware versions to improve performance, add new features, or to x
vulnerabilities. Visit https://www.teradek.com to update your device with the latest rmware.

10
NEED MORE HELP?
Support: http://support.teradek.com → Contains tips, information and all the latest rmware & software updates.
Insert a SIM card into each SIM
card slot.
Power on Link Pro using AC power,
or install a battery if Link Pro is
equipped with a Gold or V mount
battery plate.
Connect all four nodes to Link Pro
using 4-pin to 4-pin data/power
cables.
1
3
2
Link Pro Radome contains four
3G/4G/LTE modems and attaches
to a standalone Link Pro for
optimized antenna placement.
Link Pro Radome is designed to
endure the harshest of elements
and provide a consistent Internet
connection anywhere you
go, making it perfect for xed
installations and/or vehicular
applications.
NOTE: All four Nodes power up and connect to the cellular
network automatically when connected to a Link Pro modem.
Connect to one of Link Pro’s Wi-Fi
networks: Link-Pro-XXXXX or
Link-Pro-XXXXX 5G (XXXXX is the
last ve digits of the device’s serial
number).
4
Assembly and Power
LINK PRO RADOME
G
H
A
F
E
D
C
A: SIM card slot 1
B: 4-pin data/power input 1
C: SIM card slot 2
D: 4-pin data/power input 2
E: SIM card slot 3
F: 4-pin data/power input 3
G: SIM card slot 4
H: 4-pin data/power input 4
B

11
PROTOCOL SUPPORT
Network Protocols TCP/IP, UDP, HTTP, DHCP, NTP, SSL, IGMP
Bonding Up to 6 Devices, Ethernet
Remote Teradek Core
PHYSICAL ATTRIBUTES
Dimensions 1.69”W x 5.22” D x 4.72 H” [43 x 132.6 x 120 mm]
Weight 19.8 0z. (560 g)
Construction Milled Aluminum
INTERFACES
HTTP Feature-rich web UI for configuration and control
Switches On/Off and Reset switch
Expansion 2 x USB 3.0 Type-A
Status LEDs Multiple LEDs for device, wireless, and network statuses
NETWORK
Ethernet 2 x Gigabit Ethernet RJ45 Ports, Auto MDI-X
Modem 4 x 4-pin locking connectors
2 x USB 3.0 Type-A
Wireless (WiFi) 2x2 2.4GHz 802.11b/g/n, max 20dBm per chain
2x2 5GHz 802.11a/n/ac, max 16dBm per chain
Frequency Range 2.412~2.472GHz, 5.180~5.825GHz
Encryption 802.1x, 802,11i, WPA2, WPA and WEP 64/128 TKIP 128bit AES
POWER
Power Input 2-Pin Circular Locking Connector, 12-20V
Internal Battery Type Cylindrical lithium ion battery - up to 7Wh
PoE N/A
Consumption 19W + 3.5W max for connected USB devices
Battery Plates Integrated Gold or V mount battery plate (optional)
ENVIRONMENTAL
Temperature Operating: -10ºC to 50ºC
Storage: -40ºC to 90ºC
Humidity Operating: 5% to 95% (non-condensing)
Storage: Max. 90%
GENERAL
Mounting 1/4”-20 threaded hole,
2 x 4-40 threaded holes
Additional mounting options available
Link Pro
TECHNICAL SPECIFICATIONS

12
PHYSICAL ATTRIBUTES
Dimensions 1.69”W x 5.22” D x 4.72 H” [43 x 132.6 x 120 mm]
Weight 19.8 0z. (560 g)
Construction Milled Aluminum
NETWORK
LTE
US: LTE FDD Cat 4, Bands 2,4,5,13,17
EU/Asia: LTE FDD Cat 4, Bands 1,3,5,7,8,20
JP: LTE FDD Cat 4, Bands 1,3,5,8,19
SA/AUS: LTE FDD Cat 4, Bands 1,3,5,7,8,28
UMTS
US: HSDPA Cat 24, HSUPA Cat 6, Bands 850/1900
EU/Asia: HSDPA Cat 24, HSUPA Cat 6, Bands 850/900/1900/2100
JP: HSDPA Cat 24, HSUPA Cat 6, Bands 850/900/2100
SA/AUS: HSDPA Cat 24, HSUPA Cat 6, Bands 850/900/1900/2100
RF
2x2 MIMO SMA
Band 17 (700 MHz), Band 13 (750 MHz) Band 5 (850 MHz)
Band 4 (1700 MHz) Band 2 (1900 MHz)
Power Class Class 3 23dBm LTE mode
Class 3 24 dBm for UMTS/HSDPA/HSUPA mode
Data Rate
LTE cat. 4: up to 150 Mb/s DL, 50 Mb/s UL
HSDPA cat.14, up to 21 Mb/s DL
HSUPA cat.6, up to 5.6 Mb/s UL
SIM Mini-SIM (2FF)
POWER
Power Input 4-Pin Connector, 5-28V
Battery None
Nominal Power
Consumption 3.5W max
Interface 2 Status LEDs
ENVIRONMENTAL
Temperature Operating: -10ºC to 50ºC
Storage: -40ºC to 90ºC
Humidity Operating: 5% to 95% (non-condensing)
Storage: Max. 90%
GENERAL
Mounting 1/4”-20 threaded hole,
2 x 4-40 threaded holes
Additional mounting options available
Node

13
SUPPORT RESOURCES
In addition to this User Guide, there are a number of resources available with information on
Link Pro’s features and operation. For online information, visit www.teradek.com. If you are
unable to nd what you need online, please contact Teradek’s support sta:
E-mail: [email protected] | Phone: (888) 941-2111 ext. 2 (available M-F 7AM-6PM PST).
Teradek LLC hereby declares that the Link Pro system is in compliance with
Directive 1999/5/EC, the Low Voltage Directive (LVD) 2006/95/EC and the
Directive of Electromagnetic Compatibility (EMC) 2004/108/EC. The full text
of the EC Declaration of Conformity is available at the following Internet
address:
https://support.teradek.com/hc/en-us/articles/233429747-EC-
Declaration- of-Conformity-for-CE-mark
DISCLAIMER
This manual is intended for user information only. Every eort has been made to ensure that
the contents within are accurate at the time of printing, and that updates are made in a timely
manner. Teradek cannot be held responsible for inaccuracies, typographical errors, or
out-of-date information contained within this manual.
WARNING
Link Pro contains sensitive electronic components that can be damaged by electrostatic
discharge (ESD). When handling, care must be taken so that the device is not damaged.
Damage due to inappropriate handling is not covered by the warranty. For complete warranty
information, please see the warranty card that arrived with the device, or visit
www.teradek.com/pages/warranty-information.
FCC STATEMENT
This equipment has been tested and found to comply with the limits for a Class A digital
device, pursuant to Part 15 of the FCC rules. These limits are designed to provide reasonable
protection against harmful interference in a residential installation. This equipment generates,
uses, and can radiate radio frequency energy, and, if not installed and used in accordance with
the instructions, may cause harmful interference to radio communications. However, there is
no guarantee that interference will not occur in a particular installation. If this equipment does
cause harmful interference to radio or television reception, which can be determined by turning
the equipment o and on, the user is encouraged to try to correct the interference by one or
more of the following measures:
● Reorient or relocate the receiving antenna.
● Increase the separation between the equipment and the receiver.
● Connect the equipment into an outlet on a circuit dierent from that to which the
receiver is connected.
● Consult the dealer or an experienced radio or television technician for help
This device complies with Part 15 of the FCC rules and also with RSS-210 of Industry Canada.
Operation is subject to the following two conditions:
1. This device may not cause harmful interference, and
2. This device must accept any interference received, including interference that
may cause undesired operation.
EC DECLARATION OF CONFORMITY
Other manuals for LINK Pro
1
Table of contents
Other Teradek Wireless Access Point manuals
Popular Wireless Access Point manuals by other brands

Comsat
Comsat IP Basic ISDN Quick installation guide

Alarmcom
Alarmcom ADC-W110 quick start guide

Universal Scientific Industrial
Universal Scientific Industrial USI FlankerPro1 user guide

AirLive
AirLive WLA-5200AP user manual

Multitech
Multitech MultiConnect MTCAPW-L12G2 Admin guide

Planet
Planet WAP-4036 Quick installation guide