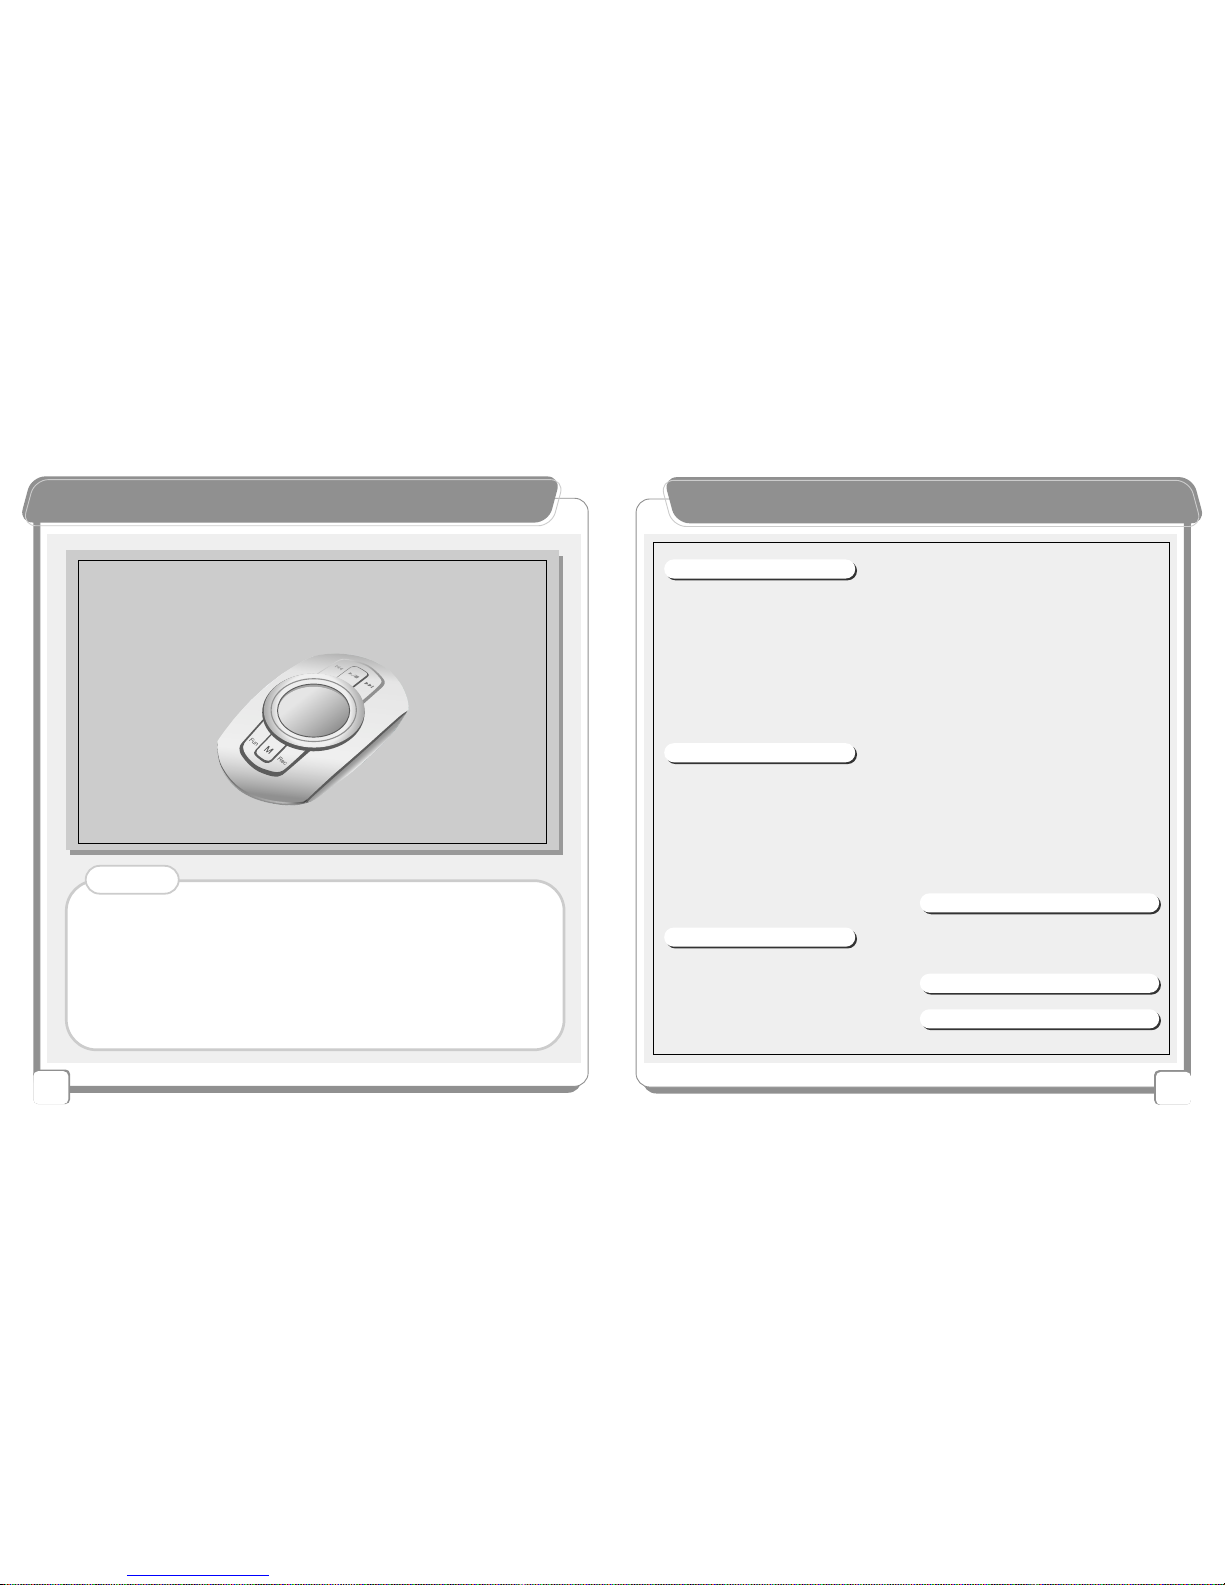
TeraValue NewGen5 TN-510 User manual


2
CCoonntteennttss
CCooppyyrriigghhtt NNoottiiccee
TeraValue reserves all copyrights of this Users Guide. Copying
and using partial or entire part of this Users Guide without
permission of TeraValue is strictly prohibited.
- Disconnecting the USB cable while upgrading the firmware will
cause a critical damage to the product.
- If the user formats a memory in PC Window, a critical damage
may be caused in this device.
- For Win98 OS, install Win98 driver included in the provided CD
before using the product. (refer to 0 page)
◐◐Notes
- Bit Rate / 3
- Sample Frequency / 3
Encoding from External
Device / 32
- Sync Function / 32
- Sample Frequency / 32
- Silence Level / 33
- Line In Volume / 33
Music Source / 34
LCD Contrast level Control / 34
Language Selection / 35
Internal/External Memory
Capacity / 35
Memory Format / 36
Erase File/Folder Erase / 37
- Select ERASE FILE / 37
- Folder ERASE / 37
Functions and Using Method of the
SD/MMC / 38
Inserting the Battery / 38
4.Firmware Upgrade
Firmware Upgrade / 39
- Installing the Driver / 39
- Firmware data downloding / 40
5.Self-troubleshooting / 42
6.Product Specifications / 4
1.Product Introduction
Accessories Items / 3
Products Safety precautions / 4
Features of NewGen 5 Series
products / 6
Simple Manual / 7
Win 98 Driver Installation / 9
USB Mass Storage / 0
Removable Disk /
Name of Each part / 3
LCD display / 4
2.Functions
Basic Operation Function / 5
Listening to MP3 Files / 6
Listening to the FM Radio / 8
FM Preset Mode / 9
Recording While Listening to FM
Radio / 2
Voice Recording / 22
Encoding from External
Devices / 24
Navigation Mode / 26
.Other Menu functions
Playing Speed / Repetition / 28
Section Repetition / 28
Language Study / 29
voice Recording / 30
- VAD / 30
- Silence Level / 30

4
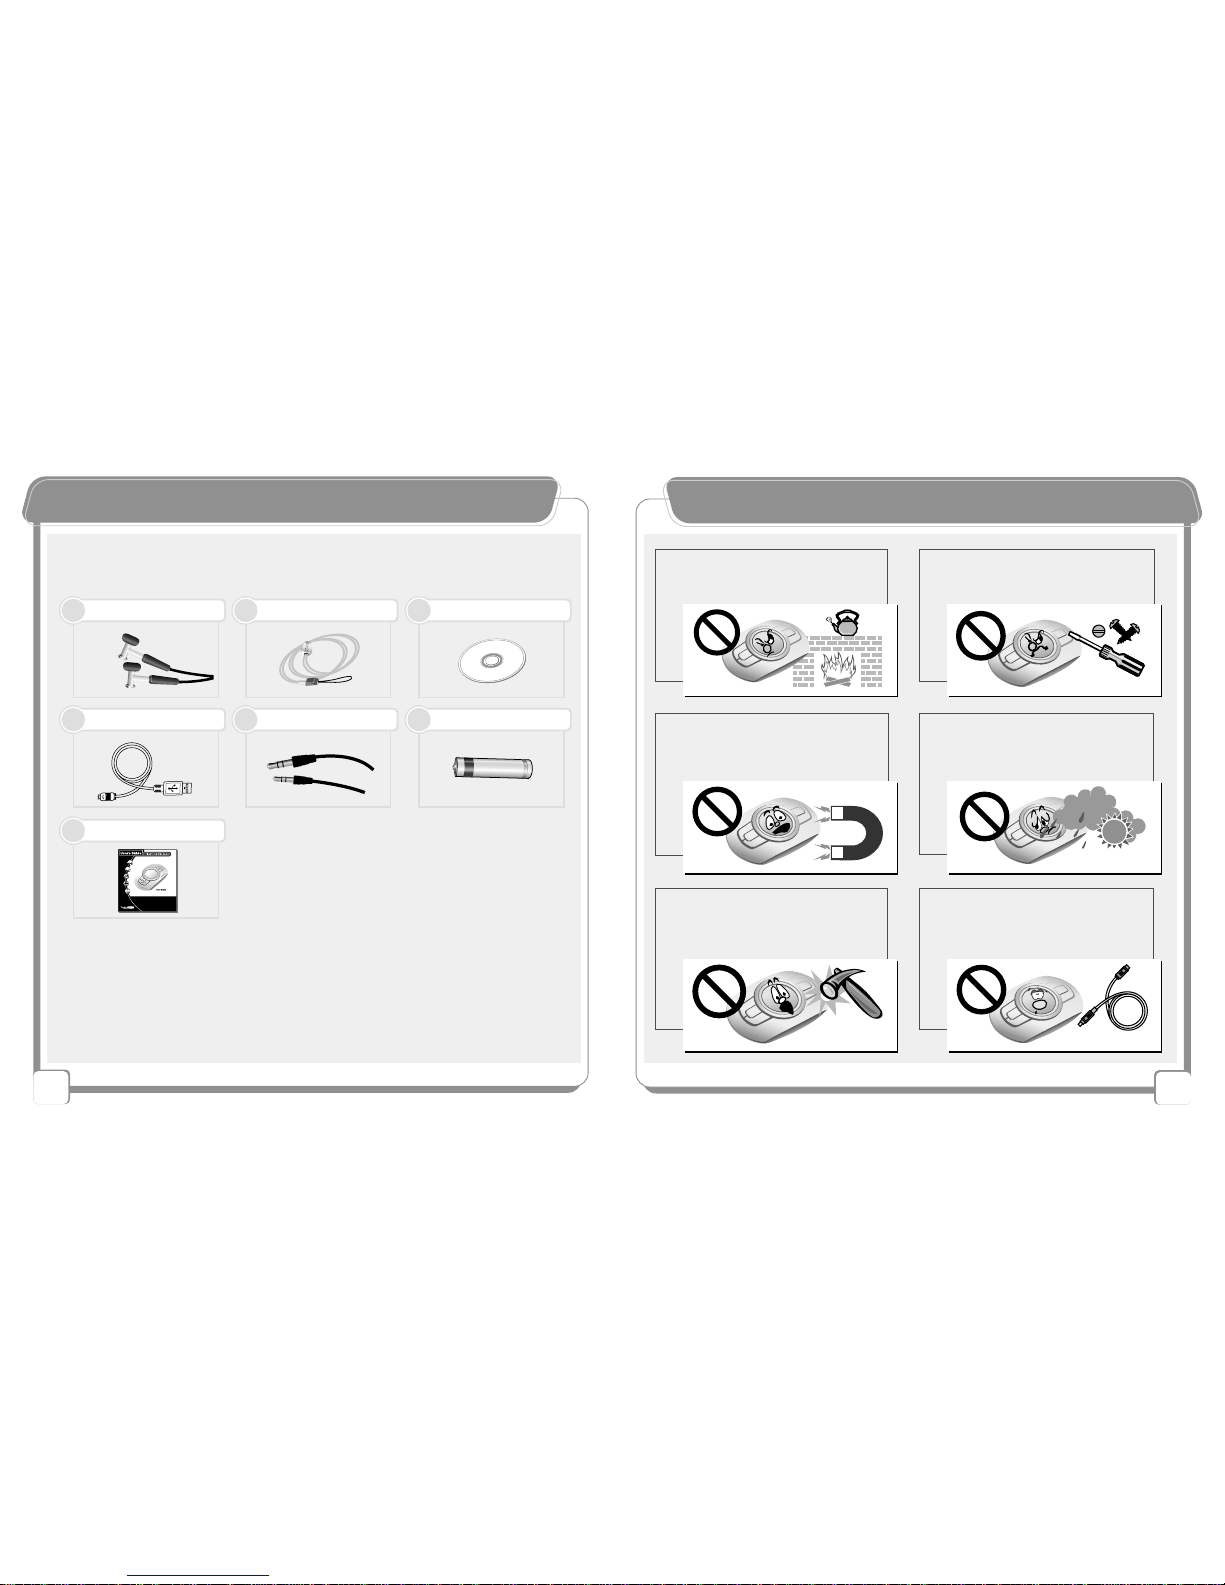
PPrroodduucctt SSaaffeettyy PPrreeccaauuttiioonnssAAcccceessssoorriieess IItteemmss
Stereo Earphone (AXE) Necklace Installation CD
※Accessory items may be added or changed according to functional improvement.
USB Cable Encoding Cable
Battery ( AAA size)
Users Guide
112233
4455
77
66
▶Basic Contents
3
Do not put magnetic cards such as
debit cards or gift cards near the
product.
Connecting the USB port while the
product is operating may damage
the product. Before connecting the
USB port, turn off the product.
Avoid direct sunrays, rainwater,
sand, and other materials that can
cause mechanical shock to the
product.
Storing the product in a dusty, hot
humid or soot-covered place may
cause a product breakdown.
Do not repair, dissemble, or remodel
the product at your own choice.
Protect the product from severe shock
and vibration, and do not drop the
product.

6
FFeeaattuurreess ooff NNeewwGGeenn55 SSeerriieess PPrroodduuccttss
Exter al Memory SD/MMC Card
-
It is easy to extend the memory capacity.
-
Extensible to GB / TN-550 (5 2MB) + 5 2MB SD/MMC Card.
Excelle t for La guage Study
-
The user can select the playing speed., and useful functions for language study such as automatic
repetition, speed control, and repetition count setting are supported.
Removable Disk
-
When the product is connected to the PC, the product is automatically recognized as a removable disk.
-
With the memory card (SD/MMC) extention slot, the user can easily extend, the memory capacity.
-
This device can be used without any separate management S/W.
-
By connecting the device to the PC through the USB cable, it can be used as a portable disk without
any separate battery.
Robust E codi g
-
By connecting the product to an external stereo system or a telephone, the user can record data.
-
Robust MP3 direct encoding.
-
Sync Function - Various encoding options are supported for CD - recording.
U limited Folders
-
The user can unlimitedly create folders and store music files by category - artist, album, genre, etc.
Necklace Type
-
The device adopted a fine design to meet new generation’s taste, and it is super-light.
-It is supper-light(46g : including batteries) and easy to carry.
Firmware Upgrade
-
By upgrading the firmware, the user can upgrade product functions as well.
-
Check library in the website of TeraValue to add and upgrade product functions.
Maximum 7-li e LCD
-
7Line Wide Graphic LCD adopted.
-
Sharpness and brightneess are controllable.
Voice fu ctio (VAD / Sile ce / Bit Rate Setti g)
-
Record various sounds including voice.
-
Maximum recording time : about 72 hours (when extending the Memory to GB)
Maci tosh Support
-
Supporting Over Mac OS Version 8.
Li ux Support
-
Supporting Over Kernel 2.4. 8
5
PPrroodduucctt SSaaffeettyy PPrreeccaauuttiioonnss
Do not cut, dissemble, or heat the battery, and do not put the battery in a fire.
(An electrolyte from the battery such as alkaline liquid may contact user's eyes or may result
in heating and explosion.)
If not using the product for a long time, take out the battery from the body.
When an electrolyte leaked from the battery, clean inside the battery cover.
When smoke is found or heating is generated, resulting in deformation of the
product, promptly take out the battery
◐Cautio s Whe Usi g the Battery
Do not insert foreign materials
besides the SD/MMC card into the
SD/MMC card slot.
When carrying this device in a
pocket or wearing it around the
neck, be careful not to get bruise or
hurt other people.
Co ecti g the USB Port
--
When downloading the firmware,
never disconnect the USB cable.
Note

8
7
SSiimmppllee MMaannuuaallSSiimmppllee MMaannuuaall
【Menu Modes and Detailed Menu 】
【Description 】
Detaild Menu ( + / - Button)
Brightness is controlled
INT FLASH(internal memory) EXT CARD(external memory)
MIC(voice recording)/ LINE IN(encording from external devices)
32kHz / 44. kHz / 48kHz
Mone / Stereo / Joint Stereo
32kHz ~ 224kHz
Line input is controlled
ON / OFF / SYNC
ON / OFF
LOW / MIDDLE / HIGH LEVEL
MONO/ STEREO
Normal / Slow / Fast
Repeat All / No Repeat / Repeat son / Repeat RANDO / RANDO
Counter = Repetition count setting
ON / OFF
MEMORY - INT REMAIN / TOTAL
(internal memory(available
capacity) (used capacity)
MEMORY - EXT REMAIN / TOTAL
(internal memory(available
capacity) (used capacity)
KOREA / ENGLISH / JAPANESE / CHINESE (Simplified / Traditional)
INT FLASH(internal memory) / EXT CARD(external memory)
Select a file, then delete it
Select a folder, then delete it
Firmware upgrade
Menu Mode (<< / >>)
LCD Contrast
MEMORY SEL
Music Source
SAMPLE FREQ
CHANNEL MODE
BIT RATE
LINE VOLUME
SYNC
VAD
SILENCE
FM MODE
SPEED MODE
REPEAT MODE
AUTO Repeat
EXERCISE
MEMORY INT
LANG SELECT
FORMAT
LOW FORMAT
ERASE FILE
FOLDER ERASE
F/W Upgrade
Recording / Encording
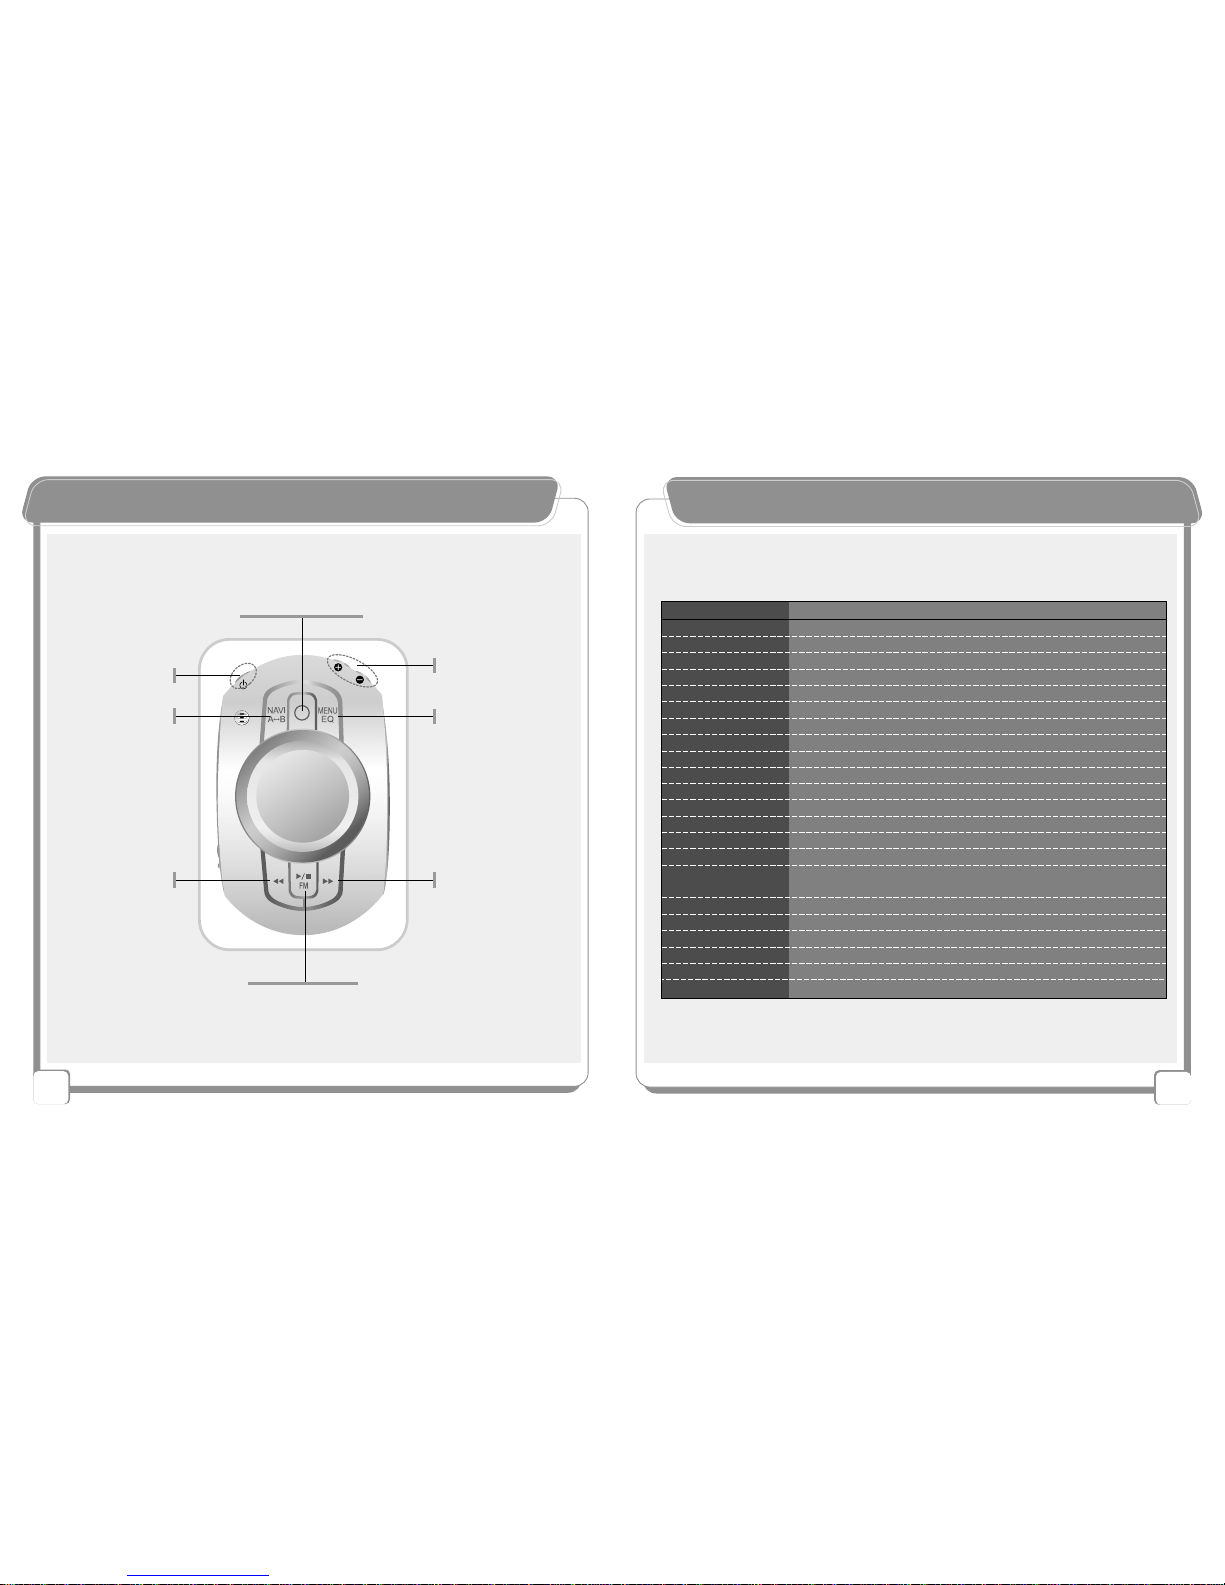
Power On/OffVolume Control
Menu Selection
Folder/File Search
MENU Mode
EQ
NAVI/A-B
Search
Phrase
Repetiton
Auto Repetiton
❼Next Track
Up FM Freq
Menu Selection
Lower Folder
❻
Previous Down
FM Freq
Menu Selection
Upper Folder
❽Play / FM Radio

90
( Insert the provided installation CD into the CD-ROM)
※For Win 98 OS, install Win 98 driver included in the provided CD before using the product.
【Installing Window 98 Driver 】
TIP - By using the install 98. bat the user can install Window 98 driver and firmware upgrade driver.
- The removable disk is automatically recognized without installation of separate driver.
( Window 2000/ME/XP/Mac 8.1 )
WWiinn 88 DDrriivveerr IInnssttaallllaattiioonn
▶Step : Click the Win 98 Folder.
▶Step 3: Connect the USB cable to the product.
▶Step 2: Click the install98.bat file.
( Internal Removable Disk )
( External Removable Disk )
(After connecting the USB cable,the removable disk is displayed in the PC as shown in
the following figure.)
USB Mass Strorage
TTIIPP::CCOONNFFIIGG.. SSYYSS ffiillee iiss bbaassiiccaallllyy ccrreeaatteedd
Upon opening an internal memory portable disk a config.
sys file saves a value set by a user in the menu.
Upon deleting a config. sys file the setting value is
intialized.
Upon power off this device the value saved in the menu
automatically saved.
When a user presses NAVI button,
config. sys is displayed on the LCD.
Note : Do not delete the config. sys file.
⊙A user who uses Wi dow 98/SE must have a additio al i stallatio program
( For the installation program, a user can use a CD contained in the product or download it from
www.teravalue.com
)
⊙Wi dows 2000/ME/XP/Over Mac 8.1
(
When this device is connected to a PC whose operating system is Windows, no additional
installation driver is required)
TIP - For a user who uses Mac OS 8.6 download “ USB Mass Storage 1.3.5.smi” from the Apple
website before using the product.
1.
Installing
Driver
2. CONFIG. Y File
Adva tages of Removable Disk
●
Suitable to moving mass storage files/folders in a PC and backing up important data.
●
A users can easily move data between the PC and the Mac, and between a house and office.
●
A users can easily and safely keep an authorized certificate for internet banking and various music
figure/presentation data.

2
▶
Copyi g a d Movi g File / Folder
-
With Window Explorer,the user can select, copy and move files and folders
.
RReemmoovvaabbllee DDiisskk -- UUssaaggee
▶
Automatic Recog itio
-
When the user connects this device with the PC through the USB cable, The device is automaticaiiy
recognized and the user can easily use it as a removable disk(Plug&Play)
▶
NO - Power USB Co ectio
-
This device uses USB power, therefore it does not need internal power upon connecting with USB
(This device can be connected with the PC without consuming battery, it can safely transmit data)
RReemmoovvaabbllee DDiisskk -- BBaassiicc FFeeaattuurreess
TIP - 2 removable disk icons are created in the PC(MY Computer)
- INT MEMORY and EXT MEMORY are displayed as different removable disks.
TIP - This device can use music and other funtions with battery power and does not support
charge function upon connecting with USB
▶
Easy - Data Move
-
No additional control program between the PC and this device is required.
- The user can easily read/write/delete/move various data(files and folders) using “Window Explore
in the PC such as HDD, FDD.
- This device enables users to move data between 2 removable disks.
▶
Portable Mass Storage SD/MMC Memory Card
- This user can easily extend mass capacity and memory by using SD/MMC memory card (EXT MEN)
and easily user several SD or MMC memory card such as a CD or a floppy diskette.
▶
Semi - perma e t Storage Media
- This device a flash memory as a storage media, so it does not damage data unlikely a CD or a
diskette and its lifetime is semi-permanent
Coping as music file saved in the PC Removable Disk
Internal Removable Disk External Removable Disk
▶
Movi g data betwee i ter al/exter al disks
-
The user can easily use data between 2 removable disks created newly
▶
Creati g a folder by music / la guage / lecture
Opening a removable disk Click folder Creation a folder
※
Note - When the user lays this device after creating only a folder in the removable disk, No Files
dis layed on the LCD.
- The device recognizes and lays only files.
TIP - The user can easily use copy move and delete all data
※
- EXT MEMORY removable disk is created when inserting an external memory slot in the PC.
- When this device is separated from the PC the corresponding removable disk icon disappears.

4
3
NNaammee ooff EEaacchh PPaarrtt
Earphone Jack
Record / Encoding / Pause
NAVI/A-B
(Search / Phrase Repetition
Auto Repetition)
Built-in Mic
LCD
Play / FM Radio
Stop / Pause
Menu Mode and EQ
Next Track / Fast Rewind
Menu Selection
Up FM Frequency
Menu Selection
Power On/Off
Volume Button
Menu Selection
NAVI Folder / File Search
Front
Side
Rear
Line In Connection Port
USB Connection
Port
Hold Switch
PreviousTrack / Fast Forward
Menu Selection
Down FM Frequency
SD/MMC Card Slot
Necklace Ring
LLCCDD DDiissppllaayy
L
C
D
Line
Sync
L
C
D

6
5
BBaassiicc OOppeerraattiioonn FFuunnccttiioonn
①Power On / Off (Press Power button for 2 seconds or more to turn on/off the power.)
②Volume Control, Menu Selection, and NAVI File Search
③All NAVI Folder Search, A-B Section Repetition, Automatic Phrase Repetition (Play State)
④Recording Start / Stop
⑤
Return to Menu (Stop State) / Equalizer (Play State)
⑥LCD - Indicates the operation status and menu setting status.
⑦Previous / Fast Forward / Down FM Frequency / Menu Selection / Upper Folder
⑧Play / Stop / FM Radio / Pause
⑨Next Track / Fast Rewind / Up FM Frequency / Menu Selection / Lower Folder
②
⑤
⑦⑨
③
⑥
①④
⑧
LLiisstteenniinngg ttoo MMPP33 FFiilleess
【Thing to Check and Prepare Before Playing MP3 Files】
Check the remai i g battery.
(The smaller the remaining battery is, the less the number
of displayed bar is.)
Put the Hold switch i Off positio .
【Listening to Music 】
【earching NAVI Folders 】
▶To save the
folder file and exit
. Selecting Memory Sel
-The user can optionally listen to the music saved in the internal/external memories.
(Go to Memory Sell menu in Stop State, and set internal/external memories with '+/-' buttons.)
2 Setting a folder with NAVI/A-B button
-By setting files in a folder, the user can optionally listen to music.
Step : Go to Folder Search menu with NAVI/A-B button in Stop State, and search the
folder with '+/-' buttons.
Step 2 : Enter the folder with '>>' button, and search folder files with '+/-' buttons.
Step 3 : Set the folder files with NAVI/A-B button and exit.
※Note - If there is no folder or file in the memory,
"No Files!!" is displayed.
▶Upper Folder
▶Lower Folder

8
7
LLiisstteenniinngg ttoo MMPP33 FFiilleess
▶Equalizer ▶Pause▶olume Control
By pressing the button for
2 ~ 3 seconds while playing,
the user can temporarily stop
playing.
Press the button for 2 ~ 3 seconds
while playing the file to enjoy
various kinds of sound effects.
Pressing long~
▶POWER ON / OFF
▶Previous / Next
▶Fast Rewind / Fast Forward
▶Play / Stop
Pressing
Shortly~
Play~
Stop~
Pressing
Shortly~
Pressing
long~
Pressing
long~
On~ Off~
【Basic Instruction】
2.
LLiisstteenniinngg ttoo tthhee FFMM RRaaddiioo
▶Turning off the Radio
▶Turning on the Radio
By pressing the button shortly, the
user can go search Radio channels.
By pressing the button for a while,
the user can automatically search
radio channels.
▶AUTO Searching
Radio Channel
▶Searching
the Radio Channel
By pressing the button for a while
in Stop state, the user can go to
FM Radio menu.
By shortly pressing the button again,
the user can go to previous standby
state.
Pressing
Shortly~
DOWN ~
UP ~
Pressing Long
~
Pressing Long~
1.
3. 4.
Pressing for
3 seconds
or more~
Pressing Shortly
~
DOWN ~
UP~
Pressing Shortly
~
TIP :
FM Mode
-By using ‘NAVI/A-B’ Button, set MONO / STEREO
- Stereo setting may be automatically changed according to FM receiving type.
Nor →Normal Clac →Classic
Live →Live Pop →Pop
Rok →Rock Tec →Techno
Jaz →Jazz
Pressing long~

20
9
FFMM PPrreesseett MMooddee
※-"Preset No" message on the LCD means that the channel was saved and the user can
listen to the channel.
-Preset numbers are from ~ 20. In other words, maximum 20 channels can be saved.
▶After searching the FM
channel, press Menu key for
a while (around 4 seconds)
▶After searching the channel
number by pressing buttons,
choose the channel number.
▶Press the Menu key for a
while (around 4 seconds)
again to save the channel
in the chosen number.
1.
▶By shortly pressing the Menu key again,
you can check preset Radio channels.
1.
▲▲Preset Setti g
▲▲Checki g Preset Radio Cha els
▶To go to the initial FM state,
shortly press the Menu key again.
2.
Pressing long~
FFMM PPrreesseett MMooddee
-Without selecting a menu, the user can freely change and set channel presetting.
▲▲Cha gi g the Preset
5.
Previous Channel
Saved preset #
Saving preset #
LCD ( PRESET)
3.2.
Pressing
Long
~
4. 6.
1.
7.
Pressing
Shortly~
Pressing
Long
~
2. 3.
Pressing long~

22
2
RReeccoorrddiinngg WWhhiillee LLiisstteenniinngg ttoo FFMM RRaaddiioo
▶Before starting recording,
control the volume. ▶By shortly pressing Record
button while listening to FM
radio, it can start recording.
▶To stop recording,
shortly press Record
button.
▶To view information of the recorded file,
press Record button, or to play the file,
press Record button again.
1. 2. 3.
■Pause
(To temporarily stop recording,
press Record button for 2 ~ 3
seconds.)
Pressing
Long
~
TIP
-
To View information of the recorded file, press Menu/EQ button.
- Recording track name is displayed as ENCO on the LCD
4.
VVooiiccee RReeccoorrddiinngg
【Things to Check Before tarting Recording】
▶Select MIC IN Music Source menu.
▶For normal recording, select AD On from Music Source Menu.
▶Before recording, control the volume.
※
Before recording, thoroughly read lower functions relating to voice recording.
VAD-ON: When no sound input is made The device enters into Pause state and resumes
recording when voice input is made.
【Recording Voice in the Folder】
Selecting Memory Sel
The user can optionally listen to the music saved in the internal/external memories.
- Go to Memory Sell menu in Stop State, and set internal / external memories with '
+/-'
buttons.
2 Setting a folder with NAVI/A-B button
By setting files in a folder, the user can optionally listen to music.
- Step : Go to Folder Search menu with NAVI/A-B button in Stop State, and search the
folder with '
+/-
' buttons.
- Step 2 : Enter the folder with '
>>
' button, and search folder files with '
+/-
' buttons.
- Step 3 : Set the folder files with NAVI/A-B button and exit.
【earching NAVI Folders】
▶
To save the folder
file and exit
※Note - If there is no folder or file in the memory,
"No Files!!" is displayed.
▶
Upper folder
▶
Lower folder

24
23
VVooiiccee RReeccoorrddiinngg
【Basic Function】
-Press the button to start recording in Stop state.
- Checking and Listening to Recorded Voice
To display the file name of recorded voice, press the button.
To play the file, press Play button again
.
■Pause
※Press the button for 2 ~ 3
seconds while playing the
file to temporarily stop playing.
Pressing
Long
~
PauseRecording
TIP -To View information of the recorded file press Menu/ EQ button.
- Recording track name is displayed as ENCO on the LCD
EEnnccooddiinngg ffrroomm EExxtteerrnnaall DDeevviicceess
【Connecting the Product with an External Device】
※Before recording, thoroughly read lower functions relating to external device recording.
22..55Ø
33..55Ø
【Things to Check Before tarting Encoding】
-
Select "Line In" from Music Source Menu.
-
Select "VAD On / Off" from Music Source Menu.
-
Select Sync / Sync Off / Sync On in Sync Menu.
-
Select 32KHz / 44. KHz / 48KHz in Sample Frequency Menu.
-
Select Low / Middle / High in Silence Level Menu.
-
Select MONO / STEREO / JOINT STEREO in Channel Menu
-
Control the volume in Line in Volume Menu.
TIP - LLiinnee IInn VVoolluummee :
During encoding increase the volume of the external device.
- JJOOIINNTT SSTTEERREEOO :When the Line in volume is high encoding is made at a high volume as well.
▶ SYNC -
Automatically stops after encoding one track.
▶SYNC ON -Encodes all tracks by dividing them into each track and encoding them into each file.
▶SYNC OFF -
Encodes all tracks as a single file.
▶
The higher the frequency is, the higher the recording sound quality.
▶
The user can select the recording sound quality by bit rate.

25
EEnnccooddiinngg ffrroomm EExxtteerrnnaall DDeevviicceess
▶After turning on the external device,
press the button in Stop state to start
recording. To stop recording, press the
button again.
【Encoding from External Devices】
When encoding,
the indicated part
blinks on the LCD.
Stop
Recording
※Press the button for 2 ~ 3
seconds while playing the file
to temporarily stop playing.
■Pause
2~3 seconds
- Checking and Listening
To display the file name of recorded voice, press the button
.
To play the file, press Play button again.
26
NNaavviiggaattiioonn MMooddee
【earching NAVI Folders】
【etting the Internal / External Memory】
▶Folder File search (+/- Button)
Continuous Search
▶To save the folder file and exit
▶Lower Folder
▶Upper Folder
Icon(Internal)
Folder
File
※No file is played in the search funtion
Icon(External)
File
(
Go to Memory Sel menu in Stop state, and set the Int Flash (internal memory) or the Ext
Card (external memory) by using +/- buttons.
)
When inserting external memory
Folder
TIP - To View information of the recorded file, press Menu/EQ button.
- Recording track name is displayed as ENCO on the LCD.

27 28
NNaavviiggaattiioonn MMooddee
La guage Study
Example) Selective Language Listening
※By setting this part, the user can listen
to only English files.
Language
Study Folder
ABCD
(Language Study File)
Recordi g Lectures
Example) Selective Lecture Listening
※By setting this part, the user can
listen to only files in Economics
folder.
Lecture Recording
Folder Economics Folder
Politics Folder
Management Folder
1 2 3 4
(Lecture-recorded File)
Liste i g to Music
Example) Selective Music Listening
Music Folder
Artist A Folder
Artist B Folder
Artist C Folder
1 2 3 4
(Music File)
※By setting this part, the user can
repeatedly listen to only Artist A's songs.
【Folder / File earch】
OOtthheerr MMeennuu FFuunnccttiioonnss
Playi g Speed / Repetitio
(Go to Menu Mode in Stop state, and make a setting by pressing +/- buttons.)
▶
Playing Speed
▶
Repetition Mode
▶
Playing Speed
▶
Repetition Mode
Sectio Repetitio
A.Shortly press the button at the starting
point of the repetition section during playing.
B.Shortly press the point at the ending point
of the repetition section during playing.
Start
~
End
~
A. B.
TIP - Repeat ALL - Play aii tracks in sequence
No Repeat - Play only a selected track then stop
Repeat 1 son - Continuously repeat only a selected track
Repeat RANDO - Repeat all tracks randomly
RANDO - Play all tracks randomly
English Folder
Japanese Folder

30
29
OOtthheerr MMeennuu FFuunnccttiioonnss
Setting the repetition count of the phrase (from to 9)
(Go to Auto Repeat Mode in Stop state and make a setting by pressing +/- buttons.)
【Language tudy】
TIP - By continuously playing/repeating each phrase
the user can easily study a foreign language.
- When setting the repetition count to 2 times
the phase is continuously repeated 2time.
(When no setting the phase is repeated one time)
TIP - The playtime is given according to
the length of phrase. The user can
listen and repeat according to the
phrase.
Pressing
Long~
Pressing
Long~
(Press the button for a while at the starting
point of the repetition section during playing.)
Continuous Repetition of the Phrase (Auto)
(Set ‘ON’ with ‘+ / - ‘ button in the Exercise
menu under the stop status.)
Language Repetition Study -EXERCISE
OOtthheerr MMeennuu FFuunnccttiioonnss
Setti g Sile ce Level (Adjusti g the Se sitivity of the Exter al Music
Source)
- In VAD On state, the user can record voice with various music
source sensitivity settings.
(Go to VAD Mode in Stop state, and set VAD On/Off by pressing +/- buttons.)
(Go to Silence Level in Stop state, and set Low / Middle/ High by pressing +/- buttons.)
【Voice Recording】
※Select MIC from Music Source menu before recording.
VAD (Voice Activity Detectio )
- When no sound input is made, NewGen5
enters into Pause state and resumes recording when voice input is made.

32
3
OOtthheerr MMeennuu FFuunnccttiioonnss
- The user can select the recording sound quality by bit rate.
-The higher the frequency is, the higher the recording sound quality.
Normal sound-quality recording
Long-time recording
High sound-quality recording
Short-time recording
32 / 40 / 48 / 56 / 64 / 80 / 96 / 112 / 128 / 160 / 192 / 224kbps
Bit Rate (Selecti g the Recordi g Sou d Quality)
Setti g Sample Freque cy
※When voice-recording is made,
symbols blinks on the LCD.
32KHz
Low Frequency 44. KHz
Normal Frequency Setting 48KHz
High Frequency
(Go to Sample Frequency menu in Stop state, and set 32KHz / 44. KHz / 48KHz by
pressing +/- buttons.)
TIP - The default bit rate is 128
kbps
.
OOtthheerr MMeennuu FFuunnccttiioonnss
32KHz
Low Frequency 44. KHz
Normal Frequency Setting 48KHz
High Frequency
(Go to Sample Frequency menu in Stop state, and set 32KHz / 44. KHz /48KHz by
pressing +/- buttons.)
- The higher the frequency is, the more similar the MP3 file is to the original
sound in case of encoding from an external device.
Sample Freque cy
▶ SYNC -
Automatically stops after encoding one track.
▶SYNC ON -Encodes all tracks by dividing them into each track and encoding them into each file.
▶SYNC OFF -
Encodes all tracks as a single file.
(Go to Sync menu in Stop state, and set Sync / Sync On / Sync Off by pressing+/-butten.)
Sy c Fu ctio
- When encoding from an external CD player, the user can automatically encode each track.
【Encoding from an External Device】
-Select Line from Music Source menu before encoding from an external device.

34
33
OOtthheerr MMeennuu FFuunnccttiioonnss
- When encoding from an external device, the user can encode by setting the
silence level of the music source.
Sile ce Level
※According to the silence level setting, Sync function may have different performance during encoding.
(Go to Silence Level menu in Stop state, and set Low / Middle/ High by pressing +/-
buttons.)
Li e I Volume
(Go to Line In Volume menu in Stop state, and set the volume by pressing +/- buttons.)
TIP-When the external device or the Line In volume is high encoding is made at a high volume as well.
TIP - In case of normal encoding set the middle level.
OOtthheerr MMeennuu FFuunnccttiioonnss
【LCD Contrast Level Control】
▶Control the contrast level
by pressing +/- buttons.
▶Select LCD Contrast
from the menu.
【MU IC OURCE 】
-Select the menu before recording/encording.
▶Select Line In / MIC by
pressi g +/- butto s
▶Select Music Source
from the menu.
※LINE IN -Encoding
MIC-Recording voice
TIP- MIC icon is not displayed on the LCD

36
35
OOtthheerr MMeennuu FFuunnccttiioonnss
※If a wrong language setting was made, broken characters may be displayed on the LCD.
【Language election】
(Korea/E glish/Japa ese/Chi ese(Simplified/Traditio al)
▶Select the language
by pressing +/ buttons.
▶Select LANG Select
from the menu.
【Internal/External Memory Capacity】
Internal Memory Capacity
Available Memory Space
Extended Memory Capacity
Available Memory Space
▶Check the current
memory capacity by
pressing +/- buttons.
▶Select Memory Int from
the menu.
OOtthheerr MMeennuu FFuunnccttiioonnss
※-Format the memory only in the device.
-Keep in mine that the user cannot recover any file after memory format.
【Memory Format】
▶Select Format / Low Format from the menu.
(The required time depends on the memory capacity.)
FORMAT / LOW FORMAT
TIP-
Fast initialization format - Delete and format part of the saved content.
Slow initialization forma - Erase and format whole of the saved content.
FORMAT
LOW FORMAT
FORMAT
LOW FORMAT
▶Play button to
(OK?/PLAY)

37
OOtthheerr MMeennuu FFuunnccttiioonnssOOtthheerr MMeennuu FFuunnccttiioonnss
. Fully insert the SD/MMC into the slot.
2. Remove the SD/MMC into the arrow direction as shown in the figure.
1. 2.
【Functions and Using Method of the D/MMC】
【
Inserting the Battery
】
. Open the
battery cover
as shown in
the figure.
2. “-” side of the
battery must be
faced toward
the necklace.
1. 2.
Note: ※Replace it with a new one under the stop staus.
※Do not open the battery cover fully to prevent its damage.
TIP -
To efficiently use the battery and maximize the using time
- Take out the battery when is not used for a long time.
- Control the LCD brightness level on the menu.
++
--
38
【ERA E 1 FILE/ FOLDER ERA E】
Select ERASE 1 FILE
FOLDER ERRAASSEE
▶Select ERASE file from the
menu ▶Play button to
(OK?/PLAY)
▶Select ERASE / FOLDER
ERASE from the menu ▶Play button to
(OK?/PLAY)
ERASE FILE
TIP- ERASE 1 FILE’ deletes only a selected file.
FOLDER ERASE’ deletes all file in folder except the folder
FOLDER ERASE
FOLDER ERASE
ERASE FILE
This manual suits for next models
2
Table of contents
Other TeraValue MP3 Player manuals