Teres Certus 460 User manual
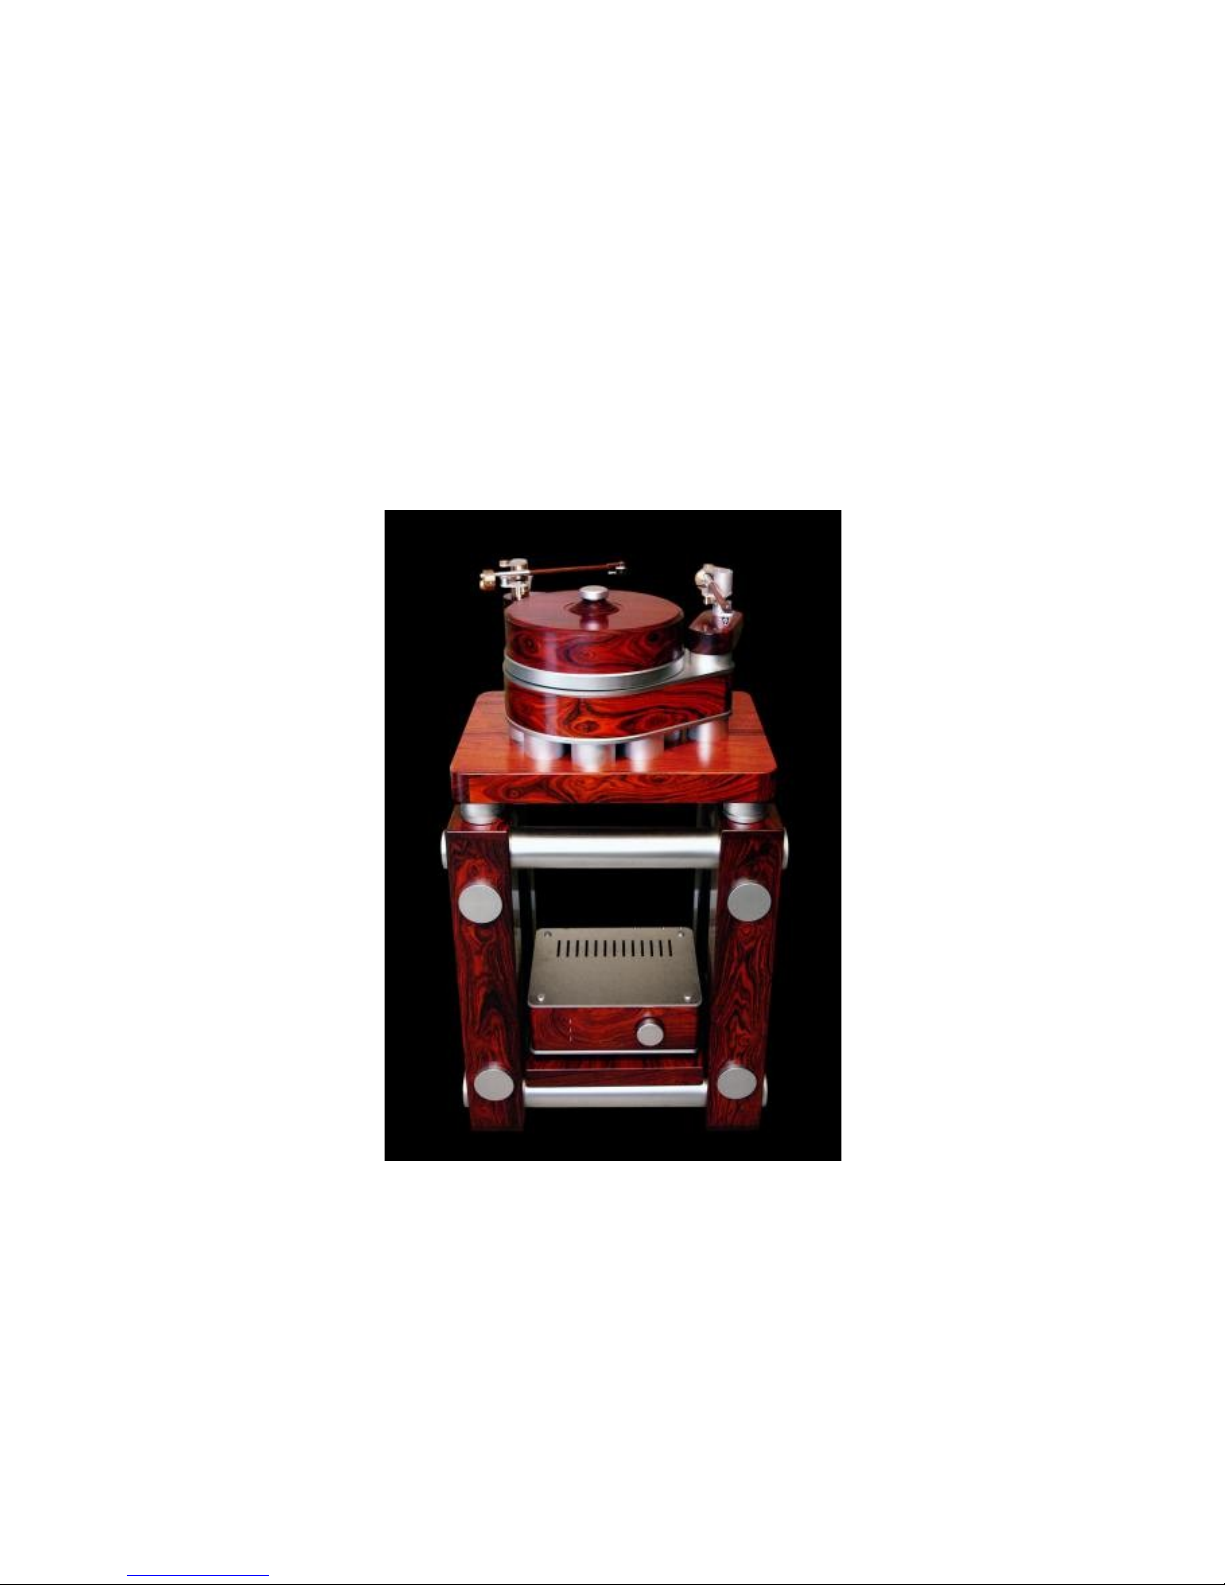
Certus Model 460
Turntable Manual
25-Jun-2007

I. Bearing Assembly
The Teres bearing was designed to have a
lot of viscous damping. This damping
helps swamp the effects of stylus drag,
resulting in better speed stability. For this
reason relatively heavy oil (10 weight) is
provided. With this oil the bearing will
turn smoothly but there will be a lot of
resistance. This is by design.
lease read this information carefully
before assembling your bearing. The
Teres bearing has been machined with
very close tolerances. The radial
clearance in the bearing is only 4 to 5 ten-
thousandths. This tight tolerance results
in superb stability reducing rocking to
microscopic levels. However, with these
tolerances it is imperative that the
bearing is clean and that proper
procedure is used for assembly. The
objective is to have the bearing
completely full of clean oil, including the
recess in the top of the bearing housing.
If air becomes trapped in the bearing it
will not seat properly. The bearing must
be assembled dry to avoid trapping air.
The procedure:
1. Clean the bearing housing and spindle
thoroughly. Wiping down the bearing
surfaces with rubbing alcohol on paper
towel works well.
2. Fill the recess in the bottom of the
spindle with oil and press in the ball
bearing. This displaces air in the recess
and will hold the ball bearing in place.
Be sure to completely wipe away any
excess oil.
3. lace 3 to 4 drops of oil into the
bottom of the bearing housing.
4. If not already installed place the brass
thrust plate in the bottom of the
bearing housing with the white Delrin
button facing upward. The thrust plate
needs to be held flat as it is lowered
into the bearing. A simple method is to
attach a small loop of tape to the end of
a pencil. Then stick the thrust plate to
the pencil and lower it in place. Be
sure that the Delrin button is facing up!
5. Carefully dispense 5.0ml of oil into the
bearing housing without getting any oil
on the sides of the bearing.
6. Insert the spindle into the bearing. The
spindle will stop about 1/2" before it is
fully seated.
7. Install the platter on the spindle. The
platter is very heavy and will require
two people to install. Inflate the
provided air jacks so that they are
about 1” thick. lace the air jacks on
both sides of the base under where the
platter will go. Orient so that the tubing
will not be under the plater. With two
people carefully lower the platter so
that it rests on the air jacks. Slowly let

air out of both jacks to lower the platter
onto the bearing spindle. As the platter
is being lowered rotate the platter as
required to align the platter mounting
holes with the holes in the spindle. A
small screwdriver may inserted into the
mounting holes to rotate the spindle for
final alignment.
8. Install but do not tighten the 8, 10-32
screws used to fix the platter to the
bearing spindle.
9. Once the platter is in place wait for the
spindle displace the oil and fully seat.
This will take roughly 30 minutes so be
patient. When fully seated the gap
between the platter and the base will
be about 0.10” (slightly less than 1/8th
inch). WARNING, do not spin the
platter until the bearing has fully
seated!
10.Once the platter has seated use the
provided dial indicator to accurately
center the platter onto the spindle as
follows:
loosen all 8 of the platter mounting
screws and then lightly tighten two
screws on opposite sides.
Wrap the end of the dial indicator
rod with scotch tape to avoid
scratching the edge of the platter.
Setup the dial indicator and stand
so that the rod of the dial indicator
presses against the edge of the
metal platter plate. The dial
indicator shaft should point
straight out from the edge of the
platter.
lace the dial indicator so that the
dial is deflected at least one half of
a rotation.
Slowly rotate the platter and locate
the point where there is maximum
deflection of the needle. Also note
the amount of deflection.
Use the provided rubber mallet to
tap on the edge of platter (at the
point of maximum deflection) to
move the platter ½ of the amount
of deflection noted before. You may
need to hold the dial indicator base
in place to keep it from being
jarred during this operation. A
series of small taps works best.
Repeat this process until there is
less than 0.002 (two tick marks) of
deflection as the platter is rotated.
This is a tricky process and may
take some time to master. lease be
patient.
Once the platter is centered tighten
two of the bolts and then recheck.
Sometimes tightening the bolts will
change the centering slightly. If
this happens loosen the bolts just
enough that the platter can be
adjusted and repeat the centering
process.
Tighten the remaining 6 bolts.
11. Thread the chrome record centering
pin into the top of the platter. Tighten
the centering pin with pliers will keep it
from backing out while using the
clamp.
12.Connect the cable from the base to the
motor controller.
II. Armboard etup
The model 460 armboard is secured by a
3/8” bolt extending from the armboard to
the bottom of the 460 base. A 3/16” allen
wrench and a ratchet with a 11/16” socket
are required to adjust and tighten the
armboard.
1. Start by using the 3/16” allen wrench
to set the armboard tension so that the
armboard is steady but loose enough
that it can be adjusted by hand. The
allen wrench is inserted into the center
of the armboard bolt from underneath
the turntable base.
2. Install the tonearm and cartridge and
adjust the overhang by rotating the
armboard.
After the overhang adjustment is
complete tighten the armboard bolt. Start
by using the 3/16” allen wrench to tighten
the armboard bolt. The proper amount of
torque is roughly what can reasonably be
exerted using a small allen wrench. Next
tighten the armboard bolt locking nut
using a ratchet and a 11/16” socket. Only
use light pressure when tightening the
armboard nut.

III. Operation
The Certus controller has a single control
switch with 5 positions, off and 0, 33, 45
and 78 R M.
ower on the controller by rotation the
switch from off to the 0 R M position.
When the controller is first powered up it
goes through a 5 second sequence that
aligns the motor magnets. The red and
yellow LEDs light during this process and
the platter movement will be erratic.
To start the turntable simply rotate the
switch to the desired speed. The red LED
will light during the spin up process. The
green LED lights when the desired speed
has been reached but the speed is not
fully stabilized until the red LED shuts off.
To stop rotate the switch to the 0 R M
position. It's best to not power down the
controller until the listening session is
over. Do not spin the platter by hand.
The Certus controller has a sleep timer
feature that will shut off the controller
after 42 minutes of uninterrupted play.
The yellow LED flashes to provide a two
minute shutoff warning. When the sleep
timer expires the motor will shut off and
the yellow LED will flash slowly. Reset
the sleep timer by turning the controller
switch to the off position. The sleep timer
may be disabled if desired.
IV. Reflex Clamp
A reflex clamp is provided with the model
460 and it's use is optional. Unlike other
Teres models clamping may or may not
produce the best results. To use the reflex
clamp place the black Delrin washer
packaged with the record clamp over the
record centering pin. The Delrin washer
must be placed directly on the platter and
under the record. lace the record over
the spindle and then thread on the clamp.
Be sure to remove the Delrin washer if
the clamp is not used.
Only a small amount of clamping pressure
is needed. A simple method for finding the
ideal pressure is to tap on the edge of the
record while clamping. Taping the edge of
the record will make a slight clicking
sound as the record edge contacts the
platter. Tighten the clamp to the point
where the edge of the record has the best
contact as indicated be the least amount
of “clicking”. The pressure is not critical
and after a little use the process will
become automatic.
V. Controller Options
The Certus motor controller has a small
number of options that may be adjusted
via internal switches mounted on the front
CB. The top cover must be removed for
access to the switches.
2 (8 position rotary switch)
S2 may be used to fine tune motor torque
for desired sound quality. The default
setting has been carefully optimized and
will likely be the preference for most
listeners.
2 Torque Percent @ 33-1/3 RPM
0 58.6%
1 63.5%
2 68.4%
3 73.2%
4 78.1% (default)
5 83.0%
6 87.9%
7 92.8%
1 (8 position DIP switch)
Sw1-5: itch adjust
Sw6-7: Must be off
Sw8: Sleep timer, on = enabled
itch Adjust Settings
w1 w2 w3 w4 w5 Pitch @
33-1/3
Off Off Off Off Off -4.880%
On Off Off Off Off -4.570%
Off On Off Off Off -4.258%
On On Off Off Off -3.945%
Off Off On Off Off -3.629%
On Off On Off Off -3.311%
Off On On Off Off -2.990%
On On On Off Off -2.668%
Off Off Off On Off -2.344%

w1 w2 w3 w4 w5 Pitch @
33-1/3
On Off Off On Off -2.017%
Off On Off On Off -1.688%
On On Off On Off -1.357%
Off Off On On Off -1.024%
On Off On On Off -0.688%
Off On On On Off -0.351%
On On On On Off -0.011%
(default)
Off Off Off Off On +0.332%
On Off Off Off On +0.677%
Off On Off Off On +1.024%
On On Off Off On +1.373%
Off Off On Off On +1.725%
On Off On Off On +2.080%
Off On On Off On +2.437%
On On On Off On +2.796%
Off Off Off On On +3.158%
On Off Off On On +3.523%
Off On Off On On +3.890%
On On Off On On +4.259%
Off Off On On On +4.632%
On Off On On On +5.007%
Off On On On On +5.385%
On On On On On +5.765%
VI. Technical pecifications
Dimensions:
•Model 460: 22 x 17" x 15.25"
•Motor Controller: 13" x 13.5" 5.5"
Weight:
•Model 460: 220 Lbs. (excluding
controller)
•latter: 60+ Lbs.
•Motor Controller: 18 Lbs.
Drive ystem:
•Low cogging multi-phase permanent
magnet synchronous (patent pending)
•Magnetic damping via eddy current
brake (patent pending)
•High torque capability (563 oz/inch)
•High resolution digital drive signal
synthesis
•Speeds Supported: 33-1/3, 45 and 78
•Speed Accuracy
•33-1/3 R M: -0.011% +- 0.003%
•45 R M: -0.006% +- 0.003%
•78 R M: -0.160% +- 0.003%
•itch adjustment available via
internal DI switch, 32 steps at
0.34% per step (33-1/3 R M) and
0.461% per step (45 R M).
•Optional sleep timer (shuts off after
42 minutes of uninterrupted
operation)
Bearing Assembly:
•Upward facing, platter embedded
•Massive 1" diameter stainless steel
spindle
•High center of gravity (thrust surface
is above lower platter surface)
•Thrust surface: 1/2" precision ball
bearing and a replaceable
Delrin/brass thrust plate.
•High precision ground and polished
bearing surfaces with precise 4-5 ten
thousandths radial clearance.
•Oil bath design with viscous damping
and superior lubrication
Power Requirements:
•115-125vac, 0.7 Amps, 85 watts
•230-250vac, 0.35 Amps, 85 watts
•Fuse:
120vac - 1.5 amp slow blow
240vac - 1 amp slow blow
Table of contents
Other Teres Turntable manuals


