TerraTec PHASE X24 fw User manual

TERRATEC PRODUCER PHASE X24 FW
English Manual
Version 1.0, last revised: March 2005

2 PHASE X24 (English)
by
Serial number: 613 – 019813 – 20177

PHASE X24 (English) 3
CE Declaration
We:
TerraTec Electronic GmbH, Herrenpfad 38, D-41334 Nettetal, Germany
hereby declare that the product:
PHASE X24 FW,
to which this declaration refers is in compliance with the following standards or standardiz-
ing documents:
EN 50022, EN 50024
The following are the stipulated operating and environmental conditions for said compli-
ance:
residential, business and commercial environments and small-company environments.
This declaration is based on:
Test report(s) of the EMC testing laboratory
The information in this document is subject to change without notice and shall not be deemed as a
warranty by the seller. No warranties, express or implied, are made with regard to the quality,
suitability or accuracy of this document. The manufacturer reserves the right to change the
contents of this document and/or the associated products at any time without the provision of prior
notice to specific persons or organizations. The manufacturer shall not be held liable for damages
of any kind arising from the use, or the inability to use this product or its documentation, even if the
possibility of such damage is known. The information in this document is subject to copyright. All
rights are reserved. No part of this manual may be reproduced or transmitted in any form or for any
purpose without the express written permission of the copyright holders. Product and brand names
contained in this document are used for identification purposes only. All registered trademarks,
product designations or brand names used in this document are the registered property of their
respective owners.
©TerraTec®Electronic GmbH, 1994 - 2005. All rights are reserved (3/24/2005).

4 PHASE X24 (English)
Contents:
Welcome!.............................................................................................................................6
From opening the package to installation............................................................................8
Scope of delivery..............................................................................................................8
Windows installation—step by step .....................................................................................9
Which operating system?.................................................................................................9
Power supply....................................................................................................................9
Installing the driver and the Control Panel .......................................................................9
Installing the GSIF driver................................................................................................14
The PHASE X24 FW as a system audio device (Windows) ..........................................14
Updating the firmware (Windows) ..................................................................................15
Mac installation—step by step...........................................................................................16
Which operating system?...............................................................................................16
Power supply..................................................................................................................16
Installing the PHASE X24 FW driver in OS X ................................................................16
The PHASE X24 FW as a system audio device (Mac OS X).........................................16
Updating the firmware (Mac OS X) ................................................................................17
Connectors and controls....................................................................................................18
Front panel.....................................................................................................................18
Rear panel......................................................................................................................20
The FireWire™ port........................................................................................................21
Drivers ...............................................................................................................................23
The Windows drivers......................................................................................................23
The MME wave driver.................................................................................................23
The ASIO driver..........................................................................................................23
The GSIF driver ..........................................................................................................24
The MIDI driver...........................................................................................................24
In detail—special properties of the drivers.....................................................................25
DirectSound & WDM ..................................................................................................25
WDM sample rate conversion (SRC) .........................................................................25
WDM kernel streaming ...............................................................................................25
The Mac OS X drivers....................................................................................................25
The PHASE Control Panel.................................................................................................27
PHASE X24 (English) 5
The digital mixer ............................................................................................................ 27
Inputs (Analog In, Digital In)....................................................................................... 27
Outputs (Wave Play 1/2, 3/4, Digital Play) ................................................................. 28
Master ........................................................................................................................ 28
Output & Settings........................................................................................................... 28
Master Clock .............................................................................................................. 28
Routing....................................................................................................................... 29
Output ........................................................................................................................ 29
The ASIO panel.......................................................................................................... 30
Colors......................................................................................................................... 30
Scenes ....................................................................................................................... 31
About ............................................................................................................................. 32
Appendix A—Technical Data ............................................................................................ 33
Technical data............................................................................................................ 33
Software ..................................................................................................................... 33
System requirements / recommendations.................................................................. 34

6 PHASE X24 (English)
Safety information
Please ensure that analog audio devices are turned off before
plugging them in. This will protect you from any possible—albeit
weak—electrical shocks, as well as protect your speakers and
your hearing from sudden peaks.
For digital devices, be sure to at least lower the volume on your
playback equipment.
Connecting the device to the FireWire™ port of your computer
may also cause a noise—please turn down the volume of your
playback system accordingly.
Welcome!
We're pleased that you've chosen a TerraTec Producer audio interface for your musical
endeavors and would like to congratulate you on your decision. With the PHASE X24 FW
Audio System, you've purchased a sophisticated product representing the state of the art
of studio technology—and we're convinced this innovative development will prove
extremely useful to you in the coming years and, above all, provide you with a great deal
of entertainment. We hope that this brochure is helpful to you while using the product. It is
designed to illustrate technical relationships based on practical examples from the studio
environment. This brochure is not only designed to help beginners with this complicated
subject—advanced musicians will also find the occasional bit of useful information.
We hope you find this manual both informative and entertaining to read, and hope you find
lots of pleasure in the PHASE X24 FW system.
Sincerely,
Your TerraTec Producer Team

PHASE X24 (English) 7
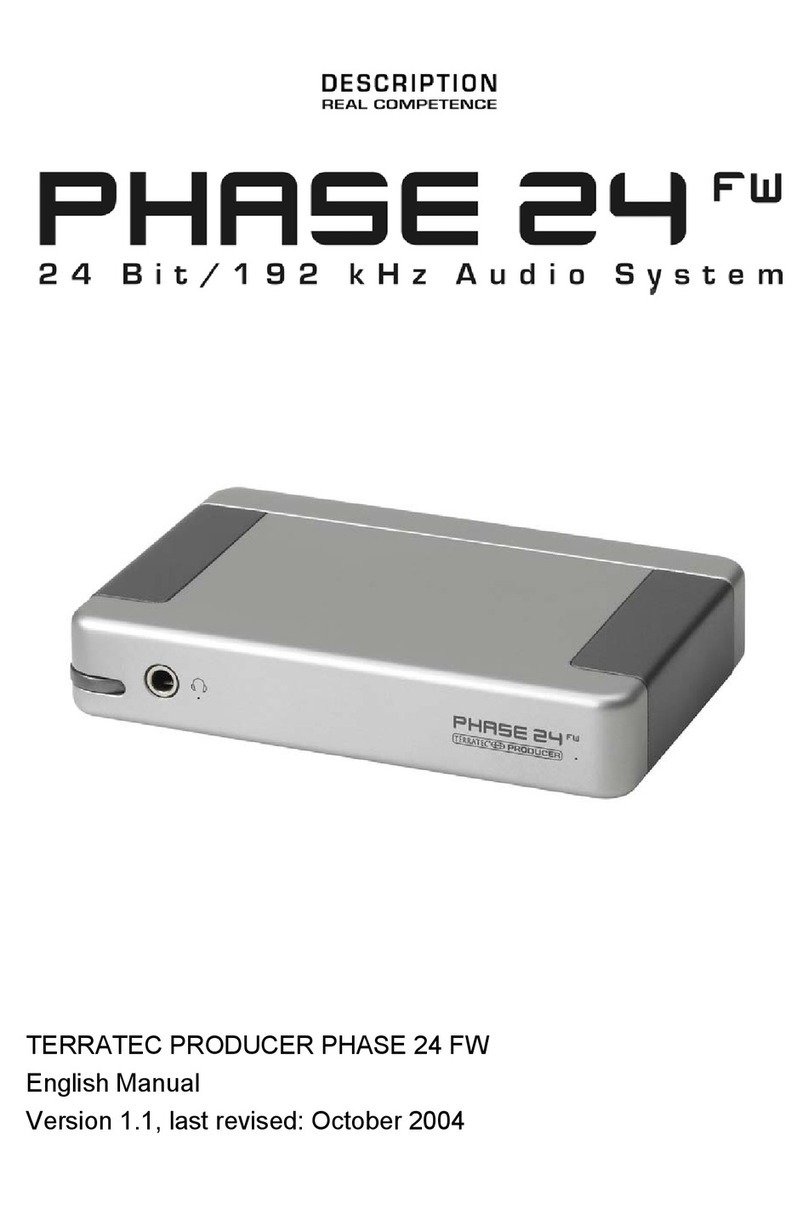
Technology and design. PHASE X24 FW – the perfect TerraTec external audio system
for mobile use, and not just because we included a protective pouch. Fantastic specs
such as 24-bit/192kHz and versatile connections with two analog inputs (line, microphone
or instrument levels), two insert jacks and four analog outputs, digital I/O (optical),
FireWire™ and MIDI I/O make the PHASE X24 FW and a notebook perfect for the DJ on
the road and a valuable assistant in the recording studio. And to top it all off, we've given it
a stylish aluminum case. Feel free to flaunt it.
►For everything you need to know about connections, see Âpage 18.
Nerve center—the software. As you know, a professional audio system is no sound card
for wild-eyed gamers, but the heart of your day-to-day studio work with your PC. That's
why we believe in clean functionality when it comes to software. And despite the extensive
routing options, the PHASE software always provides you with a clear overview and—
depending on the complexity of your switching needs—remains transparent and intuitive.
►For everything you need to know about the PHASE X24 FW Control Panel, see Âpage
27.
The drivers provided for the PHASE X24 FW System, too, leave nothing to be desired.
Our sophisticated software architecture guarantees trouble-free deployment in Windows
XP (Service Pack 1 or higher) and MAC OS X Panther 10.3.6 (or higher).
The ASIO drivers—thoroughly proven throughout years of studio application—allow the
lowest possible latency between the software-based sound generation and audio output.
►For everything you need to know about the driver use, see Âpage 23.

8 PHASE X24 (English)
From opening the package to installation
Before connecting the PHASE X24 FW System, take note of any special points pertaining
to the configuration of your computer. Also refer to the manual of your computer and other
studio peripheral devices for their settings.
The installation should run without any problems, especially in recent systems. If you are
experiencing difficulties all the same, please review carefully the relevant chapter in this
manual. If you are still having problems, please call our service hotline. You can find our
contact information on the Internet at www.terratec.com
Scope of delivery
Start by making sure that the contents of the package are complete.
The PHASE X24 FW System package should contain the following items:
■1 PHASE X24 FW (the PHASE X24 FW hardware)
■1 protective pouch
■1 network adapter 12VAC / 1500mA
■1 IEEE 1394 FireWire™ cable 6-pin/6-pin
■1 IEEE 1394 FireWire™ adapter 4-pin/6-pin
■1 PHASE CD
■1 manual German or English
■1 service request form
■1 registration card
Please fill out and return the registration card enclosed in the package to us at your
earliest convenience or register online at www.terratec.net/register.htm. This is
important for support and hotline services.

PHASE X24 (English) 9
Windows installation—step by step
Please perform the following steps in the stated order. Do not
connect the PHASE X24 FW module to the computer until
instructed to do so.
Which operating system?
The PHASE X24 FW can be used only under Windows XP (Home and Professional
editions). Older Windows versions are not supported. Please ensure also that you have
applied the current service packs and updates to your Windows installation (Service Pack
1 or higher!).
Power supply
Under normal circumstances, the PHASE X24 FW system draws its power from the 6-pin
FireWire™ port, making an AC adapter unnecessary. However, not all FireWire™
controllers deliver a constant operating voltage—we therefore recommend using the
included AC adapter. The AC adapter is also useful whenever you would like to conserve
the battery power of your laptop. The AC adapter is required if your computer only
features a 4-pin FireWire™ port. For more information, see “The FireWire™ port” starting
on Âpage 21.
Installing the driver and the Control Panel
1. Before you start, ensure that your Windows XP version is up to date. Right-click the
“My Computer” icon and choose “Properties” from the context menu. If you're still us-
ing the default Teletubbyland XP wallpaper, you can access this menu item by clicking
: Start -> Settings -> Control Panel -> System. Service Pack 1—or SP1 for short—
must be installed on your computer. If it is not, please contact Microsoft
(www.microsoft.com) to obtain an update for your system. The service pack is gen-
erally free of charge.
2. Insert the included PHASE CD and wait for the autorun application to launch. If the
autorun application on the CD does not launch automatically, start the application
manually by double-clicking “Autorun.exe” in the root folder of the CD.
3. Select your language, and “PHASE X24 FW” in the following menu. Next, click the
“Driver/Control Panel” button. The setup wizard will now appear.

10 PHASE X24 (English)
4. Choose a language for the setup wizard and click “Next” to continue with the installa-
tion.
The InstallShield Wizard will now display its welcome message.

PHASE X24 (English) 11
5. The default destination for the installation is specified in the following window. If you
prefer a different location, please click “Change”.
6. You can disregard the following safety warning without concern. Click “Continue
Anyway” to continue.

12 PHASE X24 (English)
7. The driver is now installed in your system. As soon as the message shown below
appears, connect the PHASE X24 FW to your computer's FireWire™ port using the
included cable. Windows XP will automatically recognize the device as new hardware
and will open the driver installation dialog.
8. You may once again ignore the dialog box that will reappear to inform you that the
software that you are installing has not passed the Windows logo test.

PHASE X24 (English) 13
9. Click “Finish” to complete the installation.
10. Once the driver installation is complete, the PHASE X24 FW should appear as the
following entry in the Device Manager. The Device Manager can be found on the Con-
trol Panel under “System” > “Hardware”. Then click the “Device Manager” button.
.

14 PHASE X24 (English)
Installing the GSIF driver
If you intend to use the GigaStudio sampler application, you will need to install the GSIF
driver. You can also access this installation routine via the autorun application of the
PHASE CD. If the autorun application on the CD does not launch automatically, start the
application manually by double-clicking “Autorun.exe” in the root folder of the CD.
Select your language, and “PHASE X24 FW” in the following menu. Click the “GSIF
Installation” button to start the setup wizard. Follow the on-screen instructions and click
“Next” to continue.
The PHASE X24 FW as a system audio device (Windows)
If you would like to use the PHASE X24 FW not only for specific audio applications, but as
your default Windows audio device, select the PHASE X24 FW audio driver in the Control
Panel under “Sounds and Audio Devices” > “Audio” as the default device for the desired
functions.
As the PHASE X24 FW is a professional audio interface, its levels can only be adjusted
using its included Control Panel. The Windows mixer is disabled to prevent it from
adversely affecting the signal quality.

PHASE X24 (English) 15
Updating the firmware (Windows)
Thanks to software technology, updates to existing standards and new functions can be
added to the PHASE X24 FW without changes to the hardware by updating its so-called
“firmware”. To update the firmware, proceed as follows:
■Run the program “TT_FW_WinFlash_vX.X.exe”. It can be found on the driver CD in
the “Firmware” folder and can also be downloaded from the Internet.
■Click “Open” and specify the firmware file you would like to load. The file will have the
ending “.bcd” and can be found in the Firmware folder or downloaded from the Inter-
net.
■Next, click “Upgrade Firmware” to start the update process.
■Answer “Yes” to the safety prompt that appears now.
■The PHASE X24 FW must be restarted after the firmware update completes success-
fully. Either disconnect the PHASE X24 FW from the computer and reconnect it, or
restart the computer.
■In the event of a power failure during the update, or if the update does not complete
successfully for any other reason, simply repeat the update. It's not possible to dam-
age anything in the process.

16 PHASE X24 (English)
Mac installation—step by step
Which operating system?
The PHASE X24 FW can only be used under Mac OS 10.3.6 (OS X) or higher. It can be
integrated easily using OS X CoreAudio and CoreMIDI.
Power supply
It should be possible to use the PHASE X24 FW without an AC adapter on a 6-pin
FireWire™ connection. However, some FireWire™ controllers do not provide a consis-
tently adequate operating voltage. We therefore recommend the use of the included AC
adapter. The AC adapter is a must if your computer only features a 4-pin FireWire™
connection, as these do not have the two power conductors of the 6-pin port.
Installing the PHASE X24 FW driver in OS X
As mentioned above, the PHASE X24 FW uses the operating system's CoreAudio and
CoreMIDI drivers. It's therefore not necessary to install a device-specific driver. Simply
plug the device into your FireWire™ port and it's available immediately. However, to take
full advantage of advanced routing, sampler rate switching and other features, please
install the included Control Panel. Simply run the installer in the PHASE X24 FW\Driver &
Control Panel\MAC folder.
The PHASE X24 FW as a system audio device (Mac OS X)
If you would like to use the PHASE X24 FW not only for specific audio applications, but as
your default Mac OS X audio device, select the PHASE X24 FW audio driver in the
“Sound” control panel as the default device for audio output.

PHASE X24 (English) 17
The PHASE X24 FW as the default device in OS X
Updating the firmware (Mac OS X)
■Run the program “FWUpdater_vX.X.app”. It can be found on the driver CD in the
“Firmware” folder and can be downloaded from the Internet. Click “Close” to acknowl-
edge the following security warning.
■Click “Open” and specify the firmware file you would like to load. The file will have the
ending “bcd” and can be found in the Firmware folder.
■Next, click “Upgrade Firmware” to start the update process. You must have local
administrator rights to update the firmware.
■The PHASE X24 FW must be restarted after the firmware update completes success-
fully. Either disconnect the PHASE X24 FW from the computer and reconnect it, or
restart the computer.

18 PHASE X24 (English)
Connectors and controls
The PHASE X24 FW audio interface offers you numerous options for connecting profes-
sional studio peripherals and HiFi devices. Following is a detailed overview of its technical
and electrical characteristics.
Front panel
1. Microphone/Instrument Input 1, this input is intended for microphones with XLR
connectors or instruments with 1/4" jacks and works with autopriority over the Line
Input 1 on the rear panel. In other words, you can leave the cabling on the back
panel in place when connecting a microphone or instrument to the front panel; the
input on the front panel will automatically be active. This switching is performed by
high-quality relays to ensure the optimal quality of the analog signal path.
2. Microphone/Instrument Input 2, this input is intended for microphones with XLR
connectors or instruments with 1/4" jacks and also works with autopriority over the
Line Input 2 on the rear panel.
3. Gain 1, controls the preamplification of the signal being applied to input 1.
4. Signal and Clip LED, provides visual level monitoring of the signal to be recorded
on channel 1. The lower blue LED indicates the presence of a signal, while the up-
per red one indicates an overload of the input converter.
5. 48V, applies 48V phantom power to Microphone Input 1.
6. Gain 2, controls the preamplification of the signal being applied to Input 2.
7. Signal and Clip LED, provides visual level monitoring of the signal to be recorded
on channel 2. The lower blue LED signals the presence of a signal, while the up-
per red one indicates an overload of the input converter.
8. 48V, applies 48V phantom power to Microphone Input 2.

PHASE X24 (English) 19
9. Master, this rotary encoder controls the levels of the analog outputs (Main and
Monitor). The output pair to be controlled can be selected via the Push function
(Main or Monitor or Main & Monitor). In addition, pressing and holding will mute the
channels currently being controlled. This can be used to switch back and forth be-
tween two monitor speaker sets for a direct comparison. This function is also
available via the Control Panel if ever the PHASE X24 FW isn't within reach.
10. Main and Monitor LED,indicates the output pair currently being controlled by the
master or muted. The following overview describes the operation and displays:
MAIN LED MONITOR
LED
MASTER controls: Press and hold MASTER:
on off MAIN OUT 1/2 level MAIN OUT 1/2 muted
off on MONITOR OUT 3/4 level MAIN OUT 3/4 muted
on on MAIN and MONITOR OUT level MAIN and MONITOR OUT muted
flashing off MAIN OUT 1/2 muted MAIN OUT 1/2 unmuted
flashing on MONITOR OUT 3/4 level, (note: MAIN
OUT remains muted)
MAIN and MONITOR OUT muted
off flashing MAIN OUT 3/4 muted MAIN OUT 3/4 unmuted
on flashing MAIN OUT 1/2 level, (note: MONITOR
OUT remains muted)
MAIN and MONITOR OUT muted
flashing flashing MAIN and MONITOR OUT muted MAIN and MONITOR OUT unmuted
11. Headphone Level, adjusts the volume of the headphone output. The signal from
Analog Output 3/4 (Monitor) is always available at the headphone output. The ac-
tual signal available there depends on the routing, which you can set up to suit
your needs in the Control Panel. For more information on routing, please see the
Control Panel chapter on Âpage 27.
12. Headphone Out, output for a 1/4" stereo headphone jack.

20 PHASE X24 (English)
Rear panel
13. Input 1/2, the PHASE X24 FW System features two high-quality analog mono
inputs. The connections have been realized for balanced 1/4" jacks. Unbalanced
sources can also be plugged into the outputs, of course. The gain for these inputs
can also be set using the gain controls on the front panel.
14. Insert 1/2, external effects such as compressors can be inserted into the recording
path upstream of the A/D converter via these 1/4" stereo jack sockets.
Practical tip: While recording, try to achieve as high a re-
cording level as possible to get the greatest benefit from
the wide dynamic range of the 24-bit converter. Always re-
member that a clean take is far more valuable than the best
corrective plugin.
15. Main 1/2, analog mono outputs 1/2; the connections have been realized as bal-
anced 1/4" jack sockets. Unbalanced cables can also be plugged into the outputs,
of course. The analog outputs operate with music-compatible levels of 2.0 Vrms.
Here, you can connect a mixing card, active speakers, or amplifiers.
16. Monitor 3/4, analog mono outputs 3/4; the connections have been realized as
balanced 1/4" jack sockets. Unbalanced cables can also be plugged into the out-
puts, of course.
17. Digital In, to record digital audio data with your computer, use the digital input of
the PHASE X24 FW. The interface can receive sample rates of up to 24-bit / 96 .
When recording from a digital source, make sure that the sampling rates of both
devices (e.g. DAT recorder and laptop) are synchronized. The S/PDIF protocol
contains a signal for this purpose. If such a signal is applied to the digital input and
the Master Clock switch is set to “External”, the PHASE X24 FW will automatically
synchronize to it and the “Digital In” channel will be available in the mixer. ASIO
applications such as Cubase SX often have an option to switch the hardware from
an internal to an external (sometimes also called S/PDIF) clock source. This
Table of contents
Other TerraTec Stereo System manuals

TerraTec
TerraTec SiXPack 5.1+ User manual

TerraTec
TerraTec Aureon 7.1 FireWire User manual

TerraTec
TerraTec DMX Xfire 1024 User manual

TerraTec
TerraTec Aureon 5.1 USB MK II User manual

TerraTec
TerraTec Audio Center User manual

TerraTec
TerraTec AUREON 7.1 SPACE User manual

TerraTec
TerraTec Aureon 7.1 Universe User manual

TerraTec
TerraTec PHASE 24 FW Operating and installation instructions

TerraTec
TerraTec EWS88 MT User manual

TerraTec
TerraTec Audio User manual