Tesla Series 3 User manual

SERIES 3
40Q300BF
43Q300BF
SRBENG BiH/
CG
LED TV
QUICK
START
GUIDE

2
ENG
SAFETY INFORMATION
Safety Warning
CAUTION
RISK OF ELECTRIC SHOCK
DO NOT OPEN
The lightning flash with arrowhead symbol,
within an equilateral triangle is intended to
alert the user to the presence of uninsulated
dangerous voltage within the product
enclosure that may be of sufficient magnitude
to consitute a risk of electric shock.
The exclamation point within an equilateral
triangle is intended to alert the user to
the presence of important operating and
maintenance (servicing) instructions in the
literature accompanying the TV.
Caution: To reduce the risk of electric shock, do not remove cover or back. No user-serviceable parts inside.
Refer servicing to qualified service personnel.
WARNING: TO REDUCE THE RISK OF FIRE OR ELECTRIC SHOCK, DO NOT EXPOSE THIS APPLIANCE TO RAIN OR MOISTURE.
CAUTION: CHANGES OR MODIFICATIONS NOT EXPRESSLY APPROVED BY THE PARTY RESPONSIBLE FOR COMPLIANCE WITH
THE FCC RULES COULD AVOID THE USERS AUTHORITY TO OPERATE THIS EQUIPMENT.
Before operating the unit, please read through this manual.
PLACEMENT
• Do not place the unit on an unstable cart, stand, tripod, bracket, table, or shelf.
• Do not expose the unit to direct sunlight and other sources of heat.
• Do not handle liquids near or on the unit.
• Never spill liquid of any kind into the unit
• Do not put the unit near appliances that create magnetic fields.
• Do not put heavy objects on top of the unit.
TEMPERATURE
• Do not place the unit near or over a radiator or a heater register.
• If your unit is suddenly moved from a cold to a warm place, unplug the power cord for at least two hours so that
moisture that may have formed inside the unit can dry completely.
HUMIDITY
• Do not expose machine in rain, damp or place near water.
• Ensure the indoor drying, cool.
VENTILATION
• Keep the ventilation openings clear.
WARNING (Only applicable to models over 7kg)
Never place a television set in an unstable location. A television set may fall, causing serious personal injury or
death.
Many injuries, particularly to children, can be avoided by taking simple precautions such as:
• Using cabinets or stands recommended by the manufacturer of the television set.
• Only using furniture that can safely support the television set.
• Ensuring the television set is not overhanging the edge of the supporting furniture.
• Not placing the television set on tall furniture (for example, cupboards or bookcases) without anchoring both
the furniture and the television set to a suitable support.
• Not placing the television set on cloth or other materials that may be located between the television set and
supporting furniture.
• Educating children about the dangers of climbing on furniture to reach the television set or its controls.
If your existing television set is being retained and relocated, the same considerations as above should be applied.

3
ENG
PREPARATION FOR YOUR NEW TV
WALL MOUNTING (IF AVAILABLE)
Check Accessories
Stand Installation Guide
Check the accessories that are packed with your TV. Check the accessories that are packed with your TV.
- LED TV - Remote Control + Batteries - TV Stand Base + 4 Screws - User’s Manual, Warranty Card
The TV is packaged with the TV stand separated from the cabinet. To setup the TV table stand, please
carry out the installation according to the instructions below.
1. The panel can be scratched easily, so please:
Place a soft cloth on the table and place the TV face down on the cloth.
Note: Always unplug the AC cord first when installing/removing the stand.
2. Take the base. Please align the screw holes of the base and the TV, and then insert the screws into the holes on
the base and tighten them.
Note: To ensure that the TV is stable, please lock all screws.
Please take note of the base direction:
The bottom view of the TV
(Front cabinet faces down)
Note: Picture for reference purposes only.
VESA (mm) 40“: 200x100
43“: 200 x 200

4
ENG
TV JACKS EXPLANATION
VGA: Connect the PC.
PC AUDIO IN: Connect the audio output of the PC.
SCART: Connect to receive the signal from your antenna or cable via coaxial cable.
RF: Connect to receive the signal from your antenna or cable through a coaxial cable.
HDMI: (High-Definition Multimedia Interface) Provides an uncompressed digital connection.
OPTICAL: Digital TV sound output.
CI: CI card reader.
MINI AV: Connect the Audio / Video output jack of the DVD or VCR.
MINI YPbPr: Connect the YPbPr output jack of the DVD or VCR.
USB: Connect the USB device such as the flash disk to access the TV media function.
EARPHONE: Connect a 3.5 mm headset for personal audio.

5
ENG
Front Panel
SIDE KEYPAD AND FRONT PANEL
Power/Standby Indicator: Blue and red dual-color LED. It shows red when the TV is turned off and blue when
turned on.
Remote Control Sensor: Remote control IR sensor, which receives infrared ray sent by remote control.
1. POWER ( ) /OK: In the off mode, Short press to turn on the TV. In the on mode, Short press to achieve OK
function, long press to achieve POWER function.
POWER ( ): Turns the TV on and off.
OK: Enter and confirm.
2. VOL-: Decreases the volume. In the TV menu system, it acts like the left arrow on the remote control and can be
used to select menu options.
3. VOL+: Increases the volume. In the TV menu system, it acts like the right arrow on the remote control and can be
used to select menu options.
4. MENU/CH-: Short press to achieve CH- function, long press to achieve MENU function.
MENU: Displays the TV Main Menu.
CH-: Scans down through the channel list. In the TV menu system, it acts like the down arrow on the remote
control and can be used to select menu options.
5. INPUT/CH+: Short press to achieve CH+ function, long press to achieve INPUT function.
INPUT: Displays the Source Select List.
CH+: Scans up through the channel list. In the TV menu system, it acts like the up arrow on the remote control
and can be used to select menu options.
Power/Standby Indicator
Remote Control Sensor

6
ENG
REMOTE CONTROL INSTRUCTIONS
Inserting Batteries in the Remote
Remote Control Reception Angle
1. Remove the battery compartment cover from the back of the remote control by lifting the cover.
2. Insert 2AAA batteries. making sure the polarities(+and-) are aligned correctly.
3. Put the cover back.
Use your remote control within the distance and angle range shown below.
If the remote control does not work, check these points:
• Are the polarities (+, -) correct?
• Are the batteries worn out?
• Is there an AC power failure?
• Is the power cord plugged in?
• Is there any interference or block near the remote control sensor?
CAUTION:
• Used batteries should be recycled.
• Keep out of children’s reach.
• DO NOT use new and old batteries together.
• Change both the batteries at the same time.
• When not using the remote control for a long time, remove the batteries from the unit.
Warning: All batteries (packed or in use) must not be exposed to high temperature like sun heat or fire.
Remote Control Sensor

7
ENG
REMOTE CONTROL BUTTONS
POWER ( ): Turns the TV on or switches it to Standby.
MUTE ( ): Reduces the TV volume to its minimum level. Press again to
restore the volume.
NUMBER BUTTONS: Press 0-9 select a TV channel directly when you are
watching TV.
“-/--“: Set up the digit of channel .
Recall ( ): Returns to the previous channel.
AUDIO: Switch the audio channel in DVD or multimedia mode.
FAV-./FAV+.: Scan up or down through the current favorite channel list.
FAV: Show favorite channel list.
CH+ or CH-: To access the next or previous channels.
VOL+ or VOL-: Increases or decreases the TV volume.
P. MODE: Switches between the preset picture mode.
S.MODE: Switches between the preset sound mode.
INPUT: Accesses the available input channels, Use the arrows to highlight
options, and press OK to select.
SLEEP: Selects the sleep timer, after which the TV will shut off
automatically.
ASPECT: Switches between the preset screen size mode.
INFO: Press to display the current program information on the screen.
Arrows (///): Uses the four arrows to highlight different items
in the TV menu or change the value.
OK: Enter and confirm button.
MENU: Accesses the Main Menu, or return to the upper level of a sub-
menu.
EXIT: Exits the current menu or function.
TEXT: To enter Teletext mode. Teletext is not broadcast in New Zealand.
INDEX: To display the index page.
MIX/T: TV and TXT picture are mixed together in transparent
background. Press to activate Time Shift function in Digital TV
mode, for delayed viewing.
REVEAL: Teletext mode-To reveal or hide the hidden words.
HOLD: Teletext mode-Hode current page which is display.
SUBPAGE: Sub coded page access.
SIZE: Change the size of display in Teletext mode.
CANCEL: To cancel the display.
SUB-T: Display caption information
TV/RADIO: Switch between TV and radio. (Used for models with DTV
function only)
REC: Presonal video record button. A USB memory device must be
connected to the USB port for recording.
EPG: Shows Electronic Program Guide.
RED/GREEN/YELLOW/BLUE: Use add-on functions in OSD menu.
:Stop and play or pause media files;
:Fast review and fast forward.
:Select the previous or the next media file.
NOTE:
• All pictures In this manual are examples, only for reference, actual product may differ from the pictures.
• The buttons not mentioned here are not used.

8
ENG
BASIC OPERATIONS
Turning On and Off
Select input source
Adjust the OSD Screen
Connect the AC cord to power the TV. At this time the TV will enter standby mode and power indicator will turn red.
Use Power button ( ) on the side panel of TV or on the remote control to turn on the TV. After switching off the TV
for 5 seconds, you can turn on TV again.
Press INPUT button to display the input source list;
Press /button to select the input source you want to watch;
Press OK button to enter the input source.
• Press MENU button to display the MAIN OSD MENU;
• Press /button to select the MENU you want;
• Press OK button to enter the sub menu, and press MENU button to return back to the previous menu.
• Press /button to select the option and then press OK button to enter the submenu, press /button to
adjust the value or press /button to select in the sub-menu;
You can press MENU button to save and return back to the previous menu, and press EXIT button to exit the entire
menu.

9
ENG
OSD MENU OPERATIONS
Menu Setting
Media Operation
Press MENU button to display the MAIN OSD MENU:
Channel: Used for channel searching and edit, it’s only available in TV input.
You can choose to automatically search, or choose to manually search according to your needs.
Picture: Used for TV picture effect adjusting.
For example: Picture mode, colour temperature and so on.
Sound: Used for TV sound effect adjusting.
For example: Sound mode, Balance and so on.
Time: Used for TV time effect adjusting.
For example: OSD Time, Sleep Time and so on.
Setup: Used for TV additional options.
For example: OSD Language, Reset and so on.
Lock: Used for TV Lock effect adjusting.
For example: System Lock, Channel Lock and so on.
Note: When the “Lock” function is set, if the System Lock is on, please input the password to unlock, default
password is 0000.
For more settings, please refer to the menu settings.
Note: Before operation MEDIA menu, Plug in USB device or memory card.
Press /button to select Media Player in the Home Page, and then press “OK” button to enter.
You can browse multimedia files by selecting PHOTOS, MUSIC, MOVIE or TEXT. Then press the “ ” button to start
playing.
1. Press /button to select the option that you
want to adjust in the Media menu, then press
OK or button to enter.
2. Press /button to adjust or press /
button to select.
3. After finishing your adjustment, press MENU
button to save and return back to the previous
menu and press EXIT button to exit the entire
menu.

10
ENG
TROUBLESHOOTING
If there are any problems when using the product, please consult the list below. If the list does not solve the
problem, call our Customer Service Center Immediately.
Problem Solution
The TV can’t be turned on. • Make sure the AC cord Is plugged In.
• Check the wall outlet, make sure the AC output works normally and
stably.
• Select the Key Lock function In the OPTION Menu and press OK to
uncheck the locking status.
No picture or sound but the TV is
on and there is a “No Signal” sign
on screen.
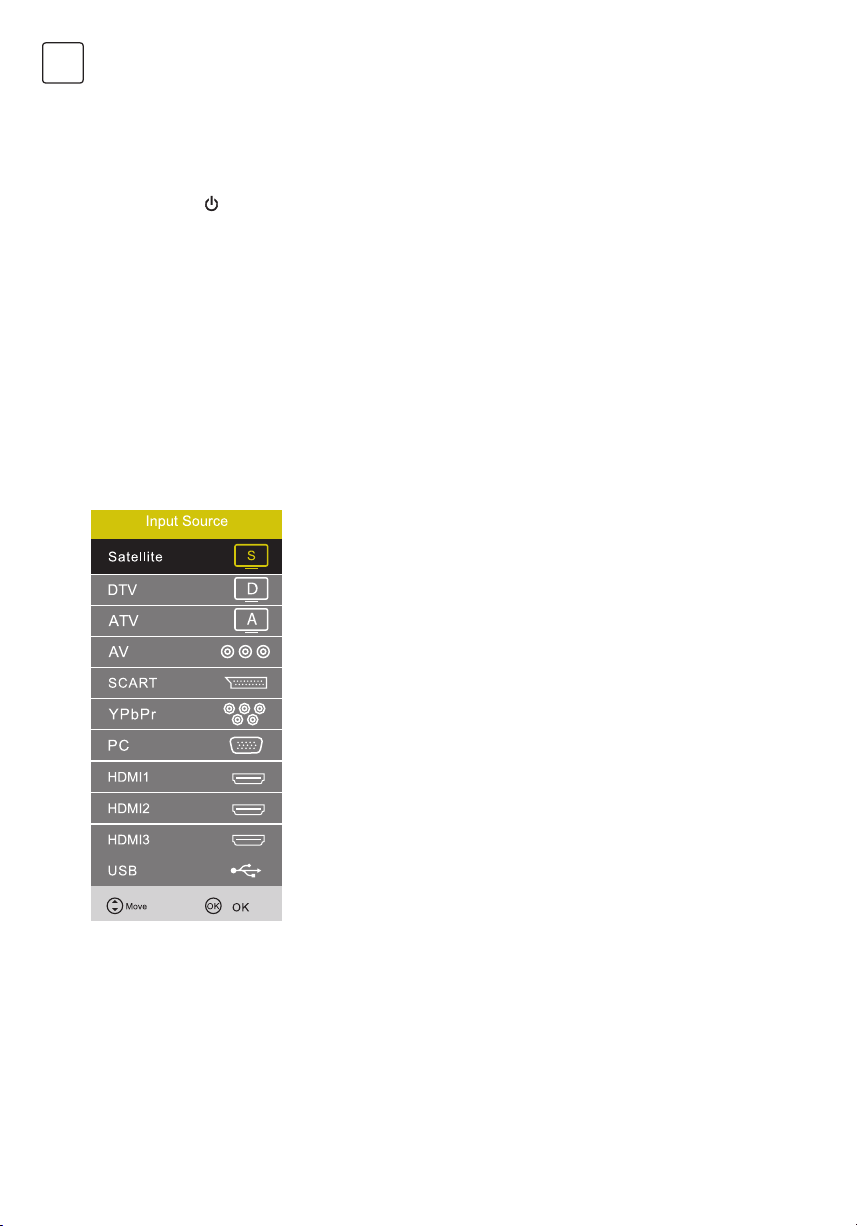
• Are you trying to use an Input source with no device connected to It?
For using other vldeo/audlo device, make sure the external device
works normally first, then press Source and choose the right Input
source.
• The signal type option may be set Incorrectly.
• The channel may be blank. Try to search the channel again or change
another channel.
The sound is fine, but the picture
is poor.
• If you can only get black and white pictures from external device that
you’ve connected to your TV, maybe It Is due to the video cables Is not
connected well, or they are connected wrongly. Check the connection
stability first, then check the correctness.
• For AV input, the yellow video cable connects to the yellow Video
In jack on the side of your TV. For Component input, the three Y,
Pb, Pr video cables (red, blue, and green) should be connect to the
corresponding input jacks on the side of your TV.
• Check the antenna connections. Make sure all of the cables are firmly
connected to the TV jack on side of your TV.
• Try adjusting the color features to improve.
There is no sound, but the picture
is fine.
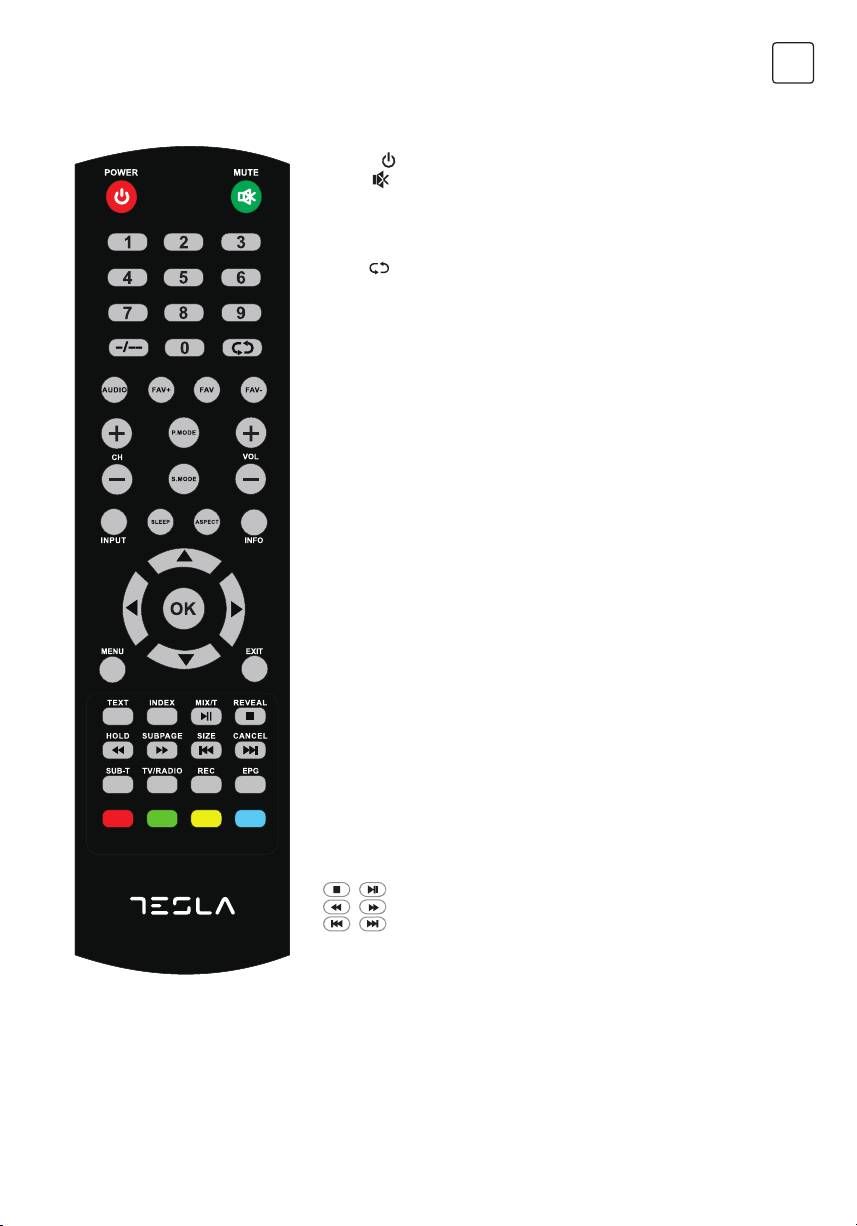
• The sound might be muted. Try pressing the MUTE button to restore
sound.
• For using AV or Component, remember to connect the device’s left and
right audio output correctly. The left channel cable is white and the right
channel cable is red. Please match the cables and jacks according to
their colors.
• The sound settings may not be set correctly.
• If your audio source has only one jack or is a (mono) audio source,
make sure you have plugged the connection into the Audio In L jack
(white) on the TV.
The buttons on the side panel
don’t work.
• Unplug the TV from the AC power for 10 minutes and then plug it back.
Turn the TV on and try again.
The TV turns off unexpectedly. • The electronic protection circuit may have been activated because of
a power surge. Wait 30 seconds and then turn the TV on again. If this
happens frequently, the voltage in your house may be abnormal. If the
other electronic equipment in your home can’t work normally, consult a
qualified service personnel.
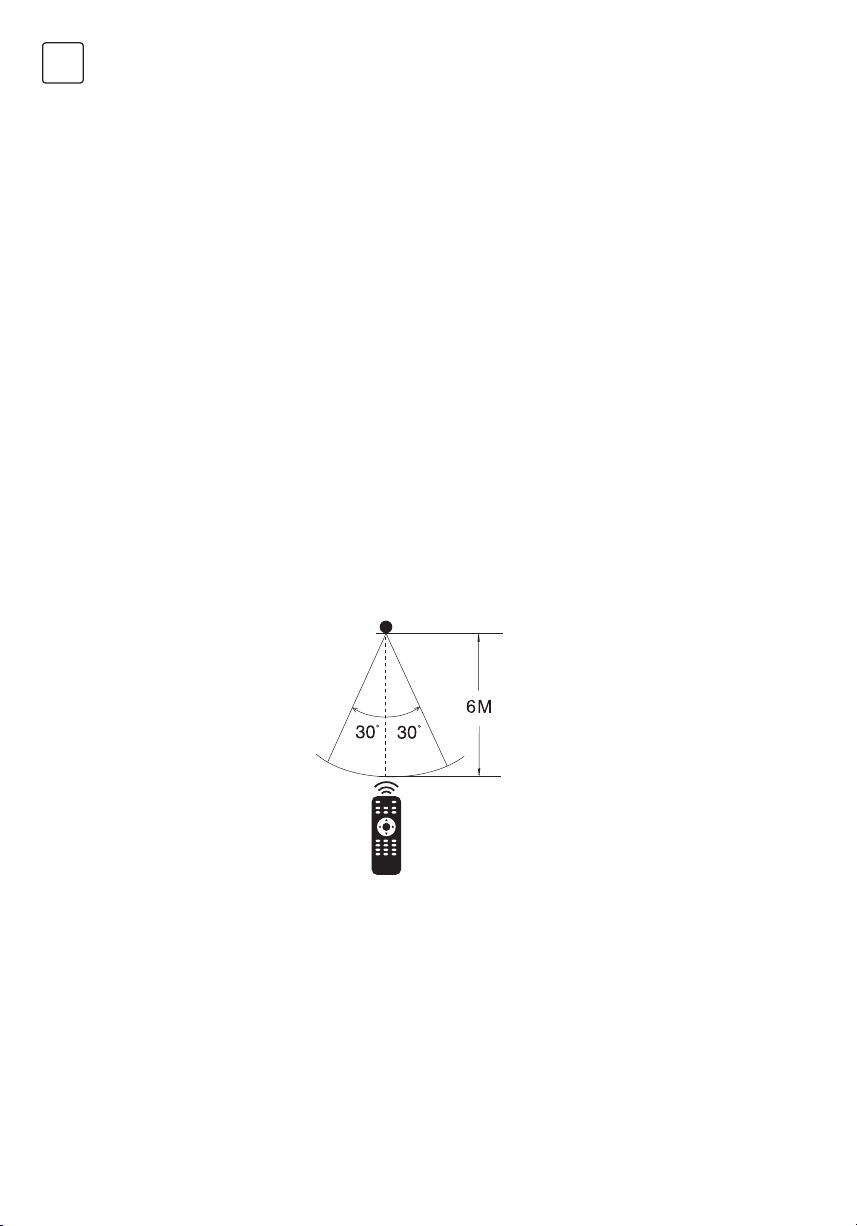
The Remote control doesn’t work. • Something might be blocking between the remote control and the
remote sensor on the front panel of the TV. Make sure there is a clear
path.
• The remote may not be aimed directly at the TV.
• The batteries in the remote may be weak, dead, or installed incorrectly.
Put new batteries in the remote.

11
ENG
PRODUCT SPECIFICATIONS
Model: 40Q300BF 43Q300BF
Video avi, MPEG
Music mp3, AAC
Photo jpg, jpeg, bmp, png
Screen resolution 1920x1080
Working voltage 100-240V~50/60 Hz
Rated power consumption 56W 62W
Weight 5,6kg 6.8kg
Dimensions (W x H x D) without stand 917x539x88mm 968x564x86mm
Dimensions (W x H x D) with stand 917x594x245mm 968x616x240mm
Environment
Working temperature: 5ºC~45ºC
Working humidity: 20%~80% RH
Air pressure: 86 kPa - 106 kPa

12
BIH/CG
SIGURNOSNA UPUTSTVA
CAUTION
RISK OF ELECTRIC SHOCK
DO NOT OPEN
Munja u okviru trougla upozorava korisnika
na prisustvo opasnog, neizolovanog napona
unutar proizvoda, koji može da bude dovoljno
jak da bi predstavljao rizik od strujnog udara
i povreda.
Uzvičnik u okviru trougla upozorava korisnika
na uputstva o rukovanju I održavanju,
priložena u pakovanju.
Ne otvarajte poklopac na pozadini televizora. Ni u kom slučaju korisniku nije dozvoljen rad unutar televizijskog seta. Samo
kvalifikovani tehničar iz ovlaštenog servisa ima dozvolu za takav rad.
UPOZORENJE: DA BISTE SMANJILI RIZIK OD POŽARA ILI ELEKTRIČNOG UDARA, NE IZLAŽITE OVAJ UREĐAJ
KIŠI ILI VLAGI
OPREZ: PROMJENE ILI IZMJENE KOJE NISU IZRAZITO ODOBRENI OD STRANE ODGOVORNE ZA SAGLASNOST
SA PRAVILIMA FCC-a, MOŽE UKINUTI AUTORITET KORISNIKA DA KORISTI OVU OPREMU
Prije korištenja uređaja, pročitajte sva sigurnosna i operativna uputstva.
POSTAVLJANJE
• Nemojte postavljati jedinicu na nestabilnu kolica, postolje, stativ, nosač, sto ili policu.
• Ne izlažite uređaj direktnoj sunčevoj svjetlosti i drugim izvorima toplote.
• Ne bavite se tečnošću u blizini ili na uređaju.
• Nikada ne izlivajte bilo koju tečnost u uređaj
• Ne stavljajte uređaj u blizinu uređaja koji stvaraju magnetna polja.
• Ne stavljajte teške predmete na uređaj.
TEMPERATURA
• Ne postavljajte uređaj u blizini ili preko radijatora ili registra grijača.
• Ako je vaš uređaj iznenada premješten iz hladnog na toplo mjesto, isključite kabal za napajanje na najmanje dva
sata kako bi se vlaga koja je nastala unutar jedinice potpuno osušila.
VLAGA
• Ne izlažite uređaj kiši, vlazi ili mjestu blizu vode.
• Osigurajte sušenje u unutrašnjosti, ohladite.
VENTILACIJA
• Otvore za ventilaciju držite otvorene.
UPOZORENJE (važi samo za modele preko 7kg)
Nikada ne postavljajte televizor na nestabilnu lokaciju. Televizor može pasti i prouzrokovati ozbiljne lične povrede
ili smrt. Mnoge povrede, naročito dječije, mogu se izbjeći preduzimanjem jednostavnih mjera predostrožnosti, kao
što su:
• Korištenje postolja ili stalka koje preporučuje proizvođač televizora.
• Korištenje samo namještaja koji sigurno može da podrži televizor.
• Osigurati da televizor ne prelazi preko ivice nosećeg namještaja.
• Ne postavljanje televizora na visoki namještaj (na primjer, ormari ili police za knjige) bez pričvršćivanja
namještaja i televizora na odgovarajuću potporu.
• Ne stavljajte televizor na krpu ili druge materijale koji se mogu nalaziti između televizora i potporni namještaj.
• Edukacija djece o opasnostima penjanja po namještaju kako bi se dokopali televizora ili njegovih kontrola. Ako
se vaš postojeći televizor zadržava i premješta, trebalo bi primjeniti ista razmatranja kao i gore.

13
BIH/CG
PRIPREME
POSTAVLJANJE NA ZID
Oprema
Postavljanje
Provjerite dodatnu opremu koja je u kompletu sa televizorom.
- LED TV - Daljinski upravljač + Baterije - Stalak i zavrtnji za stalak - Korisnička uputstva sa izjavom o sabraznosti
Pažljivo postavite televizor ekrana okrenutog prema dolje na mekanu površinu da biste izbjegli oštećenje ekrana ili
kućišta. Pratite donje slike i tekstualna uputstva kako biste pričvrstili nogice uređaja:
1. Postavite nogice na kućište kao što je prikazano na slici. Iskliučite kabal napajanja iz utičnice prije postavljanja
nosača ili zidnog nosača.
2. Oprezno pritegnite zavrtnje koje ste dobili u kompletu za pričvršćenje nogica na kućište
Molimo vas da obratite pažnju na
usmjerenje nogica:
Duža strana nogice je usmjerena
prema prednjoj strani TVa
Napomena: Slike služe samo kao referenca.
VESA (mm) 40“: 200x100
43“: 200 x 200

14
BIH/CG
PRIKLJUČCI
VGA-PC AUDIO: Priključite VGA i audio kablove između TV prijemnika i računara.
SCART: Priključite SCART kabal između TV prijemnika i spoljnog A/V uređaja.
RF IN (S2): Priključak za antenu ili kablovsku televiziju
HDMI1, HDMI2, HDMI3 Digitalni priključak: Priključite HDMI kabal između HDMI priključka TV prijemnika i
spoljašnje A/V opreme.
DIGITAL COAX AUDIO OUT: Za reprodukciju TV audio sadržaja na spoljašnjem uređaju, priključite spoljašnji
digitalni audio uređaj na digitalni optički izlaz TV uređaja.
Cl COMMON INTERFACE (Cl INTERFEJS): Čitač CI modula. Umetnite Cl ili CI+ modul za otvaranje kodiranih
programa kao što su PAYTV ili HD PAYTV programi.
MINI AV IN: Koristite audio i video kablove da bi povezali TV prijemnik sa spoljašnjim A/V uređajem putem
kompozitnog video/audio priključka. (video = žuti konektor, audio lijevo = bijeli konektor, audio desno = crveni
konektor).
MINI YPbPr IN / MINI AV in: Priključite kabal video komponentnog ulaza između TV prijemnika i spoljašnjeg A/V
uređaja.
USB: Povežite USB uređaje da biste pristupili sadržaju.
SLUŠALICE: Priključite slušalice u audio izlaz iz televizora.

15
BIH/CG
Prednja strana
UPRAVLJAČKI DUGMIĆI NA URAĐAJU
POWER ( ): Uključivanje TV-a (ukoliko je TV isključen) ili potvrda (ukoliko je TV uključen)
VOL -: Dugme za utišavanje zvuka; U modu aktivnog Menija (MENU), dugme ima istu funkciju kao lijeva strelica na
daljinskom upravljaču i koristi se za odabir opcija u Meniju.
VOL +: Dugme za pojačavanje zvuka; U modu aktivnog Menija (MENU), dugme ima istu funkciju kao desna strelica
na daljinskom upravljaču i koristi se za odabir opcija u Meniju.
MENU/CH-: Kratkim pritiskom dugmeta mijenjaju se kanali. Dužim pritiskom dugmeta aktivira se otvaranje sastava
menija (MENU).
MENU: Prikaz Glavnog menija.
CH-: Promjena kanala u listi programa. U modu aktivnog Menija (MENU), dugme ima istu funkciju kao donja
strelica na daljinskom upravljaču i koristi se za odabir opcija u Meniju.
INPUT/CH+: Kratkim pritiskom dugmeta mijenjaju se kanali. Dužim pritiskom dugmeta aktivira se otvaranje menija
za odabir Izvora.
INPUT: Prikaz Menija Izvora (Source)
CH+: Promjena kanala u listi programa. U modu aktivnog Menija (MENU), dugme ima istu funkciju kao gornja
strelica na daljinskom upravljaču i koristi se za odabir opcija u Meniju.
Senzor
IR senzor daljinskog upravljača Prima signal iz daljinskog upravljača. Ne postavljajte nikakve prepreke
između senzora i daljinskog upravljača pošto to može da utiče na
ispravan rad i kontrolu uređaja daljinskim upravljačem.
Indikator stanja Crveno svjetlo svijetli u modu čekanja. Plavo svjetlo svijetli kada je
televizor uključen.

16
BIH/CG
UPUTSTVO ZA DALJINSKI UPRAVLJAČ
Postavljanje baterija u daljinski upravljač
Domet rada daljinskog upravljača
OOtvorite zadnji poklopac da bi otvorili odjeljak za baterije daljinskog upravljača. Ubacite dvije AAA baterije.
Osigurajte da se (+) i (-) na bateriji poklapa sa (+) i (-) naznačenim na odjeljku za baterije. Zatvorite poklopac
odjeljka.
1. Lagano otvorite
2. Ubacite baterije
3. Lagano vratite poklopac
mjerite daljinski upravljač prema televizoru na udaljenosti ne većoj od 5 metara od senzora na televizoru i pod
uglom do 60° ispred televizora.
Radna udaljenost može da se mijenja zavisno od svjetlosti u prostoriji.
NAPOMENA:
• Slika proizvoda služi samo za informaciju, stvami proizvod može da se razlikuje u izgledu.
• Stare baterije odložite u označeno mjesto za odlaganje. Nemojte da bacate baterije u vatru.
• Ne miješajte tipove baterija i ne kombinujte korištene sa novim baterijama.
• Odmah zamijenite prazne baterije da bi spriječili curenje kiseline u odjeljak za baterije daljinskog upravljača.
• Ako ne planirate da koristite daljinski upravljač duže vrijeme uklonite baterije.
• Baterije ne smiju da se izlažu pretjeranoj toploti poput sunčeve svjetlosti, grijalica ili vatri.
• Hemikalije iz baterija mogu da izazovu osip i opekotine na koži. Ako baterije cure očistite odjeljak krpom. Ako
hemikalije dođu u dodir sa kožom, odmah operite.
Senzor

17
BIH/CG
DALJINSKI UPRAVLJAČ
POWER ( ): pritisnite za uključenje/isključenje TV-a.
MUTE ( ): za isključivanje zvuka. Kako biste ponovo uklj./isiklj. zvuk,
pritisnite taster
DUGMAD SA BROJEVIMA (0-9): pritiskom ovih tastera unose se
brojevi. Direktno se biraju programi u ATV/DTV modu i unose lozinke za
roditeljsko zaključavanje
-/-- dugme: promjena unosa kanala: jedna cifra ili dvije cifre
dugme: povratak na prethodni kanal
AUDIO: promjena načina emitovanja zvuka
FAV+/FAV-: promjena programa prema gore ili dolje u FAV listi (listi
omiljenih programa)
FAV: dodavanje trenutnog programa u FAV listu ili brisanje programa iz
FAV liste.
CH +/- : mijenjanje programa
VOL +/- : podešavanje zvuka
P.Mode: Podešavanje slike
S.Mode: Podešavanje zvuka
INPUT: izbor izvora
SLEEP: podešavanje vremena automatskog isključenja
ASPECT: izbor veličine prikaza slike
INFO: prikaz informacija o trenutnom statusu programa
Strelice (///): podešavanje vrijednosti u meniju ili pomak
OK: potvrda unosa
MENU: ulaz u glavni meni ili povratak iz menija.
EXIT: izlaz iz menija ili otkaz funkcije
TEXT: Ulazak u Teletekst
INDEX: Prikaz Indeks stranice
MIX/T: Teletekst podešavanje prikaza. Uključivanje Time Shift funkcije
REVEAL: Teletekst podešavanje, otkriva ili skriva tekst
HOLD: Teletekst podešavanje, zaključava trenutnu stranicu
SUBPAGE: Pristup subkodiranim stranicama
SIZE:Podešavanje veličine slike
CANCEL:Poništavanje prikaza ili funkcije
SUB-T: Prikaži informacije o titlovima
TV/RADIO: Prebacivanje sa TV i Radio programa
REC: Snimanje. Potrebno priključiti USB memoriju prethodno.
EPG: Vodič kroz program
CRVENO/ZELENO/ŽUTO/PLAVO dugme: upotrebljava se za teletekst
funkcije u TV modu, za izbor funkcije u korespodentnoj boji prikazane
unutar teleteksta.
:Pokrenuti i zaustaviti sadržaj
:Premotavanje
:Biranje prethodnog ili narednog sadržaja
Napomena:
Slika služi samo kao referenca, a stvami proizvod može neznatno da se razlikuje od prikazane slike. Tasteri koje se
ne pominju u uputstvu se ne upotrebljavaju.

18
BIH/CG
OSNOVNE OPERACIJE
Uključivanje i isključivanje
Izbor ulaza
Odabir jezika prikaza
Priključite kabal (antenski RF) u “RF-ln” ulaz na zadnjoj strani TV prijemnika.
Priključite kabal za napajanje. U ovom trenutku televizor će ući u režim pripravnosti i indikator napajanja će biti
crven. Za uključivanje televizora koristite taster za napajanje na daljinskom upravljaču ili na bočnoj ploči televizora.
Nakon što isključite televizor na 5 sekundi, možete ponovo da ga uključite.
Pritisnite INPUT taster za prikaz raspoložlvlh Izvora.
Kako biste izabrali izvor ulaza: Pritisnite taster [INPUT], Kada se pojavi lista
izvora ulaza, pritisnite [/] kako biste izabrali izvor a zatim pritisnite OK za
povezivanje.
TV prijemnik može automatski da pretraži sve kanale i pronađe sve programe
U opciji Tune Type (Tip podešavanja) možete da odaberete pretragu ATV
(Analogni programi) i DTV (Digitalni programi). Za vrijeme pretrage ATV
(Analognih TV programa) možete da pritisnete taster MENU i lijevu strelicu kako
bi preskočili ATV podešavanje (akoliko u vašoj regiji nema ATV programa).
U opciji Dlgltal Type (Digitalni tip) možete da odaberete da li vršite pretragu
DVB- T ili DVB-C (kablovskih programa).
Opcijom LCN podešavate želite li prikaz programa u listi prema redoslijedu kako
je to odredio davatelj usluge (opcija “On”) ili da se programi poredaju prema
redoslijedu kako su pronađeni (opcija LCN podešena na “Off”).
• Pritisnite tastere /i OK kako biste odabrali jezik koji će da se koristiti za prikaz menija i poruka.
• Odabir regije instalacije
• Pritisnite tastere /i OK kako biste označili regiju u kojoj se instalira TV prijemnik.
• Pritisnite tastere /i OK kako biste odabrali Mod trgovine (za prikaz slike u trgovini odaberite “ON”). Za
standardnu kućnu upotrebu podesite opciju na “OFF. Kada je opcija aktivna, na ekranu će stalno da se prikazuje
traka sa karakteristikama TV prijemnika.

19
BIH/CG
Meni podešavanja
CHANNEL (Meni podešavanja programa)
Pritisnite taster MENU da bi prikazali Glavni meni.
Pritisnite tastere /kako biste odabrali podmeni CHANNEL (KANAL) u glavnom meniju.
Pritisnite tastere /kako biste odabrali opcije koje želite podesiti u meniju CHANNEL.
Auto Podešavanje
Pritisnite /za odabir Auto Tuning (Automatsko podešavanje), zatim pritisnite OK za ulaz.
ATV Manual Tuning (ATV Ručno podešavanje)
• Current CH (Trenutni kanal)
Izbor broja programskog mjesta
• Color System (Sistem boja)
Izbor sistema boja (Dostupni sistemi: AUTO, PAL, SECAM)
• Sound System (Sistem zvuka)
Izbor sistema zvuka
Fine Tune (Fino podešavanje)
Za fino podešavanje frekvencije pritisnite tastere /.
DTV Manual Tuning (DTV Ručno podešavanje)
Pritisnite /kako biste odabrali DTV Manual Tuning (DTV Ručno podešavanje), zatim pritisnite OK kako biste
ušli u podmeni.
Pritisnite /kako biste odabrali kanal, zatim pritisnite OK za pretragu kanala.
Program Edit (Uređivanje programa)
Pritisnite /za odabir opcije Program Edit (Uređivanje programa), zatim pritisnite OK kako biste ušli u podmeni.
Obojeni tasteri u tri boje su prečice za uređivanje programa.
Prvo pritisnite /kako biste označili program koji želite da uređzjete, a zatim: pritisnite crveni taster za brisanje
programa sa liste.
Pritisnite žuti taster za pomjeranje programa u listi.
Pritisnite plavi taster za preskakanje odabranog programa kada se programi biraju uz pomoćtastera /.
TV prijemnik će automatski da preskače program kada se koristi CH+/- za pregledavanje programa.
Pritisnite taster FAV kako biste dodali ili uklonili program iz liste omiljenih programa (FAV lista).
Meni CHANNEL kada je odabran IZVOR DVB-S (Satelit)
1. Pritisnite tastere /kako biste odabrali opcije koje želite podešavati u meniju CHANNEL.
2. Pritisnite taster OK za podešavanje.
3. Pritisnite tastere /za odabir opcije koju želite podešavati u CHANNEL (KANAL) meniju.
4. Nakon podešavanja, pritisnite taster OK za spremanje i vraćanje u prethodni meni.
Auto Tuning (Auto podešavanje)
Pritisnite tastere /za odabir opcije Auto Tuning (Auto Podešavanje), tada pritisnite OK za ulaz u opciju.

20
BIH/CG
MEDIA OPERATION (Operacije USB Medija)
Napomena: Prije korištenja menija MEDIA (MEDIJ), priključite USB spoljnu memoriju i zatim pritisnite INPUT taster
kako biste odabrali SOURCE (Izvor) ulaz za medije.
1. Pritisnite/kako bi odabrali MEDIA u
meniju izvora, zatim pritisnite OK kako bi
otvorili meni. Možete izabrati Fotografije,
Muziku, Filmove ili Tekst.
2. Pritisnite /kako biste odabrali opciju koju
želite da izaberete u glavnom meniju medija,
zatim pritisnite OK za ulaz. Pritisnite „ “ za
pokretanje.
3. Nakon podešavanja, možete pritisnuti MENU
za povratak ili EXIT za izlazak iz menija
RJEŠAVANJE PROBLEMA
Ukoliko televizor ne radi kao oblčno Ili se čini da ima grešaka pažljivo pročitajte tabelu ispod.
Preporučuje se isključivanje uređaja iz utičnice na 60 sekundi a zatim ponovo pokretanje. Ovaj jednostavni proces
pomaže da se uspostave stabilni uslovi strujnog kola i firmwarea uređaja. Ukoliko problem ne uspijete da riješite
sami, obratite se ovlaštenom servisu!
SIMPTOMI MOGUĆA RJEŠENJA
Nema slike ili zvuka • Provjerite je li kabal napajanja uključen u utičnicu.
• Prekidač napajanja na donjoj desnoj ivici kućišta mora da bude
uključen. Pritisnite taster napajanja na daljinskom upravljaču kako
biste upalili uređaj.
• Provjerite je li LED svjetlo crveno ili plavo. Ukoliko svijetli, TVje OK.
Povezan je spoljašnji izvor na TV ali
nema slike i/ili zvuka.
• Provjerite da li su pravilno povezani kablovi izlaza na spoljašnjem
izvoru i ulazu na TV.
• Provjerite da li ste pravilno izabrali izvor signala.
Poslije uključenja, TV uređaju je
potrebno nekoliko sekundi do prikaza
slike. Da li je to normalno?
• Da, to je normalno. TV pretražuje prethodna podešavanja i
inicijalizuje se.
Slika je normalna, all nema zvuka. • Provjerite opcije glasnoće.
• Provjerite da li je uključena funkcija Utišan zvuk (Mute).
Zvuk bez slike ili crno bijela slika. • Ukoliko je slika crno-bijela, isključite TV iz utičnice pa opet ga
uključite poslije 60 sekundi.
• Provjerite da li je boja postavljena na 50 ili više.
• Provjerite sliku na nekom drugom programu.
Zvuk i slika su iskrivljeni ili izgledaju
talasasto.
• Električni uređaj mogu da ometaju rad TV-a. Isključite susjedne
uređaje, ukoliko smetnje nestanu, udaljite uređaje od TV-a.
• Uključite utikač uređaja u drugu utičnicu.
Zvuk i slika su mutni ili povremeno
nestaju.
• Ukoliko koristite spoljašnju antenu provjerite njen smjer, poziciju i
spoj antene.
• Podesite smjer antene ili ponovo pretražite kanale.
Horizontalna/vertikalna crta na slici ili se
slika trese.
• Provjerite postoji li izvor smetnji u blizini - kućni uređaji ili električni
alati.
Other manuals for Series 3
10
This manual suits for next models
2
Table of contents
Other Tesla LED TV manuals

Tesla
Tesla 6 SERIES User manual

Tesla
Tesla 32S605BHS User manual

Tesla
Tesla 32S307WH User manual

Tesla
Tesla 32S357SHS User manual

Tesla
Tesla Series 3 User manual

Tesla
Tesla 43K625BUS User manual

Tesla
Tesla 55S901SUS User manual

Tesla
Tesla 43E625BUS User manual

Tesla
Tesla 43E635BFS User manual

Tesla
Tesla J39E601B2 User manual

Tesla
Tesla 32S635SHS User manual

Tesla
Tesla 32S625SHS User manual

Tesla
Tesla 32E325BH User manual

Tesla
Tesla Series 3 User manual

Tesla
Tesla 43E325BF User manual

Tesla
Tesla Q55K925SUS User manual

Tesla
Tesla 40S393BF User manual

Tesla
Tesla 75K939SUS User manual

Tesla
Tesla 43E635SUS User manual

Tesla
Tesla 43S635BUS User manual