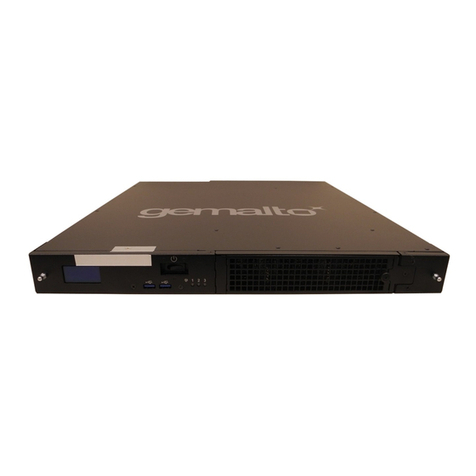
Thales V6000 Operator's manual

Data Security Manager
DSM Installation and Configuration Guide
6.4.2
Document Version 2
06/18/2020

DSM Installation and Configuration Guide
6.4.2
Document Version 2
06/18/2020
All information herein is either public information or is the property of and owned solely by Thales DIS France S.A. and/or its subsidiaries
or affiliates who shall have and keep the sole right to file patent applications or any other kind of intellectual property protection in
connection with such information.
Nothing herein shall be construed as implying or granting to you any rights, by license, grant or otherwise, under any intellectual and/or
industrial property rights of or concerning any of Thales DIS France S.A. and any of its subsidiaries and affiliates (collectively referred to
herein after as “Thales”) information.
This document can be used for informational, non-commercial, internal and personal use only provided that:
lThe copyright notice below, the confidentiality and proprietary legend and this full warning notice appear in all copies.
lThis document shall not be posted on any network computer or broadcast in any media and no modification of any part of this
document shall be made.
Use for any other purpose is expressly prohibited and may result in severe civil and criminal liabilities.
The information contained in this document is provided "AS IS" without any warranty of any kind. Unless otherwise expressly agreed in
writing, Thales makes no warranty as to the value or accuracy of information contained herein.
The document could include technical inaccuracies or typographical errors. Changes are periodically added to the information herein.
Furthermore, Thales reserves the right to make any change or improvement in the specifications data, information, and the like described
herein, at any time.
Thales hereby disclaims all warranties and conditions with regard to the information contained herein, including all implied
warranties of merchantability, fitness for a particular purpose, title and non-infringement. In no event shall Thales be liable,
whether in contract, tort or otherwise, for any indirect, special or consequential damages or any damages whatsoever including
but not limited to damages resulting from loss of use, data, profits, revenues, or customers, arising out of or in connection with the
use or performance of information contained in this document.
Thales does not and shall not warrant that this product will be resistant to all possible attacks and shall not incur, and disclaims,
any liability in this respect. Even if each product is compliant with current security standards in force on the date of their design,
security mechanisms' resistance necessarily evolves according to the state of the art in security and notably under the
emergence of new attacks. Under no circumstances, shall Thales be held liable for any third party actions and in particular in case
of any successful attack against systems or equipment incorporating Thales products. Thales disclaims any liability with respect
to security for direct, indirect, incidental or consequential damages that result from any use of its products. It is further stressed
that independent testing and verification by the person using the product is particularly encouraged, especially in any application
in which defective, incorrect or insecure functioning could result in damage to persons or property, denial of service or loss of
privacy.
Copyright 2009 - 2020 Thales Group. All rights reserved. Thales and the Thales logo are trademarks and service marks of Thales and/or
its subsidiaries and affiliates and are registered in certain countries. All other trademarks and service marks, whether registered or not in
specific countries, are the properties of their respective owners.

DSM Installation and Configuration Guide
Copyright 2009 - 2020 Thales Group. All rights reserved.
2
Contents
Preface 12
Documentation Version History 12
Assumptions 12
DSM Hypervisor Support 12
Document Conventions 13
Typographical Conventions 13
Notes, tips, cautions, and warnings 13
Hardware-Related Warnings 14
Sales and Support 14
Chapter 1: The Data Security Manager 15
DSM Overview 15
IPMI 16
DSM Deployment 16
Chapter 2: DSM V6100 Hardware Appliance 18
DSM V6100 Overview 18
Remote HSM Administration 18
Advantages 18
Requirements 19
Administrator Card Set (ACS) 19
Security World 19
ACS 20
ACS Guidelines 20
V6100 Operations that require the ACS 21
Configuring a V6100 Appliance 22
Configuring DSM with DHCP 22
Configure appliance with DHCP enabled 23
Configuring a DSM v6100 via Static IP Address 23
Configure appliance with static IP address enabled 24
Assumptions 24
DSM Installation Checklist 24
Pre-configuration tasks 26
Specify host name resolution method 26
Improving DNS Performance 26
Configure DSM ports 27
Configuration tasks 27
Connect to the V6100 appliance 28

DSM Installation and Configuration Guide
Copyright 2009 - 2020 Thales Group. All rights reserved.
3
Access the DSM Command Line Interface (CLI) 28
Configure network settings 29
Configure a bonded NIC device 31
Bonding driver modes 32
Enable DHCP on bond0 interface 33
Configure NTP, time zone, date, time 33
Configure the hostname 34
Generate DSM Certificate Authority and create ACS 34
Configuring IPMI 37
Verify Web Access 38
Upload a license file 39
Enable remote administration 39
Add more CLI administrators (optional) 40
Full Disk Encryption 40
Set boot passphrase 40
Recovering a lost passphrase 42
Configuring IPMI 44
IPMI Ports 44
Configuring IPMI on the DSM 44
Configuring High Availability for V6100 45
Chapter 3: DSMV6000 Hardware Appliance 46
Overview 46
Configuring a V6000 Appliance 46
Configuring the DSM via DHCP 46
Configuring DSM with DHCP 46
Configure appliance with DHCP enabled 47
Configuring a DSM v6000 via Static IP Addressing 47
Configuring a DSM v6100 via Static IP Address 47
Configure appliance with static IP address enabled 48
Assumptions 48
DSM Installation Checklist 48
Pre-configuration tasks 50
Specify host name resolution method 50
Configure DSM ports 50
Configuration Tasks 50
Connect to the V6000 appliance 50
Access the DSM Command Line Interface (CLI) 51
Configure network settings 52
Configure a bonded NIC device 53

DSM Installation and Configuration Guide
Copyright 2009 - 2020 Thales Group. All rights reserved.
4
Bonding driver modes 55
Enable DHCP on bond0 interface 56
Configure NTP, time zone, date, time 56
Configure the hostname 57
Generate DSM Certificate Authority and create ACS 57
Configuring IPMI 60
Verify Web Access 61
Upload a license file 62
Add more CLI administrators (optional) 62
Full Disk Encryption 62
nShield Connect Integration 63
Deployment 63
High Availability 64
System and Software Requirements 64
Configuring nShield Connect HSM with DSM 64
Configure nShield Connect appliance and associated RFS 65
Add DSM as an nShield Connect client 65
Add the nShield Connect HSM to the DSM 65
Configuring High Availability for network HSM-enabled DSM 66
Managing network HSM-enabled DSM 66
Backing up and Restoring network HSM-enabled DSM 67
Updating a network HSM-enabled DSM Security World 68
High Availability (HA) Configuration for V6000 hardware appliance 68
Chapter 4: Installing and Configuring a DSM 69
Overview 69
Assumptions 70
Virtual machine hardware requirements 70
Configuring a Virtual Appliance 71
Configuring DSM using DHCP 71
Configuring DSM using Static IP Addressing 71
Virtual DSM Installation Checklist 72
Pre-Configuration tasks 73
Specify host name resolution method 74
Configure Ports 74
Access the Command Line Interface (CLI) 74
Virtual Appliance Setup 75
Disk Re-encryption for DSM Fastboot Image 76
Disk Re-encryption after initial setup 77
Virtual Appliance Configuration 77

DSM Installation and Configuration Guide
Copyright 2009 - 2020 Thales Group. All rights reserved.
5
Configure network settings 77
Configure a bonded NIC device 79
Bonding driver modes 80
Enable DHCP on bond0 interface 81
Configure NTP, time zone, date, time 81
Configure the hostname 82
Generate DSM Certificate Authority and create ACS 82
Verify Web Access 85
Upload a license file 85
Full Disk Encryption 86
nShield Connect Integration 86
DSM Installation on bare metal using IBM Cloud 86
Upload the DSM ISO image to the IBM Cloud NAS storage 86
Configure Virtual DSM in IBM Cloud 87
DSM Installation on Hyper-V 89
Deploying a DSM Azure Image 90
Requirements 90
Deployment Procedure 90
Configure the Hostname 91
Generating the CA 92
Pinging the DSM in Azure 92
Enabling Ping 93
Configuring an HA Cluster 93
Deploying a DSM AWS image 93
Requirements 93
Installing DSM 93
Configuring HA 95
Deploying a DSM in the Google Cloud platform 95
Obtain the DSM image for GCP Deployment 95
Upload DSM Image to GCP Storage 96
Access the GCP 96
Create a GCP Storage Bucket 96
Upload the DSM image to the GCP Storage Bucket 96
Create a GCP Image 96
Creating a GCP Instance of DSM 97
Deploying a DSM to GCP through the GCP CLI 97
Uploading the DSM Tar file to GCP Bucket 97
Create the GCP Image-CLI 97
Create the GCP Instance in the CLI 98
KVM Deployment 98

DSM Installation and Configuration Guide
Copyright 2009 - 2020 Thales Group. All rights reserved.
6
virt-manager 98
virsh 98
Deploying on a Xen Hypervisor 99
virt-manager 99
virsh 99
High Availability (HA) Configuration for Virtual Appliances 100
Luna SA HSM 101
Luna Compatibility 101
Add a Luna SA HSM to an HA Cluster 102
Configuring an HA Cluster with a Luna SA HSM 102
Configure for Redundancy and Load Balancing 102
Creating a Partition on the Password-authenticated Luna 103
Creating a Partition on the PED-authenticated Luna 104
Backup your Configuration 105
Break Apart the Cluster 105
Add a Luna to the Initial Node of the HA Cluster 105
Verifying the Luna status 106
Add DSM Nodes to a Luna-enabled HA Cluster 107
Join a (missing or bad snippet) Node to an HA Cluster 108
Monitoring the Luna 109
HSM Slots 109
Upgrading a DSM attached to a Luna 110
Registering Again 110
On the DSM 110
On the Luna 110
Troubleshooting 111
Partitions 111
Logs 111
Chapter 6: Upgrade and Migration 112
Overview 112
Supported Upgrade Paths 112
Migrating from DSM v6.1.0.9229 to DSM 6.4.2 113
Best Practices for Migration 113
Prerequisites 114
Break up the HA cluster 114
Delete Idle Software 114
Backup current DSM configuration 114

DSM Installation and Configuration Guide
Copyright 2009 - 2020 Thales Group. All rights reserved.
7
Upgrading the DSM 115
Upgrading a Single Node Deployment 115
Upgrade Server Software: 115
Enable DHCP 115
Migrating from V5 appliances to V6x00 appliances 116
Restore backup 116
Migrating from V5 appliances to V6x00 appliance (KMIP) 117
Enabling Remote Administration for Upgraded V6100 Appliances 117
Requirements for Remote HSM Administration 117
Obtain a warrant 117
Replacing the ACS 119
ACS replacement guidelines 119
Enabling remote administration for an HA configuration 121
Appendix A: Specifications, Racking, and Cabling for the V6000 and
V6100 122
Hardware Appliance Diagrams 122
Control Panel LEDs 123
DSM Appliance features 123
Informational LEDs 124
DSM Hardware Appliance Specifications 124
Space, Network, and Power Requirements 125
Physical dimensions 125
External connectors 125
Power requirements 125
Data center environmental requirements 125
Appliance Rack Mount Safety Instructions 125
Rack Mounting the Appliance 126
Unpacking the system 126
Preparing for setup 126
Choosing a setup location 126
Rack precautions 126
General server precautions 127
Rack mounting considerations 127
Rack Mounting Instructions 128
Identifying the sections of the rack rails 128
Locking tabs 129
The Inner Rail Extension (Optional) 130
Installing the inner rails 130

DSM Installation and Configuration Guide
Copyright 2009 - 2020 Thales Group. All rights reserved.
8
Outer rack rails 131
Installing the chassis into a rack 132
Installing the chassis into a mid-mount position (telco) rack 132
Installing and Connecting Cables 133
Applying power 133
Connecting the serial console 133
Connecting to the network 134
Appendix B: HA for V6x00 and Virtual Appliances 135
HA Overview 135
Supported HA Deployments 135
V6100 135
V6000 and Virtual Appliances 135
Configuring HA for V6x00 and Virtual Appliances 135
Prerequisites 136
Network Latency 136
Configuring the Hardware 136
Adding Nodes to an HA Cluster 137
Join a Node to an HA Cluster 137
Configuring High Availability for Network HSM-enabled Nodes 139
Configure HA with standalone nodes 139
Configure an HA cluster with HSM-enabled nodes 140
Adding a Host to a new HA node 141
Upgrading an HA Cluster 142
Prerequisite 142
Remove Nodes from the HA cluster 142
Upgrade the Initial HA node 143
Optimize the Upgrading of Nodes in the HA Cluster 143
Deleting a Node from a Cluster 143
Deleting a Node from a Cluster with no Hosts assigned 143
Deleting a Node from a Cluster with Hosts assigned 144
Moving a Host to a different Node with the CLI 144
Moving a Host to a different Node with the UI 144
Appendix C: IPMI 146
IPMI Overview 146
Configuring and Accessing IPMI on the DSM 146
Configuring IPMI on the DSM 147
Configuring IPMI Network Settings 148

DSM Installation and Configuration Guide
Copyright 2009 - 2020 Thales Group. All rights reserved.
9
Configuring Date and Time Settings with NTP Enabled 149
Configuring Date and Time Settings with NTP Disabled 149
Configuring Users Settings 149
Configuring IPMI GUI Port Settings 150
Configuring Fan Settings 151
Remote Control 151
Console Redirection 151
Power Control 152
Using Active Directory with IPMI GUI 152
Configuring AD groups 152
Configuring the AD Server 152
Configuring LDAP Server 153
Configuring LDAP Settings on IPMI 153
Maintenance Firmware Update 154
Prerequisite 154
Upgrading the firmware 154
Reset the Firmware 154
Restore the IPMI Configuration from a Backup File 155
Server Health 155
Best Practices after IPMI is Configured 156
Replace the default certificate with a Web Server Certificate 156
Change the port through which you access IPMI 157
Change the IPMI password 158
Creating IPMI users 158
To create an IPMI user: 158
Configuring Alerts 159
Configure SMTP (optional - for e-mail alerts) 159
Configure an IPMI Alert (for SMTP and/or SNMP alerts) 159
Restrict inbound traffic to IPMI through IP Access control 160
Reset Default Configuration Settings 160
DSM IPMI CLI Commands 161
ip 162
ip set 162
ip delete 162
ip show 162
mask 163
mask set 163
mask delete 163
mask show 163
gateway 163

DSM Installation and Configuration Guide
Copyright 2009 - 2020 Thales Group. All rights reserved.
10
gateway set 164
gateway delete 164
gateway show 164
dhcp 164
disable 165
port 165
enable 165
disable 165
status 166
user 166
user add 166
user password 167
user delete 167
user show 167
user level 167
clearint 168
psinfo 168
reset 169
factorydefault 169
reset bmc 169
selftest 170
version 170
Appendix D: Ports 171
Ports to Configure 171
IPMI Ports 172
Appendix E: Bonding Driver Modes 173
Appendix F: Troubleshooting 174
Loss of Connection 174
Is the Management Console accessible? 174
Check whether Agent communication ports are open from the UI 174
Reset DSM Appliance and Remove All Data 174
Reset Original Security World with Original ACS Quorum 174
Regenerating the DSM certificate authority 175
Create New Security World with New ACS 176
Chassis Issues 178
Indicator Definitions 179

DSM Installation and Configuration Guide
Copyright 2009 - 2020 Thales Group. All rights reserved.
12
Preface
The DSM Installation and Configuration Guide describes how to install and configure the hardware and virtual
appliances, including the V6100 DSM with Hardware Security Module (HSM). This document is intended for system
administrators who install the and connect it to a network.
Documentation Version History
The following table describes the documentation changes made for each document version.
Document Version Date Changes
6.1.0 v2 08/06/2018 Removed extraneous text.
6.2.0 v1 4/11/2019 GA release; HA is now active/active, new CLI commands, new API calls
expanded KMIP features. This guide contains new troubleshooting and IPMI
information. Added rules for hostnames.
6.2.0 v2 3/26/2019 Added rules for hostnames.
6.3.0 v1 08/09/2019 Supports Efficient Storage with VTE 6.2.0, Excluding files from encryption,
fixed security vulnerabilities.
6.3.0 v2 9/16/2019 Made clearer the concept that with 6.2.x and 6.3.x user is creating a new
cluster, they cannot upgrade a 6.1.x (or lower) cluster.
6.4.0 v1 12/19/2019 DSM now compatible with the Luna SA (password) HSM and Smart cards,
users can create GuardPoints for Cloud Object Storage devices, System
admins can prevent domain admins from deleting other admins, LDAP limits
raised.
6.4.2 v1 5/22/2020 DSM is now compatible with Luna SA (PED ) HSM version. IDTGuardPoints,
SecureStart now works with ESGdevices.
6.4.2 v2 06/18/2020 Updated the IPMIchapter.
Assumptions
This documentation assumes that you have knowledge of your computer network as well as network configuration
concepts. For the hardware appliance, you’ll also need access to the data center where your DSM hardware appliance
will be racked and cabled.
For more information about what’s new in this release, refer to the DSM 6.4.2 Release Notes. Refer to the DSM
Administrators Guide for how to administer your DSM Appliance and to the various agent guides for information about
Vormetric Data Security Agents.
DSM Hypervisor Support
The virtual DSM can be installed on the following hypervisors:
lVMware 6.0 or higher
lMicrosoft Hyper-V 2012R2, 2016 and 2019

Preface
Document Conventions
DSM Installation and Configuration Guide
Copyright 2009 - 2020 Thales Group. All rights reserved.
13
lKVM
lSLES 12 SP3 with Xen v4.9
Document Conventions
The document conventions describe common typographical conventions and important notice and warning formats
used in Thales technical publications.
Typographical Conventions
This section lists the common typographical conventions for Thales technical publications.
Convention Usage Example
bold regular font GUI labels and options. Click the System tab and select General Preferences.
bold italic
monospaced font
variables or text to be replaced https://<Token Server name>/admin/
Enter password: <Password>
regular
monospacedfont
Command and code examples
XML examples
Example:
session start iptarget=192.168.253.102
italic regular font GUI dialog box titles The General Preferences window opens.
File names, paths, and directories /usr/bin/
Emphasis Do not resize the page.
New terminology Key Management Interoperability Protocol (KMIP)
Document titles Refer to the DSM Administrators Guide for information on
how to administer your DSM Appliance.
quotes File extensions Attribute valuesTerms
used in special senses
“.js”, “.ext”
“true” “false”, “0”
“1+1” hot standby failover
Table 3-1: Typographical Conventions
Notes, tips, cautions, and warnings
Notes, tips, cautions, and warning statements may be used in this document.
A Note provides guidance or a recommendation, emphasizes important information, or provides a reference to related
information. For example:
Note
It is recommended to keep tokenization keys separate from the other encryption/decryption keys.
A tip is used to highlight information that helps you complete a task more efficiently, such as a best practice or an
alternate method of performing the task.
Tip
You can also use Ctrl+C to copy and Ctrl+P to paste.

Preface
Hardware-Related Warnings
DSM Installation and Configuration Guide
Copyright 2009 - 2020 Thales Group. All rights reserved.
14
Caution statements are used to alert you to important information that may help prevent unexpected results or data
loss. For example:
CAUTION
Make a note of this passphrase. If you lose it, the card will be unusable.
A warning statement alerts you to situations that can be potentially hazardous to you or cause damage to hardware,
firmware, software, or data. For example:
WARNING
Do not delete keys without first backing them up. All data that has been encrypted with
deleted keys cannot be restored or accessed once the keys are gone.
Hardware-Related Warnings
The following warning statement is used to indicate the risk of electrostatic discharge of equipment:
ELECTROSTATIC DISCHARGE
If this warning label is affixed to any part of the equipment, it indicates the risk of
electrostatic damage to the module. To prevent equipment damage, follow suitable
grounding techniques.
The following warning statement is used to indicate the risk of hazardous voltages of equipment:
HAZARDOUS VOLTAGES
The warnings in this section indicate voltages that could cause serious danger to
personnel.
Sales and Support
If you encounter a problem while installing, registering, or operating this product, please refer to the documentation
before contacting support. If you cannot resolve the issue, contact your supplier or Thales Customer Support.
Thales Customer Support operates 24 hours a day, 7 days a week. Your level of access to this service is governed by
the support plan arrangements made between Thales and your organization. Please consult this support plan for
further information about your entitlements, including the hours when telephone support is available to you.
For support and troubleshooting issues:
lhttps://supportportal.thalesgroup.com
l(800) 545-6608
For Thales Sales:
lhttps://enterprise-encryption.vormetric.com/contact-sales.html
lsales@thalesesecurity.com
l(888) 267-3732

DSM Installation and Configuration Guide
Copyright 2009 - 2020 Thales Group. All rights reserved.
15
Chapter 1: The Data Security Manager
DSM Overview 15
DSM Deployment 16
The Data Security Manager (DSM) is the central component in the v2 (VDS Platform). The DSM provides centralized
management of data security policies and encryption keys that enable corporations to secure their data in physical as
well as virtual environments. With the DSM you can:
lDefine security policies to encrypt files and directories and control access to that encrypted data
lCreate, store and manage DSM encryption keys, efficiently
lProvide centralized key management for third-party platforms, and securely store X.509 certificates, symmetric
keys, and asymmetric keys
lProvide strong separation of duties, ensuring one administrator does not have complete control over data security
policies, encryption keys, and DSM administration
lCreate administrative domains for different business units or different customers to share the DSMs protection
but, with complete separation of administrators and the data they control
lProvide continuous availability by clustering DSMs to ensure access to DSM policies and keys
lProvide flexible administration via a web-based management console, command line interface (CLI), and
application programming interfaces (API) including REST and SOAP.
This guide describes how to install and configure the DSM V6100 and V6000 hardware appliances, an DSM virtual
appliance.
DSM Overview
The DSM is available as either a hardware appliance with a Hardware Security Module (model V6100), a hardware
appliance (model V6000), or a virtual appliance.
The DSM stores data security policies, encryption keys, and audit logs in a a virtual or hardened appliance that is
physically separated from the VTE Agents. Security teams can enforce strong separation of duties over management
of the system by requiring the assignment of key and policy management to more than one data security administrator
so that no one person has complete control over the security of data.
Figure 1-1: DSM V6000 Appliance without HSM (rear view)
Figure 1-2: DSM V6100 Appliance with HSM (rear view)

Chapter 1: The Data Security Manager
DSM Deployment
DSM Installation and Configuration Guide
Copyright 2009 - 2020 Thales Group. All rights reserved.
16
The DSM integrates key management, data security policy management, and event log collection into a centrally
managed platform that provides high availability and scalability to thousands of Vormetric Transparent Encryption
(VTE) Agents. This enables data security administrators to manage standards-based encryption across Linux, UNIX,
and Windows operating systems in both centralized and geographically distributed environments. The DSM supports
IPv4 and IPv6 addresses.
IPMI
The V6000 and V6100 DSM hardware appliances support the Intelligent Platform Management Interface (IPMI). IPMI
is a computer interface specification for autonomous computer subsystems. It provides remote access to the V6000
and V6100 hardware appliances. It allows administrators to remotely monitor appliance health (temperature, power
consumption, physical drive status, chassis intrusion), perform remote cold boots (power off and power on), and
access the DSM CLI from a remote location. IPMI is not supported by the DSM virtual appliance or hardware
appliances earlier than V6000/V6100.
As of this release, IPv6 addresses are supported on DSM hardware appliances. However IPv6 addresses cannot be
configured via the IPMI CLI. To configure an IPv6 address using IPMI, you must access the IPMI management
console UI.
Although not necessary for DSM maintenance and operation, some administrators may find the IPMI features useful.
IPMI activation and best practices are described in Appendix C: "IPMI" on page146.
DSM Deployment
The Data Security Manager (DSM) enables centralized management of data security policies and key management,
simplifying training, deployment and operations.
A VTE environment consists of a DSM and one or more VTE Agents residing on your protected hosts. A protected
host contains the data to be protected, and can be on-site, in the cloud, or a hybrid of both. The VTE Agents
communicate with the DSM and implement security policies on their protected host systems.
Communication between agents and the DSM is encrypted and secure. DSM Administrators establish access and
manage encryption policies through a web-based management console, command line interface (CLI), and application
programming interfaces (API) including REST and SOAP.
VTE achieves security with complete transparency to end users with little impact to application performance. It
requires no changes to your existing infrastructure and supports separation of duties between data owners, system
administrators, and security administrators.

Chapter 1: The Data Security Manager
DSM Deployment
DSM Installation and Configuration Guide
Copyright 2009 - 2020 Thales Group. All rights reserved.
17
Figure 1-3: The DSM in a VTE Environment

DSM Installation and Configuration Guide
Copyright 2009 - 2020 Thales Group. All rights reserved.
18
Chapter 2: DSM V6100 Hardware Appliance
DSM V6100 Overview 18
Remote HSM Administration 18
Administrator Card Set (ACS) 19
Configuring a V6100 Appliance 22
Full Disk Encryption 40
Configuring IPMI 44
Configuring High Availability for V6100 45
The DSM V6100 appliance comes with a Hardware Security Module (HSM). The HSM safeguards and manages DSM
objects (example: certificates and keys) with strong authentication and crypto-processing. This chapter describes how
to set up and configure the V6100 hardware appliance.
In a V6100 high availability (HA) environment, all systems must be V6100s, they cannot be combined with any other
appliance type or version of DSM. As of the v6.0.2 release, the DSM supports full disk encryption for enhanced
security, and dynamic IP addressing via DHCP.
Figure 2-1: DSM V6100 hardware appliance
DSM V6100 Overview
The V6100 includes a FIPS 140-2 Level 3 cryptographic HSM. The HSM is managed by a set of smart cards known as
the Administrator Card Set (ACS), which are read using a card reader. The DSM software provides a Remote HSM
Administration feature, to remotely manage the V6100 appliance. With remote HSM administration, the card reader
does not need to be connected directly to the V6100 appliance instead, it is connected to a laptop or PC, outside the
data center, which in turn, is connected to the V6100 appliance over a secure channel.
Remote HSM Administration
Advantages
lEliminates the need for administrators to be physically present in the lab to administer the DSM
lEliminates the need for physical mode switch changes for HSM administration
lEnables administrators to present smart cards remotely from a PC or laptop

Chapter 2: DSM V6100 Hardware Appliance
Administrator Card Set (ACS)
DSM Installation and Configuration Guide
Copyright 2009 - 2020 Thales Group. All rights reserved.
19
lEnables operational simplicity and efficiency
Requirements
Remote HSM Administration only applies to the V6100 appliances that have DSM software v6.0 or later installed.
Remote administration needs to be turned on from the CLI before you can begin to use it.
To use the remote HSM administration feature, the following are required:
lA remote card reader or trusted verification device (TVD) and smart cards set. These must be ordered separately,
contact your Thales Sales representative for more information.
lV6100 appliance with DSM software (v6.0 or later)
lClient system (e.g. laptop, PC outside the data center) on which to install the remote administration software and
connect the TVD.
See "Enable remote administration" on page39 for details.
Note
If you choose not to enable remote HSM administration, you can continue to use the original card reader
and card set that came with your DSM V6100 appliance.
Administrator Card Set (ACS)
The ACS is used to secure and manage the HSM. It creates a logical boundary called a Security World, within which
keys can be securely managed. You must create an ACS for your V6100 DSM environment.
The ACS must be initialized when you setup your initial DSM server. The ACS smart cards, read with a card reader
(trusted verification device, TVD) are required to carry out administrative operations for example;
lInitial DSM configuration, specifically generating certificate authority using the DSM CLI command system
security genca
lGenerating a certificate or Master Key rotation
lReplacing the ACS
These are just a few of the administrative operations that require the ACS, see "V6100 Operations that require the
ACS" on page21 for complete list of operations that require the ACS.
To configure remote HSM management for your DSM deployment, you must have a remote smart card reader (TVD)
and the associated set of smart cards. Contact Thales Sales and Support for more information about ordering these
accessories. See "Upgrading the DSM" on page115 for configuration and setup information.
Security World
A Security World is a logical security grouping of a DSM appliance and its associated objects and the Administrative
Card Set (ACS) that is used to create and manage that appliance and its associated objects. In the case of a high
availability deployment, all the DSM appliances and their associated objects in the cluster, are members of the same
Security World.
The ACS is required to access a DSM, and in an HA environment, the same ACS is required to access the HA DSM
nodes. The ACS creates the Security World to which the DSM belongs. In an HA deployment, all DSMs in the same
cluster belong to the same Security World and require the same ACS to carry out administrative functions, for
example, adding new DSMs to a cluster. Each card set consists of a number of smart cards, N, of which a smaller
number, K, is required to authorize an action. That required number Kis known as the quorum.
This manual suits for next models
1
Table of contents
Other Thales Security System manuals

