The AirLine E160 User manual

1
Owners Manual for Electric
Model's E-160 and E-260
The AirLine Phone: (352) 307-1001
4340 SE 95 Street Fax: (352) 307-0019
Ocala, FL 34480 info@airlinebyjsink.com
2
The Air Line
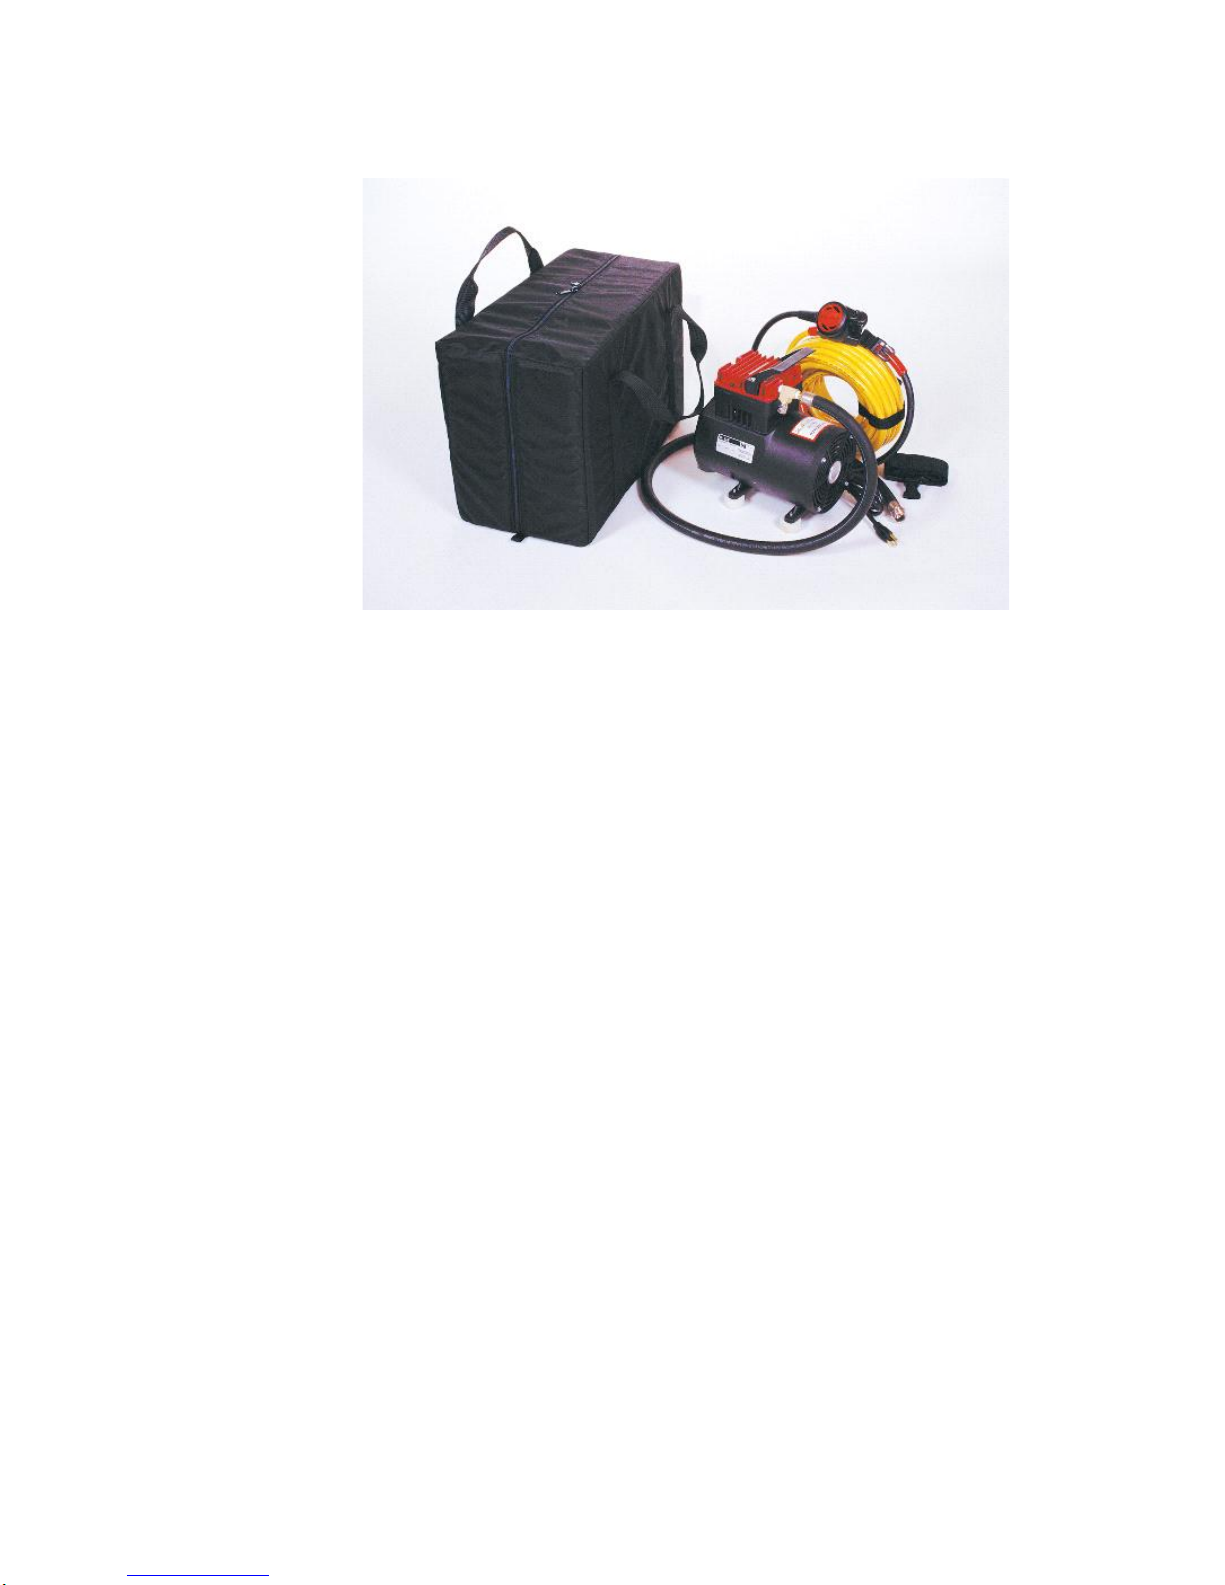
Electric powered Model's E160 or E-260 110 volt
(Picture of E-160 with soft case for conception only)
Before you get started, assemble a few items so you can complete the process without having
to go look for things. You will need a can of Marine grade lube/protectant (non-conducting for
the electrical components), and a few watch-band size and larger Velcro ties.
We congratulate you on the wisdom of your purchase. By owning an Air Line product, you
have in your possession the most modern, most reliable, surface supplied breathing air system
available anywhere. The operation is designed with your safety and convenience in mind, and
by carefully reading this brief Manual you can be assured of many hours of trouble-free
enjoyment.
There is absolutely no reason not to read your owner’s manual regardless of which Air
Line unit you own. We are not like everyone else so read your owner’s manual.
3
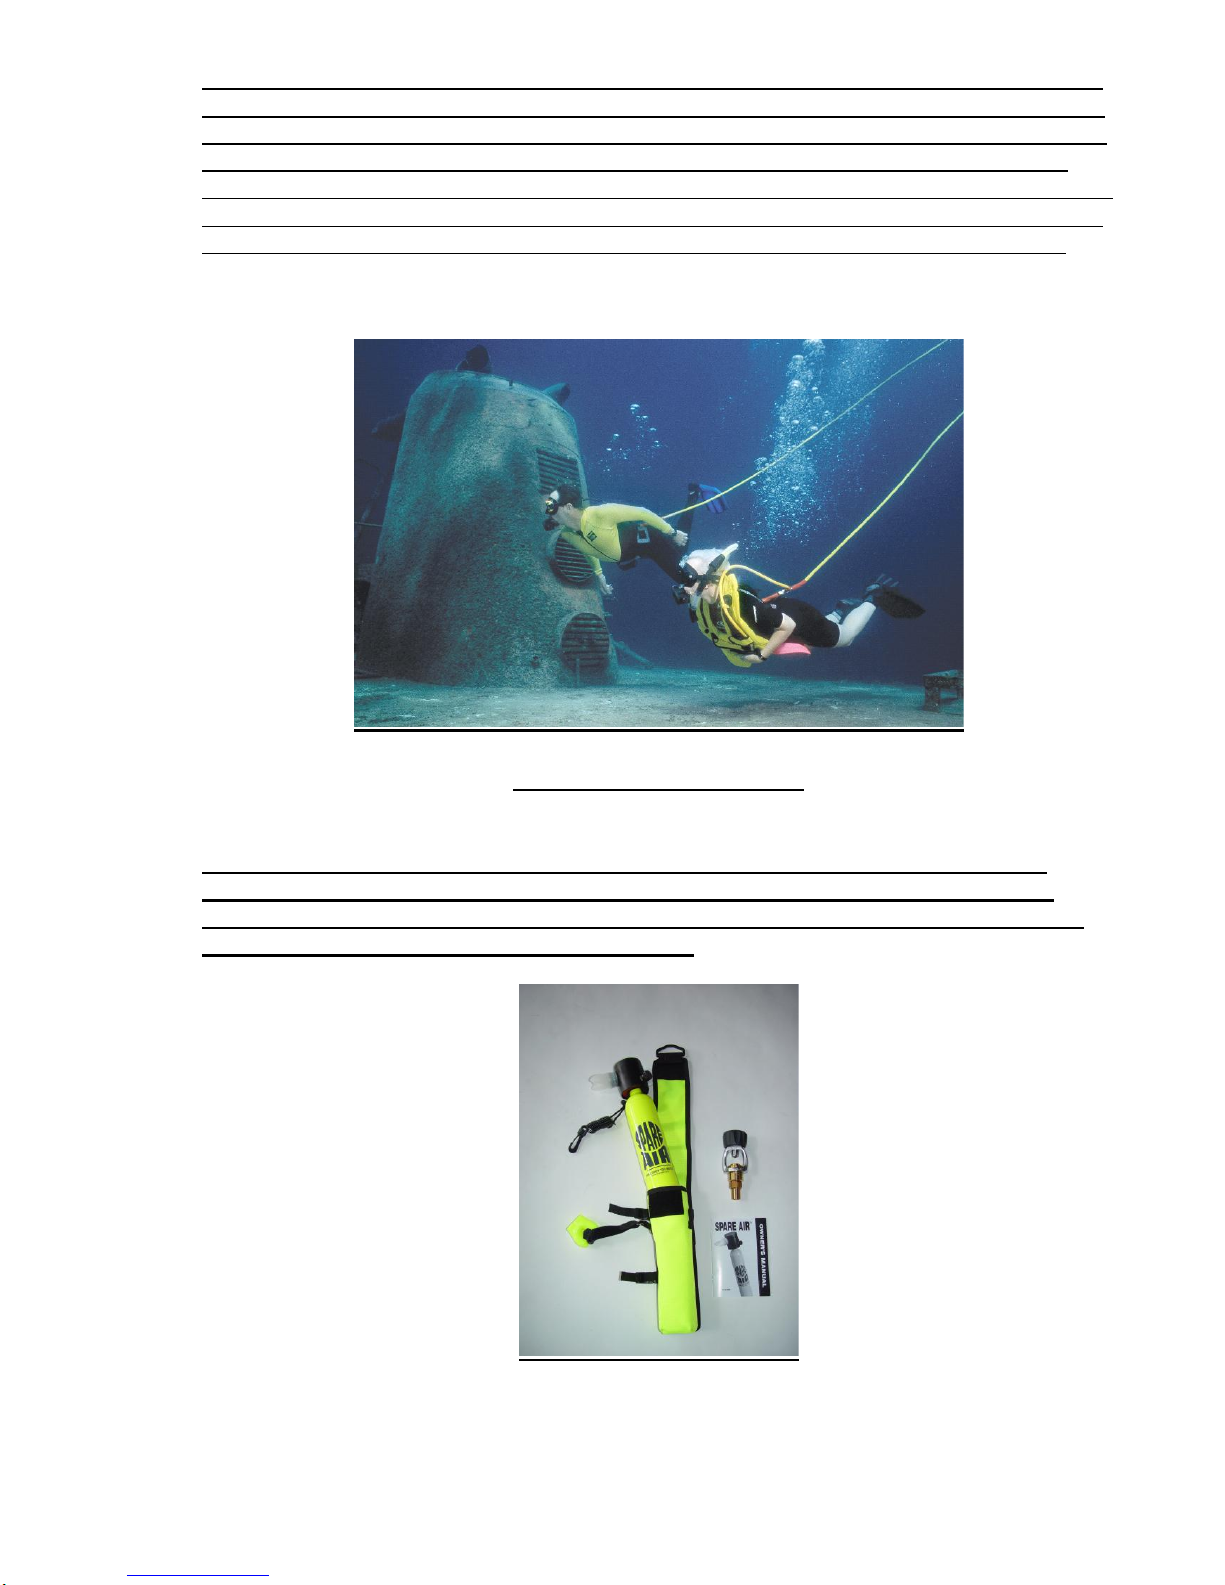
Although this equipment is much easier to use than the more cumbersome scuba gear, it
is still a serious LIFE SUPPORT SYSTEM and must be used only by trained divers who
fully understand the effects of breathing compressed air underwater. If you don't FULLY
UNDERSTAND any of the skills required for safe diving, it is essential that you seek RE-
TRAINING at a qualified training facility. Before allowing anyone to use this equipment IT IS
YOUR OBLIGATION AS THE OWNER to have them seek training from an agency, such as
NAUI, SSI, PADI or NASE. All users must be certified in Surface Supplied Air or Scuba. You
might think you are being a pal to let someone try it because "he snorkels a lot". Risk the
friendship; don't give in.
NEVER DIVE ALONE!
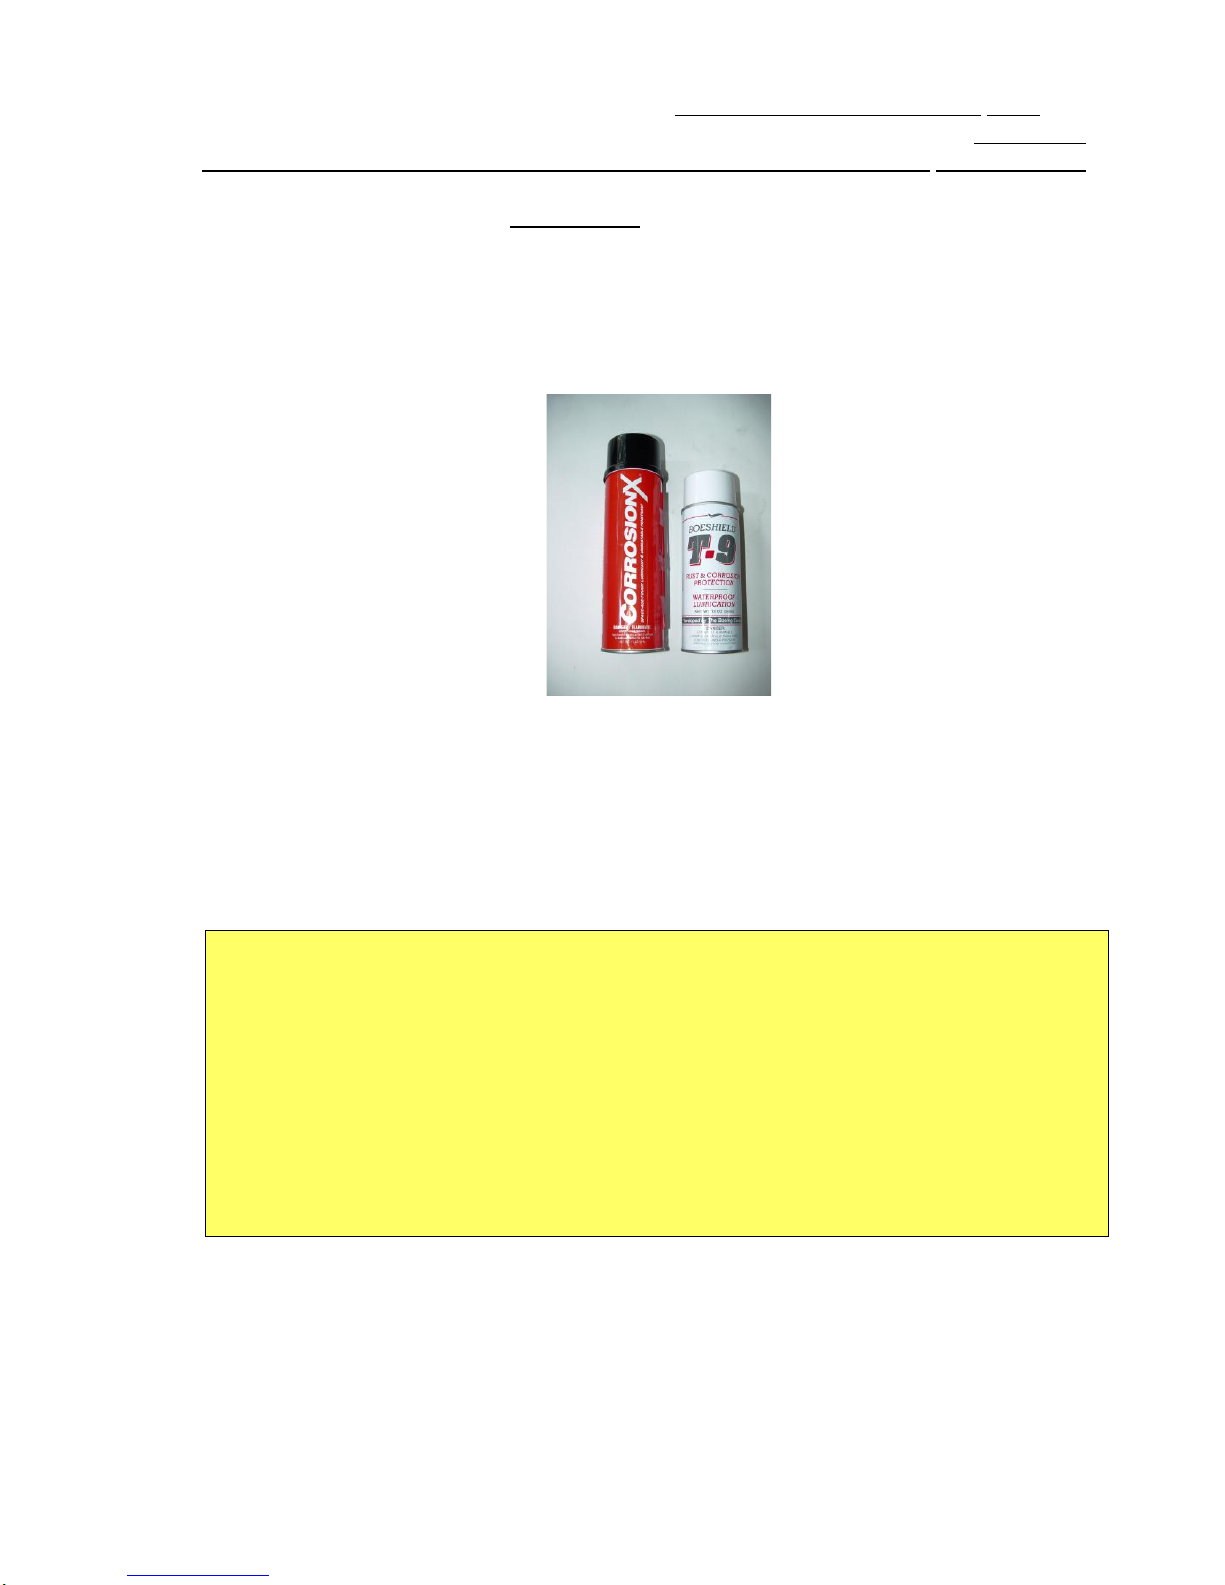
Knowing your maximum depth capability for making a free ascent in an out-of-air
situation is an important first step. NEVER USE THE EQUIPMENT PAST YOUR
FREE ASCENT CAPABILITY without an independent, back-up air supply, available
from The Air Line or from your local dive shop.

4
Your Air Line is designed for shallow water, unobstructed diving and should never be used in
enclosed areas, such as caves, shipwrecks or ledge overhangs. Air Line diving requires most of
the same skills as Scuba, but there are a few important differences. Your unit has the capability
of running for long periods of time (much longer than Scuba) and therefore requires EXTRA
ATTENTION TO DEPTHS AND DOWN- TIME. The rules for decompression are
identical regardless of the air source. You are cautioned to never dive past a no-
decompression limit on any surface supplied air system. Should the motor be accidentally
turned off, the consequences would be very serious if you did indeed exceed no-decompression
limits.
Even though compressor diving feels as free as snorkeling, IT IS NOT. While you will
probably hold your breath during a snorkeling ascent, NEVER HOLD YOUR BREATH
WHILE ASCENDING WHEN USING A SURFACE AIR DEVICE. Always breathe in and
out. Should an out-of-air situation arise, at the very least you need to be expelling air
continuously while making an emergency ascent. Remember, your life and that of your fellow
divers rely on your good judgment. DON'T TAKE CHANCES. You have nothing to prove.
WHEN YOU RECEIVE YOUR NEW COMPRESSOR SYSTEM
Inspect the contents to be sure everything is included.
The E-160 has the following items included;
1. Black single head compressor (you may have ordered it by itself or with a black soft case
or a red hard case.
2. 5' of black heat dispersing hose with black strap attached.
3. Waist tow belt, weight belt, 2 filter screen washers in a plastic bag ( if you ordered your
unit for two divers then you will have an 2 tow belts, 2 weight belts, 4 filter washers, and a
"Y" hose divider)
4. One 60' yellow diver hose with a 38" whip hose and regulator on the end. ( if you ordered a
2 diver set you will have 2 of these hoses)
5. 1 owner’s manual, but you already know this one because you're reading it. Good for you.
The E-260 has the following items included;
1. Red double head compressor (either by itself or in a red plastic hard case)
2. 10' of black heat dispersing hose.
3. Two waist tow belts, two weight belts, 4 filter screen washers, 1 "Y" divider in a plastic
bag ( if you ordered a third diver set then you will have an extra tow belt and weight belt, 2
filter screen washers and 1 more "Y" hose divider)
4. Two 60' yellow dive hoses with a 38" whip hose and regulator on the end. (you may have a
third dive hose if you ordered this with a third diver setup)
5. Last but not least 1 owner’s manual
5
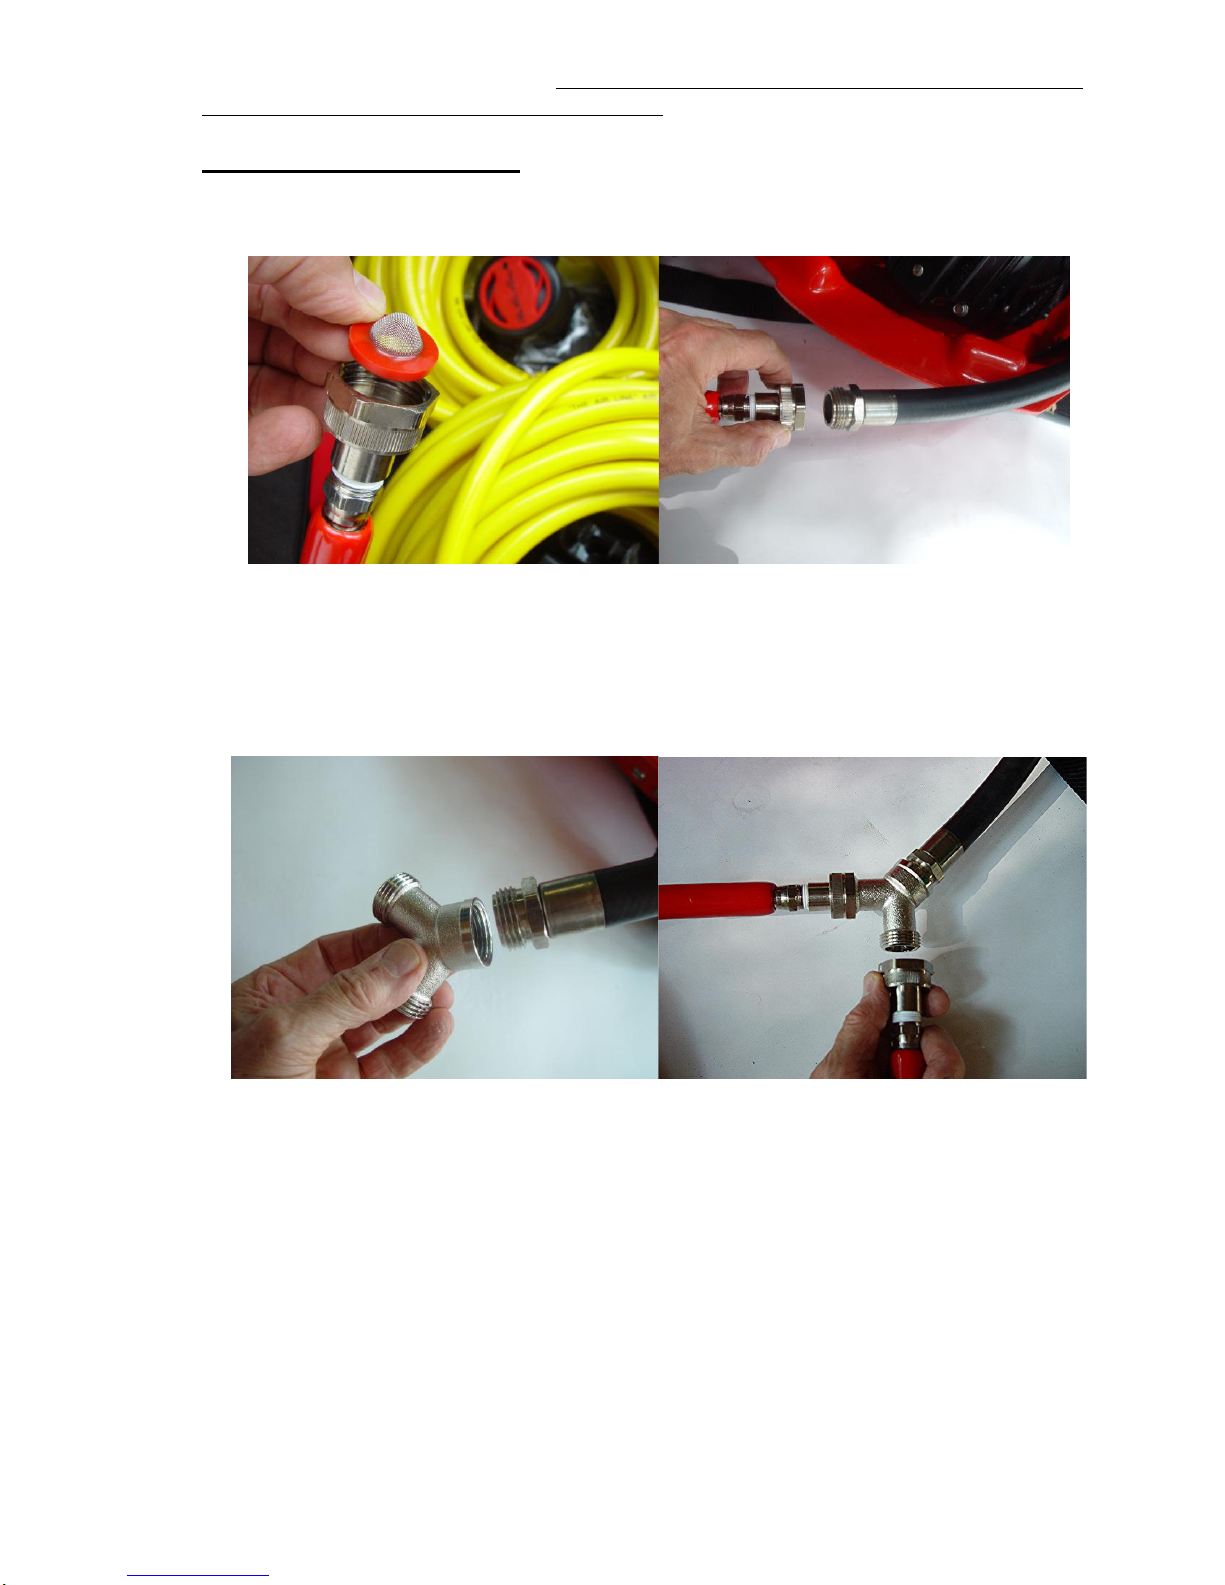
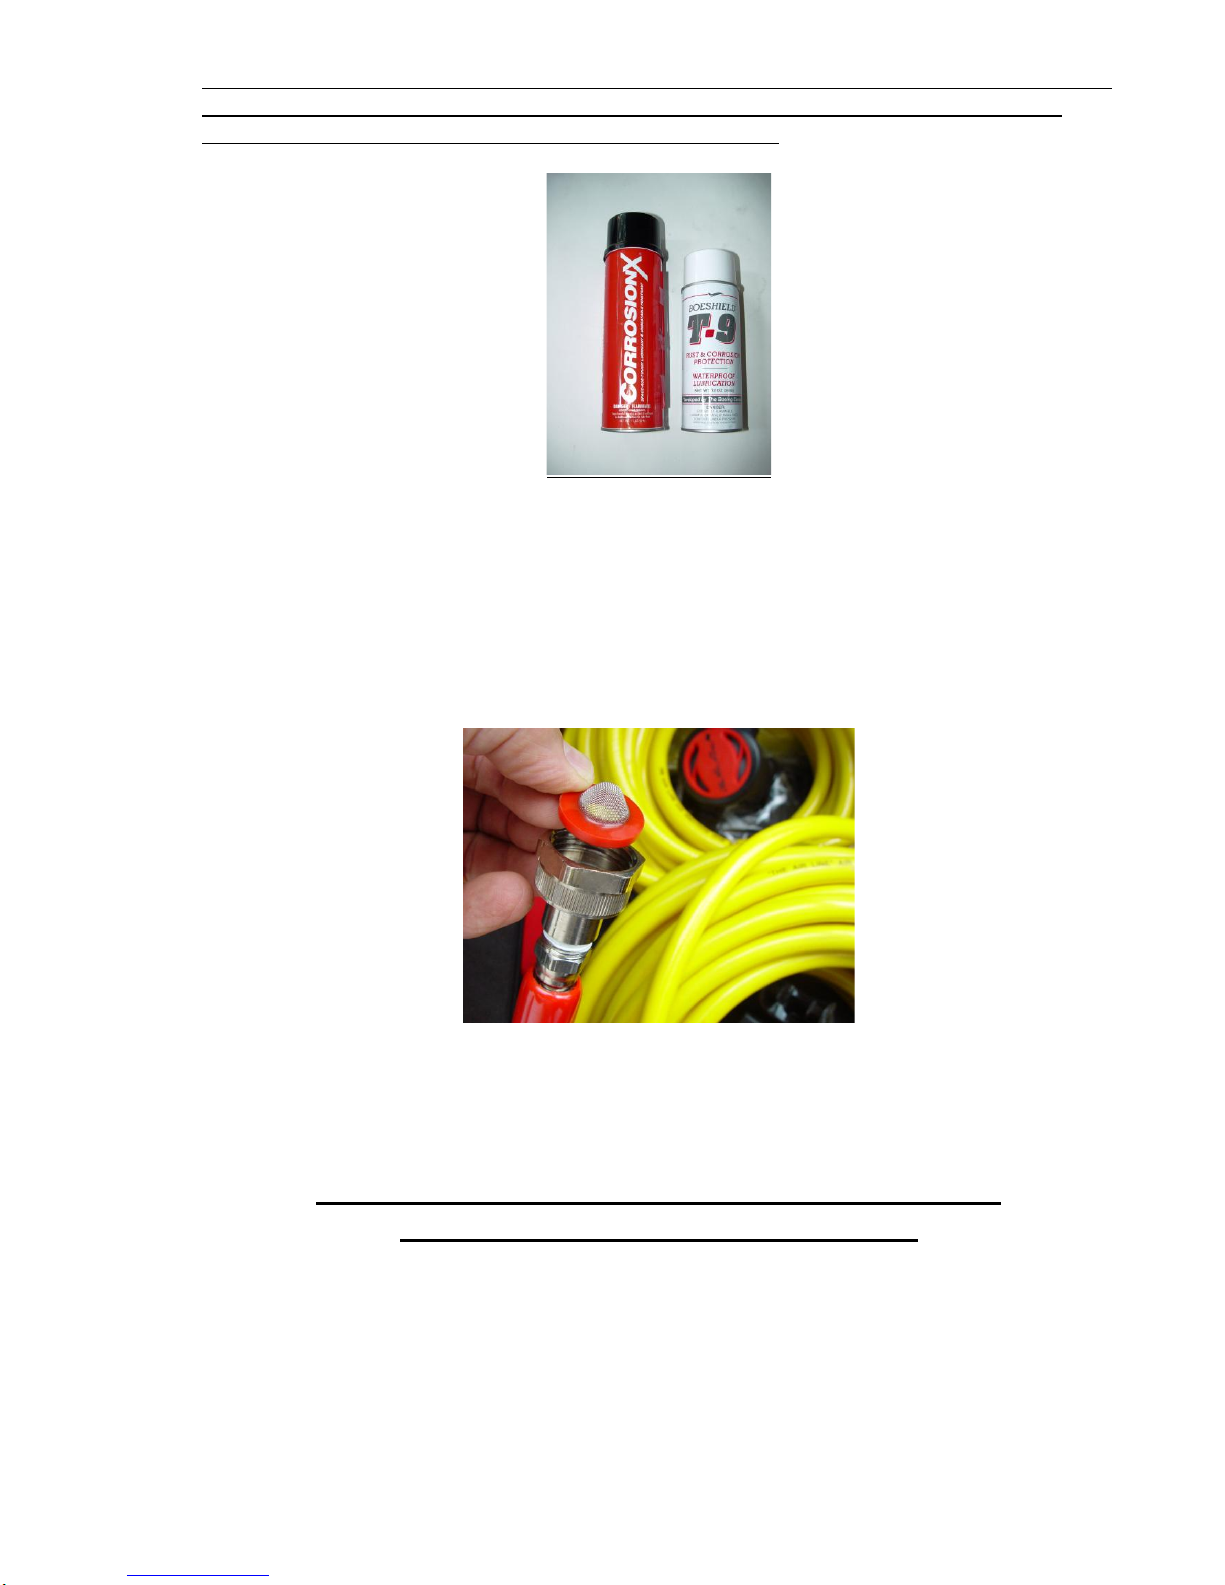
We recommend that you spray a small amount of non-electric conducting marine grade
protectant into the motor housing on all the parts at each end of the compressor. Please have
the compressor unplugged when you do this and make sure the protectant is non-conducting.
This will protect your investment for many years from the adverse affects of the salt air. We
highly recommend that you use Corrosion-X to spray into your electric motor. This is non-
conducting and works exceptionally well to protect the inner workings of your motor from salt
air for the life of your unit. You won't be sorry that you did this procedure. You only need to
turn your unit on each end a spray a small amount over the entire motor windings. No need to
spray so much that it runs out the other end. Just enough to coat the motor windings.
SETTING UP
On the E160 unit, the 5' black heat hose must be screwed into the brass fitting coming out of
the red compressor head. This is only for the E160, and is already installed on the E260. This
is to protect the E160 form breakage during shipping. Use an 11/16” wrench to hold the large
brass fitting coming out of the compressor head. You need to do this so you don’t break it off
if you apply too much wrench pressure while screwing on the black hose. Use a 5/8” wrench
to on the fitting on the black hose. Try not to use a crescent wrench since these tend to slip and
IMPORTANT: THE COMPRESSOR MUST BE PLACED WHERE THE
SURROUNDING AIR IS CONTAMINANT FREE! Care must be taken if you are
using a generator as the power source, or if any other engine is running while the
compressor is in use. The obvious concern with running an engine is the possibility of air
contamination. Special attention must be given to placement of the compressor in relation
to any engine exhaust, wind direction and current direction of a moored boat. Never place
the compressor in an area where exhaust fumes (or any other air contaminant) could
accumulate. If needed, a remote air intake hose can be ordered inexpensively to raise the
intake air away from contaminants.
6
round off the corners of your fitting. Do not over torque the black heat hose fitting you only
need to snug this so it will not come unscrewed.
The following is for either unit. For a single diver put a filter washer in the female end of
your yellow hose. Screw the 60’yellow air hose directly and snugly onto the black compressor
hose. It will only go one way (i.e., male garden hose to female garden hose).
The regulator, whip hose, and tow belt will already be assembled for you at the factory. If you
purchased a second diver package, screw the hose divider that came with it snuggly onto the
black compressor hose, and then attach the two yellow hoses to the Y-divider.
7
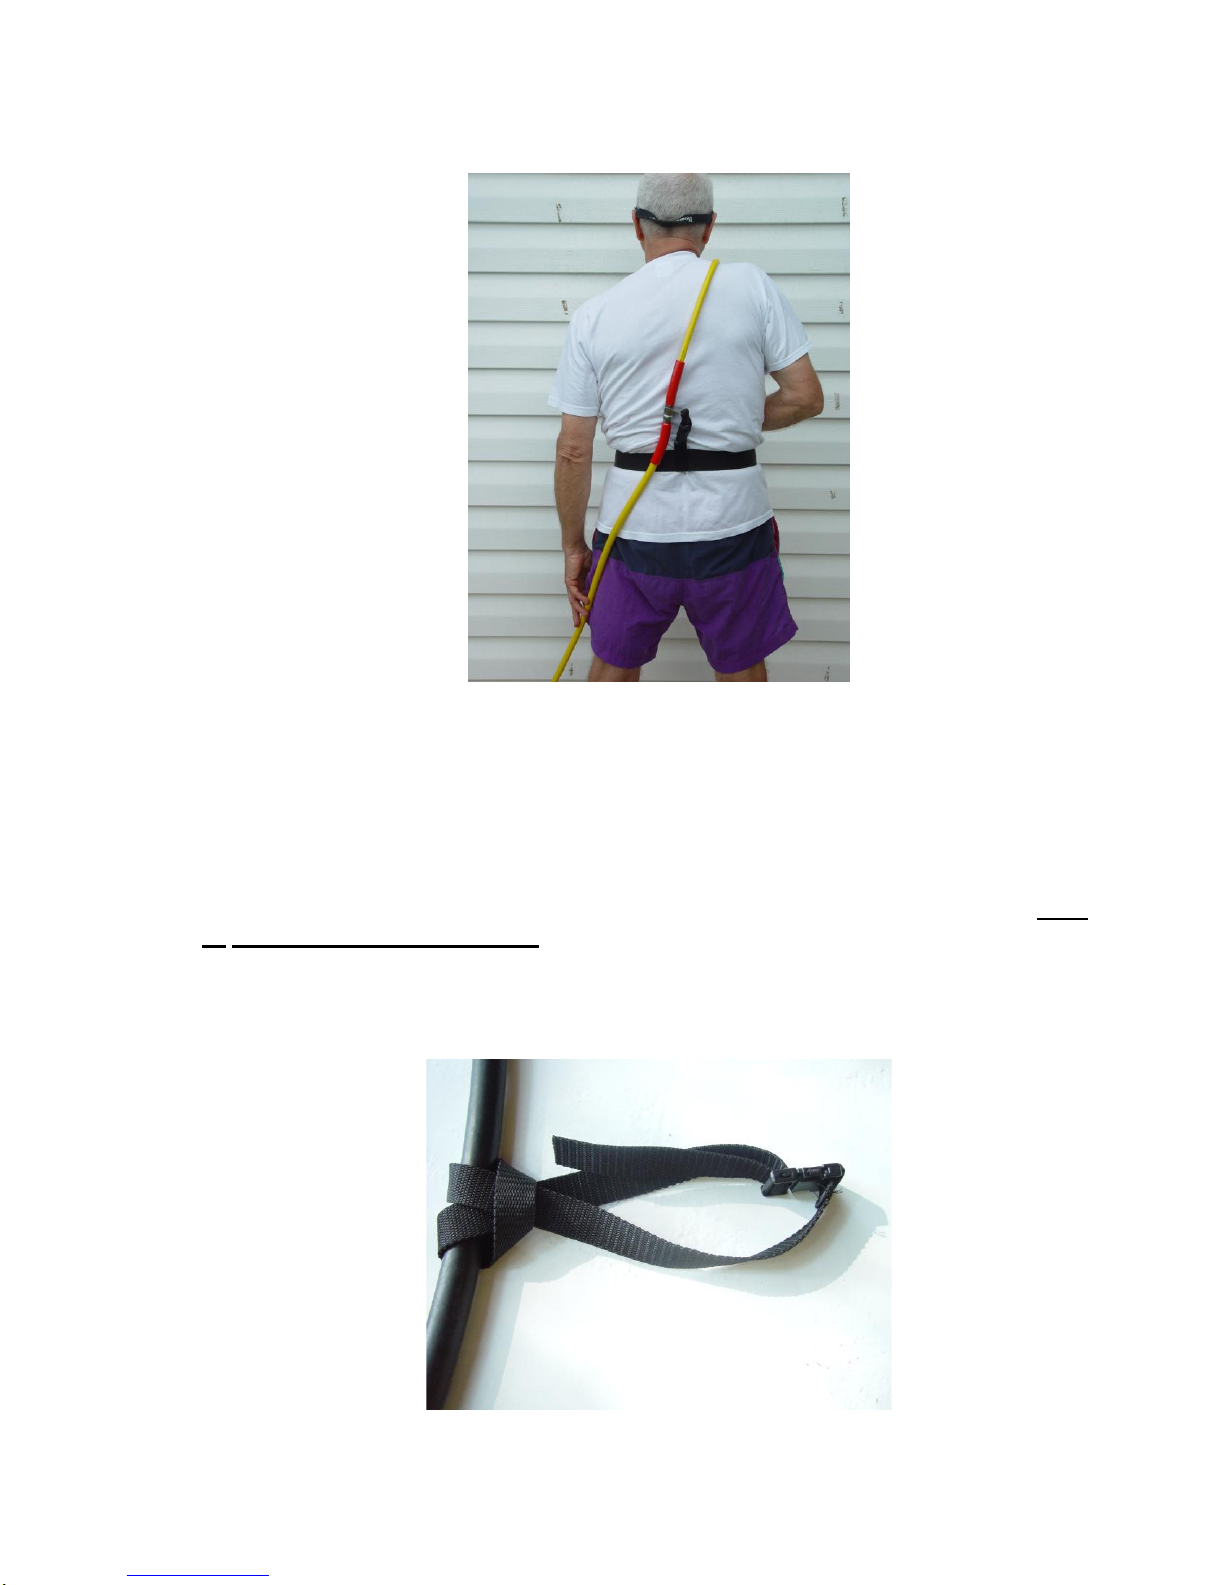
Snap a tow belt to your waist and snug it up by pulling on the loose end. The belt tab
connected to the regulator should be at the center of your back.
HOSE HANDLING
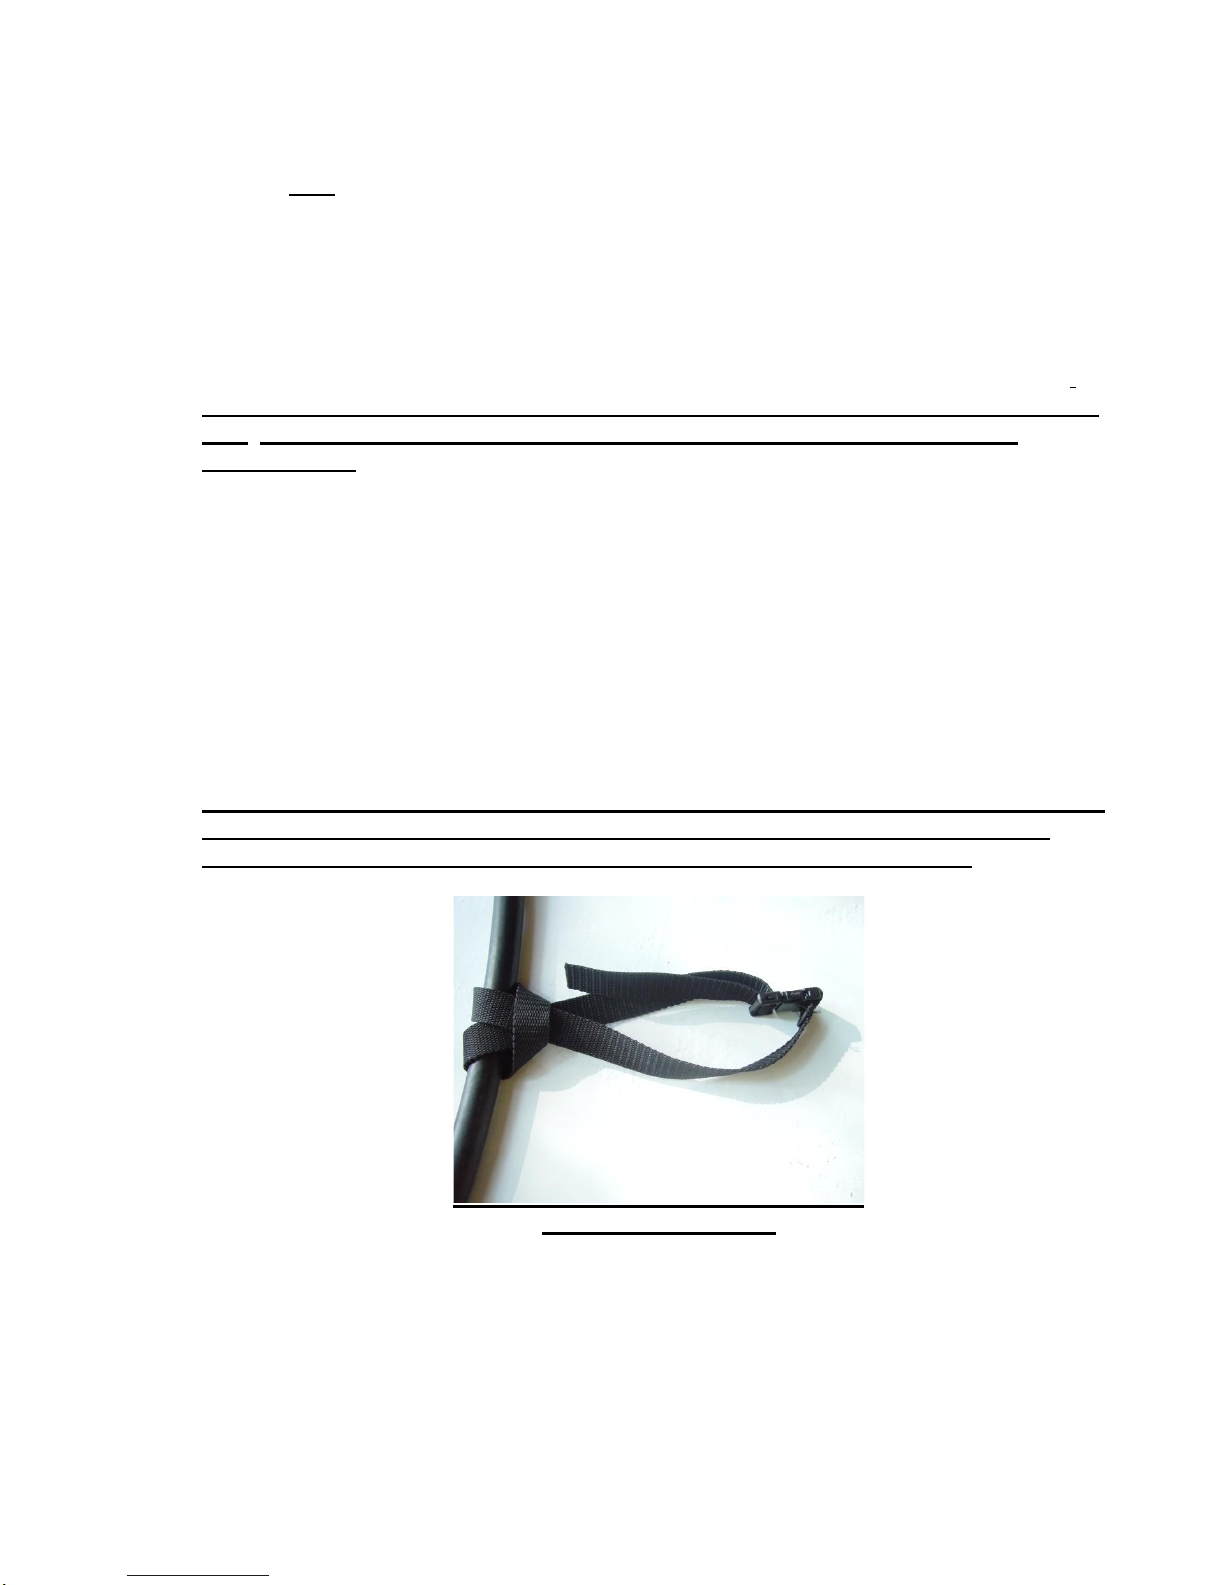
The 1” black strap (E160 Only) on your black heat hose coming out of the compressor must
be fastened to a stationary object so as not to pull on the brass fitting coming out of the
compressor. This could break off, if you tug on the hose hard enough. You also don’t want to
pull your new compressor into the water.
8
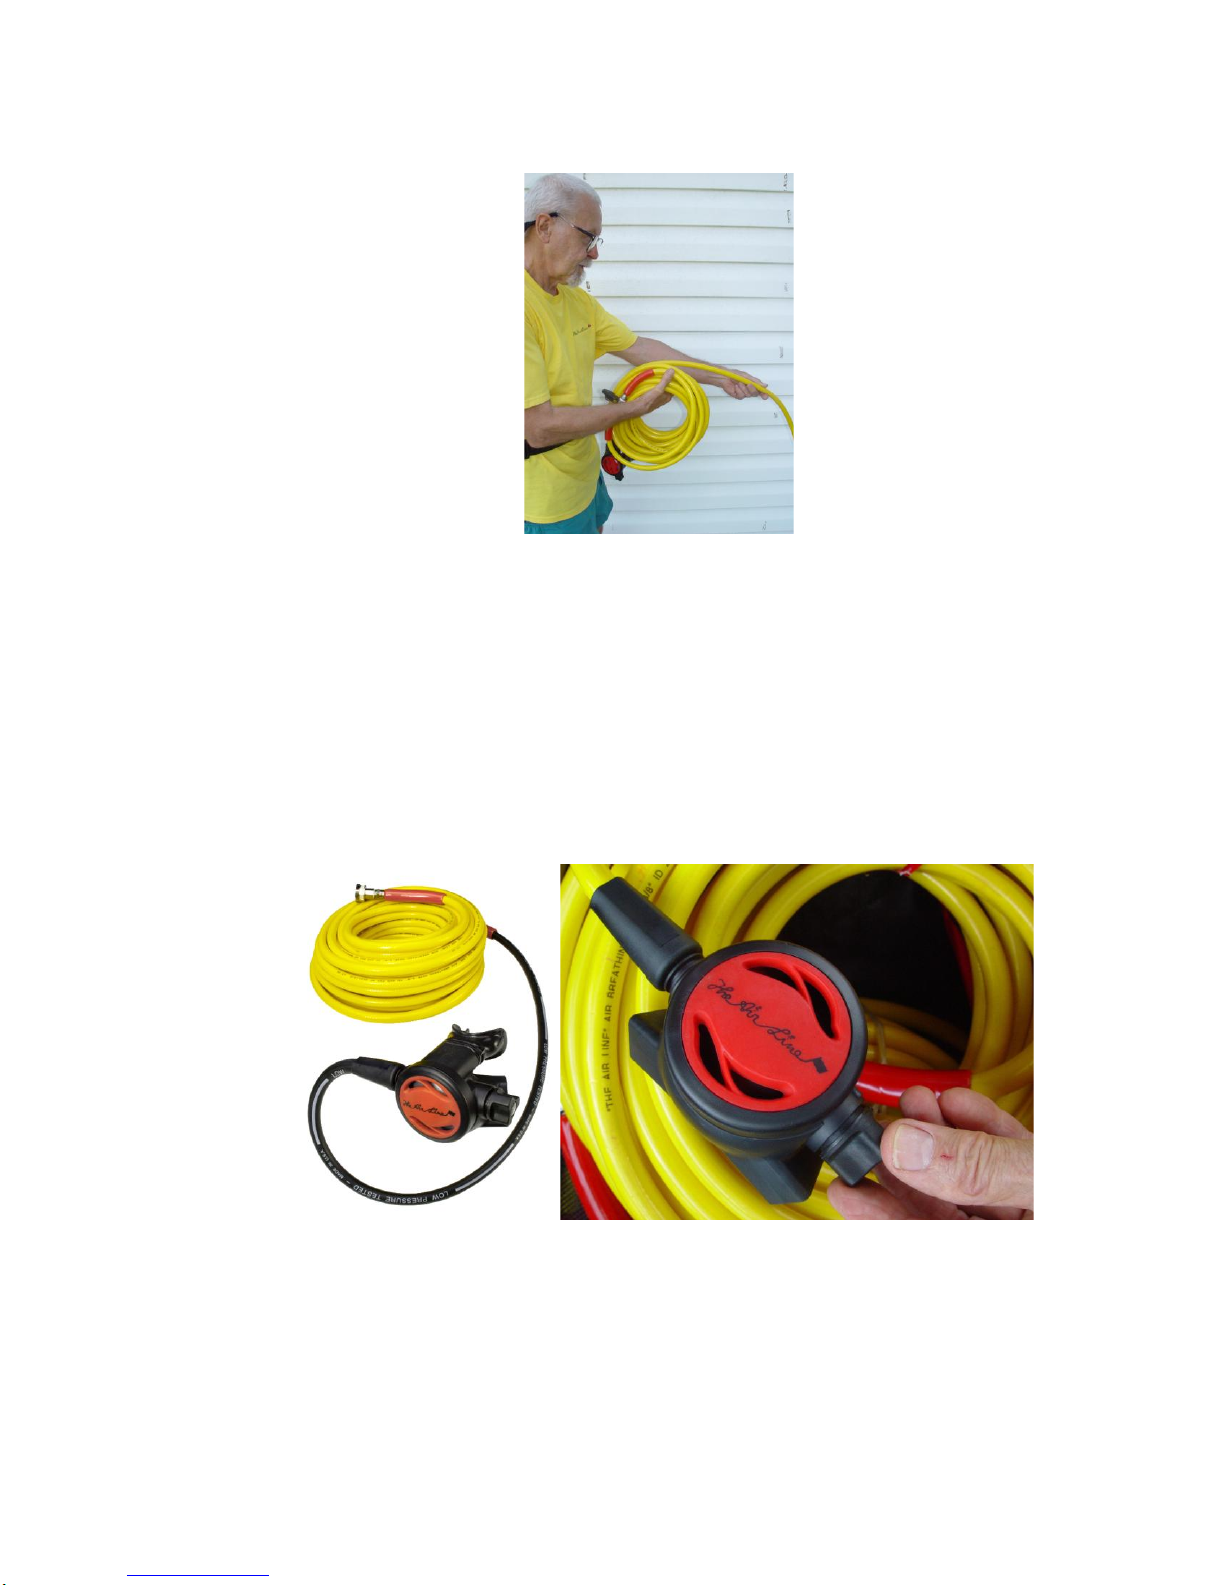
The most effective way to keep kinks out of the hoses is in the way they are handled. Always
unroll rather than uncoil hoses. Hold the reel of hose perpendicular to your chest and unroll the
hose.
By so doing, the hoses will be straight when you are in the water. When you are done with
your dive roll the hose up in neat coils and you will never have any problems deploying or
retrieving a hose.
The Regulator(s)
Your regulator is an adjustable model. This regulator unlike some others can be adjusted for
your own breathing comfort. The knob to adjust this is on the left side of the regulator.
Turning it clockwise will make the regulator breath a little harder at the surface.
If you were to open this in a counter clockwise direction, it will breathe much easier. When
close to the surface the regulator may free flow (allow air to continually flow without you
breathing) slightly in the open position. Just turn the adjusting knob until it stops. When you
descend deeper you may choose to open your regulator more to allow for easier breathing. You
can not cause any problems if you forget to turn it at the surface or if you leave it closed when
you are down deeper. It will always breathe. Adjusting the knob will only make it more
personalized for your own air demands. When you are done for the day, always store the
regulator adjusting knob in the open position. Just unscrew it all the way out.
9
STARTING THE UNIT
It is best not to start up the compressor under load. That means never start it up with air
pressure in the line. Bleed it off at the regulator by pushing the purge button on the front of the
regulator. The purge button is the red center of the regulator as pictured above. Press it down
and let all the air bleed off the system. You will notice that the On/Off switch is protected
against accidental position change. The cord is grounded and should not be used with a two
prong adaptor or you will unground the unit and could leave yourself open to get a shock
in the right circumstances. Should an extension cord be necessary, use only one that is
grounded for outdoor use. Use the shortest length possible, not exceeding 50 feet in length.
The extension cord gauge must be greater in diameter than the gauge of the compressor
cord. It is always better to have a longer yellow feeder hose rather than a longer
extension cord.
The pressure relief valve (located where the black heat hose comes out of the compressor
head) should release a hissing sound of air while you are on the surface or only a couple of feet
under water. This is normal and it only means you are not using all the air that the compressor
is producing and it is releasing the extra air back to the atmosphere. Breathing on the regulator
should indicate that the air is being produced and properly regulated. When everyone is done
diving, stop the motor and release the pressure in the lines as indicated above.
ENTERING THE WATER
Ensure that the compressor is safely situated to where it cannot be accidentally pulled in
the water. Attach the black strap(E160 Only) on the black heat hose to a stationary
object so you will not pull on the fitting coming out of the compressor head.
This is very important.
Another consideration of compressor placement needs to be mentioned. Compressors get hot.
Decks and docks get hot. As good as the compressor is, thermal overloading is possible with
the combination of compressor heat and ambient temperature. Place the compressor in a
shaded well ventilated area if possible. This will help your unit run a little cooler, which is
good for the longevity of the compressor. If the compressor gets too hot it is possible for the
thermal overload switch to kick in and this will cause your unit to shut down to protect itself.
Good for the unit, bad for the diver. After your unit cools down it will start right back up

10
again. We don't have a problem with this, but the situation could come up in the right
circumstances. Our units are an industrial grade compressor which is better than what you may
buy from someone else. This situation might be possible on a hot day.
Let's discuss diver weighting and some associated topics for a moment. A weight belt is
different from a towing belt. Do not attempt to put weights on the tow belt. You will need the
heavier and wider weight belt for the application. The weight belt is to be worn below the
towing belt, so that it can be jettisoned freely if the need arises. You will probably need some
weights but one of the advantages of surface supplied air is that you are not consuming the six
pounds or more of compressed Scuba air on your back. So, frequent adjustments of buoyancy
are unnecessary.
Weighting for Neutral Buoyancy
Practice buoyancy control off the boat, but safely connected to it with a trailing rope. Put on
the weight belt. Establishing your weight requirement is very simple. Start with just a few
pounds of weight. Hanging from the anchor line or a stern line, take a breath and hold it. The
water line should be at about eye level. Exhale and hold it. You should start sinking slowly. If
you don’t sink at all when you exhale, then you need more weight. If you start sinking too fast
when you exhale, you have too much weight. Add or subtract weights in small increments
until the above process is complete. Ideally, if weighted properly you will neither sink nor
float up when breathing normally. You should be able to maintain a particular depth without
effort while breathing normally. Once establishing your proper weighting, unless you make
some lifestyle changes or change an exposure suit, you will consistently be ready with the
same weight. You might want to mark individual weights or remember what is required for
each diver if you let others use your weight belt.
You should equalize the weight among the pockets, so that you are balanced. In the unlikely
event that you have to jettison weights for an emergency ascent, you can either discard the
entire belt by releasing the weight belt buckle, or remove individual weights from the pockets.
The latter is preferable, if time and conditions permit, because one can discard just enough
weight to make oneself positively buoyant, and thus maintain better control of one’s ascent
rate. Each pocket in the weight belt will hold up to five pounds (up to 3-4 lbs. soft weights,
and up to 5 lbs solid weights). Keep an assortment of smaller weights; twos, threes, and fours,
along with some fives. This will allow you to quickly establish your requirement, and to make
fine adjustments as needed.
11
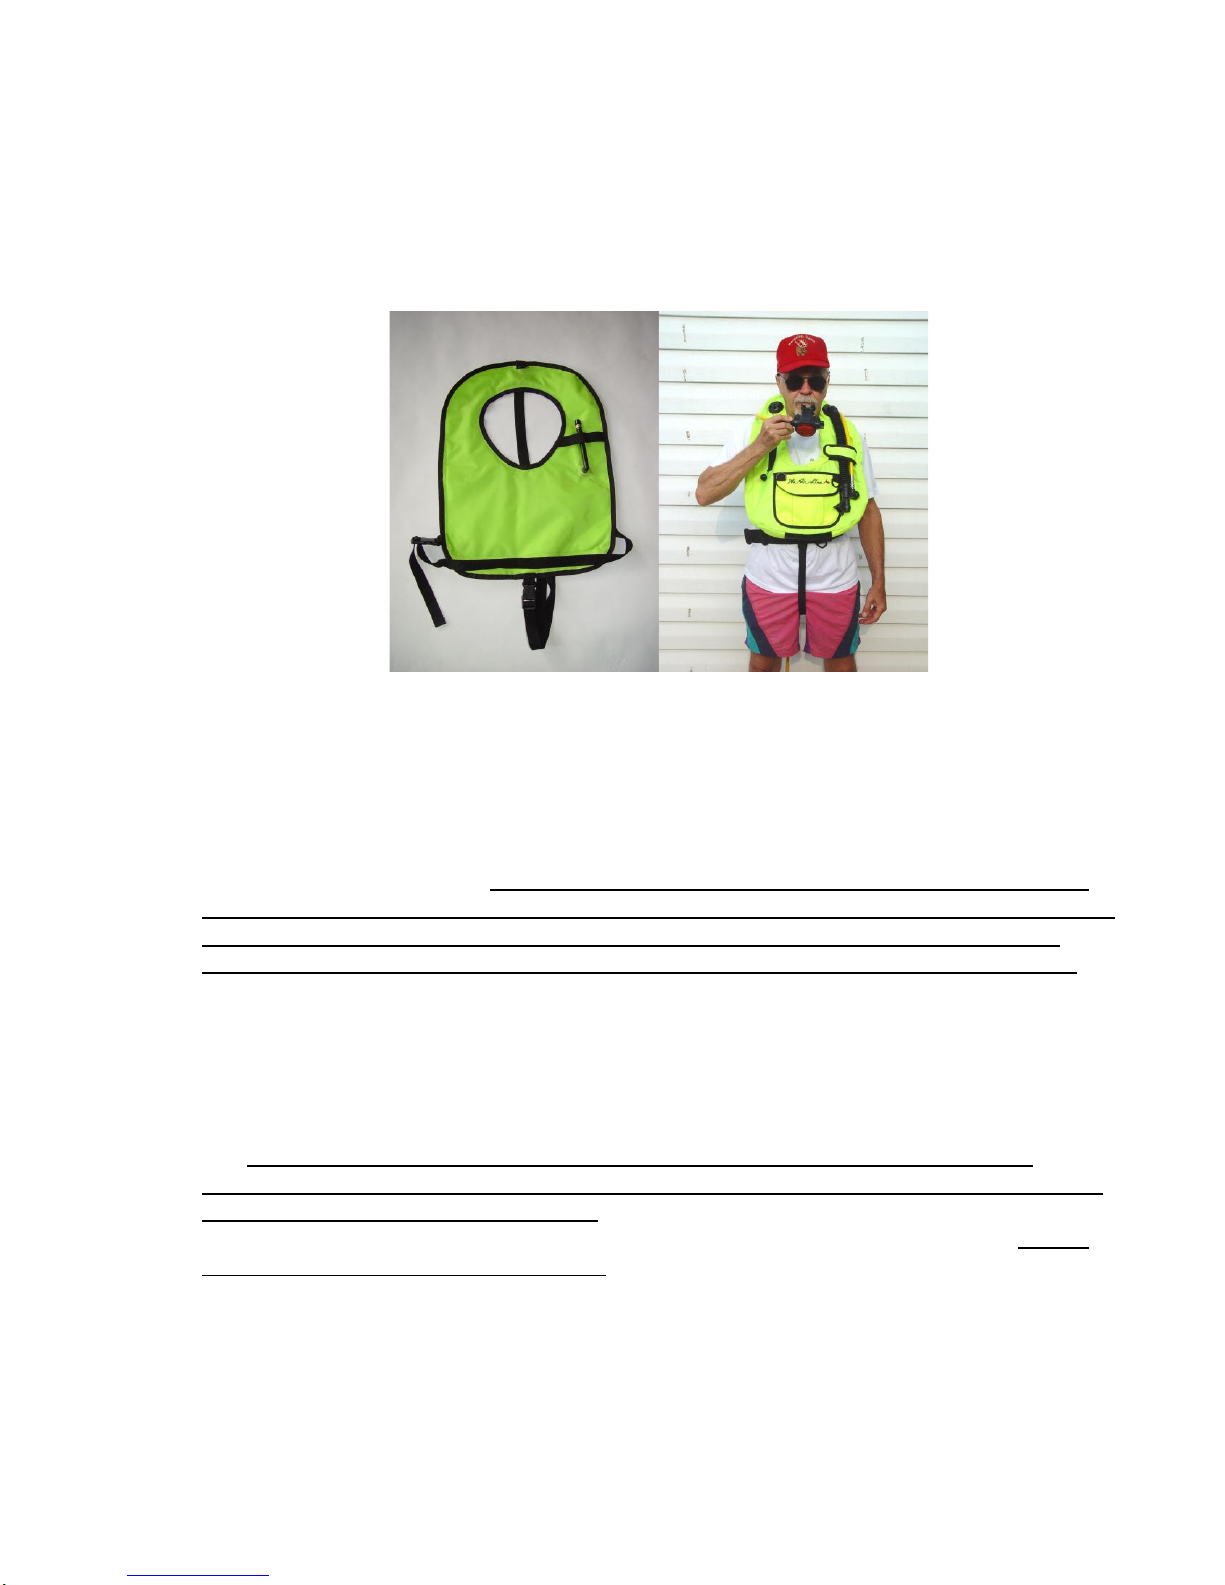
The Air Line does not discourage the use of a buoyancy compensating device (BCD), but
wishes to point out that the BCD's function is just that: to regulate buoyancy. If you choose to
wear a personal flotation device (PFD) make sure it will float you heads up in an emergency
situation. Also the PFD should only be inflated manually and minimally at depth to prevent
rocketing to the surface unless you have been trained and certified to use systems with an auto
inflate setup.
(I'm sorry, didn't mean to scare you with the guy in the red hat.)
Remember air expands as it encounters less pressure during ascent. A PFD is an important
piece of equipment if the diver tires, as it should support you head up. Remember that you are
always linked to the surface with your air hose so you can ascend slowly and safely by going
hand-over-hand up the hose to the surface. More on weighting below.
Put on personal gear and belts. Start the motor if you are completely dry, not standing in
water or doing anything that could conceivably cause you to be a ground. Do not turn the
motor on or off when you are wet. Dry off first or let someone else do it for you. The
recommended way is to have a non-diver, wearing deck shoes, start the motor for you.
Purge a regulator. Release the button and enter the water any way that is comfortable for you.
When your diving is finished and you are safely back to the swim platform or ladder, have the
non-diver turn the motor off. Hand up your gear, starting with the weight belt. Enter the boat
and release pressure by pushing the regulator purge button. Retrieve hoses starting with the
regulators by coiling them in. (See Hose Handling) Secure the reeled in hoses with the Velcro
ties. Do not drip water on the compressor. The non-diver should have secured the
compressor away by this time. NOTE: The compressor will be hot to the touch. Touch it
only by the carrying handle until cool. Unscrew the yellow air hoses from either the
compressor hose or the "Y" divider. Finish the coil and secure with the Velcro strap. You do
not have to disconnect the black heat hose. Depending upon the size of the boat or the job, you
might consider getting yellow hose extensions so that the compressor doesn't have to be
continually moved. Call The Air Line for advice.
12
SOME TIPS ON USE OF THE EQUIPMENT
It may help to remember that the air delivery from a compressor is somewhat different from a
SCUBA cylinder. A fixed pressure is not descending and ascending with you. You will
probably descend more slowly when breathing from a compressor. Having an almost unlimited
supply of air means that you haven't had to shorten your dive because you have a limited air
supply from a scuba tank. This also allows you the luxury of clearing air passages at leisure
and letting your respiration rate becomes normalized. With the second diver package, ensure
that your companion is breathing comfortably and continue your decent. Be sure that your line
is not so long as to invite the danger of a boat passing over it.
It may also help to discuss, and be aware of the fact that there is available air in the hose
system should the engine stop running. It will be necessary to inhale harder as the compressor
is not supplying pressure. You should not depend upon this however as once the small reserve
is used up you are still confronted with making a safe swimming ascent.
THE CLEAN UP AFTER YOUR DIVE DAY
There is no compressor maintenance to be concerned with other than inspecting the foam
element inside the intake housing. You will not need to check this after every dive, but should
be done after 12 or so dives. If it has a whitish appearance, it will be from dried salt deposits.
Submerge it in fresh water and knead it to rinse it. Squeeze excess water out of it and allow it
to air dry thoroughly before reinstalling. Attach hoses exactly as you used them during the
dive but leave them neat and secured by the Velcro straps. The yellow hose can either be
connected or disconnected to the black hose for this operation. Spray down the hose and the
regulator with fresh water.
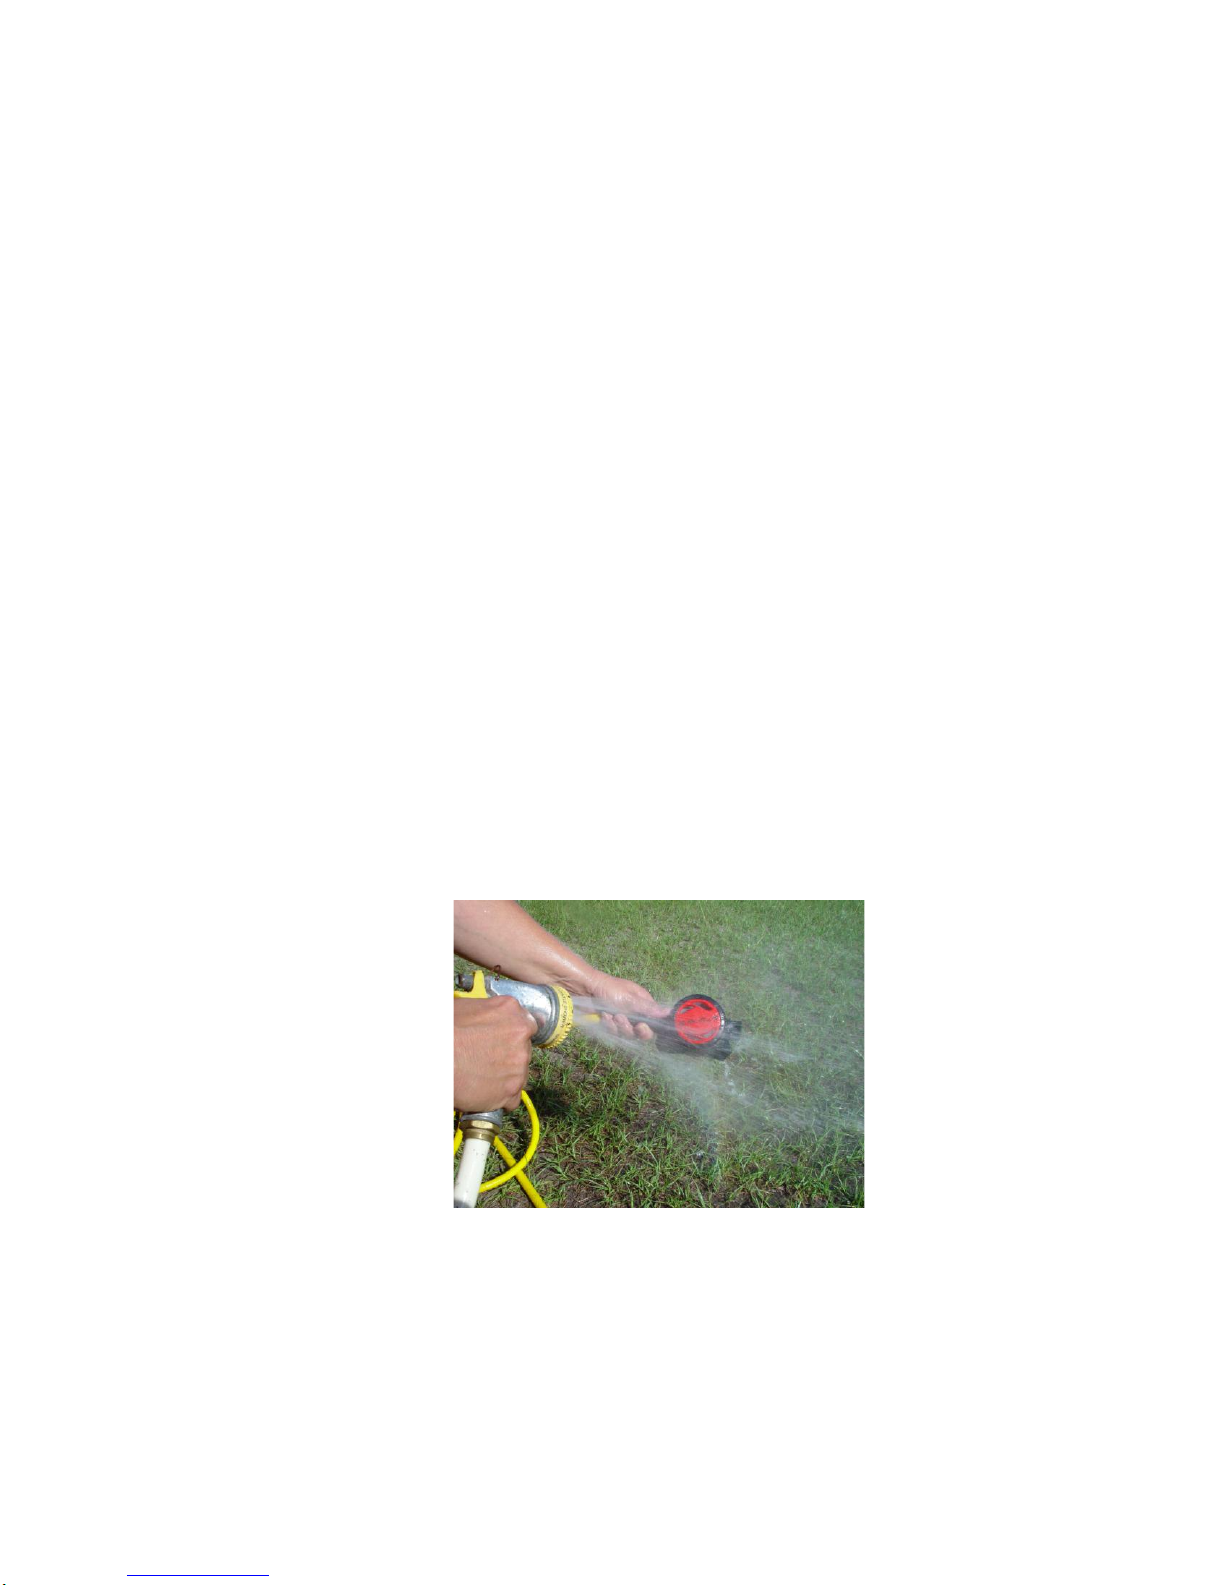
Thoroughly wash the regulators directing water into every orifice.
13
When the motor is cool enough to touch, LIGHTLY spray down the compressor with the non-
conductive protectant (ideally, CorrosionX) to give it a barrier against salt. Wipe off the
excess, wrap the heat hose around the compressor and store.
PERIODIC MAINTENANCE
The particle filters in the female garden hose ends of the yellow air hoses need to be inspected
regularly. They are washable and are removed by hand. If breathing air becomes restricted, it
is probably because you forgot to check the filter, and shame on you.
Remember, salt perseveres. A little regular effort will ensure that your investment doesn't let
you down when you need it most.
NEGLECT OR ABUSE IS NOT WARRANTIED.
ONE YEAR LIMITED WARRANTY
The Air Line, surface-supplied air breathing system is warranted to you, the original purchaser,
for a period of 1 year from the date of original retail purchase, to be free from defects in
material or workmanship. If during the specified warranty period you believe the purchased
product or any part thereof, has such a defect, you must return the product or part during such
period with proof of purchase and at your cost to the nearest authorized service center for
replacement or repair of the defective part.

14
For compressor service, contact the Thomas Industries Customer Service Department at (800)
848-7735 to find the nearest authorized Thomas Service Center. Specify that you have an Air
Line Model # AL-E160 (a.k.a. T-30) or AL-E260 (a.k.a.1820) 110 volt compressor. You will
be referred to your nearest dealer. For all other service, contact The Air Line at (352) 307-
1001.
If the product or part is found to have been defective in material or workmanship, it will be
repaired or replaced (at service center's discretion) free of charge, and returned to the
purchaser at purchaser's cost.
This warranty shall not apply to any system or part which, in the service center's judgment, has
been subject to misuse, negligence or accident, or which, in the case of electric powered
compressors, has been operated from a low or wrong power supply. Negligence on all models
will mean failure to carefully follow operating and maintenance procedures as specified in the
Owner's manual. Further this warranty will not apply to compressors that have been oiled
internally, which will also constitute a dangerous health hazard.
No implied warrantees are in effect and the manufacturer disclaims any implications with
respect to the product and its parts.
The remedy provided in this limited warranty for a defective product is purchaser's sole and
exclusive remedy, subject to your state law. Further this warranty gives you specific legal
rights and you may have other rights which vary from state to state.
The Air Line understands that use of its equipment might be seasonal, but the one year
warranty period from date of original purchase will be adhered to in the interest of
comprehensible record keeping.
The Air Line
4340 SE 95 Street
Ocala, FL 34480
Corporate and sales offices: 352/307-1001
e-mail: [email protected]
TROUBLESHOOTING GUIDE CONDITION:
Diver headache, nausea, dizziness.
POSSIBLE CAUSE: Boat engines running in vicinity of compressor. Exposure to chemicals
or fumes in the air. Remember that whatever the air quality around the compressor is what will
be delivered to you!
SOLUTION: Abort dive or move to a cleaner air environment.
ANOTHER POSSIBLE CAUSE: Failure to follow safe diving practices.
SOLUTION: Immediately seek medical attention. Secure retraining before attempting to dive
further.
15
CONDITION: Insufficient air.
POSSIBLE CAUSE: Air leak in hose system or at the compressor head..
SOLUTION: Check the washer associated with the particle filter. Check that hoses are
properly connected. Check for a hose burn or other accidental hose damage.
ANOTHER POSSIBLE CAUSE: Dirt, salt or some corrosive matter in pressure release valve
SOLUTION: The valve needs to be cleaned. This is very rare to say the least. Call us if this
needs to be done
ANOTHER POSSIBLE CAUSE: Debris in particle filter.
SOLUTION: Clean it or replace it.
AT NO TIME SHOULD OIL BE PUT INTO THE COMPRESSOR as this will introduce
a to potentially hazardous substance into the air breathing system. It is sometimes
mistakenly that food grade, vegetable or synthetic oils are not harmful. OIL IS OIL and
will cause suffocation or permanent lung damage.
See you on the bottom!

16
Now go enjoy your dive.
No, wait----I forgot something.
Get a pen and fill in the balance of this information before you start having too much fun and
forget it, like I almost did.
Air Line Model number: __________________ Invoice Number: ______________________
Serial number:_____________________ (Found at base of engine, to right of ON/OFF switch)
Equipment use Waiver
In signing below I affirm that I am competent in the use of underwater breathing apparatuses
and have had adequate training in their use. I further affirm that I understand the precaution
which must be taken with their use and, if I am not sure of any aspect of the potential hazards
of breathing compressed gas underwater, I will seek proper training or re-training before
attempting to use this, or any, life-supporting equipment. At no time will I allow untrained
people to use this equipment and I fully understand that this equipment is never to be used
beyond no-decompression limits. By so signing I release The Air Line from any liability
caused by my affirming false information, or by the use or misuse of the equipment, including
unauthorized alterations.
The Air Line has exposed me to the benefits of an independent back-up air supply such as the
Hook-UP pony bottle, which I acknowledge to be prominently displayed in its literature. This
signed document will be a part of my permanent record and I understand that it must be
returned to “The Air Line” at the time of my purchase and that no warranty will be activated
without it being on file.
Sign:__________________________________ Date:________________________
Please sign and date.
17
THE AIRLINE E-160 ELECTRIC COMPRESSOR

18
THE AIRLINE E-260 ELECTRIC DIVE COMPRESSOR
This manual suits for next models
1
Table of contents


