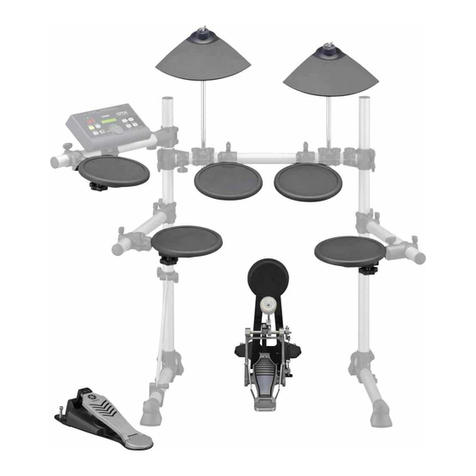
The Singing Machine SMI-1460 User manual

Electronic Drum Set
Batterie Electronique
Batería Electrónica
Instruction Manual
Manuel d’Instruction
Manual de Instruciones
SMI-1460
tempo/tap
Volume

HANDLING AND TRANSPORT
•
•
•
•
Never apply excessive force to the controls,
connectors or other parts of the instrument.
Always unplug cables by gripping the plug firmly,
but not pulling on the cable.
Disconnect all cables before moving the
instrument.
Physical shocks caused by dropping, bumping, or
placing heavy objects on the instrument can
result in scratches and more serious damage.
Clean the unit with a dry soft cloth.
A slightly damp cloth may be used to remove
stubborn grime and dirt.
Never use cleaners such as alcohol or thinner.
Avoid placing vinyl objects on top of the unit (vinyl
can stick to and discolor the surface).
This instrument contains digital circuitry and may
cause interference if placed to close to radio or
television receivers. If this occurs, move the
instrument further away from the affected
equipment.
CLEANING
ELECTRICAL INTERFERENCE
•
•
•
•
•
LOCATION
•Do not expose the unit to the following conditions
to avoid deformation, discoloration, or more
serious damage.
Direct sunlight.
High temperature (near a heat source, or in a
car during the daytime).
Excessive humidity.
Please use the AC adapter included with this
product. Insure the AC outlet voltage in the
country it is being used matches the input voltage
specified on the AC adapter’s label.
Turn the power switch OFF when the instrument
isnotinuse.
The AC adapter should be unplugged from the AC
outlet if the instrument is not in use for an
extended period of time.
Unplug the AC adapter during electric storms.
Avoid plugging the AC adapter into the same AC
outlet as an appliance with high power
consumption, such as electric heaters or ovens.
Also avoid using multi-plug adapters since this
can result in reducing the sound quality,
operation errors, and possible damage.
To avoid damage to the instrument and other
devices to which it is connected, turn the power
switches of all related devices OFF prior to
connecting or disconnecting cables.
•
•
•
POWER SUPPLY
•
•
•
•
•
•
TURN POWER OFF WHEN MAKING CONNECTIONS
ThankyouforpurchasingyourElectronicDrumSet.ThisDrumSethasbeendevelopedtoperformsimilartoan
acoustic drum set but with greater ease. Prior to using this instrument, we recommend that you read through
thismanual.
Congratulations!
Taking care of your Electronic Drum Set
English
E02
Panel Controls
Setup
Functions
Play a Tone
Create a user Drum Kit
Specifications
Voice list
Preset kit list
Tone list
MIDI implementation chart
............................................................................................. 4
........................................................................................................... 6
..................................................................................................... 8
.................................................................................................. 9
............................................................................. 11
............................................................................................ 12
................................................................................................... 13
............................................................................................ 14
.................................................................................................... 14
........................................................................ 15
- Front panel .................................................................................................. 4
- Rear Panel................................................................................................... 5
- Side Panel ................................................................................................... 5
- Connect the Pads and the Pedal ..................................................................... 6
- Connect a MIDI device ................................................................................... 7
- Connect audio equipment............................................................................... 7
- Connect a CD player, etc. (Aux. in jack)............................................................ 7
- Connect Headphones .................................................................................... 7
- Connect the Power supply jack........................................................................ 7
- Switch the power ON .................................................................................... 8
- Set the main volume ..................................................................................... 8
- Select a drum kit ......................................................................................... 8
- Play with a Metronome ................................................................................. 8
- Select a Tone .............................................................................................. 9
- Listen to the Tone ........................................................................................ 9
- Adjust Tone’s volume .................................................................................... 9
- Adjust Tone’s tempo ..................................................................................... 9
- Tap tempo function .................................................................................... 10
- Mute a Drum part ..................................................................................... 10
- Play with the Click voice .............................................................................. 10
- Use the lighting guide function ..................................................................... 10
- Set a drum voice ....................................................................................... 11
- Adjust the volume ...................................................................................... 11
- Save your drum kit voices ............................................................................ 11
English
E03
CONTENTS

[ start / stop ] button
[ drum off ] button indicator
[ save ] button
[ click ] button
Beat indicator
[ tone / volume ] button
[ voice / volume ] button
Start or stop song playing.
This button is used to turn on or turn off
the percussion of tone.
Save the current kit setting to a user kit.
Turn on / off the metronome.
Beat of metronome or a tone that is
playing.
Display the song number or
accompaniment volume value.
Display the voice number or volume value.
[ kit ] button
Display the drum kit number.
3-Digit LED display
Volume Knob
Display the parameters of the current
menu mode.
To control the volume of the headphone and
line output, turn the knob clockwise to
increase the volume and counterclockwise
to decrease the volume.
[+]and[-]buttons
Pad select buttons and indicators
[ tempo -/+ ] and [ tap ] buttons
These buttons are used to change the
setting number of the kit, voice, song and
adjusts the Pad volume.
Select current pad and adjust the pad
volume.
When you press them, the corresponding
indicator lights up.
Change current tempo.
English
E04
5
1
2
3
4
6
7
8
9
13
12
11
10
Front Panel
PANEL CONTROL
tempo/tap
Volume
1123 4 56 7 8 910
11 13
12

Phones Jack
Connect headphones to this jack.
(Connecting the headphones will not mute the output jacks).
Aux.in Jack
Power supply jack (dc 9v.)
Power switch
Connect to an external sound source.
Connect the supplied AC adapter to this
jack.
Turn the power ON/OFF.
MIDI out jack
Trigger input jacks
Output jacks (R - L/mono)
Connect to an external sound module.
Connect to pads, cymbals, hi-hat control,
kick trigger.
Connect to an amplifier or an audio system.
For monaural output, use the L/mono jack.
English
E05
PANEL CONTROL
Rear Panel
Side Panel
17
18
1916
15
14
20
20
ON OFF
midi out hi-hat
hi-hat
control Crash ride tom 3 tom 1tom 2 Snare kick R Aux.in
output
L/mono dc 9v.
14 15 16 17 18
19

ON OFF
midi out hi-hat
hi-hat
control Crash ride tom 3 tom 1tom 2 Snare kick R Aux.in
output
L/mono dc 9v.
Using the provided cables, connect each trigger input jack on the rear panel of the module, and
make sure each pad is connected to its corresponding trigger input jack.
NOTE
1. The sound of the hi-hat pad is controlled by the hi-hat pedal. Similar to an acoustic drum, the hi-
hat pad functions as an “open hi-hat” when the pedal is released. When the pedal is depressed, it
functions as a “closed hi-hat”.
2. By striking areas of the cymbal pad (ride, crash or hi-hat) near the edge of the pad, the sounds
produced are different from the other pads.
CAUTION!
To prevent electric shock and damage to the device, make sure the power is switched OFF
on the drum and all related devices before making any connection.
hi-hat
crash
ride
tom 1
tom 2
tom 3
kick
snare
hi-hat
control
English
E06
SETUP
Connectthe Padsandthe Pedals

This is for use of an external sound module or MIDI sequencer.
1.
Transmit MIDI data
Use a MIDI cable to connect the MIDI OUT jack on the drum module
with the MIDI IN jack on the external MIDI device.
2. This drum is designed to output all the MIDI codes generated by
pads striking or pedal stepping via MIDI output connector. Please
note, clicking and the MIDI codes in songs are excluded.
1. The audio output of a CD player or another audio source must be
connected to AUX IN jack on the rear panel which can be mixed
with the sound of the drum. This is a function that allows you to
play along with your favorite song.
2. The volume of the external signal is adjusted with the VOLUME
knob.
1. When connecting an amplifier please follow steps listed bellow:
a.
2. The volume is adjusted with the VOLUME knob.
Connect the amplifier to the Output L/MONO and R jacks on the
rear panel.
b. For monaural playback, use the L/MONO jack.
c. For stereo playback, connect both L/MONO and R jacks.
An optional set of stereo headphones can be connected to the
PHONES jack located on the side of the drum module.
* Adjust the volume to a comfortable level.
Make sure the power is switched OFF and connect the power adapter
totheDCINjackontherearpanel.
Note:
1. To protect the speakers, amplifier and the drum module from
damage, rotate the volume knob to the minimum volume level
before powering ON.
2. Make sure the power is switched OFF when connecting the drum
module to an external device.
E07
Connecta MIDIdevice
Connectingaudio equipment
Connecta CDplayer,etc (Aux.Injack)
ConnectHeadphones
Connectthe powersupply
English
kick
output
R L /m o n o aux .in
ON OFF
dc 9v.
kick
output
R L /m o n o aux .in
ON OFF
dc 9v.
Amplifer Amplifer
midi out
hi-hat
control hi-hat ridecrash
MIDI OUT
MIDI Device
MIDI IN
MIDI Data
kick
output
R L /m on o a u x .in
ON OFF
dc 9v.

The unit comes with 20 (001-020) preset drum kits and 10 user kits
(021-030). Reference tone list: page E14
1.Pressthe[kit]button
The current kit number appears and the Kit indicator will display.
2.Press[+]or[-]buttonstoselectthedrumkitnumber(001-020)
you want to access.
1. Press the [ click ] button to initiate the Metronome. The beat
indicator will flash and the click sound begins to play.
2. Press the [ tempo + ] or [ tempo - ] buttons to set the metronome
beat.
3.Pressthe[click]buttonagaintostopthemetronome.
4. To adjust the volume of the click sound, hold down the [click] button
andpressthe[+]or[-]buttonstoadjustthevolume of the click
sound, the metronome automatically plays.
When playing the metronome:
The metronome stops immediately when holding down the [ click ]
buttonandpressingthe[+]or[-]buttonsontheclick sound.
Volume of the click sound will be reset to default once the power is
on.
*
*
While striking a pad, gradually rotate the volume knob until a
comfortable volume level is reached.
After confirming all connections have been completed, rotate the
volume knob to the left (minimum volume level) before switching the
power ON.
Set the power switch to the ON position. The tone indicator will display
the tone being played.
English
E08
FUNCTION
Playwith aMetronome
Connecta CDplayer,etc (Aux.Injack)
Setthe powerswitch
Setthe mainvolume
-+
-+
kick
output
R L /m ono a u x .in
ON OFF
dc 9v.
Tone indicator
Kit indicator
Beat indicator

1. Press the [tone/volume] button to select the volume of the tone,
which will display “AXX”. XX = Level value 00 to 31
2.Press[+]or[-]buttontoadjustthevolume of the tone
accompaniment.
Volume of the tone will not reset to default when power is ON.
*
1. Pressing the [ tempo + ] or [ tempo - ] button will display the
current tempo value.
2. Press the [ tempo + ] or [ tempo - ] button to increase or decrease
the tempo. The tempo value will range from 30 to 280.
- Hold down either the [ tempo + ] or [ tempo - ] button to change
the setting from high to low speed.
-Pressingthe[tempo+]and[tempo-]buttonsatthesametime
will reset the tempo to the default value.
Note: Approximately 2 seconds after you stop pressing the [ tempo ]
button, the display will change to your selected song or kit number
instead of the tempo value.
This drum module has a total of 50 preset tones.
Note: The preset tone setting is 001 once powered on.
1. Press [ tone / volume ] button.
The tone indicator lights and the current tone number will appear.
2.Press[+]or[-]buttontoselectoneofthetonesandlistentothe
the Tone number 001-050, which are, preset tones.
(Reference tone list: page E14)
3. Press [ start - stop ] button and the beat indicator will flash.
The tone will start playback from the beginning.
4. The tone will stop when it reaches the end.
You can stop the tone during playback by pressing the [ start /
stop ] button.
The ASSIGN pad’s indicator flashes at the first beat of each measure.
Note: The ASSIGNED pad’s indicator will not illuminate when both [ hi-
hat]and[kick]buttonsarepressedatthesametime.
English
E09
PLAY A TONE
Listento thetone
Selectthe tonevolume
Adjustthe tonestempo
tempo/tap
Beat indicator
Beat indicator

This function allows you to set the song’s tempo by tapping in tempo
onapad.
1. Press the [ tap ] button. This will display the current tempo value.
2. Tap on the pad in the tempo that you prefer. Tap on the pad 4
times and the last two beats are detected and are set as your
desired speed.
3. The tone will be played at desired tempo you set. When the tone is
playing, you are not able to change the tempo with the tempo
function.
Any pad will activate the tap tempo function.
*
1. Press the [ click ] button to start the metronome. It will be played
with tempo.
2.Pressthe[click]buttonagaintostopthemetronome.
Note: The click sound will not stop automatically once the song ends
untilyoupressthe[click]button.
1. Press [ drum off ] button. The drum off indicator will illuminate.
The drum mute function is active.
2. Press [start / stop ] button to playback the song.The drum part in
the song will be muted.
3. To cancel the drum mute function, press the [ drum off ] button
again. The drum indicator will not illuminate.
The drum mute function can be used during the tone play.
*
The lighting guide function provides a valuable lesson to practice or
learn the drum kit while playing the preset tones.
1. Select the tone number you choose to practice.
2. Press [ drum off ] button.
3.Press[start/stop]buttontostarttoneplay.
4. Strike the pad in accordance with the lighting of the pad’s indicators
or press the hi-hat pedal and kick the bass drum pad exactly when
their indicators light.
During the tempo play, you can change the Tempo (speed), or use
the tap tempo function to set your desired tempo.
*
English
E10
Taptempo function
Mutea Drumpart
Playwith theClicksound
Usingthe lightingguidefunction
Press the [ hi-hat control ] + [ kick ] buttons
to turn off all the pad’s indicators.
Press the [ hi-hat control ] + [ kick ] buttons
again to turn on all the pad’s indicators.
tempo/tap
Drum off indicator

This unit includes 215 high quality percussion sounds, which you can
assign to any of the drum pads, 3 cymbals, hi-hat control and bass
drum. This allows you to create your own drum kit, which consists of
the voice you choose. Reference voice list: page E13.
The kit number 021-030 are used for saving your own drum kit.
1.Press[voice]button.
The voice indicator illuminates and displays the number of the pad.
2. Press [ pad ] button or hit the pad you want to set. The pad
indicator will illuminate and display the current voice number of the
lit pad.
3.Press[+]or[-]buttonstoselectthevoice number you want to
assign.
4. Repeat step 2 and 3 to set the voice for another pad or bass drum.
All settings will be reset to default once power is ON.
*
This unit allows you to adjust the volume of every voice in the kit and
also will control the individual level (volume) of the pads or bass drum.
1. Press the [ voice / volume ] button to view the volume level setting.
Level settings run from 00 to 31 The pad button indicator
illuminates and will display the current volume level of the lit pad.
2. Press the [ PAD ] button or kit the percussion pad you want to
adjust.
3.Pressthe[+]or[-]toincreaseordecreasethevolume. While
you are adjusting the corresponding pad, listen carefully to the
sound level until reaching the level you desire.
4. Repeat step 2 and 3 to adjust the volume of other pad voices.
Volume of the pad will be reset to default once power is ON.
*
Upon completion of your personalized drum kits please follow the steps
below to save them:
1.Press[save]button.
The kit number 021 appears and is flashing.
2.Press[+]or[-]buttontosetthekitnumber(021-030) for saving
your drum kit.
3. Press [ save ] button again. The flashing kit number stops.
Note: To cancel the save operation, press the voice button. If
there is an error “Err” will be displayed.
English
E11
CREATE A USER DRUM KIT
Saveyour drumkitvoices
Seta Drumvoice
Adjustthe volumeofthe Pad
Voice indicator
Pad buttons
Volume level value
Pad indicator

Drum Pad:
Voices:
Drum Kits:
Song:
Controls:
Display:
Connections:
Power Supply:
4 drum pads, 3 cymbal pads, 1 hi-hat control pedal,
1 kick trigger.
215 voices
20 preset kits, 10 user kits
50 preset songs
POWER SWITCH, START / STOP, SAVE, KIT, VOICE /
VOLUME, SONG / VOLUME, DRUM OFF, CLICK, HI-HAT,
CRASH, RIDE, HI-HAT CONTROL, SNARE, TOM 1, TOM 2,
TOM 3, KICK, VOLUME, + / - TEMPO, TAP
LED display
MIDI OUT
Hi-hat control
Hi-hat
Crash
Ride
Snare
Tom 1
Tom 2
Tom 3
Kick
Output(R&L/MONO)
Aux in
AC adapter (DC 9V.)
English
E12
SPECIFICATIONS

No. Name
Acoustic Base Drum
Electronic Base Drum
Acoustic Snare Drum
001 BD head
002 Real BD1
003 Real BD 2
004 Real BD 6
005 BD Std 1
006 BD Std 2
007 Room BD 1
008 Room BD 2
009 Lo BD
010 Rock BD 1
011 Rock BD 3
012 Rock BD 4
013 BD-Var 3
014 BD-Var 5
015 Big Drum 1
016 Big Drum 2
017 BD-Analg
018 MrDance 1
019 MrDance 2
020 MrDance 5
021 Lo-BD 1
022 Lo-BD 2
023 Hard BD 3
024 SD-Std 1
025 SD-Std 2
026 SD-Std 3
027 SD-Std 4
028 SD-Std 5
029 SD-R 1
030 SD-R 2
031 SD-R 5
032 Snare 1
033 Snare 2
034 Snare 4
035 Snare 5
036 Snare 6
037 SD-Std 21
038 SD-Std 22
039 SD-Std 23
040 SD-Std 24
041 SD-Std 25
042 SD-Std 26
043 SD-Std 27
044 SD-Std 28
045 SD-Std 29
046 SnareDr 1
047 SnareDr 5
048 SnareDr 6
049 SnareDr 7
050 SnareDr 8
051 SidStik 1
052 SidStik 2
053 SnarTimb
054 RowDrum 1
055 RowDrum 2
056 RowDrum 3
057 SD-Ana 2
058 SD-Ana 6
059 SD-Ana 7
060 SD-Ana 11
061 SD-Danc 5
062 SD-Danc 6
063 SD-Elec
064 Syn-SD 1
065 Syn-SD 7
066 Syn-SD 8
067 Syn-SD 11
068 Cool SD 1
069 HD-SD 1
070 Brush 1
071 Brush 2
072 Brush 3
073 Brush 5
074 Brush 7
075 Brush 8
076 Brush 10
077 Brush 13
078 Tom-Std 5
079 Tom-Std 3
080 Tom-Std 2
081 Tom-Std 1
082 Tom-Jaz M
083 Tom-Jaz F
084 Tom-Brs H
085 Tom-Brs M
086 Tom-Brs L
087 Tom-Brs F
088 Tom-BRK H
089 Tom-BRK M
090 Tom-BRK L
091 Tom-BRK F
092 Tom-Rom 6
093 Tom-Rom 5
094 Tom-Rom 4
095 Tom-Rom 3
096 Tom-Rom 2
097 Tom-Rom 1
098 Tom-Rm 2L
099 Tom-Rm 2F
100 TomH-A
101 Tom-A 5
102 Tom-A 4
103 Tom-A 3
104 Tom-A 2
105 Tom-A 1
106 Tom-T 1M
107 Tom-T 3L
108 Tom-T 3F
109 Tom-El 4
Electronic Snare Drum
Acoustic Tom
Electronic Tom
110 Tom-El 3
111 Tom-El 2
112 Tom-El 1
113 CrashStd
114 CrashBrt
115 CrashSt 2
116 SftCrash
117 CrashSt3
118 CrashSht
119 CrashThin
120 CrashRev
121 CrashRol
122 CrashSt 4
123 RideBel 1
124 RK Ride 2
125 RideBStd
126 Splash C 1
127 Cymbal 2
128 Cymbal 3
129 BigGong 1
130 BigGong 2
131 B.Cymbl 1
132 B.Cymbl 2
133 S.Cymbl 2
134S.Cymbl 2 M
135 SmalGong
136 H.H.Cls 1
137 H.H.Cls 3
138 H.H.Cls 4
139 H.H.Opn 1
140 H.HCNor 1
141 RK HHcls
142 H.H Opn 3
143 Open HH 2
144 Open HH 3
145 Open HH 4
146 RK HHOpn
147 Open HH 7
148 HH pedl 1
149 HH pedl 2
150AnaHh1
151 Agogo-1
152 Agogo-2
153 Bell tre
154 Bongo Hi
155 Bongo Lo
156 Cabasa 1
157 Cabasa 2
158 Castanet
159 ClapA
160 Claves 1
161 Claves 2
162 Conga-Hi
163 Conga-M 1
164 Conga-M 2
Cymbal
Acoustic Tom
Percussion
165 Conga-3
166 Conga-4
167 Conga-5
168 CowBell 1
169 CowBell 2
170 Cuica H
171 Cuica L
172 Fsnap
173 Guiro 1
174 Guiro 2
175 HiQ
176 JingBell
177 Maracas 1
178 Maracas 2
179 MetroBell
180 MetroClk
181 Scrach
182 Shake
183 Surdo 1
184 Surdo 2
185 Tabla 1
186 Tabla 2
187 Tabla 3
188 Tabla 4
189 TalkD
190 TalkDrD
191 TalkDrU
192 TalkDrV
193 Tambouri
194 TimbleH
195 TimbleL
196 TimblePH
197 TimblePL
198 Triangle
199 TriagMut
200 VibrSlap
201 Whistal
202 XfadeTri
203 Smallwood
204 BoardDr 1
205 BoardDr 2
206 Lotus Brd
207 BanbuBrd
208 SouthBan
209 B.WdFish
210 S.WdFis 1
211 S.WdFis 2
212 S.WdFis 3
213 S.WdFis 4
214 ImpacBel
215 ImpaBel M
English
E13
VOICE LIST

No. Name
001 Standard 1
002 Standard 2
003 Dance 1
004 Jazz Latin
005 Room 1
006 Electric
007 Brush
008 Room Stick
009 Latin 1
010 Latin 2
No. Name
001 Guitar
002 Accordion Fussion
003 Folk Pop
004 Rock
005 Blues
006 New Age
007 Reggae Funk
008 Drum & Bass
009 Pop & Beat
010 Dance
011 Drk-2
012 Pop 3
013 Pop 5
014 Jazz 1
015 Rhythm & Blues 4
016 Ballad 1
017 Ballad 2
018 Ballad 4
019 Ballad 5
020 Ballad 6
021 Waltz
022 Slow Rock
023 Rock Pop 4
024 Latin 4
025 Latin 5
Beat
4/4
4/4
4/4
4/4
4/4
4/4
4/4
4/4
4/4
4/4
4/4
4/4
4/4
4/4
6/8
4/4
4/4
4/4
4/4
4/4
3/4
6/8-9/8
4/4
4/4
4/4
No. Name
011 Jazz
012 Brush 2
013 Dance Stick
014 Orchestra
015 Drum & Bass
016 House
017 Rhythm & Blues
018 Ungle
019 China LuoGu
020 Oriental 1
No. Name
026 Reggae
027 Shuffle 1
028 Rhythm & Blues 3
029 Rock N’ Roll 1
0308Beat4
0318Beat2
032 16 Beat
033 March
034 Latin 6
035 Funk 3
036 Fusion 2
037 Rock N’ Roll 2
038 Hard Rock 3
039 Rock Pop 2
040 Funk 1
041 Funk 4
042 Jazz 3
043 Dance 1
044 Dance 2
045 Mambo
046 Rhythm & Blues 1
047 Rhythm & Blues 2
048 Ballad 3
049 Jing Opera
050 Chinese Rhythm
Beat
4/4
4/4
4/4
4/4
4/4
4/4
4/4
4/4
4/4
4/4
4/4
4/4
4/4
4/4
4/4
4/4
6/8
4/4
4/4
4/4
4/4
4/4
4/4
4/4
2/4
English
E14
DRUM KIT LIST
TONE LIST

KEY = O:Yes
X: NO
Basic
Channel
Mode
Note
Number
Velocity
After
Touch
Pitch Bend
Control Change
Program Change
System
System
Common
System
Real Time
Aux
Messages
TRANSMITED
10 ch
X
X
X
*****
0-127
*****
O 9NH, V=1 -127
X (9NH V=0)
X
X
X
X
X
X
X
X
X
X
X
X
X
X
X
X
X
X
X
X
X
X
X
X
X
X
X
X
X
X
X
X
FUNCTION
Default
Changed
Default
Messages
Altered
True Voice
Note On
Note Off
Key’s
Channel’s
0
1
5
6
7
10
11
64
65
66
67
80
81
91
93
120
121
123
True #
Exclusive
Song Position
Song Select
Tune
Clock
Comands
LocalON/OFF
All notes OFF
Active Sense
Reset
Bank Select
Modulation
Portamento Time
Data Entry
Volume
Pan
Expression
Sustain Pedal
Portamento ON / OFF
Sostenuto Pedal
Soft Pedal
Rear Program
Chorus Program
Rear Level
Chorus Level
All Sound OFF
Reset All Controller
All Notes OFF
English
E15
MIDI IMPLEMENTATION CHART

Félicitation!
Nous vous remercions de l’achat de votre Batterie Electronique. Cette Batterie Electronique a été
conçue pour jouer comme une batterie acoustique avec plus de facilité. Avant d’utiliser cet instrument,
nousvousrecommandons de lire ce manuel.
Utilisation de votre ensemble de Batterie Electronique:
MANIEMENT ET TRANSPORT
•
•
•
•
•
•
•
•
•
Ne pas exercer de pression aux parties de
contrôle, de connections ou d’autres éléments de
l’instrument.
Toujours débrancher en tenant la prise
fermement et non en tirant sur le câble.
Débrancher tous les câbles avant de déplacer
l’instrument.
Des coups physiques causés par des chutes, ou
en plaçant des objets lourds sur l’instrument il
pourrait se produire des éraflures ou des dégâts
plus importants.
Nettoyer l’ensemble avec un chiffon sec et doux.
Utilisez un chiffon légèrement humide pour ôter
les saletés et poussières persistantes.
Ne jamais utiliser de produits de nettoyage tel
que de l’alcool ou un diluant.
Evitez de placer des objets en vinyl sur l’appareil
(Le vinyl pourrait coller et décolorer la surface).
L’instrument contient des circuits électroniques
et cela peut causer des interférences si il est
proche d’une radio ou d’une télévision. Si cela
arrive, éloigner l’instrument de l’équipement
affecté par les interférences.
NETTOYER
INTERFÉRENCE ÉLECTRIQUE
LIEU D’EMPLACEMENT
•Ne pas exposer le matériel à ces différentes
conditions pour éviter toute déformation,
décoloration ou de plus sérieux dommages.
Exposition au soleil.
Températures hautes (près d’une source de
chaleur ou dans une voiture la journée).
Humidité excessive.
euillez utiliser l’adaptateur AC fourni avec
l’appareil. Vérifiez que le voltage de la prise AC
dans votre pays correspond au voltage d’entrée
indiqué sur l’étiquette de l’adaptateur AC.
ettre le bouton power sur OFF lorsque
l’instrument n’est pas utilisé.
’adaptateur AC doit être débranché de la prise
de courant AC si l’instrument n’est pas utilisé
pendant une période prolongée.
ébrancher l’adaptateur AC pendant les orages.
viter de brancher l’adaptateur AC sur la même
prise. de courant que des appareils de haute
consommation d’énergie comme les chauffages
électriques ou les fours. Eviter aussi d’utiliser des
prises multiples car cela conduit à réduire la
qualité du son, à des erreurs d’opération et à de
possibles dommages du matériel.
Pour éviter tout dommage de l’instrument et des
autres elements auquel il est connecté, mettre le
bouton power de tous les éléments liés sur OFF
avant de brancher ou de débrancher les
câbles.débrancher les câbles.
•
•
•
SOURCE D’ÉNERGIE
METTRE LE BOUTON POWER SUR OFF AVANT
DE BRANCHER L’APPAREIL
•
•
•
•
•
•
V
M
L
D
E
F02
Français

Français
F03
Tableau de Contrôle
Installation
Fonctions
Jouer une Timbres
Créer un Kit D’utilisateur
Caractéristiques Techniques
Liste des Sons
Liste des Kits de Batteries
Liste des Timbres
MIDI Graphique du Mode D’exécution
...................................................................................... 4
................................................................................................... 6
..................................................................................................... 8
.........................................................................................9
............................................................................ 11
............................................................................................ 13
......................................................................... 14
....................................................................................... 14
.......................................................... 15
- Tableau de Contrôle Avant ............................................................................. 4
- Tableau de Connexion Arrière ......................................................................... 5
- Tableau de Connexion Sur le Coté ................................................................... 5
- Brancher les Pads et Les Pédales................................................................... 6
- Brancher un Appareil MIDI ............................................................................. 7
- Brancher un Équipement Audio....................................................................... 7
- Brancher un Baladeur CD .............................................................................. 7
- Brancher un Casque ..................................................................................... 7
- Brancher la Prise de Courant ......................................................................... 7
- Mettre en Marche ........................................................................................ 8
- Régler le Volume .......................................................................................... 8
- Sélectionner un Kit de Batterie ....................................................................... 8
- Jouer Avec un Metronome............................................................................. 8
- Sélectionner une Timbres .............................................................................. 9
- Ecouter une Timbres ..................................................................................... 9
- Ajuster le Volume d’une Timbres ..................................................................... 9
- Ajuster le Tempo D’une Timbres ..................................................................... 9
- Régler le Tempo en Frappant Sur un Pad ....................................................... 10
- Rendre la Batterie D’une Chanson Muette...................................................... 10
- Fonction Metronome ................................................................................... 10
- Utiliser la Fonction Guide Lumière ................................................................. 10
- Régler L’enregistrement de la Batterie........................................................... 11
- Ajuster le Volume ....................................................................................... 11
- Sauvegarder Vos Sons de Kit de Batterie ....................................................... 11
....................................................................... 12
CONTENU

Le bouton [ start/stop ]
Le bouton et indicateur [ drum off ]
Le bouton [ click ]
L’indicateur de tempo
Le bouton [ tone/volume ]
Débuterouarrêterlachanson.
Ce bouton est utilisé pour allumer ou
éteindre les percussions de la chanson.
Allumer ou éteindre le metronome.
Tempo du métronome ou d’une Timbres jouée.
Afficher le numéro de la chanson et
l’intensité du volume d’accompagnement.
Le bouton [ save ]
Le bouton [ kit ]
Le bouton [ voice/volume ]
Sauvegarder les enregistrements des kits
en cours pour l’utilisateur.
Afficher le numéro du kit de batterie.
Afficher le numéro du son ou l’intensité du
volume.
Affichage du [ 3digit LED ]
Bouton du volume
Afficher les paramètres du mode en cours.
Contrôle du volume du casque et de la
sortie. Tournez le bouton dans le sens des
aiguilles d’une montre pour augmenter le
volume et dans le sens contraire pour le
baisser.
Lesboutons[+]et[-]
Les boutons et indicateurs de sélection des Pad.
Lesboutons[tempo+/-]et[tap]
Ces boutons sont utilisés pour modifier les
numéros des kits, des sons et ajuster le
volume du Pad.
Sélectionner les Pad et ajuster le volume du
Pad. Une pression sur le bouton permettra à
l’indicateur correspondant de s’allumer.
Changer le tempo en cours.
TABLEAU DE CONTRÔLE
Tableaude contrôleavant
1
2
3
5
4
6
7
8
9
13
12
11
10
F04
Français
tempo/tap
Volume
11 123 4 56 7 8 910
11 13
12

MIDI hors du cric
Crics d'entrée de déclenchement
Crics de rendement
Branchez à un module de son externe.
Brancher avec les Pad, les cymbales, le
contrôle hi-hat et les branchements rapides.
Brancher avec l’ampli ou le système audio.
Pour des sorties monophonique utiliser le
L/mono jack.
Jack pour le casque ou écouteur
Branchez l’écouteur à cette prise jack.
Aux. dans le cric
Cric d'alimentation d'énergie (C.C dans 9V)
Le bouton Power
Branchez à une source de son externe.
Branchez l’adaptateur AC fourni à cette
prise jack.
Mettre le bouton sur ON/OFF.
ON OFF
midi out hi-hat
hi-hat
control Crash ride tom 3 tom 1tom 2 Snare kick R Aux.in
output
L/mono dc 9v.
14 15 16 17 18
19
Tableaude connexionarrière
TABLEAU DE CONTRÔLE
17
18
19
16
15
14
20
Tableaude connexionsurle cotéa
20
F05
Français

ATTENTION!
Pour éviter un choc électrique et des dommages sur le matériel, assurez vous que le
bouton power est bien sur OFF sur la batterie et le matériel relié avant de faire les
branchements.
A l’aide des câbles fournis, branchez chaque prise jack sur le panneau arrière du module. Pad est
connecté à son « trigger input jack » correspondant.
1. Le son du pad hi-hat est contrôlé par la pédale hi-hat. Comme une batterie acoustique, le pad hi-
hat fonctionne comme “hi-hat ouvert” quand on relâche la pédale. Quand on appuie sur la pédale,
il fonctionne comme un “hi-hat fermé”.
2. En frappant sur le pad de cymbales (ride, crash ou hi-hat) qui se trouve au bord du pad. Les sons
produits sont différents des autres pads.
INSTALLATION
Brancherles Padsetles pédales
ON OFF
midi out hi-hat
hi-hat
control Crash ride tom 3 tom 1tom 2 Snare kick R Aux.in
output
L/mono dc 9v.
F06
Français
hi-hat
crash
ride
tom 1
tom 2
tom 3
kick
snare
hi-hat
control
Table of contents
Languages:
Other The Singing Machine Drum manuals

The Singing Machine
The Singing Machine Electronic 5-Pad Drum Set SMB-545 User manual

The Singing Machine
The Singing Machine Electronic 8-Pad Drum Set SMB-546 User manual

The Singing Machine
The Singing Machine Sound X SMI-1321B User manual

The Singing Machine
The Singing Machine SMI-1452 User manual

The Singing Machine
The Singing Machine SoundX SMI-1330YB User manual

The Singing Machine
The Singing Machine SMI-1332YB User manual