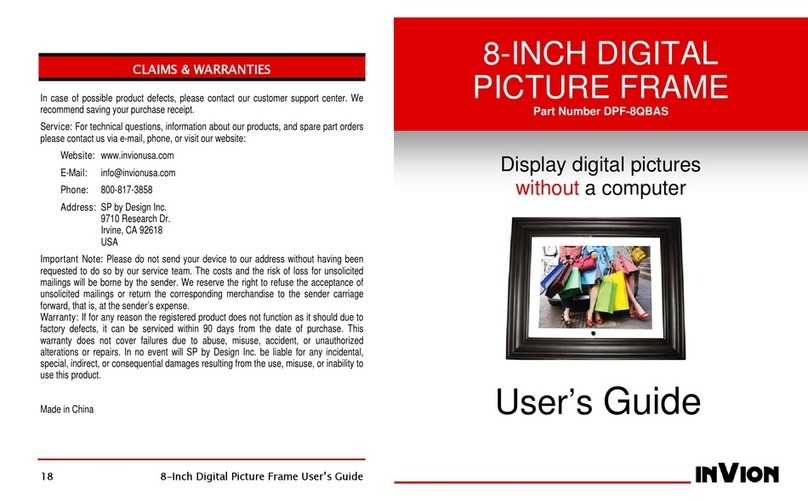
The Source Fluid 8008852B User manual

Instruction Manual
8008852B
10-inch
Digital Picture Frame
Read all of the instructions before using this device and
keep in a safe place for future reference.

2
Important Safety Instructions
Read all instructions before use and keep for future reference.
• Whenleftunusedforalongperiodoftime,theunitshouldbeunpluggedfromthewalloutlet.
• Thisproductisdesignedforuseinamoderateclimate.Donotuseorinstallthisunitwhereit
wouldbeexposedtodirectsunlightorinextremehottemperatures,orneararadiator,stoveor
appliance that produces heat.
• Donottakethisunittothebathroom,ornearaswimmingpool.Donotuseitwhereitwouldbe
exposedtowater,moisture,drippingorsplashing.
• Donotplacenearnakedamesources,suchaslightedcandles.
• Ifwatergetsinsidetheunit,unplugthepowercordfromthepowersocketandconsultan
authorized service technician.
• Donothandlethepowercordwithwethands.Toavoidelectricshock,NEVERtouchany
internalparts.Repairs/servicingshouldbelefttoqualiedservicepersonnel.
• Whenconnectingordisconnectingfromthepowersupply,holdtheplugbutnotthecord.Pulling
thecordmaydamageitandisdangerous.
• Donotdroptheunit,spillliquidintoitorallowobjectstofallinit.
• Whenpluggedin,averysmallcurrentwillow.Tosaveelectricityandforsafety,itis
recommendedthattheproductiscompletelydisconnectedfromthepowersocketiftheunitwill
notbeusedforaperiodoftime.
• Consultyournearestdealerwhendamage,disconnectionorcontactfailureisfoundwiththecord.
• Donotbendthecordsharply,pullortwistit.
• Donotmodifythepowercordinanymanner.
• Donotinsertanymetallicobjectintotheunit.
• Unplugthepowercordwhenthereisthepossibilityoflightning.
• Thepowerplugisusedasthedisconnectdevice.Itshallremainreadilyoperableandshould
not be obstructed during intended used.
• Tocompletelydisconnectthedevicefromthepowersupply,thepowerplugofthedeviceshall
bedisconnectedfromthewalloutletcompletely.
• AmbientTemperatureshouldbe0~40°C.Donotstoretheunitinhotorcoldareas.
• ConnecttheACadaptertotheDC5Vjack,andtothewalloutlet.
• Onlyuseattachments/accessoriesspeciedbythemanufacturer.
• Incaseofmalfunctionduetoelectrostaticdamage,resettheproductbyreconnectingthepower
sourcetoresumenormaloperation.
Warning:
Toreducetheriskofreorelectricshock,donotexposetheunittorain,moistureorwater.

3
Contents
ImportantSafetyInformation .......................2
1.ProductIntroduction ..........................4-5
1.1ProductOverview ......................4
1.2What’sintheBox ......................4
1.3RemoteControl ........................5
2.Set-Up ....................................6-7
2.1PowerAdapter.........................6
2.2ConnectingtoPowerSupply..............7
2.3PlacingthePictureFrame................7
2.4PowerON/OFF ........................7
3.Operation .................................8-10
3.1CardandUSB .........................8
3.2PictureMode ..........................8
3.3File .................................8
3.4Calendar .............................9
3.5Setup.............................9-10
3.6StandInstruction ......................10
4.Specications/Troubleshooting...................11
4.1TechnicalSpecications ................11
4.2TroubleshootingGuide .................11
Warranty......................................12

4
1. Product Introduction
1.1 Product Overview
1POWER
EXIT
•PressandholdtopowerON/OFF
•Toreturntothemainmenu
2UP
ROTATE
•Tomoveupinthemenu/thumbnail/optionsettings
•Torotatetheimagecounter-clockwise
3RIGHT
NEXT
•Tomoverightinthemenu/thumbnail/optionsettings
•Todisplaythenextphoto
4 LEFT
PREV
•Tomoveleftinthemenu/thumbnail/optionsettings
•Todisplaythepreviousphoto
5ENTER
PLAY/PAUSE
•Toconrmasettingorfunction
•Tostart/pausetheslideshow
6DOWN
ROTATE
•Tomovedowninthemenu/thumbnail/optionsettings
•Torotatetheimageclockwise
7 MENU/SETUP •Toenterthesetupmenu
8MemoryCardSlot •ToaccommodateSD,SDHC,MMCcards
9USBInputjack •ToaccommodateUSBdevicessuchasportableUSBash
drivesorashmemorycardreaders
10 PowerInputJack •Toconnecttothemainpoweradapter
1.2 WHAT’S IN THE BOX
•ACAdapter •USBChargingCable
•PictureFrame •RemoteControl
•Owner’sManual

5
1. Product Introduction
Remote Control
1. “POWER”button
2.“LEFT”button
3. “PLAY/PAUSE”button
4.“Rotate”button
5. “UP”button
6.“SETUP”button
7. “ENTER”button
8.“RIGHTbutton
9. “DOWN”button
10.“EXIT”button
11.“Zoom”button
12.“SlideShow”button

6
2. Set-Up
2.1 Power Adapter
InserttheUSBcableintotheDCadapter.

7
2. Set-Up
2.2 Connecting to Power Supply
Connectthesuppliedadapter(5V,1.0A)
totheDCINjack,thenplugtheotherend
intoapoweroutlet.
2.3 Placing the Picture Frame
Pulloutthestandfromthebackoftheunit
until the stand is in place.
Thepictureframeshouldbepositioned
horizontallyforportraitdisplay.
2.4 Power ON/OFF
Pressandholdthe “POWER”buttonontheunit
for3secondstopowerON/OFFtheunit,orpressthe
“POWER”buttononremotecontroltopowerON/
OFFtheunit.
NOTE:
With regards to operation, these instructions are for the REMOTE ONLY.
You can also access the operation menus using the buttons on the frame.

8
3. Operation
ThispictureframesupportsSD/SDHC/MMCmemorycardsandUSB2.0ash
devices.AfterinsertingacardorUSBdevice,aslideshowoftheimageswill
playautomatically.
PressEXITtwicetoaccessthePhoto,File,CalendarandSetupmenus.
PressENTER toconrmthesettingyouwant.
Note:
1.Makesuretherearesupportedpicturelesin
thecardorUSBdevice.
2.Itwilltakealongertimetobuffertheslideshowif
thephotole’ssizeismorethan2MB.
3.1 Card and USB
ThememorycardSelectionmenuwillappearif
youpressEXIT.
Selectthedeviceyouwishtouse.
3.2 Picture Mode
PressENTER toaccessthephoto,le,calendar
andsetupmenus.Select“Photo”fromthemain
menu,thenpressENTER to enter the picture
modemenu.Use toselectthepictureyouwish
todisplaythenpressENTER toplaythepicturein
asinglewindow.
Note:youcanselecttheslideshowmode(single
window/threewindows/fourwindows)inthe
SETUPoperation
.
3.3 File
Select“File”fromthemainmenu,thenpress
ENTERtoenter.
Youcanpreviewallthelesintheselected
devicebypressing .

9
3. Operation
3.4 Calendar
Select“Calendar”fromthemainmenu,then
pressENTERtoenter.
Thecalendarisdisplayedandanyphotos
ontheconnectedmemoryareshownasa
slideshowontheleftsideofthecalendar.
Browsethedateinformationusing buttons.
3.5 Setup
Select“Setup”fromthemainmenu,then
pressENTERtoaccesstoSetupmenu.Use
toselectthesettingyouwanttosetup.
Optionsare:Language,SlideMode,Slide
Speed,PhotoEffect,SlideEffect,Photo
Mode,Display,Settime/date,Settime
format,Formatbuilt-inmemory,Reset
SettingandExit.
PressENTERtoshowthesubmenu,selectwith ,thenpressENTER
toconrm.
3.5.1 Language:English,French,Italian,German,Spanish,Portuguese
SwedishandDutch
3.5.2 Slide mode:Singlewindow,threewindowsandfourwindows
3.5.3 Slide speed: 3/5/15/30seconds,1/5/15/30minutesand1hour:
Use toselectthespeed,pressENTERtoconrm,thenpress
ENTERtocompletetheslidespeedsetting.
3.5.4 Photo Effect:Colour,Mono,Sepia.
3.5.5 Slide effect:Random,SplitHorizontalin,SplitHorizontalout,
Jalousie,SplitVerticalin,SplitVerticalout,Radiation,Surround,
Fade,Rightrefresh,NextRefresh,OnPan,Rollfromdowntoup,
Rollfromuptodown,Brick.
3.5.6 Photo mode:AutoFit,Optimal,Full.
3.5.7 Display
Contrast:PressENTERtwicetoselect.Use toselectfrom00
(lowest)to40(highest).

10
3. Operation
Brightness:PressENTERtoselect.Use toselectfrom00
(lowest)to40(highest).
Saturation/Tint:PressENTERtoselect.Use toselectfrom00
(lowest)to40(highest).
3.5.8 Set time/date:PressENTERtwicetoselect,thenuseENTERto
set,thenuse tosetthetime,thenselect“SaveTime”tosave
the setting.
3.5.9 Set time format: 12/24.PressENTERtoselect.Press toset,
useENTERtoconrm.
3.5.10 Format built-in memory:PressENTER,use to select or
unselecttoformatthebuilt-inmemory.PressENTERtoconrm.
3.5.11 Reset setting: PressENTER,use to select or unselect to reset
allsettingstotheirdefaultvalues.PressENTERtoconrm.
3.5.12 Exit:PressEXIT.
3.5.13 Copy picture operation:Inthumbnailinterface,pressENTERto
previewinfullscreen.PressSETUPbuttontoentersubmenu.You
cansetimagedisplaymode:SavePicture/Rotate/Zoomoperation.
Select“SavePicture”tosavethepicturetothebuilt-inmemory.
(Ifpicturedoesnotcopytobuilt-inmemory,formatmemoryrst).
3.5.14 Delete picture operation:Inthumbnailinterface,makethecursor
stoponthepictureyouwanttodelete.PressSETUPbuttonto
entersubmenu,selectDeleteFile,pressENTERtodeletepicture.
3.5.15 Rotate function:Whenyouplaythepicturepress button,then
presstheRotatebuttontorotatethepictureclockwise.
3.5.16 ZOOM function:Whenyouplaythepicturepress button,then
presstheZoombuttontoenlargethepicture.
3.5.17 Slide Show function:PressSlideShowbuttontoplaythepicture
inslideshowmode.
3.6 Stand Instruction
Extendthebracketfromtheslotofthedigitalpicture
frame.Rotatetheframetostandhorizontallyand
lockintoplace.Seeillustration.

10
11
4
. Specications/Troubleshooting
4.1 Technical Specications
• Adapter:
Input: AC100-240V,50/60Hz,0.3A
Output: DC5V/1A
• Picture Format: JPEG
• Memory cards: SD/SDHC/MMC
• Built-in Memory: 120kb(±10kbdeviation)
• USB Connection: USB2.0
• Screen Parameters:
Screen Size: 10inchLED
Resolution: 1024*600
Contrast: 400:1
Aspect Ratio: 16:9
Viewing Angle: 60°(left/right/vertical),40°(horizontal)
Working Temperature: 0°-40°,Humidity:10-85%
4.2 Troubleshooting Guide
Ifyouhaveproblemswithyourplayer,consultthismanual.Ifyouneed
furtherassistance,pleasecontacttechnicalsupport.
• No power:
Checkwhethertheplugisinsertedcorrectly.
• Cannot read the card or USB:
ConrmwhetherthereisenoughstorageroominthecardorUSB
device.Emptydevicescannotberead.
• Slide speed is not the same as the setting time:
Checkifphotosizeistoobig(thephotocanbeplayednormallyifthe
photosizeiswithin2MB).
• Display is either too bright or too dark:
AdjustthebrightnessorcontrastinSetupmenu.
• The colour is light or there is no colour:
AdjustcolourorcontrastinSetupmode.

12
Warranty
Please Recycle
The Source warrants that this product will be free from defects in
materials and workmanship for a period of one (1) year from the date
of purchase. Within this period, simply take the product and your
proof of purchase to any The Source store or participating dealer and
the product will be replaced (where available) without charge. Any
product which has been subject to misuse or accidental damage is
excluded from this warranty.
This warranty is only applicable to a product purchased through The
Source company-owned stores or participating dealers in Canada
where the warranty is included with the product. While this warranty
does not confer any legal rights other than those set out above, you
may have additional statutory rights which will vary under the laws
of the various countries, states, provinces and other governmental
entities in which The Source operates. This warranty is subject to all
statutory rights you may have in Canada.
©2016TheSource
Allrightsreserved.
Importedby:
TheSource,
Barrie,Ontario,Canada,L4M4W5
ManufacturedinChina
Forproductsupportpleasevisit
www.thesource.ca
THE SOURCE – WARRANTY
Table of contents
Other The Source Digital Photo Frame manuals
